Using Shared Folders
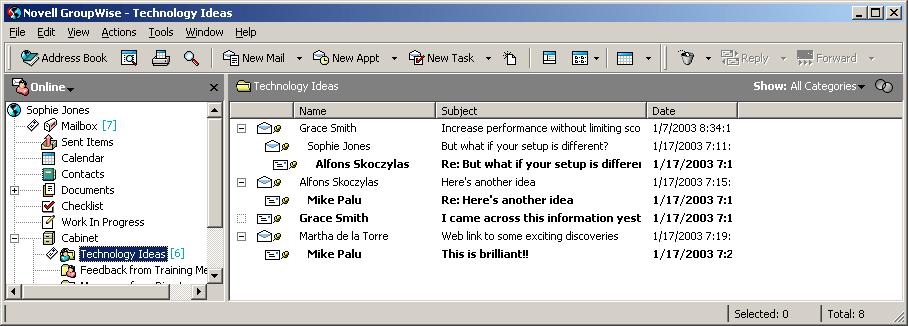
A shared folder is like any other folder in your Cabinet, except other people have access to it and it appears in their Cabinets. You can create shared folders or share existing personal folders in your Cabinet. You choose whom to share the folder with, and what rights to grant each user. Then, users can post messages to the shared folder, drag existing items into the folder, and create discussion threads. You can't share system folders, which include the Calendar, Documents, Mailbox, Sent Items, Checklist, Contacts, Cabinet, Work In Progress, Junk Mail Handling and Trash folders. This is what the contents of a typical shared folder might look like:
If you place a document in a shared folder, people with rights to the shared folder don't automatically have rights to edit the document. Before they can edit the document, you must give them Edit rights on the Document Sharing tab.
In Remote and Caching modes, changes in shared folders are updated whenever you connect to the master GroupWise system.
This section contains the following topics:
- Sharing an Existing Folder with Other Users (v6.5 and v6.5 for NNLS 1.0)
- Posting a Message to a Shared Folder
- Viewing Discussion Threads in a Shared Folder
Sharing an Existing Folder with Other Users (v6.5 and v6.5 for NNLS 1.0)
-
In the Main Window, right-click the folder you want to share, then click Sharing.

-
Click Shared With.
-
In the Name box, start typing the name of a user, or click the Address Book button to select the user from the Address Selector dialog box.
-
When the user's name appears in the box, click Add User to move the user into the Share List.
-
Click the user's name in the Share List.
-
Select the access options you want for the user.
-
Repeat Steps 3-6 for each user you want to share the folder with.
-
Click OK.
If you are sharing an IMAP4 folder, the IMAP4 server must support sharing folders. You can only share IMAP4 folders with a user who is in the same IMAP4 server.
If you want the folder to have a specific function, you can create a new display setting. For example, if the folder is for shared discussions, you should create a setting that views items by reply thread and contains both sent and received items. Right-click the folder, click Properties, then click Display.
Posting a Message to a Shared Folder
-
Click the shared folder in your Folder List to open it.
-
Click File, click New, then click Discussion/Note.
If you want to post a different type of item, such as a task, click Edit, click Change To, then click an item type.
-
Type a subject.
-
Type your message.
-
Click Attach to attach files.
-
Click Post on the toolbar.
To reply to an existing item in a shared folder, open the item, click Reply, select a reply option, then click OK. See Replying to an Item in a Shared Folder for more information.
 on the toolbar.