37.2 Using the POA Web Console
The POA Web console enables you to monitor and control the POA from any location where you have access to a Web browser and the Internet. This provides substantially more flexible access than the POA server console, which can only be accessed from the server where the POA is running.
37.2.1 Setting Up the POA Web Console
The default HTTP port for the POA Web console is established during POA installation. You can change the port number and increase security after installation in ConsoleOne.
-
In ConsoleOne, browse to and right-click the POA object, then click .
-
Click to display the Network Address page.

If you configured the POA for TCP/IP links during installation, the TCP/IP Address field should display the POA server’s network address. If it does not, follow the instructions in Using TCP/IP Links between the Post Office and the Domain. The POA must be configured for TCP/IP in order to provide the POA Web console.
-
Make a note of the IP address or DNS hostname in the TCP/IP Address field. You need this information to access the POA Web console.
The HTTP Port field displays the default port number of 7181.
-
If the default HTTP port number is already in use on the POA server, specify a unique port number.
-
Make a note of the HTTP port number. You need this information to access the POA Web console.
-
If you want to use an SSL connection for the POA Web console, which provides optimum security, select in the HTTP SSL drop-down list.
For additional instructions about using SSL connections, see Section 71.0, Encryption and Certificates.
-
Click to save your changes on the Network Address page.
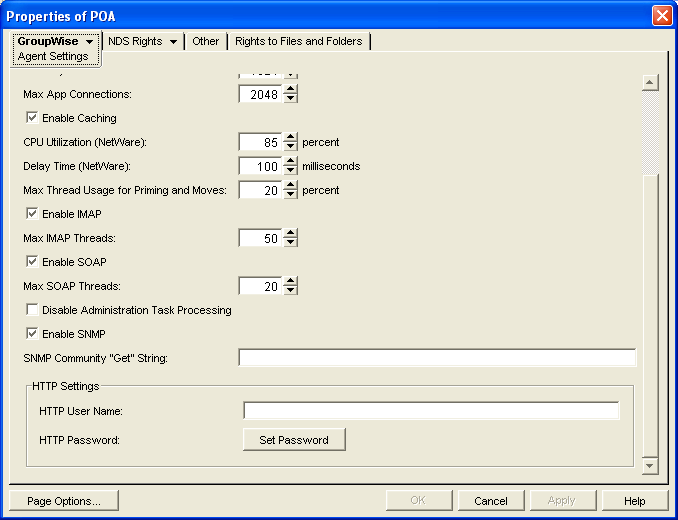
If you want to limit access to the POA Web console, you can provide a username and password.
-
Click , then scroll down to HTTP Settings.
-
In the box:
-
In the field, specify a unique username.
-
Click .
-
Type the password twice for verification.
-
Click .
Unless you are using an SSL connection, do not use a Novell® eDirectory™ username and password because the information passes over the insecure connection between your Web browser and the POA.
For convenience, use the same username and password for all agents that you plan to monitor from GroupWise Monitor. This saves you from having to provide the username and password information as Monitor accesses each agent.
-
-
Click to save the POA Web console settings.
ConsoleOne then notifies the POA to restart so the new settings can be put into effect.
Corresponding Startup Switches You can also use the /httpport, /httpuser, /httppassword, and /httpssl startup switches in the POA startup file to enable and secure the POA Web console. In addition, you can use the /httprefresh switch to control how often the POA refreshes the information provided to your Web browser.
37.2.2 Accessing the POA Web Console
To monitor the POA from your Web browser, view the URL where the POA is located by supplying the network address and port number as displayed on the Network Address page in ConsoleOne. For example:
http://172.16.5.18:1677
http://172.16.5.18:7181
http://server1:7181
https://server2:1677
When viewing the POA Web console, you can specify either the client/server port or the HTTP port.
Figure 37-3 POA Web Console
37.2.3 Monitoring the POA from the POA Web Console
The POA Web console provides several pages of information to help you monitor the performance of the POA. The bar at the top of the POA Web console displays the name of the POA and its post office. Below this bar appears the POA Web console menu that lists the pages of information available in the POA Web console. Online help throughout the POA Web console helps you interpret the information being displayed and use the links provided.
Monitoring POA Status
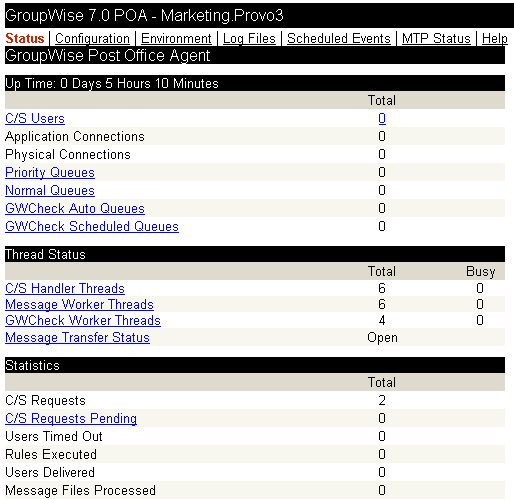
When you first access the POA Web console, the Status page is displayed. Online help on the Status page helps you interpret the status information being displayed.
Figure 37-4 POA Web Console with the Status Page Displayed
Click any hyperlinked status items for additional details. The status information is much the same as that provided at the POA server console, as described in Section 37.1.1, Monitoring the POA from the POA Server Console.
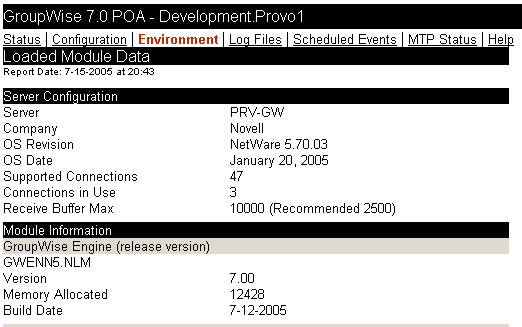
Checking the POA Operating System Environment
On the POA Web console menu, click to display information about the operating system where the POA is running. On a NetWare server, the following information is displayed:
Figure 37-5 POA Web Console Environment Page for a NetWare Server
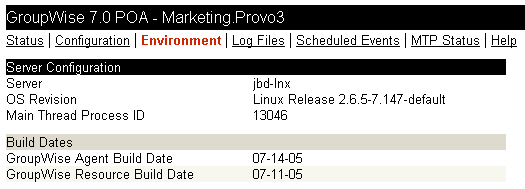
On a Linux server, the following information is displayed:
Figure 37-6 POA Web Console Environment Page for a Linux Server
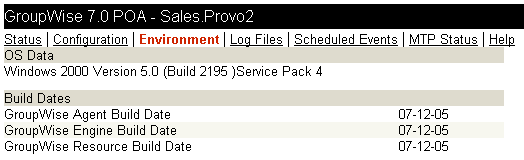
On a Windows server, the following information is displayed:
Figure 37-7 POA Web Console Environment Page for a Windows Server
Viewing and Searching POA Log Files
On the POA Web console menu, click to display and search POA log files.
Figure 37-8 POA Web Console with the Log Files Page Displayed
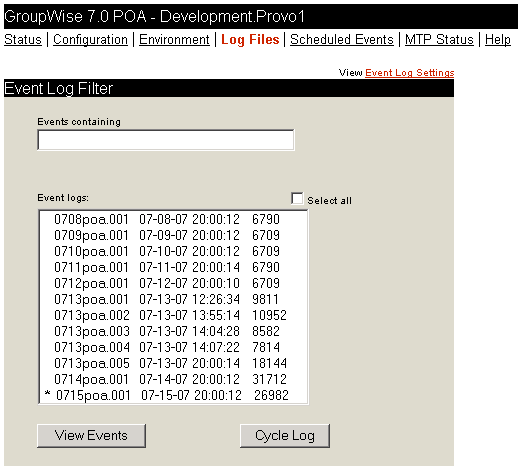
To view a particular log file, select the log file, then click .
To search all log files for a particular string, type the string in the Events Containing field, select l, then click . You can also manually select multiple log files to search.
The results of the search are displayed on a separate page that can be printed.
Listing POA Scheduled Events
On the POA Web console menu, click to view currently scheduled events and their status information.
Figure 37-9 POA Web Console with the Scheduled Events Page Displayed

QuickFinder indexing and remote downloadable Address Book generation can be controlled using links from the Configuration page. The Configuration page also displays information about disk check events and database maintenance events. However, scheduled events must be created and modified using ConsoleOne.
Checking Link Status to the MTA
On the POA Web console menu, click to view status information about the link between the POA for the post office and MTA for the domain.
Figure 37-10 POA Web Console with the MTP Status Page Displayed
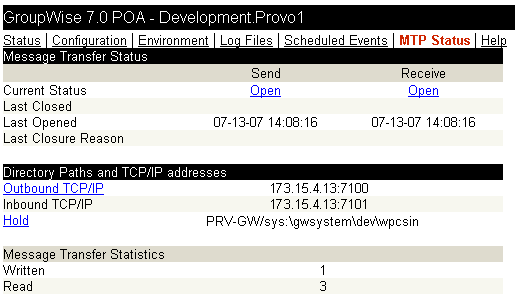
The link displays the MTA Web console where you can get status information about the MTA. The link displays the contents of the MTA input queue, so you can find out if messages are waiting for processing by the MTA.
37.2.4 Controlling the POA from the POA Web Console
At the POA Web console, you can change some POA configuration settings for the current POA session. You can also stop and start some specific POA threads.
Changing POA Configuration Settings
On the POA Web console menu, click . Online help on the Configuration page helps you interpret the configuration information being displayed.
Figure 37-11 POA Web Console with the Configuration Page Displayed
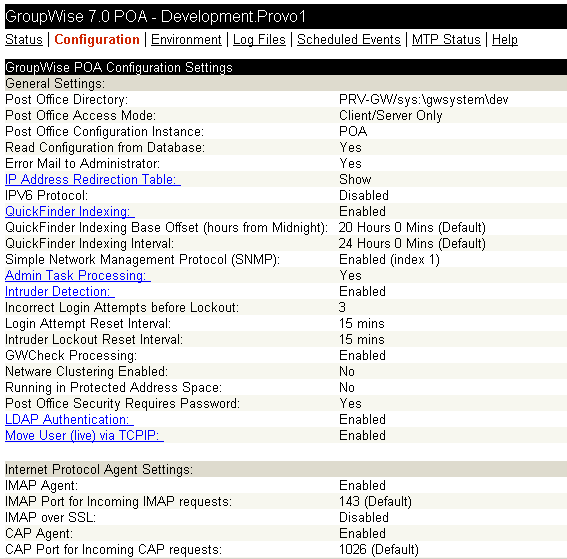
Click any hyperlinked configuration items to change settings for the current agent session. The settings that can be modified are much the same as those that can be changed at the POA server console, as described in Section 37.1.2, Controlling the POA from the POA Server Console.
Controlling the POA Admin Thread
On the Configuration page, click
Figure 37-12 POA Web Console with the Admin Task Status Page Displayed
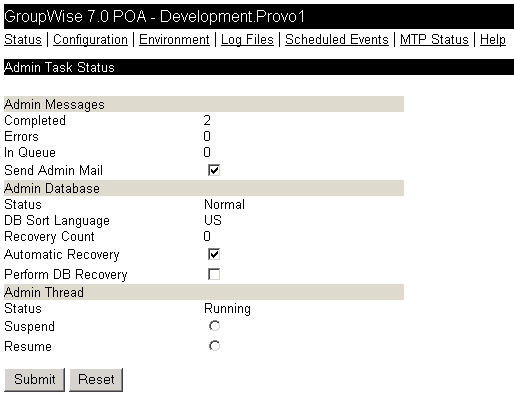
Modify the functioning of the POA admin thread as needed, then click . The changes remain in effect for the current POA session.
Controlling the POA MTP Threads
On the Configuration page, click
Figure 37-13 POA Web Console with the Message Transfer Protocol Settings Page Displayed
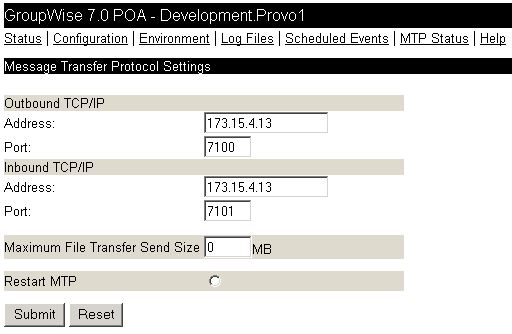
On this page, you can restart MTA processing between the POA and the MTA. On the MTP status page, you can restart the send and receive threads separately.