34.1 GroupWise Check
GroupWise Check (GWCheck) is a tool provided for GroupWise to check and repair GroupWise user, message, library, and resource databases without using ConsoleOne. In addition to checking post office, user, and library databases, it also checks users’ remote, caching, and archive databases.
The GWCheck utility runs on Windows, Linux, and Macintosh. You should match the platform of GWCheck to the platform where the databases are located. Windows GWCheck processes databases on NetWare and Windows. Linux GWCheck processes databases on Linux. Macintosh GWCheck processes databases on Macintosh.
IMPORTANT:GWCheck should not be used to process databases that are located across a connection between different platforms (for example, between NetWare or Windows and Linux).
34.1.1 GWCheck Functionality
The GWCheck utility begins by comparing three databases.
Table 34-1 Three Databases That GWCheck Compares
|
WPHOST.DB |
NGWGUARD.DB |
FILE SYSTEM |
|---|---|---|
|
The post office database (wphost.db) is checked for the file ID (FID) of the selected user. |
The guardian database (ngwguard.db) is checked to find out if this user database has been created. |
The file system for this post office is checked to see if the user database (userxxx.db) for this user exists. |
After GWCheck makes the database comparisons, it begins processing according to the databases selected and any inconsistencies found.
Case 1 - Missing Entry in the Post Office Database (wphost.db)
In this example, a contents check is run either against all users on the post office or against one user, “ABC.” GWCheck does not find the FID of one or more users.
Table 34-2 Missing Entry in Wphost.db
|
WPHOST.DB |
NGWGUARD.DB |
FILE SYSTEM |
|---|---|---|
|
? |
userabc.db |
userabc.db |
|
No entry for this user is found in the post office database (wphost.db). |
An entry is found in the guardian database (ngwguard.db), indicating that the user has been deleted. |
Also, a user database (userxxx.db) for this user is found in the ofuser directory. |
GWCheck removes the entry from ngwguard.db, deletes userabc.db and systematically deletes all of the user’s messages from the message databases that are not still being referenced by other users. If the user has been deleted, GWCheck cleans up after that user.
WARNING:If a post office database becomes damaged so some users are unable to log in, GWCheck should not be run until the post office has been rebuilt. For more information, see Section 26.3, Rebuilding Domain or Post Office Databases.
Case 2 - Missing Entry in the Guardian Database (ngwguard.db)
In this example, a GWCheck is run either against all users on the post office or against one user, “ABC.” A user’s FID is found and the user’s database is found in the post office, but the user is missing in ngwguard.db.
Table 34-3 Missing Entry in Ngwguard.db
|
WPHOST.DB |
NGWGUARD.DB |
FILE SYSTEM |
|---|---|---|
|
FID abc |
? |
userabc.db |
|
The user appears in the post office database (wphost.db). |
The guardian database (ngwguard.db) shows no user database for this user. |
A user database (userxxx.db) for the user does exist in the ofuser directory. |
GWCheck creates the user in ngwguard.db, using database userabc.db. Even if ngwguard.db is damaged, it is unlikely that data is lost.
Case 3 - Missing User Database (userxxx.db)
In this example, a GWCheck is run either against all users on the post office or against one user, “ABC.” The user’s FID is found, as well as the user’s record in ngwguard.db. However, the user’s database is not found.
Table 34-4 Missing Entry in Userxxx.db
|
WPHOST.DB |
NGWGUARD.DB |
FILE SYSTEM |
|---|---|---|
|
FID abc |
userabc.db |
? |
|
The user is found in the post office database (wphost.db). |
The user is found in the guardian database (ngwguard.db). |
No user database (userxxx.db) is found in the ofuser directory. |
GWCheck takes action depending on what options are selected.
Contents Check: GWCheck deletes all of this user’s messages from the message databases if they are not referenced by other users.
Structural Rebuild: GWCheck creates a blank user database for this user. Existing messages for this user are ignored.
Re-create User Database: GWCheck creates a blank user database for this user and populates it with messages in the message databases that have been sent to or from this user.
WARNING:If a user database has been deleted, do not run a Contents Check until after a Structural Rebuild or Re-create User Database has been run for that user. For more information, see Section 27.2, Performing a Structural Rebuild of a User Database and Section 27.3, Re-creating a User Database.
34.1.2 Using GWCheck on Windows
You can use GWCheck on any Windows XP/Vista/7 workstation or Windows 2003/2008 server.
As an administrator, you can run GWCheck for databases in any post office accessible from the workstation where GWCheck is installed. The GWCheck program performs all database maintenance itself, rather than handing off a task to the POA as ConsoleOne would do to perform database maintenance.
Depending on how GWCheck is installed, users can have a Repair Mailbox item on the GroupWise Windows client Tools menu that enables them to run GWCheck from the client. If the GWCheck program is available to users, users can perform database maintenance on their Remote, Caching, and archive mailboxes, which are not accessible from ConsoleOne.
For the Repair Mailbox item to display on the GroupWise Windows client menu, the following files must be installed in the GroupWise software directory; by default, this is c:\Program Files\Novell\GroupWise.
-
gwcheck.exe
-
gwchkxx.dll (Replace xx with your language code)
-
gwchkxx.chm (Replace xx with your language code)
The GroupWise administrator can install these files by using SetupIP to install the GroupWise Windows client, and selecting to install and enable GWCheck. The default for SetupIP is to install GWCheck, but not enable GWCheck. The files are then copied to the \novell\groupwise\gwcheck directory. For additional information about SetupIP and GWCheck, see [GWCheck].
If the client was installed using the GroupWise Windows client Setup program or the defaults are chosen for SetupIP, the client user needs to copy the files from the GWCheck directory (\novell\groupwise\gwcheck) to the main GroupWise directory (\novell\groupwise).
To run GWCheck:
-
From the menu, click , then browse to and double-click gwcheck.exe.

-
To view online help in GWCheck, click .
-
Continue with Section 34.1.5, Performing Mailbox/Library Maintenance Using GWCheck.
34.1.3 Using GWCheck on Linux
Two versions of GWCheck are available on Linux, one for a graphical user interface (GUI) environment and one for a text-only environment.
Using GUI GWCheck (gwcheck)
You can use GUI GWCheck on any Linux workstation where you can run the Linux/Mac client. By default, GWCheck is installed with the client when using the GroupWise installation program. If you installed the GroupWise Linux/Mac client manually from the RPM, you must install GWCheck manually.
-
Change to the directory where the GWCheck RPM is located or copy it to a convenient location on your workstation.
The GWCheck RPM (groupwise-gwcheck-version-mmdd.i386.rpm) is located in the /client and /admin directories in your GroupWise software distribution directory if it is has been updated, or on the GroupWise 8 DVD or downloaded GroupWise 8 software image if an updated software distribution directory is not available.
-
Install GWCheck.
rpm -i groupwise-gwcheck-version-mmdd.i386.rpm
-
Change to the /opt/novell/groupwise/gwcheck/bin directory.
-
Enter ./gwcheck to start GWCheck.

-
To view online help in GWCheck, click .
-
Continue with Performing Mailbox/Library Maintenance Using GWCheck.
Using Text-Based GWCheck (gwcheckt)
You can use text-based GWCheck in any environment where the X Window System is not available, such as on a text-only server where a post office and its POA are located. However, you must use GUI GWCheck to create an options file before you can run text-based GWCheck.
-
Install and run GUI GWCheck in a convenient location, as described in Using GUI GWCheck (gwcheck).
-
Select the maintenance activities that you want GWCheck to perform, as described in Section 34.1.5, Performing Mailbox/Library Maintenance Using GWCheck.
-
Save the settings you selected in an options file, as described in Saving Mailbox/Library Maintenance Options.
The default options filename is gwcheck.opt.
-
Copy the GWCheck RPM to a convenient location on the text-only server.
-
Install GWCheck on the text-only server.
rpm -i groupwise-gwcheck-version-mmdd.i386.rpm
-
Copy the GWCheck options file you created in Step 3 to the /opt/novell/groupwise/gwcheck/bin directory.
-
Change to the /opt/novell/groupwise/gwcheck/bin directory.
-
Enter ./gwcheckt options_filename to run text-based GWCheck.
If you did not copy the options file to your home directory on the text-only server, specify the full path to the options file.
Over time, a collection of options files might accumulate. To see what maintenance activities an options file performs, use ./gwcheckt options_filename --dump.
To remind yourself of these options when you are at your Linux server, view the gwcheckt man page.
34.1.4 Using GWCheck on Macintosh
You can use GWCheck on any Macintosh workstation where you can run the Linux/Mac client. By default, GWCheck is installed along with the client.
-
In a terminal window, change to the /Applications/GroupWise.app/Contents/Resources/gwcheck directory.
-
Enter ./gwcheck to start GWCheck.

-
To view online help in GWCheck, click .
-
Continue with Performing Mailbox/Library Maintenance Using GWCheck.
34.1.5 Performing Mailbox/Library Maintenance Using GWCheck
With only a few differences in interface functionality, as described in the online help, you can perform the same maintenance activities in GWCheck as you can in Mailbox/Library Maintenance in ConsoleOne:
Using Mailbox/Library Maintenance Tab Options
Both GWCheck and Mailbox/Library Maintenance in ConsoleOne use tab options to control the checking process.
Databases
To select the types of database to perform the Mailbox/Library Maintenance check on, click .
Figure 34-1 Databases Tab in the Mailbox/Library Maintenance Dialog Box
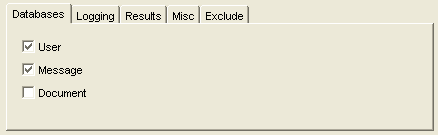
Depending on the object type and action already selected in the main window, some database types might be unavailable. If all the database types are unavailable, then one or more database types have been preselected for you.
You can perform an action on the following databases when the type is not unavailable:
-
User: Checks the user databases.
-
Message Databases: Checks the message databases.
-
Document: Checks the library and document properties databases.
Logging
To specify the name of the file where you want the results of the MailBox/Library Maintenance check to be stored, click .
Figure 34-2 Logging Tab in the Mailbox/Library Maintenance Dialog Box

Specify a filename. By default, the file is created in the post_office_directory\wpcsout\ofs directory.
Click to log detailed information. Verbose logging might produce large log files and slow execution.
This file is sent to the users selected on the tab.
Results
To select users to receive the results of the Mailbox/Library Maintenance check, click .
Figure 34-3 Results Tab in the Mailbox/Library Maintenance Dialog Box
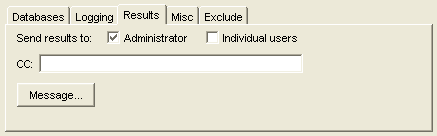
Select to send the results to the user defined as the GroupWise domain administrator. Select to send each user the results that pertain to him or her. Click to include a message with the results file.
Misc
If you need to run a Mailbox/Library Maintenance check with special options provided by Novell Support, click .
Figure 34-4 Misc. Tab in the Mailbox/Library Maintenance Dialog Box
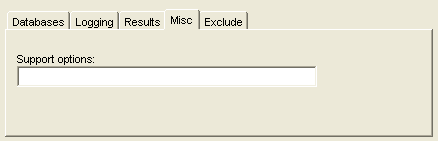
Use the field to specify command line parameters. Support options are typically obtained from Novell Support representatives when you need assistance resolving specific database problems. Search the Novell Support Knowledgebase for TIDs and Support Pack Readmes that list support options. Make sure that you clearly understand what the Support options do before you use them.
Exclude
If you want to exclude certain users in the selected post office from having the Mailbox/Library Maintenance check performed on their databases, click .
Figure 34-5 Exclude Tab in the Mailbox/Library Maintenance Dialog Box
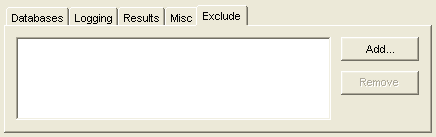
Click , select one or more users to exclude, then click .
Reusing Library/Mailbox Maintenance Settings
For convenience, you can store the options you select in Mailbox/Library Maintenance and GWCheck so that you can retrieve them for later use.
Saving Mailbox/Library Maintenance Options
-
After you have selected all of the options in the Mailbox/Library Maintenance dialog box, click .
-
Browse to the directory where you want to save the options file if you do not want to use the default of wptools in the domain to which you’re currently connected.
-
Specify a filename if you do not want to use the default of gwcheck.opt.
-
Click .
The GWCheck options file is created in XML format on all platforms. Therefore, you can create the GWCheck options file on any platform and use it on any platform interchangeably.
Retrieving Mailbox/Library Maintenance Options
-
In the Mailbox/Library Maintenance dialog box, click .
-
Browse to and select your saved option file.
-
Click .
34.1.6 Executing GWCheck from a Windows Batch File
The GWCheck program is located in the \admin\utilities\gwcheck directory in your GroupWise software distribution directory if it has been updated, or on the GroupWise 8 DVD or downloaded GroupWise 8 software image if an updated software distribution directory is not available. It might also be installed along with the GroupWise client software in the gwcheck subdirectory of the client installation directory.
-
Use the following syntax to create a batch file to execute GWCheck:
gwcheck /opt options_file /batchIf you want to include the path to an archive database, use the /pa switch.
-
To create an options file, see Saving Mailbox/Library Maintenance Options.
34.1.7 Executing GWCheck from a Linux Script
The GWCheck program is located in the /admin directory in your GroupWise software distribution directory if it has been updated, or on the GroupWise 8 DVD or downloaded GroupWise 8 software image if an updated software distribution directory is not available.
-
Make sure that GWCheck has been installed, as described in Section 34.1.3, Using GWCheck on Linux
-
Create a script to execute GWCheck using the following syntax:
/opt/novell/groupwise/gwcheck/bin/gwcheck --opt options_file --batchIf you did not create the options file in your home directory, specify the full path to the options file.
If you want to include the path to an archive database, use the --pa switch.
-
To create an options file, see Saving Mailbox/Library Maintenance Options.
34.1.8 GWCheck Startup Switches
The following startup switches can be used with GWCheck:
/batch
Indicates that you want to run GWCheck without a user interface. Because you do not provide the desired options from the interface, you must provide an options file.
|
Linux GWCheck |
Windows GWCheck |
|
|---|---|---|
|
Syntax: |
--batch |
/batch |
For example, to specify that you want GWCheck to run it batch mode, you would use:
|
Linux: |
./gwcheck --opt gwcheck.opt --batch |
|
Windows: |
gwcheck /opt gwcheck.opt /batch |
/lang
Specifies the language to run GWCheck in, using a two-letter language code as listed below. You must install GWCheck in the selected language in order for it to display in the selected language.
|
Linux GWCheck |
Windows GWCheck |
|---|---|---|
|
Syntax: |
--lang language_code |
/lang language_code |
The table below lists the valid language codes. Contact your local Novell sales office for information about language availability.
|
Language |
Language Code |
Language |
Language Code |
|---|---|---|---|
|
Arabic |
AR |
Hungarian |
MA |
|
Chinese-Simplified |
CS |
Italian |
IT |
|
Chinese-Traditional |
CT |
Japanese |
NI |
|
Czechoslovakian |
CZ |
Korean |
KR |
|
Danish |
DK |
Norwegian |
NO |
|
Dutch |
NL |
Polish |
PL |
|
English-United States |
US |
Portuguese-Brazil |
BR |
|
Finnish |
SU |
Russian |
RU |
|
French-France |
FR |
Spanish |
ES |
|
German-Germany |
DE |
Swedish |
ES |
|
Hebrew |
HE |
|
|
For example, to specify that you want GWCheck to run in Spanish, you would use:
|
Linux: |
./gwcheck --opt gwcheck.opt --lang es |
|
Windows: |
gwcheck /opt-gwcheck.opt /lang es |
/opt
Specifies a database maintenance options file created in a GWCheck session. This starts GWCheck with the same options settings as the session in which the options file was created. The default location of the options file varies by platform:
|
Linux: |
User’s home directory |
|
Windows: |
Directory where gwcheck.exe is installed. |
If the options file is not in the default directory, you must specify the full pathname.
|
Linux GWCheck |
Windows GWCheck |
|
|---|---|---|
|
Syntax: |
--opt file |
/opt file |
For example, to start GWCheck with saved settings, you would use:
|
Linux: |
./gwcheck --opt gwcheck.opt ./gwcheck --opt /gwsystem/post1/gwcheck.opt |
|
Windows: |
gwcheck /opt gwcheck.opt gwcheck /opt \gwsystem\post1\gwcheck.opt |
/pa
Specifies the path to an archive database.
|
Linux GWCheck |
Windows GWCheck |
|
|---|---|---|
|
Syntax: |
--pa path_to_archive |
/pa path_to_archive |
For example, to specify the archive database that a user keeps is his or her home directory, you would use:
|
Linux: |
./gwcheck --opt gwcheck.opt --batch --pa /home/gsmith\of7bharc |
|
Windows: |
gwcheck /opt gwcheck.opt /batch /pa \home\gsmith\of7bharc |
/po
Specifies the path to a post office.
|
Linux GWCheck |
Windows GWCheck |
|
|---|---|---|
|
Syntax: |
--pa path_to_post_office |
/pa path_to_post_office |
For example, to specify a post office directory, you would use:
|
Linux: |
./gwcheck --opt gwcheck.opt --batch --po /mail/sales |
|
Windows: |
gwcheck /opt gwcheck.opt /batch /po \mail\sales |
/pr
Specifies the path to a Remote mailbox.
|
Linux GWCheck |
Windows GWCheck |
|---|---|---|
|
Syntax: |
--pr path_to_mailbox |
/pr path_to_mailbox |
For example, to specify the Remote mailbox that a user keeps on a computer at home, you would use:
|
Linux: |
./gwcheck --opt gwcheck.opt --pr /novell/groupwise\of7bharc |
|
Windows: |
gwcheck /opt gwcheck.opt /pa \novell\groupwise\of7bharc |