7.2 Creating a user
If you want to create a new user and are authorized to access the Create User or Group page for that purpose, follow these steps.
To create a user:
-
On the Identity Self-Service tab, click Create User or Group in the menu (under Directory Management, if displayed).
The Select an object to create panel displays.
-
Use the Object type dropdown to select User, then click Continue.
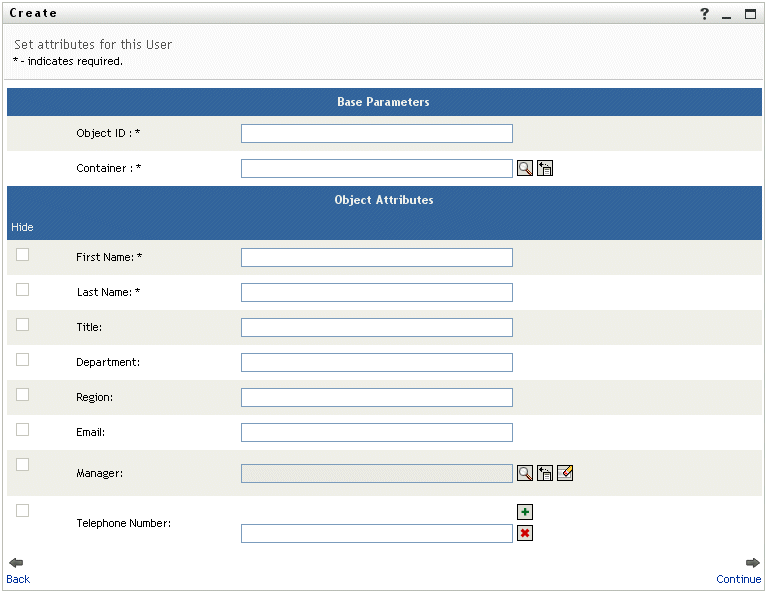
The Set attributes for this User panel displays:
-
In the Base Parameters section, specify values for the following required attributes:
Attribute
What to specify
Object ID
The username for this new user.
Container
An organizational unit in the identity vault under which you want the new user stored (such as an OU named users). For example:
ou=users,ou=MyUnit,o=MyOrg
To learn about using the buttons provided to specify a container, see Section 7.2, Creating a user.
NOTE:You won’t be prompted for Container if the system administrator has established a default create container for this type of object.
-
In the Object Attributes section, specify the details about this new user.
At minimum, you must fill in the required attributes: First Name and Last Name.
& To learn about using the buttons provided to specify values for certain attributes, see Section 7.2, Creating a user.
-
Click Continue.
The Create Password panel displays:
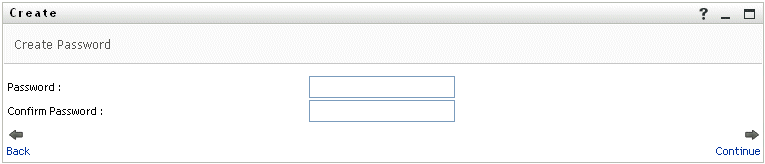
If a password policy is in effect for the target container, this panel provides information about how to specify a password that meets the policy’s requirements. The password is also validated against that policy.
-
Type a password for the new user in the Password and Confirm Password textboxes, then click Continue.
NOTE:This sets the new user’s initial password. When that user first logs in, the Identity Manager user interface will prompt the user to change this password.
The user and password are created, then the Review panel displays to summarize the result:
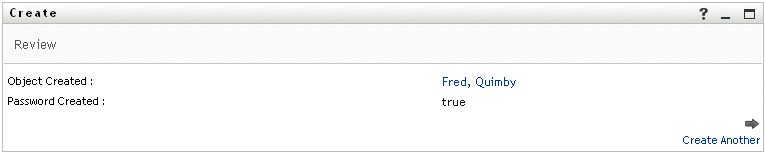
The Review panel provides a couple of optional links that you might find handy. You can:
-
Click the new user’s name to display the Profile page of detailed information for this user
HINT:From the Profile page, you can edit the user’s details to make changes (if needed) or even delete the user (if the system administrator has given you this ability).
-
Click Create Another to return to the initial panel of the Create User or Group page
-