5.6 Installing the User Application on a JBoss Application Server from the Install GUI
This section describes how to install the Identity Manager User Application on a JBoss Application Server by using the graphical user interface version of the installer.
5.6.1 Launching the Installer GUI
-
Navigate to the directory containing your installation files, described in Table 5-2.
-
Launch the installer for your platform from the command line:
java -jar IdmUserApp.jar
-
Select a language from the drop-down menu, then click .
-
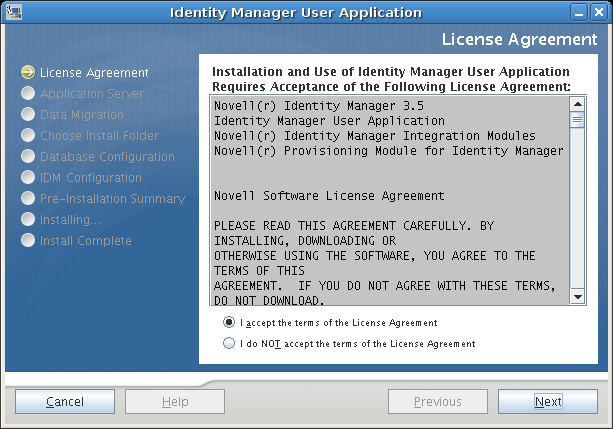
Read the license agreement, click I accept the terms of the License Agreement, then click .
-
Read the Introduction page of the install wizard, then click Next.
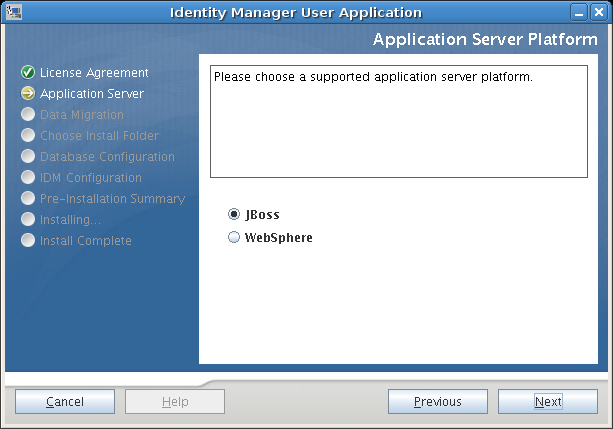
5.6.2 Choosing an Application Server Platform
-
Choose the JBoss application server platform and click .
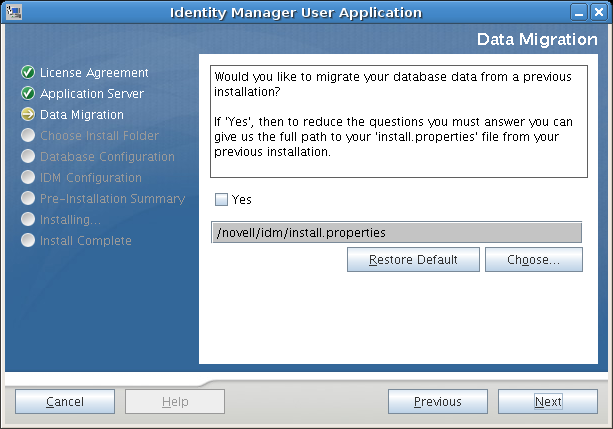
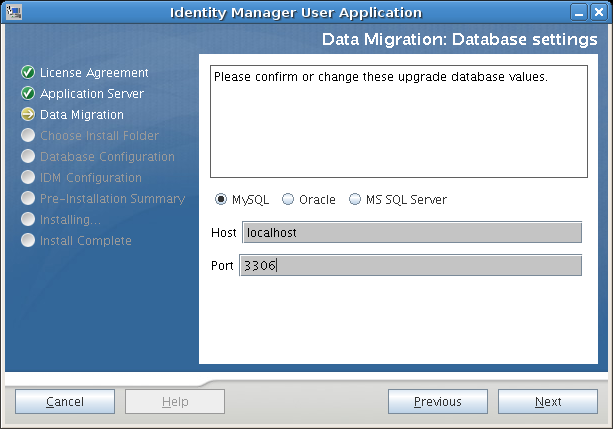
5.6.3 Migrating Your Database
If you do not want to migrate a database, click and continue to Section 5.6.4, Specifying the Location of the WAR.
If you want to use an existing database from your Version 3.0 or Version 3.01 User Application, you must migrate the database.
-
Verify that you started the database that you want to migrate.
-
Click in the Data Migration page of the installation program.
-
Click to navigate to the install.properties file in the Identity Manager 3.0 or 3.01 User Application installation directory.
Specifying the location of the install.properties file from your previous installation reduces the number of items that you have to specify in the following pages.
-
You are asked to confirm the database type, hostname, and port. Do so, and click .
-
Click and continue to Section 5.6.4, Specifying the Location of the WAR or Section 5.6.5, Choosing an Install Folder.
The User Application installer upgrades your User Application and migrates data from the Version 3.0 or 3.0.1 database to the database used for Version 3.5.1. For information on and additional steps for migrating your database, see the Identity Manager User Application: Migration Guide.
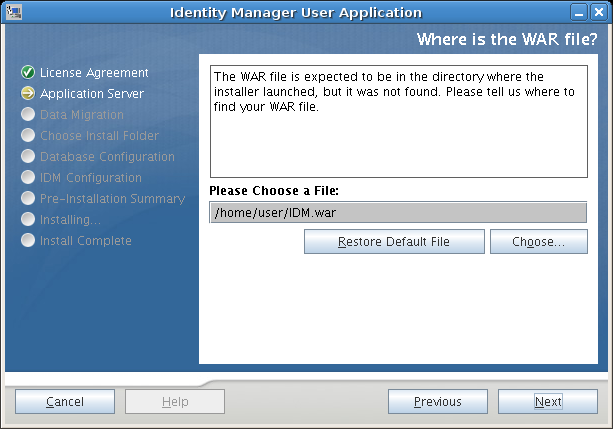
5.6.4 Specifying the Location of the WAR
If the Identity Manager User Application WAR file is in a different directory from the installer, the installer prompts for the path to the WAR.
-
If the WAR is in the default location, click . Or, to specify the location of the WAR file, click and select a location.
-
Click , then continue with Section 5.6.5, Choosing an Install Folder.
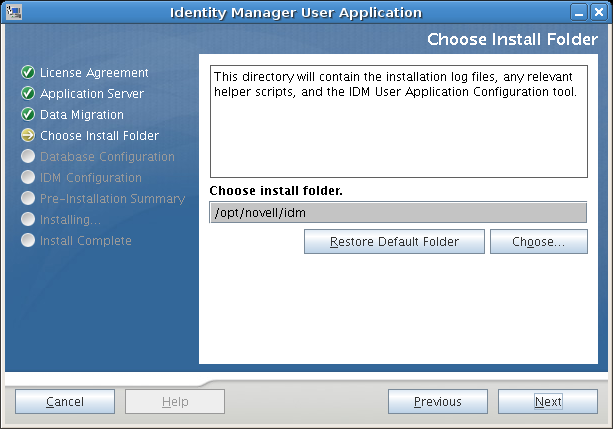
5.6.5 Choosing an Install Folder
-
On the Choose Install Folder page, select where to install the User Application. If you need to remember and use the default location, click Restore Default Folder, or if you want to choose another location for the installation files, click and browse to a location.
-
Click , then continue with Section 5.6.6, Choosing a Database Platform.
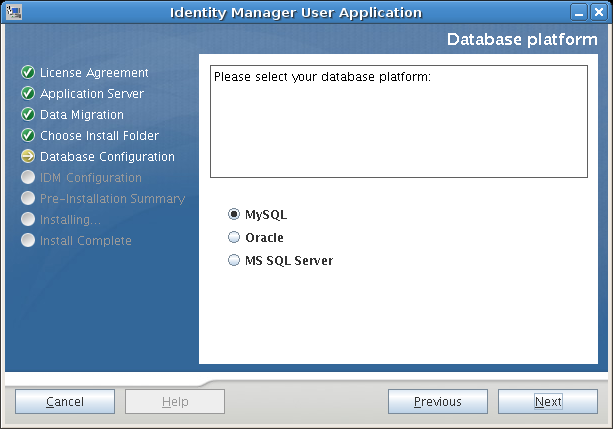
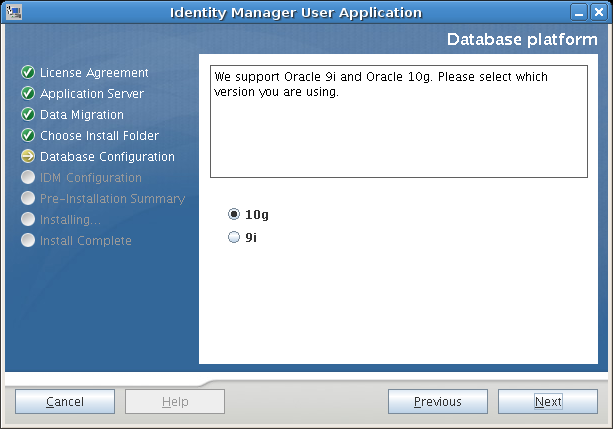
5.6.6 Choosing a Database Platform
-
Select the database platform to use.
-
If you are using an Oracle database, continue with Step 3. Otherwise, skip to Step 4.
-
If you are using an Oracle database, the installer asks you which version you are using. Choose your version.
-
Click Next, then continue with Section 5.6.7, Specifying the Database Host and Port.
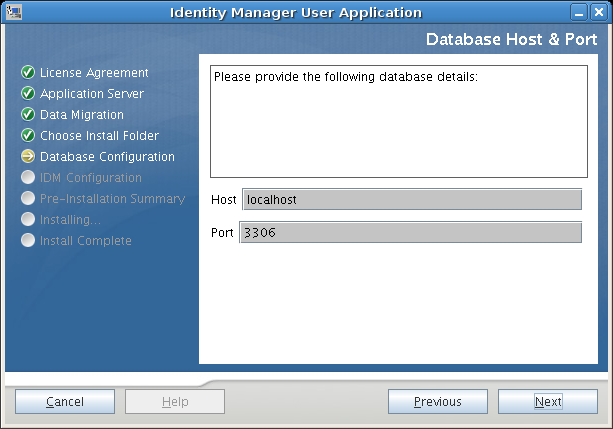
5.6.7 Specifying the Database Host and Port
-
Fill in the following fields:
-
Click , then continue with Section 5.6.8, Specifying the Database Name and Privileged User.
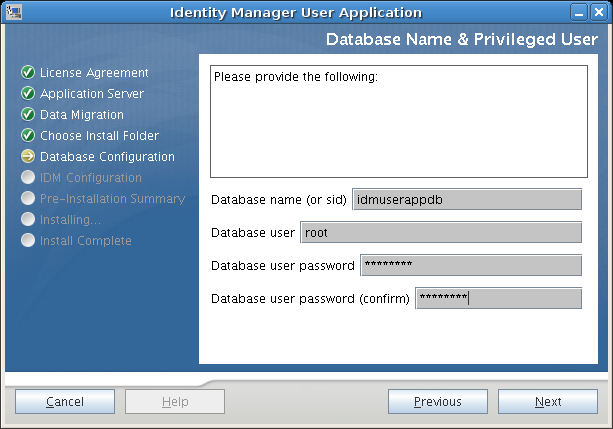
5.6.8 Specifying the Database Name and Privileged User
-
Fill in the following fields:
-
Click Next, then continue with Section 5.6.9, Specifying the Java Root Directory.
5.6.9 Specifying the Java Root Directory
-
Click to browse for your Java root folder. To use the default location, click .

-
Click , then continue with Section 5.6.10, Specifying the JBoss Application Server Settings.
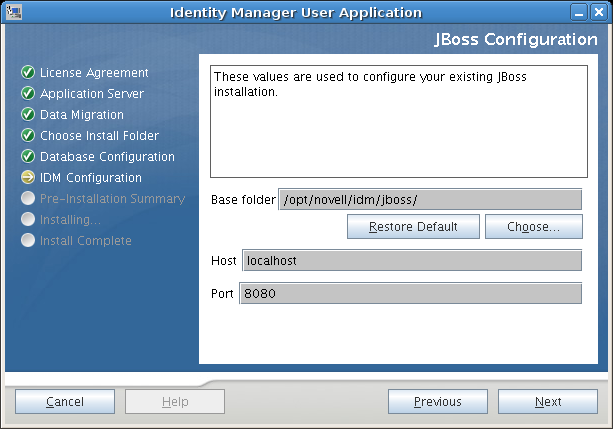
5.6.10 Specifying the JBoss Application Server Settings
On this page, tell the User Application where to find the JBoss Application Server.
This installation procedure does not install the JBoss Application Server: for directions on installing the JBoss Application Server, see Section 5.2.1, Installing the JBoss Application Server and the MySQL Database.
-
Supply the base folder, host, and port:
-
Click , then continue with Section 5.6.11, Choosing the Application Server Configuration Type.
5.6.11 Choosing the Application Server Configuration Type
-
Fill in the following fields:
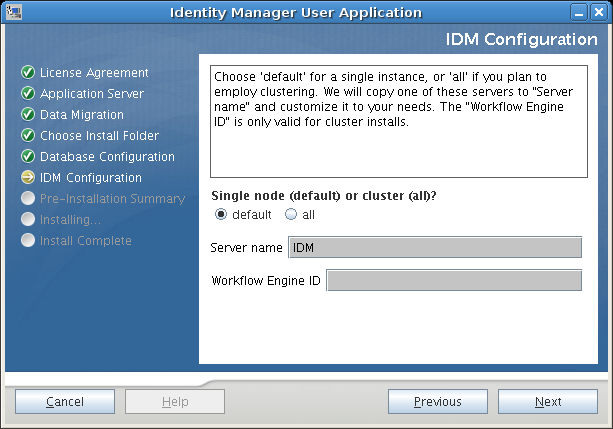
-
Click , then continue with Section 5.6.12, Enabling Novell Audit Logging.
5.6.12 Enabling Novell Audit Logging
(Optional) To enable Novell Audit logging for the User Application:
-
Fill in the following fields:
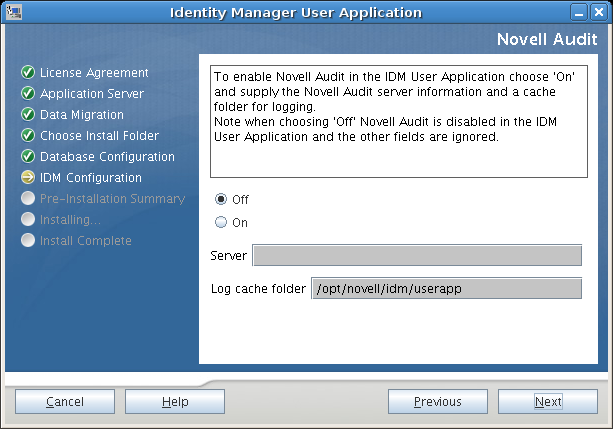
-
Click Next, then continue with Section 5.6.14, Configuring the User Application.
5.6.13 Specifying a Master Key
Specify whether to import an existing master key or create a new one. Examples of reasons to import an existing master key include:
-
You are moving your installation from a staging system to a production system and want to keep access to the database you used with the staging system.
-
You installed the User Application on the first member of a JBoss cluster and are now installing on subsequent members of the cluster (they require the same master key).
-
Because of a failed disk, you need to restore your User Application. You must reinstall the User Application and specify the same encrypted master key that the previous installation used. This gives you access to the previously stored encrypted data.
-
Click to import an existing master key, or click to create a new one.
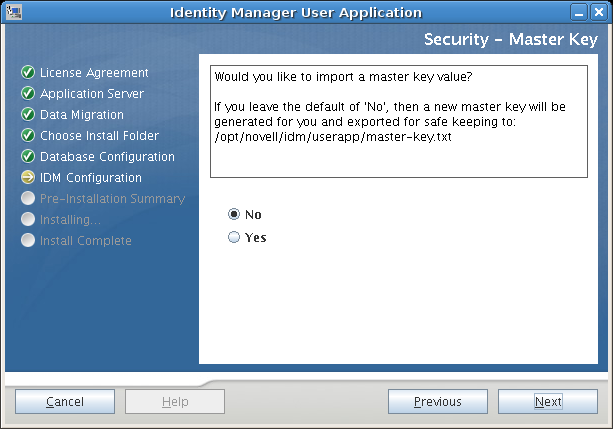
-
Click .
The installation procedure writes the encrypted master key to the master-key.txt file in the installation directory.
If you chose , skip to Section 5.6.14, Configuring the User Application. After you finish the installation, you must manually record the master key as described in Section 5.10.1, Recording the Master Key.
If you chose , continue with Step 3.
-
If you choose to import an existing encrypted master key, cut and paste the key into the install procedure window.
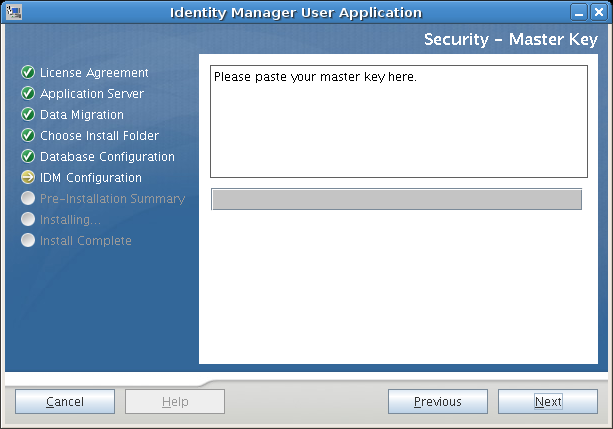
-
Click .
5.6.14 Configuring the User Application
The User Application install enables you to set User Application configuration parameters. Most of these parameters are also editable with configupdate.sh or configupdate.bat after installation; exceptions are noted in the parameter descriptions.
For a cluster, specify identical User Application configuration parameters for each member of the cluster.
-
Set the basic User Application configuration parameters described in Table 5-4, then continue with Step 2.

Table 5-4 User Application Configuration: Basic Parameters
Type of Setting
Field
Description
eDirectory Connection Settings
Required. Specify the hostname or IP address for your LDAP server and its secure port. For example:
myLDAPhost
This is same server that is actively running the IDM engine.
Specify the non-secure port for your LDAP server. For example: 389.
Specify the secure port for your LDAP server. For example: 636.
Required. Specify the credentials for the LDAP Administrator. This user must already exist. The User Application uses this account to make an administrative connection to the Identity Vault. This value is encrypted, based on the master key.
Required. Specify the LDAP Administrator password. This password is encrypted, based on the master key.
Allows users who are not logged in to access the LDAP Public Anonymous Account.
Allows users who are not logged in to access permitted portlets. This user account must already exist in the Identity Vault. To enable LDAP Guest, you must deselect . To disable Guest User, select .
Specify the LDAP Guest password.
Select this option to require that all communication using the admin account be done using a secure socket (this option can have adverse performance implications). This setting allows other operations that don't require SSL to operate without SSL.
Select this option to require that all communication using the logged-in user’s account be done using a secure socket (this option can have adverse performance implications). This setting allows other operations that don't require SSL to operate without SSL.
eDirectory DNs
Required. Specify the LDAP distinguished name of the root container. This is used as the default entity definition search root when no search root is specified in the directory abstraction layer.
Required. Specify the distinguished name of the User Application driver that you created earlier in Section 5.4, Creating the User Application Driver. For example, if your driver is UserApplicationDriver and your driver set is called myDriverSet, and the driver set is in a context of o=myCompany, you would type a value of:
cn=UserApplicationDriver,cn=myDriverSet,o=myCompany
Required. An existing user in the Identity Vault who has the rights to perform administrative tasks for the User Application user container specified. This user can use the tab of the User Application to administer the portal.
If the User Application Administrator participates in workflow administration tasks exposed in iManager, Novell Designer for Identity Manager, or the User Application ( tab), you must grant this administrator appropriate trustee rights to object instances contained in the User Application driver. Refer to the IDM User Application: Administration Guide for details.
To change this assignment after you deploy the User Application, you must use the pages in the User Application.
This role is available in the provisioning version of Identity Manager 3.5.1. The Provisioning Application Administrator uses the tab (under the tab) to manage the Provisioning Workflow functions. These functions are available to users through the tab of the User Application. This user must exist in the Identity Vault prior to being designated the Provisioning Application Administrator.
To change this assignment after you deploy the User Application, you must use the pages in the User Application.
eDirectory DNs (continued)
Required. Specify the LDAP distinguished name (DN) or fully qualified LDAP name of the user container. This defines the search scope for users and groups. Users in this container (and below) are allowed to log in to the User Application.
IMPORTANT:Be sure the User Application Administrator specified during User Application driver setup exists in this container if you want that user to be able to execute workflows.
Required. Specify the LDAP distinguished name (DN) or fully qualified LDAP name of the group container.
Used by entity definitions within the directory abstraction layer.
eDirectory Certificates
Required. Specify the full path to your keystore (cacerts) file of the JDK that the application server application server is using to run, or click the small browser button and navigate to the cacerts file.
On Linux or Solaris, the user must have permission to write to this file.
Required. Specify the cacerts password. The default is changeit.
Email
Specify the application server hosting the Identity Manager User Application. For example:
myapplication serverServer
This value replaces the $HOST$ token in e-mail templates. The URL that is constructed is the link to provisioning request tasks and approval notifications.
Used to replace the $PORT$ token in e-mail templates used in provisioning request tasks and approval notifications.
Used to replace the $SECURE_PORT$ token in e-mail templates used in provisioning request tasks and approval notifications.
Specify e-mail to come from a user in provisioning e-mail.
Specify the SMTP e-mail host that provisioning e-mail is using. This can be an IP address or a DNS name.
Password Management
This feature enables you to specify a Forgot Password page residing in an external Forgot Password WAR and a URL that the external Forgot Password WAR uses to call back the User Application through a Web service.
If you check , you must supply values for and .
If you do not select IDM uses the default internal Password Management functionality, ./jsps/pwdmgt/ForgotPassword.jsf (without the http(s) protocol at the beginning). This redirects the user to the Forgot Password functionality built into the User Application, rather than to an external WAR.
This URL points to the Forgot Password functionality page. Specify a ForgotPassword.jsf file in an external or internal password management WAR. For details, see Using Password WARs.
If you are using an external password management WAR, supply the path that the external Password Management WAR uses to call back the User Application through Web Services, for example https://idmhost:sslport/idm.
-
If you want to set additional User Application configuration parameters, click Show Advanced Options. (Scroll to view the whole panel.) Table 5-5 describes the Advanced Options parameters.
If you do not want to set additional parameters described in this step, skip to Step 3.
Table 5-5 User Application Configuration: All Parameters
Type of Setting
Field
Description
eDirectory Connection Settings
Required. Specify the hostname or IP address for your LDAP server. For example:
myLDAPhost
Specify the non-secure port for your LDAP server. For example: 389.
Specify the secure port for your LDAP server. For example: 636.
Required. Specify the credentials for the LDAP Administrator. This user must already exist. The User Application uses this account to make an administrative connection to the Identity Vault. This value is encrypted, based on the master key.
Required. Specify the LDAP Administrator password. This password is encrypted, based on the master key.
Allows users who are not logged in to access the LDAP Public Anonymous Account.
Allows users who are not logged in to access permitted portlets. This user account must already exist in the Identity Vault. To enable LDAP Guest, you must deselect . To disable Guest User, select .
Specify the LDAP Guest password.
Select this option to require that all communication using the admin account be done using a secure socket (this option can have adverse performance implications). This setting allows other operations that don't require SSL to operate without SSL.
Select this option to require that all communication done on the logged-in user's account be done using a secure socket (this option can have severe adverse performance implications). This setting allows other operations that don't require SSL to operate without SSL.
eDirectory DNs
Required. Specify the LDAP distinguished name of the root container. This is used as the default entity definition search root when no search root is specified in the directory abstraction layer.
Required. Specify the distinguished name of the User Application driver that you created earlier in Section 5.4, Creating the User Application Driver. For example, if your driver is UserApplicationDriver and your driver set is called myDriverSet, and the driver set is in a context of o=myCompany, you type a value of:
cn=UserApplicationDriver,cn=myDriverSet,o=myCompany
Required. An existing user in the Identity Vault who has the rights to perform administrative tasks for the User Application user container specified. This user can use the tab of the User Application to administer the portal.
If the User Application Administrator participates in workflow administration tasks exposed in iManager, Novell Designer for Identity Manager, or the User Application ( tab), you must grant this administrator appropriate trustee rights to object instances contained in the User Application driver. Refer to the IDM User Application: Administration Guide for details.
To change this assignment after you deploy the User Application, you must use the pages in the User Application.
This role is available in the provisioning version of Identity Manager 3.5.1. The Provisioning Application Administrator manages Provisioning Workflow functions available through the tab of the User Application. This user must exist in the Identity Vault prior to being designated the Provisioning Application Administrator.
To change this assignment after you deploy the User Application, you must use the pages in the User Application.
Meta-Directory User Identity
Required. Specify the LDAP distinguished name (DN) or fully qualified LDAP name of the user container.
This defines the search scope for users and groups.
Users in this container (and below) are allowed to log in to the User Application.
IMPORTANT:Be sure the User Application Administrator specified during User Application driver setup exists in this container if you want that user to be able to execute workflows.
The LDAP user object class (typically inetOrgPerson).
The LDAP attribute (for example, CN) that represents the user’s login name.
The LDAP attribute used as the identifier when looking up users or groups. This is not the same as the login attribute, which is used only during login, and not during user/group searches.
Optional. The LDAP attribute that represents the user’s group membership. Do not use spaces in this name.
Meta-Directory User Groups
Required. Specify the LDAP distinguished name (DN) or fully qualified LDAP name of the group container. Used by entity definitions within the directory abstraction layer.
The LDAP group object class (typically groupofNames).
The attribute representing the user’s group membership. Do not use spaces in this name.
Select this option if you want to use dynamic groups.
The LDAP dynamic group object class (typically dynamicGroup).
eDirectory Certificates
Required. Specify the full path to your keystore (cacerts) file of the JRE that the application server application server is using to run, or else click the small browser button and navigate to the cacerts file.
The User Application installation modifies the keystore file. On Linux or Solaris, the user must have permission to write to this file.
Required. Specify the cacerts password. The default is changeit.
Private Key Store
The private keystore contains the User Application’s private key and certificates. Reserved. If you leave this empty, this path is /jre/lib/security/cacerts by default.
This password is changeit unless you specify otherwise. This password is encrypted, based on the master key.
This alias is novellIDMUserApp unless you specify otherwise.
This password is nove1lIDM unless you specify otherwise. This password is encrypted, based on the master key.
Trusted Key Store
The Trusted Key Store contains all trusted signers’ certificates used to validate digital signatures. If this path is empty, the User Application gets the path from System property javax.net.ssl.trustStore. If the path isn’t there, it is assumed to be jre/lib/security/cacerts.
If this field is empty, the User Application gets the password from System property javax.net.ssl.trustStorePassword. If the value is not there, changeit is used. This password is encrypted, based on the master key.
Novell Audit Digital Signature and Certificate Key
Contains the Novell Audit digital signature key and certificate.
Displays the digital signature certificate.
Displays the digital signature private key. This key is encrypted, based on the master key.
iChain Settings
If this option is selected, the User Application supports simultaneous logout of the User Application and either iChain or Novell Access Manager. The User Application checks for an iChain or Novell Access Manager cookie on logout and, if the cookie is present, reroutes the user to the ICS logout page.
The URL to the iChain or Novell Access Manager logout page, where the URL is a hostname that iChain or Novell Access Manager expects. If ICS logging is enabled and a user logs out of the User Application, the user is rerouted to this page.
Email
Specify the application server hosting the Identity Manager User Application. For example:
myapplication serverServer
This value replaces the $HOST$ token in e-mail templates. The URL that is constructed is the link to provisioning request tasks and approval notifications.
Used to replace the $PORT$ token in e-mail templates used in provisioning request tasks and approval notifications.
Used to replace the $SECURE_PORT$ token in e-mail templates used in provisioning request tasks and approval notifications.
Refers to a non-secure protocol, HTTP. Used to replace the $PROTOCOL$ token in e-mail templates used in provisioning request tasks and approval notifications.
Refers to a secure protocol, HTTPS. Used to replace the $SECURE_PROTOCOL$ token in e-mail templates used in provisioning request tasks and approval notifications.
Specify e-mail from a user in provisioning e-mail.
Specify the SMTP e-mail host that provisioning e-mail is using. This can be an IP address or a DNS name.
Password Management
This feature enables you to specify a Forgot Password page residing in an external Forgot Password WAR and a URL that the external Forgot Password WAR uses to call back the User Application through a Web service.
If you select , you must supply values for and .
If you do not select IDM uses the default internal Password Management functionality, ./jsps/pwdmgt/ForgotPassword.jsf (without the http(s) protocol at the beginning). This redirects the user to the Forgot Password functionality built into the User Application, rather than to an external WAR.
This URL points to the Forgot Password functionality page. Specify a ForgotPassword.jsf file in an external or internal password management WAR. For details, see Using Password WARs.
If you are using an external password management WAR, supply the path that the external Password Management WAR uses to call back the User Application through Web Services, for example https://idmhost:sslport/idm.
Miscellaneous
The application session timeout.
If the client installation uses the On-Line Certificate Status Protocol (OCSP), supply a Uniform Resource Identifier (URI). For example, the format is http://host:port/ocspLocal. The OCSP URI updates the status of trusted certificates online.
Fully qualified name of the authorization configuration file.
Container Object
Select each Container Object Type to use.
Select from the following standard containers: locality, country, organizationalUnit, organization, and domain. You can also define your own containers in iManager and add them under .
Lists the Attribute Type name associated with the Container Object Type.
Specify the LDAP name of an objectclass from the Identity Vault that can serve as a container.
For information on containers, see the Novell iManager 2.6 Administration Guide .
Supply the attribute name of the container object.
NOTE:You can edit most of the settings in this file after installation. To do so, run the configupdate.sh script or the Windows configupdate.bat file located in your installation subdirectory. Remember that in a cluster, the settings in this file must be identical for all members of the cluster.
-
After you finish configuring the settings, click OK, then continue with Section 5.6.15, Verify Choices and Install
Using Password WARs
Use the configuration parameter to specify the location of a WAR containing Forgot Password functionality. You can specify a WAR that is external or internal to the User Application.
Specifying an External Password Management WAR
-
Use either the install procedure or the configupdate utility.
-
In the User Application configuration parameters, select the configuration parameter check box.
-
For the configuration parameter, specify the location for the external password WAR.
Include the host and port, for example http://localhost:8080/ExternalPwd/jsps/pwdmgt/ForgotPassword.jsf. An external password WAR can be outside the firewall protecting the User Application.
-
For the , supply the path that the external Password Management WAR uses to call back the User Application through Web Services, for example https://idmhost:sslport/idm.
The return link must use SSL to ensure secure Web Service communication to the User Application. See also Section 5.10.3, Configuring SSL Communication Between JBoss Servers.
-
If you are using the installer, read the information in this step and proceed to Step 6.
If you are using the configupdate utility to update the external password WAR in the installation root directory, read this step and manually rename the WAR to the first directory you specified in . Then, proceed to Step 6.
Before the installation ends, the installer renames IDMPwdMgt.war (bundled with the installer) to the name of the first directory that you specify. The renamed IDMPwdMgt.war becomes your external password WAR. For example, if you specify http://www.idmpwdmgthost.com/ExternalPwd/jsps/pwdmgt/ForgotPassword.jsf, the installer renames IDMPwdMgt.war to ExternalPwd.war. The installer moves the renamed WAR into the installation root directory.
-
Manually copy ExternalPwd.war to the remote JBoss server deploy directory that runs the external password WAR functionality.
Specifying an Internal Password Management WAR
-
Do not select .
-
Accept the default location for the , or supply a URL for another password WAR.
-
Accept the default value for .
5.6.15 Verify Choices and Install
-
Read the Pre-Install Summary page to verify your choices for the installation parameters.
-
If necessary, use to return to earlier installation pages to change installation parameters.
The User Application configuration page does not save values, so after you re-specify earlier pages in the installation, you must re-enter the User Application configuration values.
-
When you are satisfied with your installation and configuration parameters, return to the Pre-Install Summary page and click .
5.6.16 View Log Files
-
If your installation completed without error, go to Section 5.10, Post-Install Tasks.
-
If the installation issued errors or warnings, review the log files to determine the problems:
-
Identity_Manager_User_Application_InstallLog.log holds results of the basic installation tasks
-
Novell-Custom-Install.log holds information about the User Application configuration done during installation
For help solving problems, see Section 5.12, Troubleshooting.
-