2.4 Post-Installation Tasks
2.4.1 Importing the Driver Configuration File
The sample Exchange 5.5 driver configuration creates and configures the objects needed to make the driver work properly.
For example, consider the following scenario:
You create a driver set and driver object in the lab. After configuring the driver, you save the configuration. To save time and keep the same settings that worked well in the lab, you import the driver’s configuration file from the lab environment into your production environment.
Importing by Using iManager
-
In iManager, select > .
-
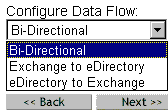
Select whether to place the configuration file in a new or existing driver set.
Select for the following situations:
- The driver should be logically grouped with the other drivers in the tree.
- The server can handle the additional traffic that would the new driver would generate.
- You want to update or customize an existing driver.
For example, you can point the driver to a different container but keep all the rules that you have set up.
-
In the Import Drivers dialog box, select the Exchange 5_5 driver, then click .
-
Scroll to the following parameters and provide required information. Refer to the descriptions provided in the interface.
- e
-
-
Using Role-Based Entitlements is a design decision. Don't select this option unless you have reviewed
Creating and Using Entitlements
in Novell Identity Manager 3.0.1 Administration Guide.If you select this option, also provide information for .
- Remote Host Name and Port
- Driver Password
- Remote Password
-
Define security equivalences.
The tendency is to assign Admin. However, you might want to create a DriversUser (for example) and assign security equivalence to that user.
-
Identify all objects that represent Administrative Roles and exclude them from replication.
Exclude the security-equivalence object (for example, DriversUser) that you specified in Step 5. If you delete the security-equivalence object, you have removed the rights from the driver. Therefore, the driver can’t make changes to the Identity Vault.
-
(Conditional) If you are re-creating or updating a driver, select , then click .
-
In the Summary screen, review options, then click .
If you need to make changes, click .
After importing, configure the Driver Set object and the Driver object for your setup, then start or restart the driver.
Importing by Using Designer for Identity Manager
You can import the basic driver configuration file for JDBC by using Designer for Identity Manager. This basic file creates and configures the objects and policies needed to make the driver work properly.
The following procedure explains one of several ways to import the sample configuration file:
-
Open a project in Designer.
-
In the modeler, right-click the Driver Set object, then select .
-
From the drop-down list, select , then click .
-
Click , in the Perform Prompt Validation window.
-
Configure the driver by filling in the fields.
Specify information specific to your environment.
-
After specifying parameters, click to import the driver.
-
Customize and test the driver.
-
Deploy the driver into the Identity Vault.
2.4.2 Configuring the Exchange Server
This section contains information on configuring the Exchange server for use with the Identity Manager Driver for Exchange. You should already be familiar with Exchange administration and deployment.
Before you proceed, you must have the following information about your setup:
- The name of the Exchange Server that the driver will be synchronizing with.
- The name of the Exchange site you want to administer.
- The IP address or hostname of the Exchange server.
- The name of the Exchange service account and its password.
If the Exchange server is running on the same computer as the Identity Vault, unload the LDAP server or reconfigure it to run on a different port.
To unload LDAP:
-
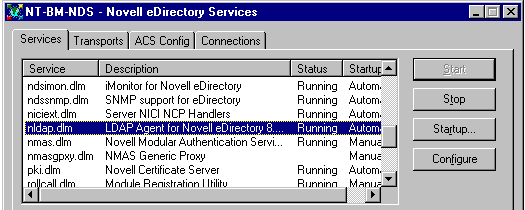
In the , double-click .
-
Scroll to and select ldap.dlm, then click .
To reconfigure LDAP to run on a different port:
-
In Novell iManager, select > .
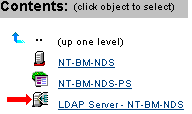
-
Navigate to and select the LDAP Server object.
-
From the drop-down list, select > .
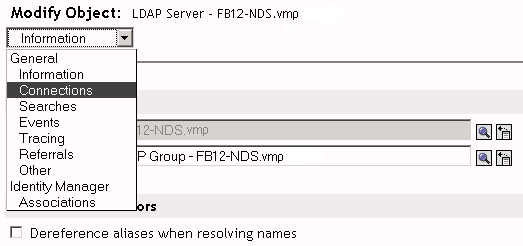
-
Scroll to the Ports section.
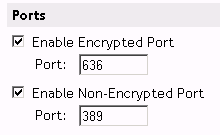
-
Change to a value other than 389, then click .
If another LDAP service is already using port 389, change the Exchange server’s LDAP port number so that it doesn’t conflict with the other service. If you change the Exchange server’s port number, also change the LDAP port that the Identity Manager Driver for Exchange looks at. See see Section 4.6, Specifying the LDAP Port .
2.4.3 Installing a Remote Exchange Driver
The driver doesn’t need to run on the same machine as the Exchange Server. However, when running remotely, the driver can run only on an NT server or member server that belongs to the same domain as the Exchange server domain. This restriction is a Microsoft-imposed NT credential restriction.
The NT server where you install the driver needs to have three Microsoft .dll files installed before the driver can run: libxds.dll, exchmem.dll, and expsrv.dll. The files are installed by the Exchange Administrator program. You can install Exchange Administrator from the Microsoft Exchange Server CD.
A remote driver doesn’t create NT accounts when a new Exchange mailbox is created. This is also because of restrictions imposed by the Microsoft DAPI API that the driver uses.
For instructions on installing the Remote Loader, see Setting
Up a Connected System
in Novell
Identity Manager 3.0.1 Administration Guide.
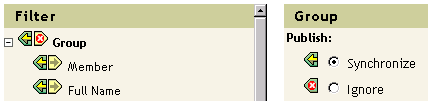
2.4.4 Configuring the Driver Filter
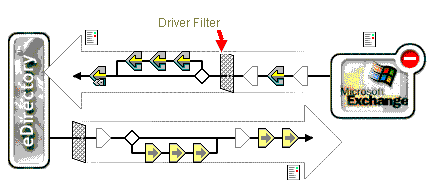
Modify the filter on the Publisher and Subscriber channels to include object classes and attributes that you want Identity Manager to process.
-
In iManager, click > .
-
Locate the driver set that contains the Exchange driver, then click the driver’s icon to display the Identity Manager Driver Overview page.
-
Click the driver filter icon.
-
(Optional) Add classes that you want Identity Manager to process.
The Exchange driver supports the Distribution List, Remote, and Mailbox classes.
-
Enable synchronization.
As the following figure illustrates with red Xs, when you add a class, the Publisher and Subscriber channels aren’t enabled.
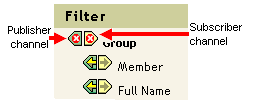
To enable a channel, click the channel icon, then click .
-
Save changes by clicking .
Mail-nickname is the Alias attribute on the General page in the Exchange Administrator. It is the Exchange attribute name that the driver supports but does not map to any existing eDirectory attributes. Based on your organization's needs, you can map this Exchange attribute to existing or new eDirectory attributes (after extending the schema) by modifying the Schema Mapping policy. Make sure that the syntax for any maps you add is valid. You can also handle this in a style sheet.
2.4.5 Starting the Driver
-
In iManager, click > .
-
Browse to and select the driver set where the driver exists.
-
In the driver that you want to start, click the icon for the drop-down list.
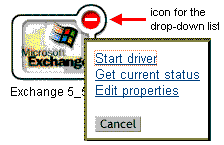
-
Select .
After the driver starts, you can open DSTrace to see driver processing details.
Synchronization takes place on an object-by-object basis as changes are made to individual objects. To have immediate synchronization, initiate synchronization as explained in Migrating and Resynchronizing Data.
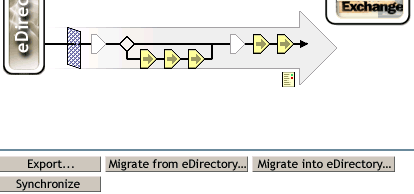
2.4.6 Migrating and Resynchronizing Data
Identity Manager synchronizes data as it changes. If you want to synchronize all data immediately, you can choose from the following options:
-
Migrate Data from eDirectory: Allows you to select containers or objects you want to migrate from eDirectory to an application. When you migrate an object, the Metadirectory engine applies all of the Matching, Placement, and Create policies, as well as the Subscriber filter, to the object.
-
Migrate Data into eDirectory: Allows you to define the criteria the Metadirectory engine uses to migrate objects from an application into Novell eDirectory. When you migrate an object, the Metadirectory engine applies all of the Matching, Placement, and Create policies, as well as the Publisher filter, to the object. Objects are migrated into eDirectory by using the order you specify in the Class list.
-
Synchronize: The Metadirectory engine looks in the Subscriber class filter and processes all objects for those classes. Associated objects are merged. Unassociated objects are processed as Add events.
To use one of the options explained above:
-
In iManager, select > .
-
Locate the driver set containing the Exchange driver, then double-click the driver icon.
-
Click the appropriate migration button.
2.4.7 Activating the Driver
Activate the driver within 90 days of installation. Otherwise, the driver will stop working.
For information on activation, refer to Activating
Novell Identity Manager Products
in the Identity
Manager 3.0.1 Installation Guide.