
5250 Connect User's Guide
CHAPTER 2
For demonstration purposes, three transactions are used throughout this document in the samples presented: PART, GORD, and MENU. These transactions represent typical transactions used by operators. The PART transaction represents a scenario in which an operator uses a SKU number to drive an inquiry to a database. The GORD transaction represents a scenario in which an order for an item or several items is placed. The MENU transaction represents a scenario in which an operator navigates through a menu-driven application to get to a particular screen. The PART, GORD, and MENU transactions are used to show you how to build Integration Manager services that do the same things as the real life scenarios.

While there are many ways to go about creating 5250 components, the most commonly used steps in creating a simple component are as follows:
Enter Record mode and navigate through the transaction using terminal emulation available via the component editor's Native Environment Pane.
Once you have the XML templates in place, your next step will be to create a Connection Resource to access the AS/400 transaction. If you try to create a 5250 Component in the absence of any available Connection Resources, a dialog will appear, asking if you wish to create a Connection Resource. By answering Yes to this dialog, you will be taken to the appropriate wizard.
When you create a Connection Resource for the 5250 Component, you will have two choices: a basic "TN5250 Connection" and a "5250 Logon Connection". The Logon Connection is used for connection pooling, which will be explained in greater detail in Chapter 5 of this Guide. For normal connections, you will use the TN5250 Connection when you want to connect to any IBM AS/400 environment.
 To create a 5250 Connection Resource:
From the Integration Manager File menu, select New > xObject, then open the Resource tab and select Connection.
NOTE: Alternatively, under Resource in the Integration Manager window category pane you can highlight Connection, click the right mouse button, then select New.
Select the TN5250 Connection type from the pull-down menu. The dialog changes appearance to show just the fields necessary for creating the 5250 connection.
In the Host or IP Address field, enter the physical address or alias for the machine to which you are connecting. Your system administrator will provide you with this information, which is defined in a separate host file.
In the Telnet Port field, enter the number of the port. The default port number is 23.
In the Code Page field, specify a code page from the drop down list box (See "About Code Page Support" on page -16).
The Screen wait (seconds) field, displays the amount of time in seconds that a 5250 Terminal component will wait for the arrival of the next screen in the Map Screen Action pane.
Enter a UserID and Password. These are not actually submitted to the host during the establishment of a connection. They are simply defined here (the password is encrypted). Right-mouse-click and choose Expression if you want to make these fields expression-driven.
NOTE: After you've entered UserID and Password info in this dialog, the ECMAScript global variables USERID and PASSWORD will point to these values. You can then use these variables in expressions (or as described in "5250 Specific Expression Builder Extensions" in Chapter 4.
The Terminal Type field lists the various types of terminals supported by 5250 components, including different screen sizes (i.e. 24x80 and 27x32). Select from the drop down list box the type of terminal you are using.
In the DBSC Support field, select from the drop down list box your choice of your Default, Double Encoding or SO/SI Using Ox1F.
In the DBCS Code Page field, select from the drop down list box the appropriate code page.
Click in the Default checkbox if you'd like this particular 5250 connection to become the default connection for subsequent 5250 components.
Click on the Advanced button for creating a Screen Handler, see Chapter 6, "Handling System Messages" for more detailed information.
Click Finish. The newly created resource connection object appears in the Integration Manager Connection Resource detail pane.
You can specify Connection parameter values in one of two ways: as Constants or as Expressions. A constant-based parameter uses the static value you supply in the Connection dialog every time the Connection is used. An expression-based parameter allows you to set the value using a programmatic expression (that is, an ECMAScript expression), which can result in a different value each time the connection is used at runtime. This allows the Connection's behavior to be flexible and vary based on runtime conditions.
For instance, one very simple use of an expression driven parameter in a TN5250 Connection would be to define the User ID and Password as PROJECT Variables (e.g. PROJECT.XPATH("USERCONFIG/MyDeployUser"). This way when you deploy the project, you can update the PROJECT Variables in the Deployment Wizard to values appropriate for the final deployment environment. At the other extreme, you could have a custom script that queries a Java business object in the Application Server to determine what User ID and Password to use.
To switch a parameter from Constant driven to Expression driven:
Click the right mouse button in the parameter field you are interested in changing.
Select Expression from the context menu and the editor button will appear or become enabled.
Click on the Expression Editor button. The Expression Editor appears.
Create an expression (optionally using the pick lists in the upper portion of the window) that evaluates to a valid parameter value at runtime.
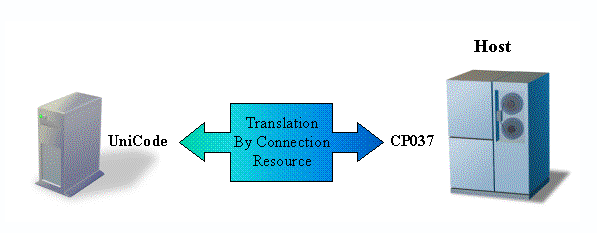
Code Page support in Integration Manager Connection Resources allows you to specify which Character Encoding scheme to use when translating characters sent between Integration Manager and other host systems. Integration Manager data uses Unicode character encoding (the Java and XML standard). Existing legacy and other host systems use a variety of character encoding schemes (i.e., Code Pages) specific for their language or usage. A mechanism is needed to translate the character encoding between these systems if they are to communicate with one another. This is handled in Integration Manager by specifying the Code Page used by a host system in the Connection Resource used to access that system. For more information on encoding, refer to "Java Code Pages" in Appendix A.
An additional resource associated with the 5250 Connect is the style sheet resource. This allows you to create a style sheet with which to display the emulation screen in the native environment pane.
To create a Style
Sheet Resource:
Select File>New> xObject from the Integration Manager menu, then open the Resource tab and select Terminal Style Sheet.
NOTE: Alternatively, you may highlight Terminal Style Sheet in the Resource section of Integration Manager's category pane, click your right mouse button, and select New.
Type a Name for the new style sheet. Optionally, you may type in Description text.
Click the Next button. The Style Sheet Editor window appears.
Use the Style Sheet Editor as described below to configure your style sheet:
Style Sheet - Select a style sheet from this drop down list to change the appearance of the emulation screen in the native environment pane. This field initially contains the name you specified on the first page of the Terminal Style Sheet wizard. To create a new style sheet, type a name over one of the names in the list.
Set Default - Select this button to make the currently selected style sheet the default for a component.
Cell Width/Height - Modify these settings for drawing characters that may be truncated by changing font types.
Background - Select this button to see background color options for the style sheet.
3270 Style - This control lists the styles available from the TDS. You cannot edit these values. Select the style you wish to map to a new style you create.
GUI Style - This control lists available styles you create. Type over an existing style to create a new one, then specify its Font, Foreground, and Background using the corresponding buttons.
Border Style - Select one of three pre-defined borders from this drop down list. You cannot edit this control.
Transparent Background - Select this check box if you want the GUI to have a transparent background.
Click OK. The newly created style sheet resource appears in Integration Manager's detail pane.
Although it is not strictly necessary to do so, your 5250 Component may require you to create XML templates so that you have sample documents for designing your component. (For more information, see Chapter 5, "Creating XML Templates," in the Integration Manager User's Guide.)
In many cases, your input documents will be designed to contain data that a terminal operator might type into the program interactively. Likewise, the output documents are designed to receive data returned to the screen as a result of the operator's input. For example, in a typical business scenario, a terminal operator may receive a phone request from a customer interested in the price or availability of an item. The operator would typically query the host system via his or her 5250 terminal session by entering information (such as a part number) into a terminal when prompted. A short time later, the host responds by returning data to the terminal screen, and the operator relays this information to the customer. This session could be carried out by an Integration Manager Web Service that uses a 5250 Component. The requested part number might be represented as a data element in an XML input document. The looked-up data returned from the host would appear in the component's output document. That data might in turn be output to a web page, or sent to another business process as XML, etc.
NOTE: Your component design may call for other xObject resources, such as custom scripts or Code Table maps. If so, it is also best to create these objects before creating the 5250 Component. For more information, see the Integration Manager User's Guide.
Copyright © 2004 Novell, Inc. All rights reserved. Copyright © 1997, 1998, 1999, 2000, 2001, 2002, 2003 SilverStream Software, LLC. All rights reserved. more ...


