10.1 iPrint Appliance Configuration
The iPrint Appliance Configuration page displays the following options:
10.1.1 Printers
The Printers page lists all printers currently managed by iPrint Appliance. You can enable a printer for AirPrint, Email printing, and IPP printing.
Advertising a Printer as AirPrint
-
Select a printer or printers, click the drop-down menu, then click .
All Apple certified AirPrint printers are supported for AirPrint printing.
On enabling the printer for AirPrint, the printer is advertized as an AirPrint-enabled printer and also gets enabled for Mobile and Email Printing.
Enabling Mobile Printing for a Printer
-
Select a printer or printers, click the drop-down menu, then click .
On enabling the printer for mobile, you can print to that printer from your mobile devices or by using the email printing feature.
Enabling Private Email Printing
Using email printing, you can print documents from any device capable of sending emails. You can print emails by specifying email printing commands in the subject line of the email. You can also print documents by emailing them to your printer as attachments. When configured for email printing, iPrint Appliance becomes a client to an email server.
To enable private email printing, you must ensure to meet the following:
-
Enable the printer for mobile printing
-
Configure global email settings
-
Email accounts are created and functional
You can configure a printer for private email printing by providing a specific email address to each printer. To enable a private email address for the printer, do the following:
-
Select a printer, click the drop-down menu, then click .
-
Specify the values as follows:
Account
-
Email Address: Specify the full email address of the mailbox to be polled for the print jobs. When an email-based job arrives, the print job is processed to the printer. For example, print@example.com.
-
Username: Specify the user name to be used by iPrint Appliance to log in to the email server to access the private printer email account. For example, iprint.
-
Password: Specify the password for iPrint Appliance to log in to the email server to access the private printer email account.
-
Retype Password: Confirm the account password.
Server
-
Incoming Mail Server: Specify the address of the incoming email server for the email account. For example, imap.example.com.
-
Outgoing Mail Server: Specify the address of the outgoing email server for the email account. For example, smtp.example.com.
-
Access Method: iPrint Appliance supports two different protocols to poll for incoming print jobs. Select POP or IMAP depending on the protocol your email server supports.
-
Caveats For Email Printing
-
An email address used for a particular printer (per-printer email configuration) cannot be shared for any other printer or mobile service.
-
If you configure a printer for private email printing and then disable the printer for Mobile printing, the private email configuration settings are deleted. If you want to enable private email printing in future, you must specify the information manually.
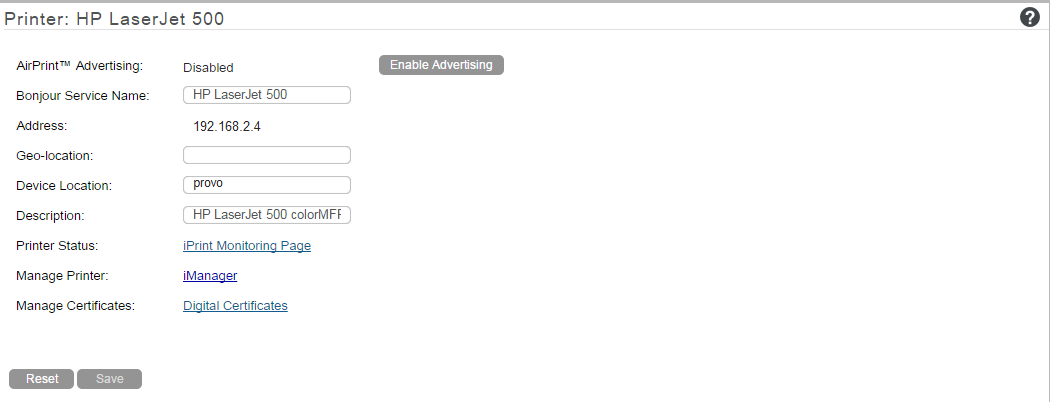
Editing a Printer
-
To view and modify the details of a printer, click the printer name.
-
You can modify the details as follows:
-
AirPrint Advertising: Click the button to enable or disable AirPrint advertising.
All Apple certified AirPrint printers are supported for AirPrint printing.
-
Bonjour Service Name: Displays the name with which the printer will be advertised as AirPrint printer.
-
Address: Displays the IP address or host name of the printer.
-
Geo-location: (Optional) Geographical location of the printer.
-
Device Location: (Optional) Local location of the printer.
-
Description: (Optional) Specific description related to the printer.
-
Printer Status: Displays the health monitoring GUI to monitor the printer status.
-
Manage Printer: Displays the iManager GUI to manage the print environment.
-
Manage Certificates: Displays the Digital Certificates page. The certificates are managed from this location.
-
-
Click .
Printer Rename and Printer Refresh
You can rename a printer from the Printers page. Select a printer you want to rename, click the menu, then click .
To refresh the printers list, click the button in the upper right of the Available Printers window.
Bulk Printer Creation Using a CSV File
You can create multiple printers using a csv file. You must create a csv file, then upload the csv file into iPrint Appliance by clicking the button in the upper-right corner of the Configuration page.
The csv file must contain the following fields:
PrinterName,PrinterIP,Location,Description,Win95_98_Driver,Winnt_Driver,Win2k_Driver,Winxp_Driver,Linux_Driver,Mac_Driver,Vista32_Driver,Vista64_Driver,Win732_Driver,Win764_Driver,Win832_Driver,Win864_Driver,Enable DirectPrinting,Secure Printing,Enable Auditing,LPR/RAW,Raw Port
Uploading the CSV File
-
On a Web browser, specify either the host name or the IP address. For example, https://10.0.0.1:9443 or https://iprint.example.com:9443.
-
Specify the and , then click .
-
Click .
-
Click Printers.
-
Click the button in the upper-right corner of the window.

-
To download the sample csv file, click .
-
-
Navigate to the .csv file, select it, then click to begin the printer import process.
For more information on the parameters in the csv file, see Bulk Printer Import Using a CSV File.
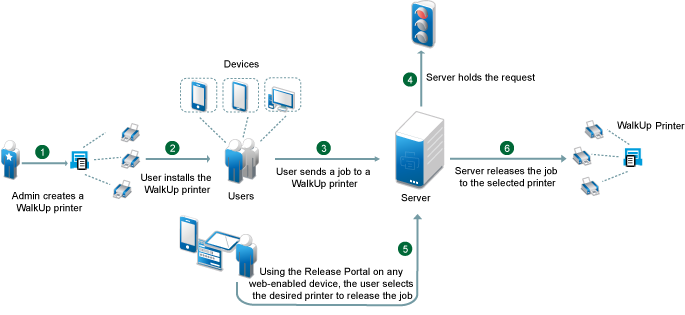
10.1.2 WalkUp Printers
WalkUp printer is a virtual print queue that includes group of physical printers. The print jobs sent to the WalkUp printer are put on hold by the iPrint Appliance server and released to a desirable printer. To release the job, use a web browser and specify the server address (<https://<Appliance_IP_address or host_name>/user) to launch the Release Portal UI. On successful user authentication, a list of jobs on hold are displayed.
You must associate drivers for printers when performing desktop printing.
Figure 10-1 WalkUp Flow
Prerequisites
-
Ensure that the physical printers are available before creating a WalkUp printer.
-
All the WalkUp jobs are stored on the secondary disk. Depending on the usage of the print service, decide the space required on the secondary disk.
-
The users releases the jobs by using a Release Portal or an iOS app. Ensure that the user is aware of the printer location and printer names.
-
By default, only the WalkUp administrator and the users created in the iPrintAppliance container will have access to the WalkUp printer. To provide access to all the imported users or users in other containers use iManager.
In the Management Console, page, you can create, edit, and delete a WalkUp printer. You can modify the job hold duration for a printer and also enable it for Mobile printing.
Creating a WalkUp Printer
-
Under , click .
-
Click .
-
Specify the name of the WalkUp (virtual) printer. This name will be exposed to the user when they install printers on their desktop or mobile devices.
-
(Optional) Specify description for the printer.
-
To enable mobile users to use this printer, select .
-
From the list of printers, select the printers to group under the WalkUp printer. The jobs sent to the WalkUp printer will be put on hold and the user will have control to release those jobs to one of the grouped printer.
You must select at least one printer.
-
Click .
-
Assign platform-specific drivers for the WalkUp printer.
If Windows drivers are selected, then bi-directional communication can be set for the WalkUp printer.
-
Specify the IP Address or host name from the pool of the printer that you have selected for WalkUp.
-
-
Click .
WalkUp printer object is created that includes group of printers. The jobs on hold can only be released to these printers.
Editing a WalkUp Printer
-
Under , click .
-
Click the printer name.
Displays the details of the printer and its drivers.
-
In the tab, modify the details of the printer.
-
Click the tab, then reassign the drivers for the selected printers. You can also modify the IP address or host name for bi-di communication.
-
Click .
The modified settings are applicable to all jobs sent to the selected WalkUp printer.
Deleting a WalkUp Printer
Ensure all the jobs are completed before deleting the printer. On deleting this printer, all the held jobs will be automatically cancelled.
-
Under , click .
-
Select a printer or printers, then click .
Enabling Mobile Printing for a WalkUp Printer
-
Under , click .
-
Select a printer or printers, click the drop-down menu, then click .
Modifying the Job Hold Time
By default, the job is put on hold for four hours, after which the job will be cancelled. You can modify the time duration to put the job on hold as follows:
-
Under , click .
-
Click .
-
Modify the duration to hold a job. This change is applicable only for the jobs put on hold after the setting is modified. The existing jobs will continue to be on hold as per the earlier set duration.
Caveats for Implementing WalkUp Printing
This section lists a few pointers for avoiding common WalkUp implementation problems.
-
Using iManager: The following management tasks for the WalkUp printer are only managed by iManager:
-
Enable auto driver or profile update
-
Assign driver profiles
-
Set Access Control
-
Enable auditing
-
Delete held jobs
-
-
Using iPrint status (iPrint Health Monitoring page): The following tasks of the WalkUp printers are monitored using the iPrint Health Monitoring tool:
-
Delete held jobs
-
Enable auditing
-
-
Job hold time: By default, the job is put on hold for four hours, after which the job is cancelled. If a job is cancelled it is no longer available in the Release Portal. The job hold time can be modified from the Management Console. For more information, see Modifying the Job Hold Time.
-
Insufficient balance when printing in PaperCut setup: If the user prints in spite of having insufficient balance in his account, the job is canceled even though the Release Portal displays a success message.
iPrint Release Portal for Users
The iPrint Release Portal displays the jobs that are put on hold, the time the job was submitted to the WalkUp printer, and the expiry time of the job. By default, the job is put on hold for four hours, after which the job will be cancelled. If a job is canceled it is no longer available in the Release Portal.
To launch the Release Portal in a web browser, specify the Appliance server’s address (<https://<Appliance_IPaddress or host_name>/user> or <https://:9443/release-portal).
Printing a WalkUp Job
-
Using a web browser, specify the server address (https://<Appliance_IPaddress or host_name>/user) or (https://<Appliance_IPaddress or host_name>:9443/release-portal).
-
Specify the user authentication details.
On successful authentication, jobs are displayed.
-
Select the document, then click .
-
Select the printer, then click .
The document is printed by the selected printer.
Deleting a WalkUp Job
-
Using a web browser, specify the server address (https://<Appliance_IPaddress or host_name>/user) or (https://<Appliance_IPaddress or host_name>:9443/release-portal).
-
Specify the user authentication details.
On successful authentication, jobs are displayed.
-
Select the document or multiple documents, then click .
The selected jobs are deleted and no longer available to print.
10.1.9 Import Users
To create an iPrint Appliance user account, you can synchronize initial user information from your network directory service (NetIQ eDirectory or Microsoft Active Directory service) after you have installed the iPrint Appliance software. Over time, you can continue to synchronize user information from the LDAP directory to your iPrint Appliance.
When you synchronize user information into iPrint Appliance from a source LDAP directory service, the entire Base DN on the source is imported into iPrint Appliance. For example, if you sync the context o=users from an LDAP source, the same o=users context is created in iPrint Appliance.
IMPORTANT:
-
iPrint Appliance performs one-way synchronization from the LDAP directory. If you change user information in iPrint Appliance, the changes are not synchronized back to your LDAP directory. It is recommended that you do not change synced LDAP user information on iPrint Appliance.
-
iPrint Appliance does not support multi-value attributes. If your LDAP directory contains multi-value attributes, iPrint Appliance recognizes only the first attribute. For example, if your LDAP directory contains multiple email addresses for a given user, only the first email address is synchronized to iPrint Appliance.
-
LDAP import does not sync user passwords to iPrint Appliance. Authentication requests from the mobile app are redirected to the defined LDAP source. If a user password is changed on the LDAP source, you do not need to update the same password on iPrint Appliance.
-
The LDAP source IP or host name must be always active for iPrint Appliance to authenticate users.
You can configure multiple LDAP connections. To create a new LDAP connection, click on the LDAP Import page.
Each connection requires the following configuration information:
LDAP Server URL
In order to synchronize initial user information, iPrint Appliance must access an LDAP server where your directory service is running. You must provide the hostname of the server, using a URL with the following format:
ldap://hostname
If the LDAP server requires a secure SSL connection, use the following format:
ldaps://hostname
If the LDAP server is configured with a default port number (389 for non-secure connections or 636 for secure SSL connections), the port number is not required in the URL. If the LDAP server uses a different port number, use the following format for the LDAP URL:
ldap://hostname:port_number
ldaps://hostname:port_number
If the LDAP server requires a secure SSL connection, additional setup is required. You must import the root certificate for your LDAP directory into the Java KeyStore (JVM Certificates) from on the iPrint server, before you configure iPrint Appliance for LDAP synchronization.
User DN (Proxy User for Synchronizing Users and Groups)
To sync users into iPrint Appliance, you must provide the user name and password of a user who has sufficient rights to access the user information on the LDAP server.
In your LDAP directory tree, you must provide the fully qualified, comma-delimited user name, along with its context, in the format expected by your directory service.
|
Directory Service |
Format for the User Name |
|---|---|
|
eDirectory |
cn=username,ou=organizational_unit,o=organization |
|
Active Directory |
cn=username,cn=organizational_unit,dc=domain_component |
LDAP Attribute to Identify a User or Group
The LDAP attribute that uniquely identifies a user or group helps facilitate renaming and moving iPrint users and groups in the LDAP directory. If this attribute is not set and you rename or move a user in the LDAP source directory, iPrint Appliance assumes that the new name (or the new location of the same name) represents a new user rather than a modified user, and creates a new iPrint Appliance user.
For example, you have an iPrint user with a given name of William Jones. If William changes his name to Bill and you make that change in the LDAP directory, iPrint Appliance creates a new user named Bill Jones.
To ensure that iPrint Appliance modifies the existing user instead of creating a new user when the user is renamed or moved in the LDAP directory, you must specify the name of the LDAP attribute that uniquely identifies the user. For eDirectory, this value is GUID. For Active Directory, this value is objectGUID. This attribute always has a unique value that does not change when you rename or move a user in the LDAP directory. If you want to map users to a different attribute, you must ensure that the attribute that you use is a binary attribute. For example, the cn attribute cannot be used because it is not a binary attribute.
LDAP Attribute for iPrint Appliance User Name
The setting is used for two purposes:
-
The value is used as the iPrint Appliance user name when the user is first provisioned from LDAP. The value of this attribute must be unique.
-
During iPrint Appliance login, iPrint Appliance uses this attribute to locate the user in the LDAP directory, and then tries to authenticate as that user.
LDAP directories differ in the LDAP attribute used to identify a User object. Both eDirectory and Active Directory might use the cn (common name) attribute. A more sure alternative for Active Directory is to use the sAMAccountName attribute. Other LDAP directories might use the uid (unique ID) attribute, depending on the structure and configuration of the directory tree.
Consult with your directory administrator in order to determine the best attribute to use. In some cases where not all users are being imported successfully, you must set up two LDAP sources pointing to the same LDAP server and have each source use a different value for the . For example, set up one LDAP source and use cn as the , and then set up a separate source to the same LDAP server and use sAMAccountName as the .
In addition to the attributes already mentioned in this section, other LDAP attributes can be used for the , as long as the attribute is unique for each User object. For example, the mail LDAP attribute on User objects can be used to enable iPrint Appliance users to log in by using their email addresses.
User and Group Object Locations
iPrint Appliance can find and synchronize initial user information from User objects located in one or more containers in the LDAP directory tree. A container under which User objects are located is called a base DN (distinguished name). The format you use to specify a base DN depends on your directory service.
|
Directory Service |
Format for the User Container |
|---|---|
|
eDirectory |
ou=organizational_unit,o=organization |
|
Active Directory |
cn=organizational_unit,dc=domain_component |
To identify potential iPrint users, iPrint Appliance by default filters on the following LDAP directory object attributes:
-
Person
-
orgPerson
-
inetOrgPerson
If you want to create iPrint groups based on information in your LDAP directory, iPrint Appliance filters on the following LDAP directory object attributes:
-
group
-
groupOfNames
-
groupOfUniqueNames
You can add attributes to the user or group filter list if necessary. You can use the following operators in the filter:
-
| OR (the default)
-
& AND
-
! NOT
You can choose whether you want iPrint Appliance to search for users (and optionally, groups) in containers below the base DN (that is, in subtrees).
You can create a group that consists of all the users that you want to set up in iPrint Appliance, regardless of where they are located in your LDAP directory. After you create the group, you can use the following filter to search for User objects that have the specified group membership attribute:
(groupMembership=cn=group_name,ou=organizational_unit,o=organization)
IMPORTANT:Ensure that you include parentheses in your filter.
LDAP Synchronization
Synchronization options apply to all LDAP configurations.
Select , then set the schedule to synchronize users and groups. You can perform LDAP synchronization every day, or on specific days of the week. You can also perform a sync once a day at a specified time, or multiple times each day. The smallest time interval you can set is .25 hours (every 15 minutes).
To synchronize users and groups immediately, select .
NOTE:If you want to delete users that are synced from a particular LDAP source, you must delete the LDAP source connection then run an LDAP sync. When you delete an LDAP source, the users and groups from that context are deleted while the context itself is retained.
Securing LDAP Synchronization
If your LDAP directory service requires a secure LDAP connection (LDAPS), you must configure iPrint Appliance with a root certificate. The root certificate identifies the root certificate authority (CA) for your appliance, which enables you to export a self-signed root certificate based on your eDirectory or Active Directory tree.
Exporting a Root Certificate
Exporting a Root Certificate for eDirectory
-
Launch and log in to iManager for your tree.
-
Click .
-
Click .
-
Click the magnifying glass icon to browse to and select the “Tree Name CA” object in the Security container of the eDirectory tree.
-
Click .
-
Click the tab.
-
Select the check box for the root certificate (this is not the certificate titled , but rather the root certificate), then click .
-
Select the check box for the root certificate, then click .
-
Deselect , then click .
-
Click , then select .
-
Save the file to a location where it can be accessed later and with a file name that you can remember, such as SelfSignCert.der.
-
Click > .
-
Continue with Importing the Root Certificate into the Java Keystore.
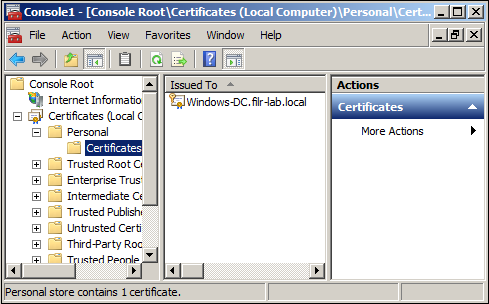
Exporting the Root Certificate for Active Directory
-
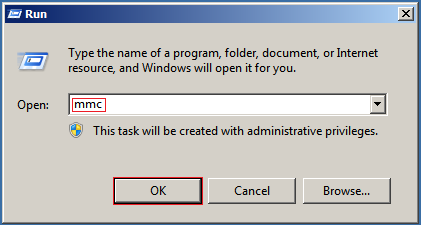
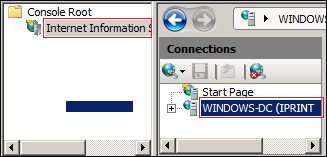
On the Windows server, click > , then enter mmc.
-
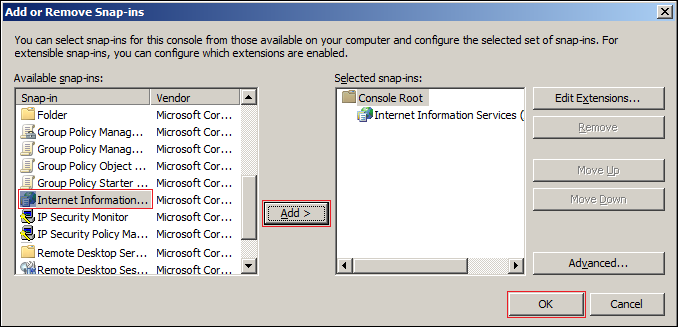
In MMC, type Ctrl+M.
-
If the snap-in is not installed on your Windows server, install it.
-
With IIS selected, click , then click .
-
In the left frame, click , then click a Windows server that iPrint Appliance can connect to for synchronizing users.
-
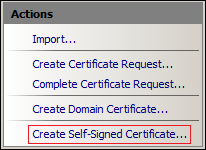
In the Filter list, scroll down to and double-click the icon.

-
In the list, click .
-
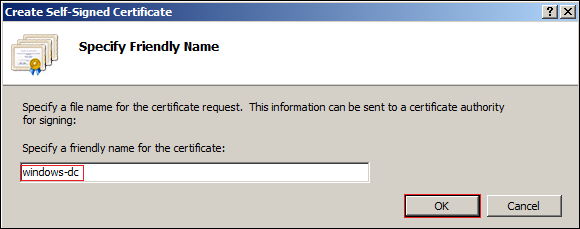
Name the certificate with a name you can remember, such as the server name, then click .
-
Type Ctrl+M, select the plug-in, then click .

-
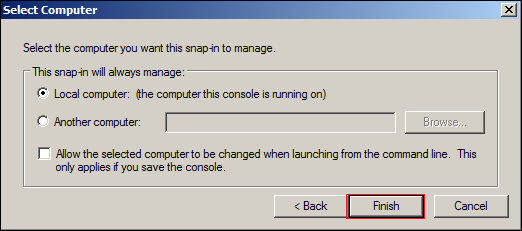
Select , then click .

-
Click .
-
In the Snap-ins dialog, click .
-
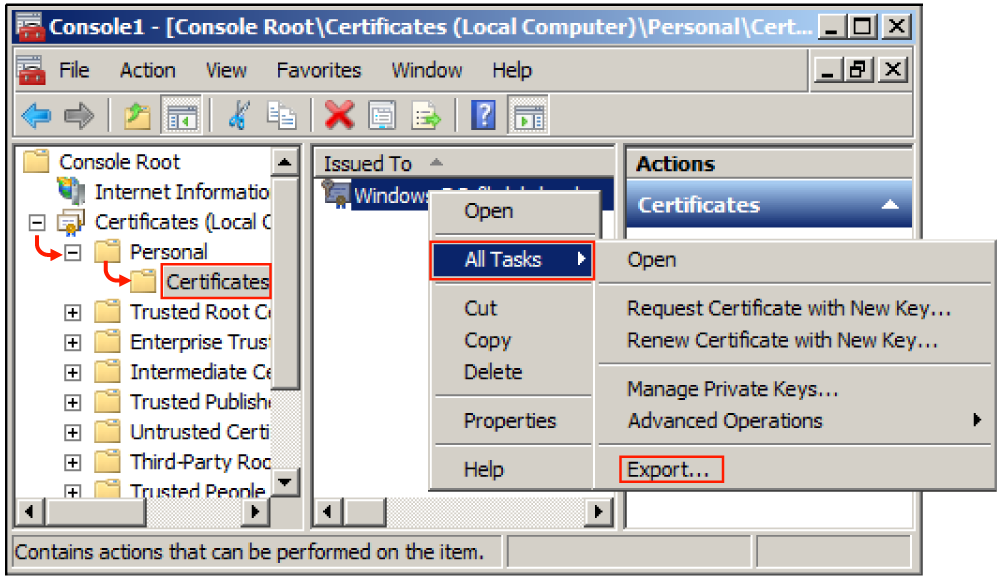
In MMC, expand the plug-in, expand , then click .
-
Right-click the certificate you created, select , then click .
-
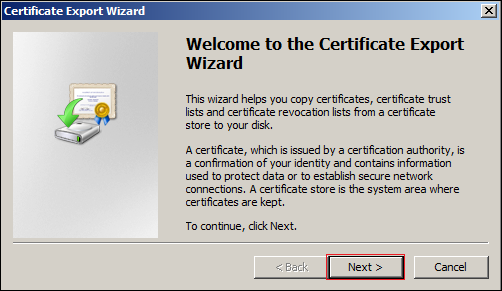
In the Certificate Export wizard, click .
-
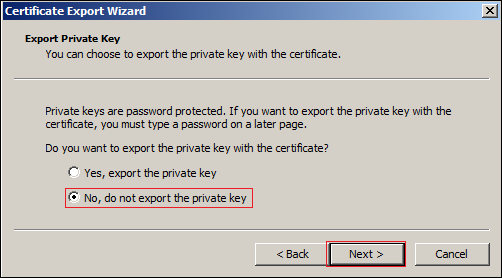
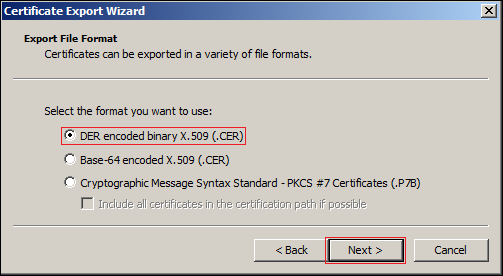
Ensure that is selected, then click .
-
Ensure that is selected, then click .
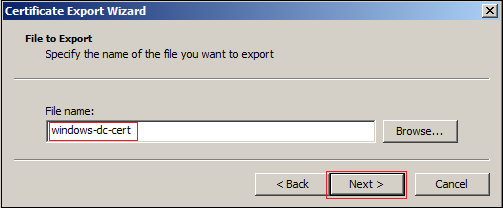
-
Name the certificate, then click .
-
Click > .
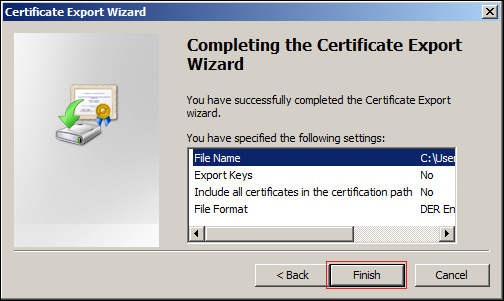
The certificate is saved in C:\Users\Your-User-Name.
-
Ensure that the certificate is accessible from your management browser.
-
Continue with Importing the Root Certificate into the Java Keystore.
Importing the Root Certificate into the Java Keystore
-
On a Web browser, use either the host name or the IP address to access the Management Console. For example, https://10.0.0.1:9443 or https://iprint.example.com:9443.
-
Click .
-
In the drop-down list, select .
-
Click > > .
A .der certificate is required for the import to be successful.
-
Browse to and select the trusted root certificate that you want to import.
If you want to import multiple certificates, ensure that the certificate names are different for each certificate.
-
Do not make any changes to the field. It is populated by default.
-
Click .
The certificate should now be displayed in the list of JVM certificates.
-
Restart iPrint Appliance so that Tomcat rereads the updated Java keystore file.
You can restart the iPrint Appliance service as described in System Services.
You are now ready to configure iPrint Appliance for secure LDAP synchronization.