9.3 Installing and Configuring a Remote Renderer
For desktop quality printing for Microsoft Office and PDF documents, you must install a remote renderer on a Microsoft Windows 7, Windows 8.1, Windows 2008 R2, Windows 2012, or Windows 2012 R2 64-bit system with a dual-core processor or higher.
During the remote renderer configuration process, when prompted for service configuration credentials, local users must specify the credentials of an account with Windows admin and domain users must specify the user name in [domainname]\[username] format.
9.3.3 Downloading the Remote Renderer
-
On a web browser, use either the host name or the IP address to access the Management Console. For example, https://10.0.0.1:9443 or https://iprint.example.com:9443.
-
Specify root or vaadmin as the user name.
-
Specify the password that you provided for root or vaadmin.
The Management Console page is displayed.
-
Click .
-
Under , click .
-
Click the
 icon in the upper-right corner of the screen.

NOTE:The remote renderer installation interface is not available in Slovak, Hungarian, Netherlands Dutch, or Catalan languages
A zip file named iPrintRendererBundle.zip is downloaded. This zip file contains a setup.exe file, iPrintRendererSetup.msi file, readme.txt, and a device.pfx certificate file.
Continue with installing and configuring the remote renderer.
9.3.6 Secure Communication Mode
By default, the iPrint Appliance accepts both secure and non-secure communication.To set only secure communication mode, you must ensure that the renderer is secure and the iPrint Appliance accepts only secure communications.
On the Windows computer, run the iPrntRendCmd -c command to configure secure remote renderer. On configuring the renderer to a secure mode, you can verify the status in the Management Console, page under the column, the value displayed is
To configure iPrint Appliance to accept only secure communications, modify the secure communication settings in the Management Console as follows:
-
On a web browser, use either the host name or the IP address to access the Management Console. For example, https://10.0.0.1:9443 or https://iprint.example.com:9443.
-
Specify the root or vaadmin name that you provided as the user name.
-
Specify the password that you provided for the root or vaadmin.
The Management Console page is displayed.
-
Click .
-
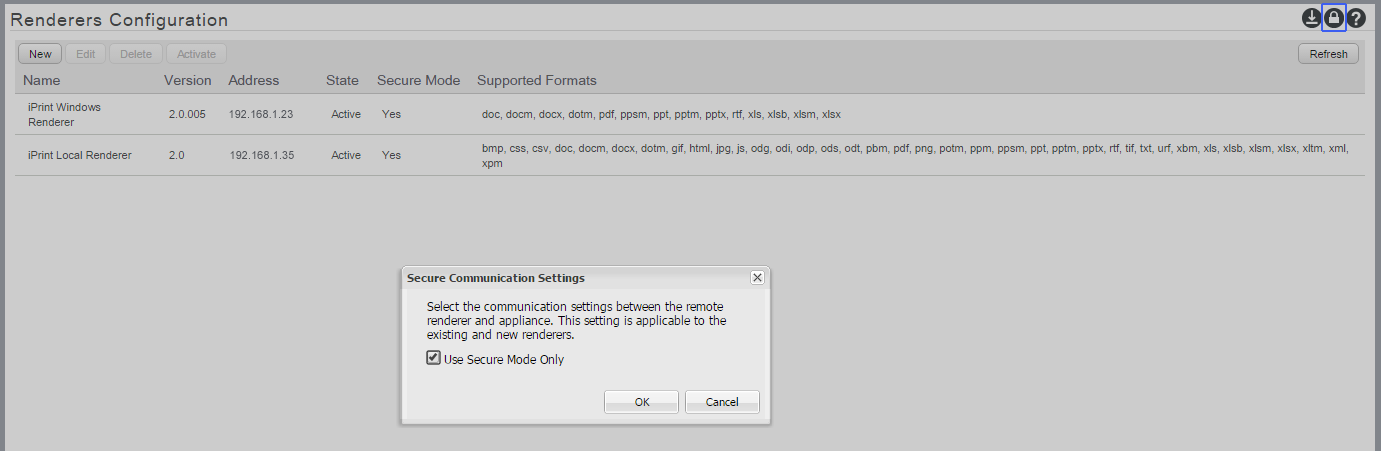
Under , click . All the available renderers are displayed.
-
Click the icon.
The Secure Communication Settings window is displayed.
-
Select the check box, then click . The iPrint Appliance will now accept only secure communications. The non-secure renderers will fail to communicate with the iPrint Appliance and no jobs can be rendered by those renderers.
9.3.7 Non-secure Communication Mode
By default, the iPrint Appliance accepts both secure and non-secure communication but if the iPrint Appliance is modified to accept only secure communications, then you must modify the iPrint Appliance to accept both secure and non-secure communications.
On the Windows computer, run the iPrntRendCmd -c command to configure the non-secure remote renderer. On configuring the renderer to a non-secure mode, you can verify the status in the Management Console, page under the column, the value displayed is
Modify the secure communication settings in the Management Console for iPrint Appliance to accept both secure and non-secure communications:
-
On a web browser, use either the host name or the IP address to access the Management Console. For example, https://10.0.0.1:9443 or https://iprint.example.com:9443.
-
Specify the root or vaadmin name that you provided as the user name.
-
Specify the password that you provided for the root or vaadmin.
The Management Console page is displayed.
-
Click .
-
Under , click . All the available renderers are displayed.
-
Click the icon.
The Secure Communication Settings window is displayed.
-
Deselect the check box, then click . The iPrint Appliance will now accept both secure and non-secure communications.