2.3 Configuring Transparent Proxies
A transparent proxy enables you to use a proxy server without reconfiguring each of the user's Browse tors. This section has the following information.
2.3.1 Configuring an HTTP Transparent Proxy
An HTTP Transparent proxy enables you to use an HTTP proxy server without reconfiguring each of the user's browsers. Use an HTTP Transparent proxy to require users to send requests through the proxy server.
Pre-requisites
-
Clients must use the private IP address of proxy as the TCP/IP gateway address.
-
IP forwarding must be enabled on the server.
-
Make sure port 80 is free as the HTTP transparent proxy listens on port 80.
NOTE:If the Apache Web server is listening on port 80, make sure you change it to any other free port before you begin configuring the HTTP transparent proxy.
To configure an HTTP Transparent proxy:
-
Log in to iManager.
-
Select
-
Browse to and select the BorderManager server or container that you want to configure, then click .
-
Select in the section.
-
Select .
-
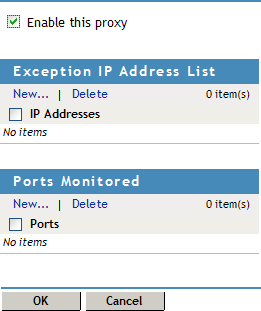
In the section, click , specify a local IP address, then click .
-
In the section, click , specify a port for monitoring, then click .
Specify 80 for HTTP traffic.
-
Click .
-
Click to save the changes.
To configure authentication for HTTP transparent proxy, refer to Section 2.4, Configuring Authentication.
2.3.2 Configuring Telnet Transparent Proxy
Telnet Transparent proxy enables you to use a Telnet proxy server without manually connecting to a proxy server.
When you use Telnet Transparent proxy, the clients must either use the private IP address of proxy as the TCP/IP gateway address or the proxy server must be in the routing path. IP forwarding must be enabled on the server.
To set up Telnet Transparent proxy:
-
Log in to iManager.
-
Select
-
Browse to and select the BorderManager server or container that you want to configure, then click .
-
Select in the section.
-
Select .
-
In the section, click , specify a local IP address, then click .
-
In the section, click , specify a port for monitoring, then click .
For example, specify 23 for Telnet traffic.
-
Click .
-
Click to save the changes.
To set up authentication for a Telnet transparent proxy, refer to Section 2.4, Configuring Authentication.