3.3 Providing User Searches Based on E-Mail Addresses
By default, Messenger users can search for other users to add to their contact lists in the Messenger client by first name, by last name, by first and last name, and by eDirectory user ID. You can add the capability of searching on e-mail addresses by setting up Messenger addresses that are equivalent to users' existing e-mail addresses. To set up Messenger addresses, you must add one or more hostnames to your Messenger system.
For another approach to this task, see Customizing Authentication and Searches by eDirectory Attribute.
3.3.1 Establishing a Hostname for Your Messenger System
If all of your Messenger users have e-mail addresses that are part of the same Internet domain (for example, Corporate.com), you can set up your Messenger system to recognize that Internet domain name as a Messenger address. This enables users to locate contacts by searching for their e-mail addresses (for example, JSmith@Corporate.com).
-
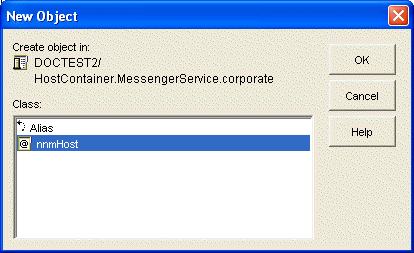
In ConsoleOne, browse to and expand the Messenger Service object.
-
Right-click the Host Container object, then click > .
-
Select , then click .
-
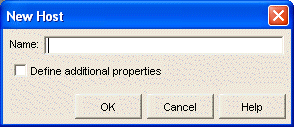
Specify a descriptive name for the new Host object (or host profile)
For simplicity, you might want to name the new host profile after the Internet domain name it represents. For example, if users receive e-mail at username@Corporate.com, then you could use Corporate as the name of the host profile.
-
Select , then click .
-
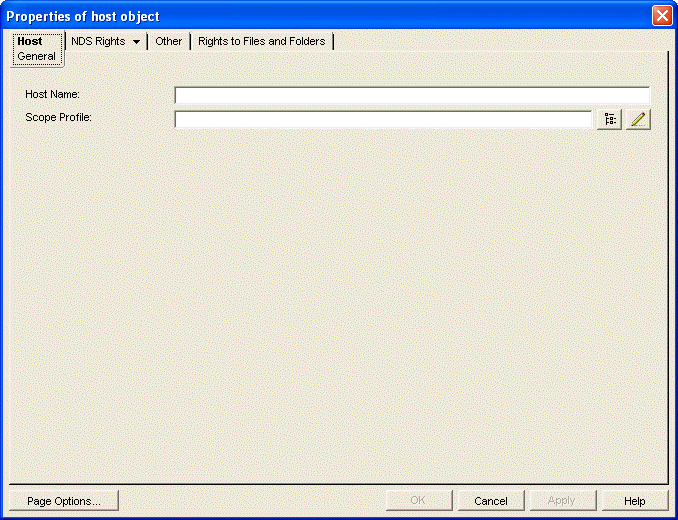
In the field, specify the Internet domain name that appears in users' e-mail addresses (for example, Corporate.com).
-
In the field, browse to and select the object, then click to create the new host profile.
-
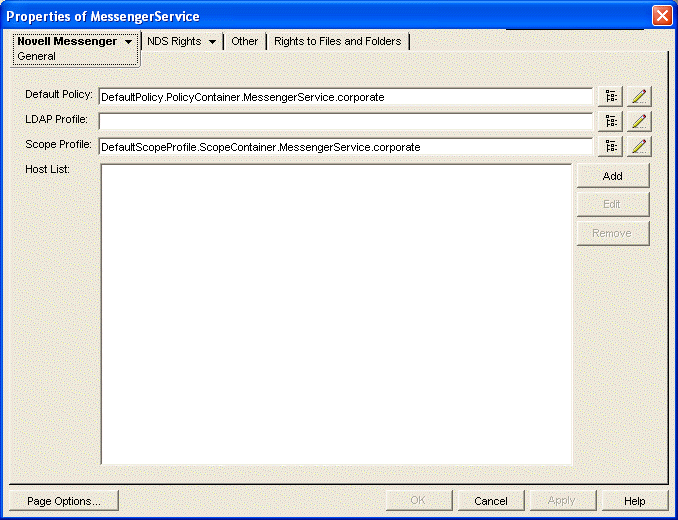
Right-click the Messenger Service object, then click .
-
Beside the , click .
-
Browse to and select the new host profile you created in Step 7 above.
-
Click to save the updated host list.
-
Stop and then start the Messaging Agent to put the new hostname into effect.
Messenger users can now specify e-mail addresses as well as eDirectory user IDs in the Messenger client Use This User ID field.
If archiving is enabled, authorized Messenger users can search the Messenger archive for users' conversations by specifying their e-mail addresses. Conversations archived before the hostname was established are not searchable by e-mail address.
3.3.2 Setting Up Multiple Hostnames
If your organization is large, it might be divided up into units. For example, Corporate.com might include Development.Corporate.com, Sales.Corporate.com, and so forth. By setting up multiple hostnames, you enable Messenger users to search for contacts within subsets of your organization.
In order to set up multiple hostnames, you must first set up a scope profile for each hostname.
-
In ConsoleOne, browse to and expand the Messenger Service object.
-
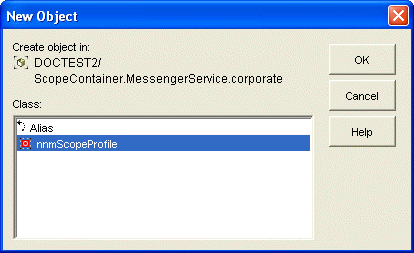
Right-click the Scope Container object, then click > .
-
Select , then click .
-
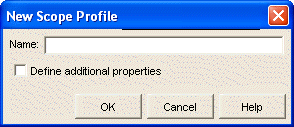
Type a descriptive name for the new scope profile, select , then click .
-
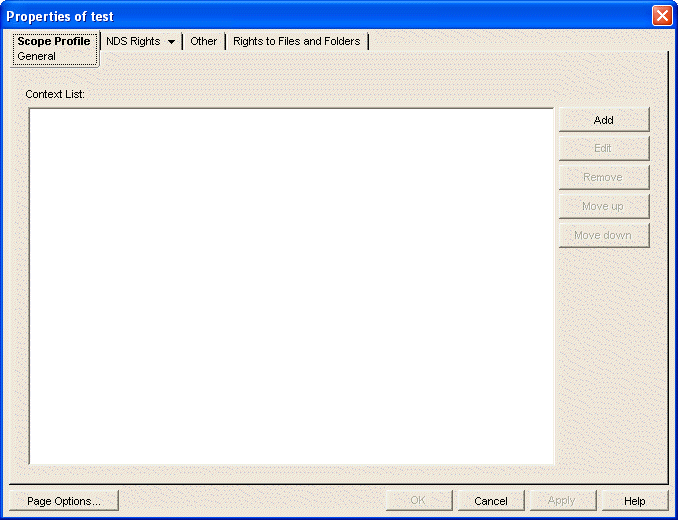
Click .
-
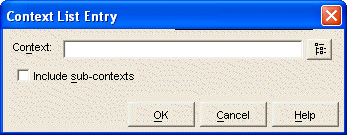
Browse to and select one or more contexts that use the hostname you want to create.
-
If necessary, select for the selected contexts.
-
Click to add the contexts to the context list.
-
Repeat Step 5 through Step 8 for additional contexts that use the hostname you want to create.
-
Click to save the scope profile for the hostname.
-
Right-click the Host Container object, then click > .
-
Select , then click .
-
Type a descriptive name for the new Host object.
It could be the same as the hostname you are setting up or it could be different, as needed.
-
Select , then click .
-
Fill in the following fields:
Host Name: Specify the hostname the corresponds to the scope profile you created in Step 10 above.
Continuing with the above example, to subdivide Corporate.com, you would specify Development.Corporate.com.
Scope Profile: Browse to and select the new scope profile you just created in Step 10 above.
-
Click to create the new Host object.
-
Repeat Step 2 through Step 16 for each hostname you want to establish in your Messenger system.
-
Right-click the Messenger Service object, then click .
-
Beside the host list, click .
-
Browse to and select the new Host objects to add them to the host list.
-
Click to save the updated host list.
-
Stop and then start the Messaging Agent to put the new hostnames into effect.