6.2 Creating Groups of Users
This section describes how to create groups within Filr. You can also synchronize groups of users from your LDAP directory to your Novell Filr site, as described in Section 14.1, Synchronizing Users and Groups from an LDAP Directory.
You can use existing groups or create additional groups within Filr to facilitate sharing on your Filr site. For background information on sharing, see Section 3.0, Setting Up Sharing.
In addition to creating groups to assist with sharing, you might want to create groups for any of the following reasons:
-
To facilitate managing data quotas, as described in Section 17.2, Managing User Data Quotas.
You can create either static or dynamic groups.
6.2.1 Creating Static Groups
Static groups are groups whose membership does not change based on LDAP queries.
This section describes how to create static groups directly from Filr. Alternatively, you can synchronize static groups to Filr from your LDAP directory as described in Section 14.1, Synchronizing Users and Groups from an LDAP Directory.
To create static groups in Filr:
-
Log in to the Filr site as the Filr administrator.
-
Launch a web browser.
-
Specify one of the following URLs, depending on whether or not you are using a secure SSL connection:
http://filr_hostname:8443
https://filr_hostname:8443
Replace filr_hostname with the hostname or fully qualified domain name of the Filr server that you have set up in DNS.
Depending on how you have configured your Filr system, you may not be required to enter the port number in the URL, and if you are using NetIQ Access Manager, the Filr login screen is not used.
-
-
Click the link in the upper right corner of the page, then click the icon
 .
.
-
Under , click , then click .

-
Fill in the following fields:
Name: Specify the unique name under which the group is stored in the Filr database. You can use only alphanumeric characters (a-z, A-Z, 0-9), hyphens (-), and underscores (_).
Title: Specify the group name that displays to users on the Filr site. This string can include any characters that you can type.
Description: Describe what the members of this group have in common.
-
Select .
This means that group membership does not change based on LDAP queries.
-
Click .
-
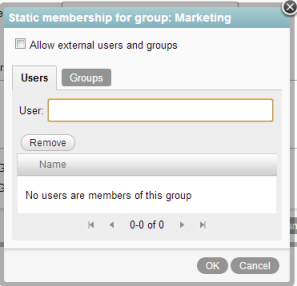
Select if you want to allow external users and groups to be members of the group that you are creating.
-
Click the or tab, depending on whether you want to add users or groups to the group that you are creating.
-
In the or field, specify the name of the user or group that you want to add to the group that you are creating, then click the name of the user or group when it appears in the drop-down list.
-
Repeat Step 8 and Step 9 to add multiple users and groups to the group that you are creating, then click when you have finished adding users and groups.
-
Click to create the group.
After you have created one or more small groups, you can use the field to create larger groups from smaller groups.
6.2.2 Creating Dynamic Groups
Groups based on LDAP queries are dynamic because they can be configured to have their membership updated when the information in the LDAP directory changes.
Creating groups based on LDAP queries is a quick way to create Filr groups that consist of users who match specific criteria. You can create dynamic groups as described in the following sections:
Creating Dynamic Groups within LDAP
Depending on the LDAP directory that you are using, you might be able to create dynamic groups within your LDAP directory. For example, you can create dynamic group objects in eDirectory with Novell iManager (for more information, see the iManager Documentation).
Dynamic groups created within LDAP are stored in your LDAP directory and can then be synchronized to Filr, as described in Section 14.1, Synchronizing Users and Groups from an LDAP Directory.
Creating Dynamic Groups within Filr
You can create dynamic groups in Filr by querying the LDAP directory.
Prerequisites
-
Users must already have existing Filr user accounts in order for them to be added to a Filr group as described in this section. If your LDAP query includes users who are not already Filr users, the users are not added to the Filr group
-
When you configure your LDAP connection, you must specify the name of the LDAP attribute that uniquely identifies the user (the value of this attribute never changes). For eDirectory, this value is GUID. For Active Directory, this value is objectGUID. For more information about this attribute, see LDAP Attribute to Identify a User or Group.
The Filr process that creates a dynamic group uses the LDAP configuration settings in Filr to authenticate to the LDAP directory server. The credentials that are used are the LDAP server URL, user DN, and password. For more information on how to configure these and other LDAP configuration settings in Filr, see Section 14.1, Synchronizing Users and Groups from an LDAP Directory.
Advantages
Advantages to creating dynamic groups within Filr rather than within your LDAP directory include:
-
Allows the Filr administrator to control group membership without having direct access to the group object in the LDAP user store.
-
Your LDAP directory might not support dynamic groups.
-
You do not want dynamic groups to sync to applications other than Filr that are leveraging your LDAP directory.
Considerations with Multiple LDAP Sources
Consider the following if your Filr site is configured with multiple LDAP sources:
-
You should not create dynamic groups in Filr if the base DN that you define for the dynamic group does not exist in each LDAP source. This is because the membership of the dynamic group might not be updated correctly.
-
If your Filr site is configured with multiple LDAP sources and the base DN that you define for the dynamic group exists in each LDAP source, the membership of the dynamic group contains users from each LDAP source that match the dynamic group’s filter.
Creating the Group
To create the dynamic group within Filr:
-
Log in to the Filr site as the Filr administrator.
-
Launch a web browser.
-
Specify one of the following URLs, depending on whether or not you are using a secure SSL connection:
http://filr_hostname:8443
https://filr_hostname:8443
Replace filr_hostname with the hostname or fully qualified domain name of the Filr server that you have set up in DNS.
Depending on how you have configured your Filr system, you may not be required to enter the port number in the URL, and if you are using NetIQ Access Manager, the Filr login screen is not used.
-
-
Click the link in the upper right corner of the page, then click the icon
.
-
Under , click , then click .
-
Fill in the following fields:
Name: Specify the unique name under which the group is stored in the Filr database. You can use alphanumeric characters (a-z, A-Z, 0-9), hyphens (-), and underscores (_).
Title: Specify the group name that displays to users on the Filr site. This string can include any characters that you can type.
Description: Describe what the members of this group have in common.
-
Select .
This means that group membership is based on an LDAP query that you will define in this procedure.
-
Click .

-
Specify the following options:
Base DN: Specify the base DN where you want to start your search.
If you have multiple LDAP sources, see Considerations with Multiple LDAP Sources before proceeding.
LDAP Filter: Specify the filter criteria.
For example, to search for all users located in Utah, specify (st=Utah).
Search subtree: Select this option if you want to also search for matches in subtrees of the base dn you are currently searching.
Update group membership during scheduled ldap synchronization: Select this option to update the membership of this group during each scheduled LDAP synchronization. Group membership is updated based on changes that might have occurred in the LDAP directory.
For information on how to set the LDAP synchronization schedule, see Synchronization Schedule.
-
(Optional) Click to test the results of your LDAP query.
This process can take several minutes, depending on the size of your LDAP directory.
-
Click > to create the group.