8.3 Setting Up Net Folders
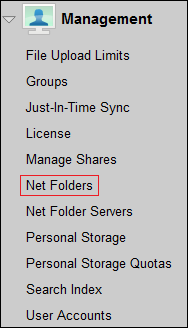
8.3.1 Specifying Net Folder Servers
Net Folder Servers are connections to shares on Windows file servers. You can set up as many connections to each file server as needed. For the hands-on lab, you create one Net Folder Server for each Share defined in Setting Up the Other Hands-on Exercise Folders and Files.
Configuring the Home_Folders Net Folder Server
-
Under , click .

-
Four of the users that you synchronized with the Windows server have Home directories on the server. Therefore, the Net Folder Server for the Home_Folder$ share on your Windows server (for example, ), is already created and listed.
IMPORTANT:Although Home folders are technically like other Net Folders in Filr, their primary role is personal storage. Therefore, they are accessed through rather than through .
-
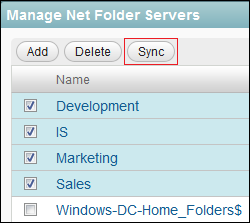
The Home Net Folder Server is marked with an icon that indicates that its configuration needs attention.
In the Name column, click the Home_Folders$ server link.

-
One valuable Filr feature is the ability to share files and folders with others who do not have native file system rights.
This sharing functionality is provided through Net Folder proxy users. However, the
Home
Net Folder Server has no Net Folder proxy user configured. That is why the yellow icon is displayed.You granted the Net Folder proxy user (filrproxyuser) full control of the Home_Folders$ share in Step 2. You simply need to make Filr aware of that assignment.
-
In the field, type the DN of the filrproxyuser.
For example, in the guide’s development environment, this is
cn=filrproxyuser,cn=testusers,dc=filr-lab, dc=local
-
In the field, type the password specified for the filrproxyuser:
For example, N0v3llfi!r
-
Click .

-
-
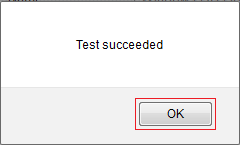
When you click , you should see a message that the test succeeded.
Click .
-
Click > .
The warning icon is removed.

Configuring the Other Net Folder Servers
-
To add Net Folder Servers for the other shares on the Windows server, click .

-
Use the information in Table 8-1 as you add a Net Folder server for each share.
Table 8-1 Net Folder Servers to Add
Share
Field
Text
Dev
Name
- Development
Server Path
- \\windows-server-IP-address\Dev
Proxy Name
filrproxyuser DN
For example: cn=filrproxyuser,ou=testusers,dc=filr-lab,dc=local
filrproxyuser Password
For example: N0v3llfi!r
IS
Name
- IS
Server Path
- \\windows-server-IP-address\IS
Proxy Name
filrproxyuser DN
For example: cn=filrproxyuser,ou=testusers,dc=filr-lab,dc=local
Proxy Password
For example: N0v3llfi!r
Mrktg
Name
- Marketing
Server Path
- \\windows-server-IP-address\Mrktg
Proxy Name
filrproxyuser DN
For example: cn=filrproxyuser,ou=testusers,dc=filr-lab,dc=local
Proxy Password
For example: N0v3llfi!r
Sales
Name
- Sales
Server Path
- \\windows-server-IP-address\Sales
Proxy Name
filrproxyuser DN
For example: cn=filrproxyuser,ou=testusers,dc=filr-lab,dc=local
Proxy Password
For example: N0v3llfi!r
-
Type the information for each share in the fields indicated, beginning with Dev. Then click to verify that the information is typed correctly.
Notice that the Net Folder Server names do not necessarily need to mirror the server and share names.
-
Click .
-
Under , select
Then click .
-
-
Repeat from Step 2 to create Net Folder Servers for the IS, Marketing, and Sales shares.
-
Click .
When the sync operation completes, Filr has metadata for each Net Folder Server in its database.
-
Continue with Creating Net Folders and Setting Net Folder Access and Sharing Rights.
8.3.2 Creating Net Folders and Setting Net Folder Access and Sharing Rights
Net Folders are connections to specific directories on Net Folder Servers. You can set up as many Net Folders as needed. You can also specify a separate and independent synchronization schedule for each Net Folder.
-
Under , click .
-
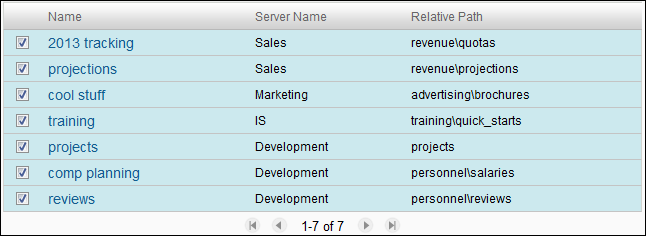
Use the information in Table 8-2 as you create the Net Folders needed for the hands-on exercises.
Table 8-2 Net Folder Configuration Information
Name
Server
Relative Path
Users with Rights to Net Folder
Sharing Rights
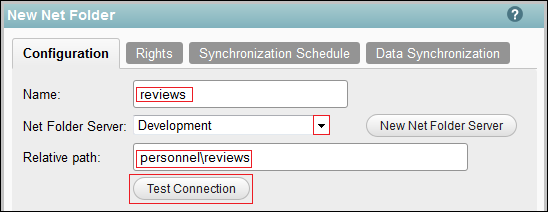
reviews
Development
personnel\reviews
- ared
- Allow Access
- Internal
comp planning
Development
personnel\salaries
ared
Allow Access
projects
Development
projects
ared
Allow Access
Internal
External
training
IS
training\quick_starts
- ablue
Allow Access
Internal
Re-share
cool stuff
Marketing
advertising\brochures
- ayellow
Allow Access
Internal
External
Public
Re-share
projections
Sales
revenue\projections
- ablack
Allow Access
Internal
2013 tracking
Sales
revenue\quotas
- ablack
Allow Access
Internal
-
Click .
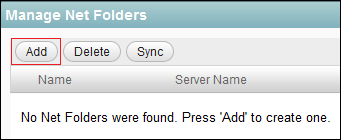
Although the Home_Folders$ share is Net Folder Server and four users have Home folders, there are no Net Folders displayed.
Home folders are displayed and managed under rather than .
-
Referring to Table 8-2, in the New Net Folder dialog type a name (starting with reviews). Select the appropriate Net Folder Server, type the relative path for the Net Folder, then click to verify that the information is entered correctly.
-
Click .

-
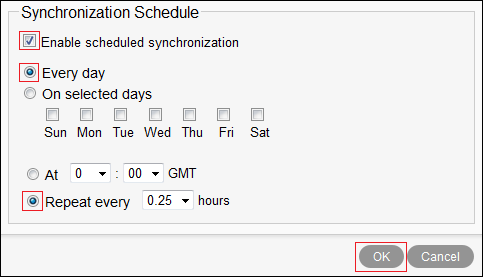
Click and .
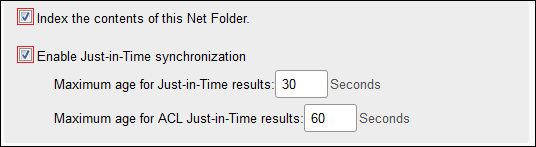
Although content indexing carries significant processing overhead and should, therefore, probably not be applied to all Net Folders, the content used in these exercises is so small that the overhead involved with indexing is miniscule.
-
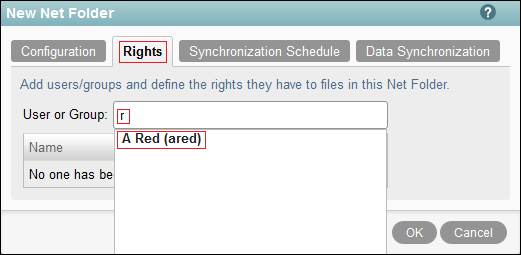
Click the tab.
In the field, begin typing the user listed in the table, then select the correct user.
-
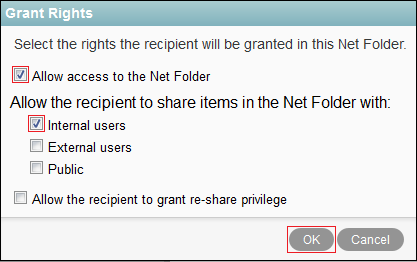
In the dialog, set the sharing rights as listed for the folder, then click .
-
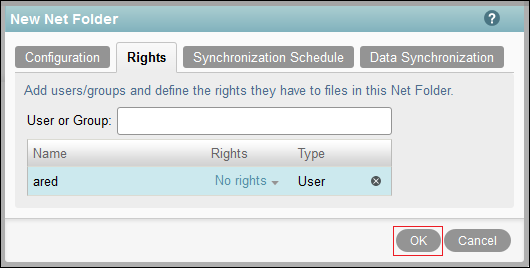
Click .
-
Click , then return to Step 2 for the next Net Folder.
-
When all of the Net Folders have been specified, continue with Enabling Sharing.