7.13 Migrating NIS Maps
If you already have a UNIX NIS Server (text-based) and you want the new NetWare NIS Server to serve the same data served by the old NIS server, copy all those text files into the specified location, then run the migration utility to create eDirectory entries for a specified domain.
The migration utility creates the Domain object in the default context as well as two other containers in the same context with the names domainname_U and domainname_G.
During migration, the utility searches for existing eDirectory users and groups under the containers specified by search_root, the configuration parameter (specified in nfs.cfg) and then, based on the migration option specified, modifies the UNIX information of those objects. If the objects are not found, the users are migrated to domainname_U and the groups are migrated to domainname_G. The rest of the data is migrated under the Map objects created under the Domain object.
IMPORTANT:The User and Group objects aren't created under the passwd and group Map object. They spread across the eDirectory tree and DomainName_U, DomainName_G depending upon the SEARCH_ROOT configuration parameter.
You can migrate maps using any one of the following three options:
-
UPDATE: (Default) Updates all existing objects’ information with the new information. If no objects exist, it creates new ones.
-
REPLACE: Deletes all existing objects and creates new ones. For passwd and group maps, the old objects are not deleted. The UNIX profile of the objects does not change.
-
MERGE: Retains all existing objects’ information and logs them as conflicting records in the makenis.log file. If no objects exist, it creates new ones. The migrated users do not have UNIX passwords. To set the UNIX password, you need to log in as that NIS user from the NIS client run the YPPASSWD utility.
For more information on UNIX user management, see UNIX User Management with eDirectory.
7.13.1 File-Based Migration
By default, migration uses the makefile sys:etc/nis/nismake, which contains the location of the text file for every map.
The syntax of the migration utility is:
makenis [-r resultfilename -[r]d domainname [-n context] [-f nismakefilename] {[mapname -[l|b]p line or byte object in mapname]...}
NOTE:Use all options only in the specified order.
-
To create a domain and migrate data or to use the existing domain object, use the following format:
makenis -d domainnameThe domainname parameter is mandatory.
-
To capture the results of the migration, use the following format:
makenis -r resultfilename -d domainname
-
To remove the existing domain data and then migrate, use the following format:
makenis -rd domainname -
To specify the context where you want to create your Domain object and data, specify it as the contextname:
makenis -d domainname -x contextname
Edit the context parameter by prefixing each of the dots (.) in the Relative Distinguished Names with a backslash (\) to distinguish them from eDirectory names.
-
To specify an NIS makefile other than the default sys:etc/nis/nismake, use the following format:
makenis -d domainname -f makefilepath
To specify the text files that you want to migrate, modify the NIS makefile. The NIS makefile is in the following format:
map name full path parameters (if any)
The comment character is the pound sign (#).
If you do not specify anything, all the files in the makefile are migrated.
For each map, specify the SECURE parameter so that only requests coming from secure ports are able to access the data. You can specify the migration options: UPDATE, REPLACE, or MERGE.
For the Password map, you can specify two additional parameters: -u uid (which stops users with a UID less than a particular value from migrating to eDirectory) and AUTOGEN (which generates a UID from the program itself).
You must specify the text file in the full path in DOS name format.
-
To migrate specific maps, use the following format:
makenis -d domainname mapname1, mapname2
-
To migrate a map from a particular offset in a specified map text file, use the following format:
makenis -d domainname mapname -lp lineoffset
or
makenis -d domainname mapname, -bp byteoffset
Line offset is used to start migration from a particular line from the map text file. If the migration fails while migrating large maps, instead of migrating it again from the beginning, you can specify the byteoffset to start from the offset specified in the migration log file. For more details on this offset, refer to the description of the FILEMARK_LOG_FREQ configuration parameter in nis.cfg.
Makenis adds users to the Members attribute, gives the user the rights equivalent to that of the group, and updates its Group Membership attribute.
7.13.2 ConsoleOne Migration
-
In the left pane of ConsoleOne, click The Network.
-
Select the server's tree where you want to manage the domains and maps.
-
Click the toolbar M icon.
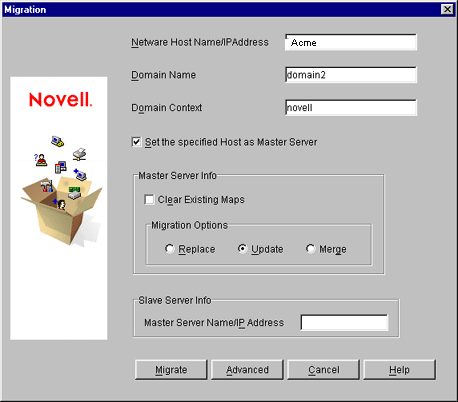
The following dialog box appears:
Figure 7-5 Migration Dialog Box
-
Specify the , , and to migrate a domain.
-
Select the option to set the NIS Server as master for this specified domain.
-
In the Master Server Info section, select , if you want to clear the existing maps.
-
Select the type of the migration you want to perform: , , or .
-
Specify the in the Slave Server Info section to set the NIS Server as Slave Server.
-
Click to migrate the domain for default maps.
The available default maps are ethers, hosts, networks, protocols, RPC, services, passwd, group, netgroup, and bootparams. By default, these files should be present in sys:\etc\nis.
-
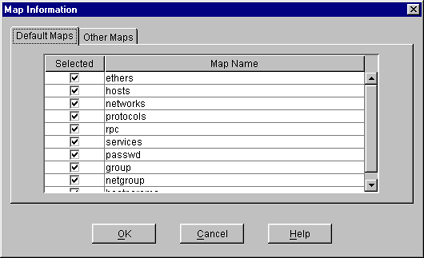
Click to go to the Map Information dialog box to migrate the domain for specific maps.
Figure 7-6 Map Information Dialog Box
-
Click either or .
-
Select the desired maps from the list, deselect the maps you do not want to migrate, and click .
-
-
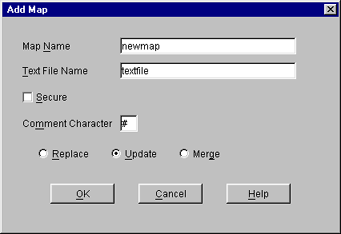
To modify an existing map or add a new map, click to go to the Add Map dialog box.
Figure 7-7 Add Map Dialog Box
-
Specify the and the .
-
(Conditional) Select if you want to enable secure access to the map.
-
In the box, specify the comment character present in the specified text file, then click .
The default comment character is the pound sign (#).
-
-
Click .
NOTE:When performing special map migration through ConsoleOne, you are required to give the complete path of the file. For example, sys:etc\nis\phlist.
7.13.3 Managing Users and Groups
You can add and modify the information of a User or Group object that already exists in eDirectory.
Modifying User Information
-
In the left pane of the ConsoleOne main menu, click the eDirectory tree where the object resides.
If you do not find the tree, click Novell Directory Services, select the tree and log in to it.
-
Double-click the container named domainname_U, where the User objects reside.
The User objects under this particular container are displayed.
-
Right-click the User object whose properties you want to change, then click Properties.
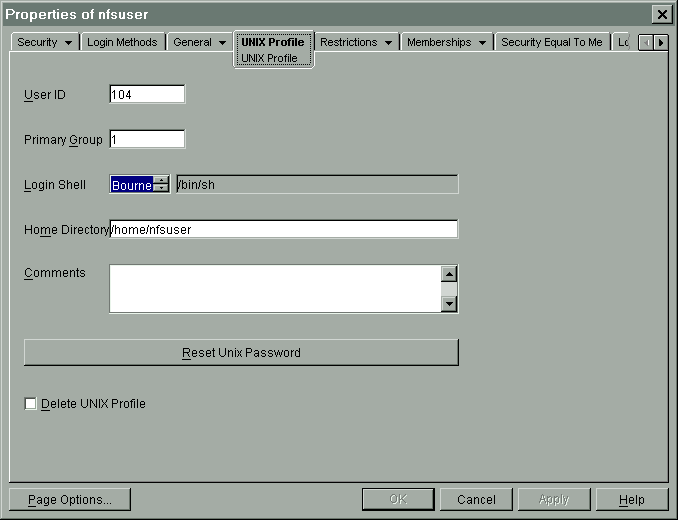
The following property page appears, displaying the various tabs that should be specified to add and modify the user information in eDirectory.
All the tabs except the UNIX Profile tabs are standard forms.
Figure 7-8 UNIX Profile Tab of User Properties Property Page
-
Click UNIX Profile to modify the UNIX user profile, and specify the information in the following fields:
: The users' UNIX UID.
: The group ID (GID) of the group this user belongs to. To specify the GID of the user, click Browse and select the appropriate group.
: The preferred login shell of the user.
: The home directory the user wants to be placed in while logging in to the system.
: Any other comments that the user might want to specify.
: Use to reset the user's UNIX password.
-
Click , then click .
Modifying Group Information
-
In the left pane of the ConsoleOne main menu, click the eDirectory tree where the object resides.
If you do not find the tree, click Novell Directory Services, then select the tree and log in to it.
-
Double-click the domainname_G container where the Group objects reside.
The groups under this particular container are displayed.
-
Right-click the Group object whose properties you want to change, then click Properties.
The following property page appears, displaying the various forms which should be specified to add and modify the group information in eDirectory.
All the forms except the UNIX Profile form are standard forms.
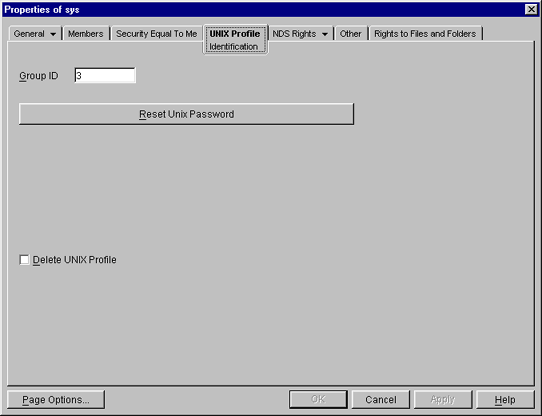
Figure 7-9 UNIX Profile Tab of Group Properties Property Page
-
Click the tab and specify the following information to modify the UNIX group profile:
: The group's UNIX GID.
-
Click , then click .
Adding a New User or Group
To add a new user:
-
In the left pane of the ConsoleOne main menu, click the context where you want to add the new user.
-
Select , then click .
-
Provide the user information.
To add a new group:
-
In the left pane of the ConsoleOne main menu, click the context where you want to add the new group.
-
Select , then click .
-
Specify the group information.
To make this newly added user or group an NIS User and NIS Group record, add the nisUserGroupDomain attribute to the object. This attribute holds a list of the domains to which that record belongs.
IMPORTANT:When you update a UNIX profile from ConsoleOne, execute NFSSTOP and NFSSTART, for NFS Server to get the modified UNIX information.
Managing Migration Utility Log Files
When you execute the makenis migration utility, the makenis.log log file is created by default in sys:\etc\nis. This file records messages that provide following information:
-
The containers added, such as domainname container, domainname_U (for users), and domainname_G (for groups).
-
The maps added and attached to the container.
-
Parsing statistics for each map. For example, the number of records read, migrated, conflicts, and invalid records.
-
Conflicting record details.