4.1 Installing the iPrint Client
In order for iPrint to work properly, a workstation must have the iPrint Client installed. You can distribute the client to your workstations in a variety of ways, including the iPrint Printer List Web page, distribution software like ZENworks®, login scripts, etc. Three clients are available.
The clients are located in the following directories:
|
OES Linux |
/var/opt/novell/iprint/htdocs/clients/platform |
|
OES NetWare |
sys:\apache2\htdocs\ippdocs\clients\platform |
4.1.1 Linux: iPrint Client
Linux: iPrint Client Requirements
In order for iPrint to work properly, workstations should have the following:
-
Novell Linux Desktop, SUSE® 9.2 Professional, SUSE Linux Enterprise Desktop (SLED), or later versions.
IMPORTANT:To install the client, you must have the root password or rights as root.
-
A Mozilla-based browser such as Epiphany, Firefox*, or Galeon
NOTE:If the iPrint server is busy when your installed printer attempts to communicate, CUPS moves the printer into an error state and holds all print jobs. To release print jobs, use the printer management utility to restart the printer.
Linux: Controlling Access to the Workstation Print System
The Linux iPrint Client is packaged in two different, specialized installations that control access to the workstation’s print system. The following table explains the differences between the two clients.
Table 4-1 iPrint Client for Linux RPM list
The above clients do not affect installation of the iPrint Client, just access to the workstation print system. To install the iPrint Client you still need root permissions. Also, these clients do not limit printing capabilities.
IMPORTANT:To install the iPrint Client you need root permissions. To upload drivers from the system, you need to be defined with lppasswd or know the root password; otherwise, when you attempt to add drivers from the system, the driver list is blank. To define a user to be part of lppasswd, you can use the following command:
lppasswd -a linux_user_account -g sys
Printing to Secure Printers
When installing a secure iPrint printer, you might be prompted twice for your username and password. First, you are prompted to provide your network credentials to verify that you have access to the printer (it would be no use installing a printer that would not allow you to print). The second prompt is for CUPS, to ensure you have rights to install printers on the client machine. You need to provide the root password or be defined in the CUPS lppasswd.
Printing to secure printers is supported only when you are logged in to the desktop. If for any reason the CUPS iPrint back end cannot deliver the job to a secure printer, the job is requeued on the client with a hold. You can then see the held job and release it after you log in to the desktop.
NOTE:This client does not support printing from text logins such as SSH, unless the GUI is running on the host workstation.
Linux: Distributing the iPrint Client
Use one of the following methods to install the iPrint Client on users’ workstations:
Linux: Install the Client from iPrint Printer List Web Page
You can download and install the iPrint Client from the iPrint Printer List Web page that resides on the server where the Print Manager is loaded. By default, the link is set to install the novell-iprint-xclient-sl-version.i586.rpm high security client. You can change this by creating a symbolic link in /var/opt/novell/iprint/htdocs using the following command:ln -sf client novell-iprint-xclient.i586.rpm where client is the client filename noted above.
To reach the Web page:
-
Enter the iPrint server URL in your Web browser Address field:
http://server_IP_ address_or_dns_name/ipp.
For example, if the DNS name for printing is printing.my_company.com, you would access iPrint from the following URL:
http://printing.my_company.com/ipp
-
Click the printer you want to install.
If the iPrint Client is not yet installed on your workstation, you are prompted to install it.
-
When prompted, save the iPrint Client RPM to your desktop or home directory.
-
Install the iPrint Client RPM by double-clicking the RPM. If a file association for the RPM does not exist, use an RPM installer program.
-
Exit and restart your Web browser before installing printers.
-
(Conditional) If you are using the KDE desktop and printing to secure printers, re-login as a user (not root) to start the iPrint listener or run the following command to manually load the listener:/opt/novell/iprint/bin/iprint-listener
For GNOME* users, you must load the iPrint listener manually or configure GNOME to load it. See Additional Configuration for Secure Printers with GNOME.
If you are using a non-standard installation of a browser, and the plug-in does not appear, create a symbolic link in the browser’s plug-in directory using the following command: ln -s opt/novell/iprint/plugin/npnipp.so
Deliver the Client Using Distribution Software
Using client distribution software (such as ZENworks), you can also deliver the iPrint Client and possibly printers to your client workstations. For more information, see the documentation for your distribution software.
Additional Configuration for Secure Printers with GNOME
Users of the GNOME desktop that are printing to secure printers (printers that require you to authenticate) must add iprint-listener to the list of applications launched at login; otherwise, print jobs are not submitted to the secure printer.
NOTE:This does not apply to the KDE Desktop or GNOME running on the Novell Linux Desktop. This also does not apply when printing to non-secure printers.
-
On the GNOME desktop, click > .
-
Under the System section, click .
-
Click > .
-
For the Startup Command, enter /opt/novell/iprint/bin/iprint-listener.
-
Click > .
-
Load iprint-listener by either running the command in Step 4 or by logging out and logging in again.
The next time you log in, iprint-listener is automatically loaded.
If iprint-listener is not running, jobs submitted to secure iPrint printers are held in the local client queue. To release the jobs, start iprint-listener and then resume the job on the printer.
4.1.2 Macintosh: iPrint Client
Macintosh: iPrint Client Requirements
-
Mac OS* 10.2 or later
-
Compatible Web browser. See
iPrint Client Supported Browsers
for more information.
NOTE:If the iPrint server is busy when your installed printer attempts to communicate, CUPS moves the printer into an error state and holds all print jobs. To release print jobs, use the printer management utility to restart the printer.
Macintosh: Distributing the iPrint Client
Use one of the following methods to install the iPrint Client on users’ workstations:
Macintosh: Install the Client from iPrint Printer List Web Page
You can download and install the iPrint Client from the iPrint Printer List Web page that resides on the server where the Print Manager is loaded. To reach the page
-
Enter the iPrint server URL in your Web browser Address field:
http://server_IP_ address_or_dns_name/ipp.
For example, if the DNS name for printing is printing.my_company.com, you would access iPrint from the following URL:
http://printing.my_company.com/ipp
The disk image file is downloaded, the install package extracted, and the disk image file is move to the trash. Then the iPrint Client install is launched.
-
Click the printer you want to install.
-
If the iPrint Client is not yet installed on your workstation, follow the prompts to install the client.
The disk image file is downloaded, the install package extracted, and the disk image file is moved to the trash. Then the iPrint Client install is launched.
-
After installing the client, restart your Web browser in order for the browser to recognize the iPrint Client plug-in.
-
-
After installing the client, restart your Web browser in order for browser to recognize the iPrint Client plug-in.
(Optional) PostScript Printer Description (PPD) files that use Foomatic filters should be running the latest Foomatic filter script and ESP Ghostscript, which are available from Linux Printing.org.
Deliver the Client Using Distribution Software
Using client distribution software (such as ZENworks), you can also deliver the iPrint Client and possibly printers to your client workstations. For more information, see the documentation for your distribution software.
4.1.3 Windows: iPrint Client
Beginning with this release
Windows: iPrint Client 5.x Requirements (Vista Only)
-
Windows Vista Business, Enterprise, or Ultimate (x86 or x64)
NOTE:While any user can install the iPrint Client on a Vista Machine, to install printers, and upload drivers, your Web browser must be running as Administrator
-
Web browser with JavaScript* enabled and
-
Microsoft Internet Explorer 7 or later
NOTE:You must run your browser as Administrator.
-
-
Hotfixes from Microsoft*:
Contact Microsoft Customer Support Services for more information.
Limitations of the iPrint Client 5.x
The iPrint Client v5.x for Windows Vista does not support the following features:
-
Printer driver profiles
-
iPrint Client Management
-
User printers
-
DOS box printing
-
iCapture
-
Auto-update of the client
-
Sharing credentials with the Novell Client
Windows: iPrint Client 4.x Requirements
-
Windows 95/98/ME or Windows NT*/2000/XP Professional
To install the client on Windows NT/2000/XP, you must have Administrator rights or be a Power User on Windows NT/2000.
-
Web browser with JavaScript* enabled and
-
Microsoft Internet Explorer 5.5 or later
-
Mozilla-based Web browser
-
NOTE:The iPrint Client for Windows uses ActiveX* controls when using Internet Explorer. By default, Internet Explorer’s Run ActiveX Controls and Plug-ins are enabled. However, if this has been changed, you need to reenable it for iPrint to work correctly. This setting is found in > > > . You need to enable the setting on the Internet page, if you are running across the Internet
Windows: iPrint Client Installation Files
The Windows iPrint Client is packaged in several different, specialized installations. Depending on your distribution method or need, select the file you want. The following table compares the different types of installations.
Table 4-2 iPrint Clients for Windows
NOTE:Windows 9x users must restart their workstations. After the iPrint Client is installed, Windows NT/2000/XP users do not need to restart, unless they are using iPrint utilities to capture LPT ports.
4.1.4 Windows: Distributing the iPrint Client
Use one of the following methods to install the iPrint Client on users’ workstations:
NOTE:Windows 9x users must restart their workstations. After the iPrint Client is installed, Windows NT/2000/XP users do not need to restart, unless they are using iPrint utilities to capture LPT ports.
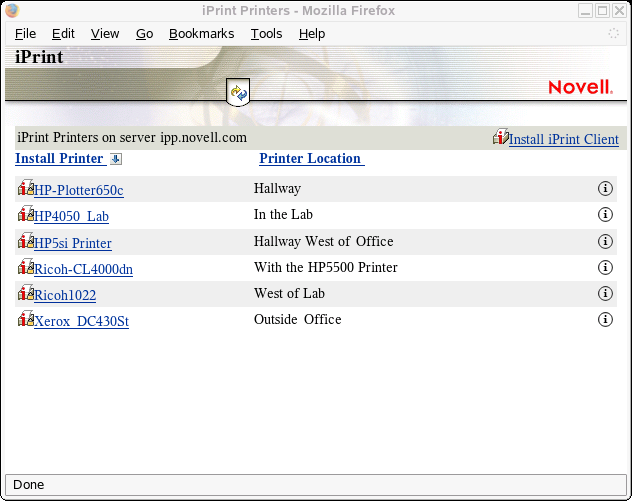
Windows: Install the Client from iPrint Printer List Web Page
You can download and install the iPrint Client from the iPrint Printer List Web page that resides on the server where the Print Manager is loaded. To reach the page, enter the following URL in your Web browser address field: http://server_IP_ address_or_dns_name/ipp.
Figure 4-1 iPrint Printer List Web Page
For example, if the DNS name for printing is printing.my_company.com, you would access iPrint from the following URL:
http://printing.my_company.com/ipp
Deliver the Client Using Distribution Software
Using client distribution software (such as ZENworks), you can also deliver the iPrint Client and possibly printers to your client workstations. For more information, see the documentation for your distribution software.
For example, when using Novell ZENworks, you can use any of the iPrint Clients described in Windows: iPrint Client Installation Files to deliver the Windows iPrint Client. Most likely you need to use the nipp.zip file to deliver the client to the desktop and execute setupipp.exe with one of the command line parameters.