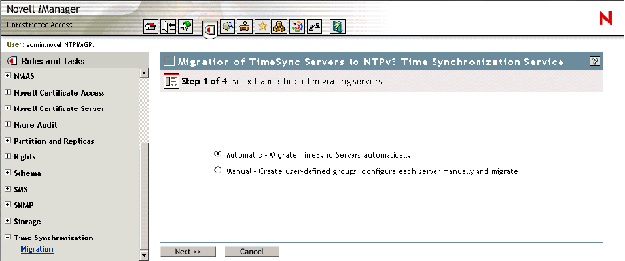
5.2 Selecting the Mode of Migration
-
In iManager, click to display the Migrate Time Servers page.
-
Select the method of migration, or .
5.2.1 Automatically Migrating Servers
This is the default migration method and it can be used by a user who is new to NTP and prefers time synchronization services to be automatically set up in the eDirectory tree. The servers are migrated to NTPv3 based on a one-to-one mapping of timesync.cfg to ntp.conf.
-
Select the servers to be migrated.

-
Click to confirm the migration.
A time-out screen is displayed, followed by the status of monitored servers.
For more information on monitoring the status of migrated servers, see Section 5.4, Monitoring the Health Status of Migrated Servers.
5.2.2 Manually Migrating Servers
This method can be used by a user who is familiar with NTP. It helps you create a group of servers and configure individual servers. Do the following tasks in order:
Adding or Removing Timesync Groups
To add a Timesync Group:
-
On the Timesync Server Group page, click .
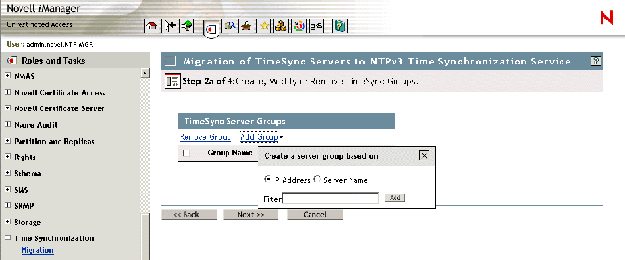
-
Select the servers to be added to the group, based on the IP address or server name filter, then click .
IMPORTANT:The only permitted wildcard filter is the asterisk (*)
To remove a Timesync Group:
On the Timesync Server Group page, select the group to be excluded and click .
Adding or Removing Servers from a Group
To add a server to a Group:
-
Click to display a drop-down list.
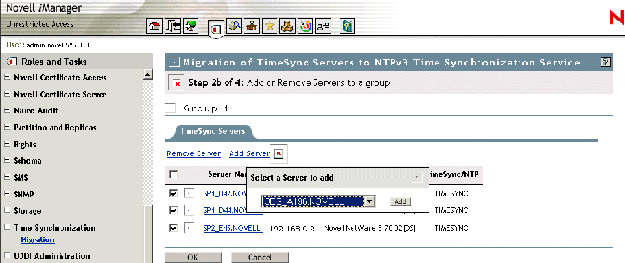
-
Select the server you want, then click
To remove a server from Group:
-
Select one or more servers from the list displayed, then click .