12.12 Renaming a Clustered NSS Pool
When an NSS pool is cluster-enabled with Novell Cluster Services, special steps must be followed to rename the pool. The pool cluster resource must be taken offline during the renaming process. You can use NSSMU or the Storage plug-in to iManager to rename the shared pool.
When you use an NSS management tool to rename a cluster-enabled pool, it automatically changes the Pool object name in eDirectory, updates the pool name for its Volume objects, and updates the pool name that appears in the load, unload, and monitor scripts for the pool’s cluster resource. The rename function does not change the names for the following resource objects:
-
Cluster resource name (such as POOL1_SERVER)
You can use the cluster rename command to rename the resource. See Section 10.15, Renaming a Cluster Resource.
-
Virtual server name (the NCS:NCP Server object, such as CLUS1-POOL1-SERVER)
-
CIFS virtual server name (such as CLUS1-POOL1-W), if CIFS is enabled as an advertising protocol for the resource
To rename a pool name in a way that also modifies names of resource objects, you can disable clustering for the pool, rename the pool, and then enable clustering for the renamed pool. This method is also described in Section 12.12.3, Renaming a Shared Pool and Its Resource Objects.
Because renaming requires that information is modified in eDirectory, you should rename the pool from the master node. NSS management tools require that the shared pool is active locally on a cluster node that has its NCP Server object in the same context as the Pool object of the pool you want to rename. The server must also be in the resource’s list to migrate to it. To view or modify the list, see Section 10.10, Configuring Preferred Nodes and Node Failover Order for a Resource.
You can use any of the methods in this section to rename a shared pool.
12.12.1 Renaming a Shared Pool with iManager
-
Ensure that the pool cluster resource is running on the master node.
If you need to migrate the resource:
-
In iManager, select > , then select the cluster that you want to manage.
-
On the Cluster Manager page, select the check box next to the pool cluster resource, then click .
-
Select the master node, then click .
Wait for the resource to report a state before you continue.
-
-
Take the pool cluster resource offline. On the Cluster Manager page, select the check box next to the pool cluster resource, then click .
Wait for the resource to report an state before you continue.
-
Activate the pool locally on the master node:
-
In iManager, select > .
-
Select the node where you took the resource offline.
-
Select the pool, then click .
-
-
Rename the shared pool:
-
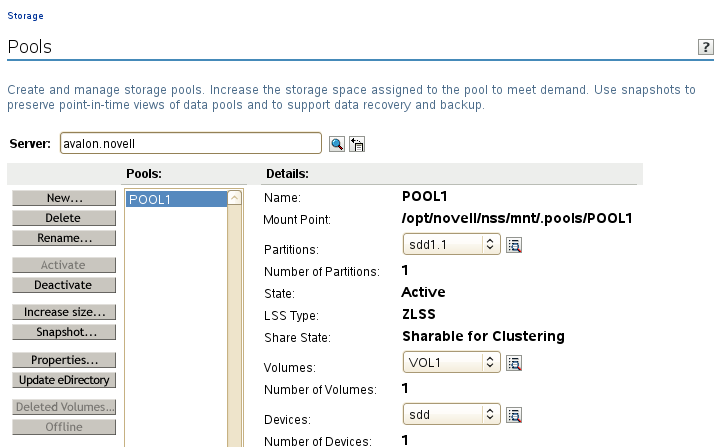
In the list, select the pool, then click .
-
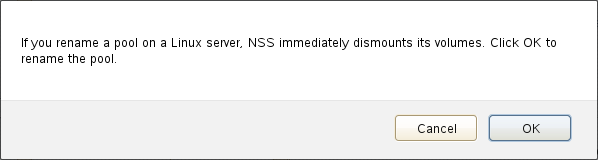
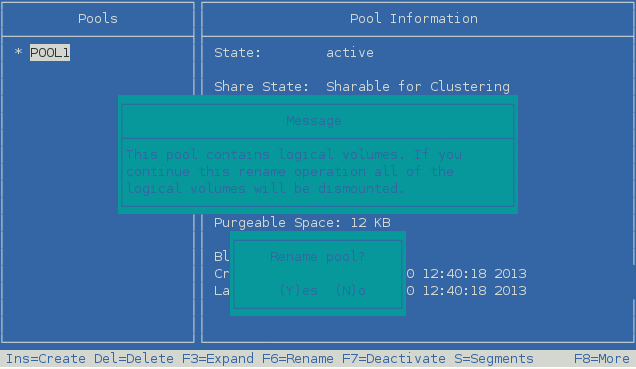
Read the warning message that the pool’s volumes will be dismounted, then click to confirm that you want to rename the pool.
-
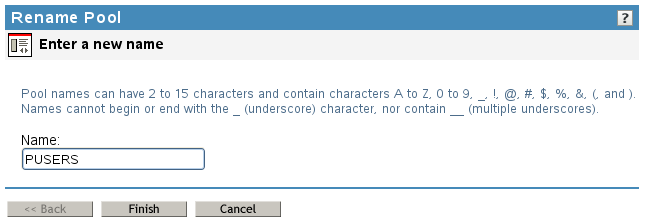
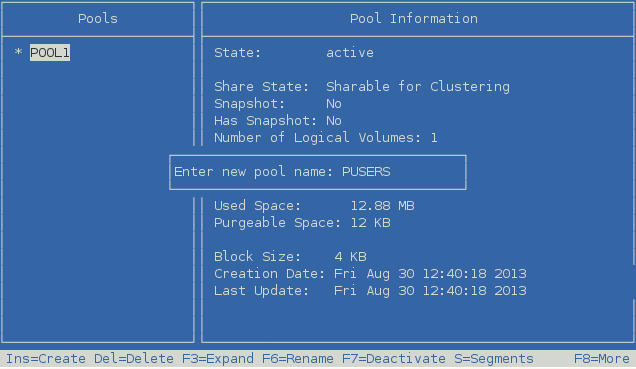
In the dialog box, type the new name, then click .
-
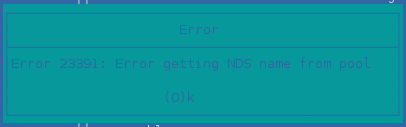
Read the error message, then click to dismiss it.
Error 23391 is EDIR OBJECT NOT FOUND. Typically, it means that the old Pool object has been removed successfully and can no longer be found.

-
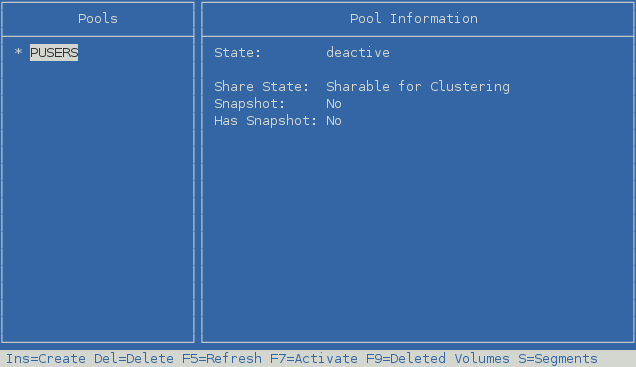
View the renamed pool in the list.
After the rename, the pool is in a deactive state.

-
-
Verify that the pool name was modified in the pool resource scripts:
-
In iManager, select > , then select the cluster that you want to manage.
-
On the Cluster Manager page, click the name link of the pool resource.
The pool resource name has not been modified by the pool rename. Its default name is <old_pool_name>_SERVER.
-
On the Resource Properties page, click the tab.
-
Verify that the new pool name is used in the load, unload, and monitor scripts.
Remember that the resource name and virtual server name are not modified by a pool rename. Do not modify those names in scripts.
-
On the Load Script page, verify that the pool name was changed in the nss command. If you modify the load script, click .
exit_on_error nss /poolact=<new_pool_name>For example:
exit_on_error nss /poolact=PUSERS
-
Click , then verify that the pool name was changed in the nss command. Also check any custom commands where the volume name appears. If you modify the unload script, click .
exit_on_error nss /pooldeact=<new_pool_name>For example:
exit_on_error nss /pooldeact=PUSERS
-
Click , then verify that the pool name was changed in the status_fs command. Also check any custom commands where the pool name appears. If you modify the monitor script, click .
exit_on_error status_fs /dev/pool/<new_pool_name> /opt/novell/nss/mnt/.pools/<new_pool_name>
For example:
exit_on_error status_fs /dev/pool/PUSERS /opt/novell/nss/mnt/.pools/PUSERS
-
-
Click to return to the Cluster Manager page, or click to apply any changes you made in the scripts.
-
-
Bring the pool cluster resource online:
-
In iManager, select > , then select the cluster that you want to manage.
-
On the Cluster Manager page, select the check box next to the pool cluster resource, then click .
The resource is brought online on a node in its list, according to availability. Wait for the resource to report a state before you continue.
-
-
(Optional) Rename the pool cluster resource. For example, rename POOL1_SERVER as PUSERS_SERVER.
For instructions, see Section 10.15, Renaming a Cluster Resource.
12.12.2 Renaming a Shared Pool with NSSMU
-
Log in to the master node as the root user, then launch a terminal console.
-
Ensure that the pool cluster resource is running on the master node. Enter
cluster status
If you need to migrate the resource, enter the following at the command prompt:
cluster migrate <resource_name> <master_node_name>
-
Take the pool cluster resource offline. At the command prompt, enter
cluster offline <resource_name>You can verify the offline state by entering
cluster status
-
Activate the pool locally on the master node:
-
At the command prompt, enter
nssmu
-
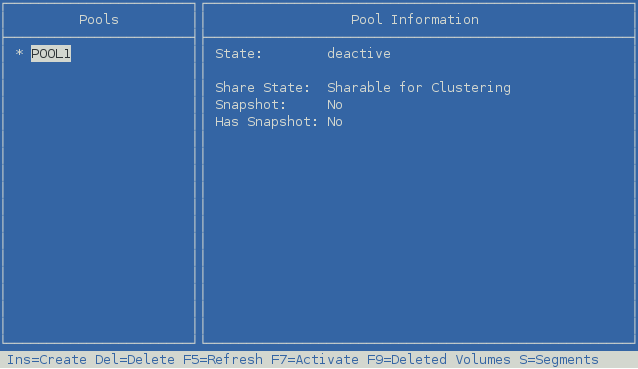
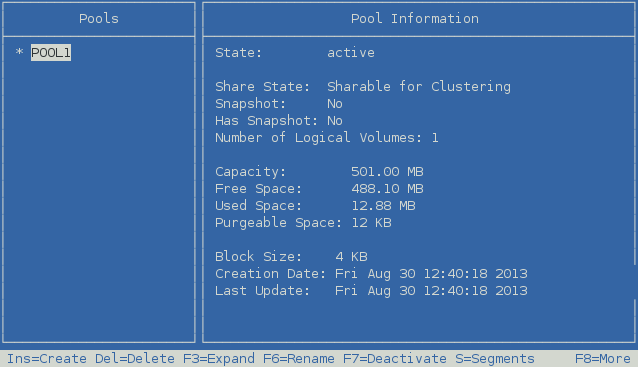
Select to view a list of pools. The pool state is .
-
Select the pool, then press F7 .
-
-
Rename the pool:
-
On the NSSMU Pools page, select the pool.
-
Press F6 .
-
Read the warning message that the pool’s volumes will be dismounted, then click to confirm that you want to rename the pool.
-
Specify the new name, then press Enter.
-
Read the error message, then press o (OK) or press Enter to dismiss it.
Error 23391 is EDIR OBJECT NOT FOUND. Typically, it means that the old Pool object has been removed successfully and can no longer be found.
-
After the rename, the pool is in a deactive state.
-
-
Press Esc twice to exit NSSMU.
-
Verify that the pool name was modified in the pool resource scripts:
-
In iManager, select > , then select the cluster that you want to manage.
-
On the Cluster Manager page, click the name link of the pool resource.
The pool resource name has not been modified by the pool rename.
-
On the Resource Properties page, click the tab.
-
Verify that the new pool name is used in the load, unload, and monitor scripts.
Remember that the resource name and virtual server name are not modified by a pool rename. Do not modify those names in scripts.
-
On the Load Script page, verify that the pool name was changed in the nss command. If you modify the load script, click .
exit_on_error nss /poolact=<new_pool_name>For example:
exit_on_error nss /poolact=PUSERS
-
Click , then verify that the pool name was changed in the nss command. Also check any custom commands where the volume name appears. If you modify the unload script, click .
exit_on_error nss /pooldeact=<new_pool_name>For example:
exit_on_error nss /pooldeact=PUSERS
-
Click , then verify that the pool name was changed in the status_fs command. Also check any custom commands where the pool name appears. If you modify the monitor script, click .
exit_on_error status_fs /dev/pool/<new_pool_name> /opt/novell/nss/mnt/.pools/<new_pool_name>
For example:
exit_on_error status_fs /dev/pool/PUSERS /opt/novell/nss/mnt/.pools/PUSERS
-
-
Click to return to the Cluster Manager page, or click to apply any changes you made in the scripts.
-
-
Bring the pool cluster resource online. At the command prompt, enter
cluster online <resource_name>You can verify the online state by entering
cluster status
-
(Optional) Rename the pool cluster resource. For example, rename POOL1_SERVER as PUSERS_SERVER.
For instructions, see Section 10.15, Renaming a Cluster Resource.
12.12.3 Renaming a Shared Pool and Its Resource Objects
To modify the pool name and its related resource objects, you can disable clustering for the pool, rename the pool, and then enable clustering for the renamed pool. Ensure that the pool is on the master node when you disable clustering. The Clusters plug-in in iManager must be used to disable and enable clustering for the pool. The rename procedure can be performed in iManager or NSSMU.
-
Ensure that the pool cluster resource is running on the master node.
If you need to migrate the resource:
-
In iManager, select > , then select the cluster that you want to manage.
-
On the Cluster Manager page, select the check box next to the pool cluster resource, then click .
-
Select the master node, then click .
Wait for the resource to report a state before you continue.
-
-
Take the pool cluster resource offline. On the Cluster Manager page, select the check box next to the pool cluster resource, then click .
Wait for the resource to report an state before you continue.
-
In iManager, use the Clusters plug-in to delete the cluster resource for the shared pool:
-
Select > , then select the cluster.
-
Select the tab.
-
Select the check box next to the resource, then click .
-
When you are prompted to confirm the deletion, click to continue, or click to abort the deletion.
-
In the in iManager, browse to verify that the Cluster Resource objects and related objects were removed from eDirectory.
If necessary, you can manually delete the objects. In iManager, go to > , select the objects, then click .
-
-
In iManager, re-create Storage objects for the pool and its volumes:
These objects are needed by NSS when you rename the pool. They are also used by Novell Cluster Services when you re-create the resource.
-
In iManager, select > , then select the cluster node where you want to rename the pool.
-
In the list, select the pool, then click .
-
Select the pool, then click .
This creates a Pool object in eDirectory with a name format of <server_name>_<pool_name>_POOL.
-
Select > The server should still be selected.
-
In the list, select the volume, then click .
-
Select the volume, then click .
This creates a Volume object in eDirectory with a name format of <server_name>_<volume_name>.
-
Repeat Step 4.e through Step 4.f for each volume in the pool.
-
-
Rename the pool.
The following rename procedure uses iManager. You can alternatively use NSSMU to rename the pool.
-
In iManager, select > . The server should still be selected.
-
In the list, select the pool, then click .
-
Read the warning message that the pool’s volumes will be dismounted, then click to confirm that you want to rename the pool.
-
In the dialog box, type the new name, then click .
-
Read the error message, then click to dismiss it.
Error 23391 is EDIR OBJECT NOT FOUND. Typically, it means that the old Pool object has been removed successfully and can no longer be found.
-
View the renamed pool in the list.
After the rename, the pool is in a deactive state. Do not activate it on any nodes.
If you activate it to verify that it is working as desired with the new name, deactivate it again before you continue.
-
-
Use the Clusters plug-in to cluster-enable the pool and create new resource objects with the new pool name.
For detailed instructions, see Step 5 thru Step 18 in Section 12.5, Cluster-Enabling an Existing NSS Pool and Its Volumes.
-
In , select > , then select the cluster.
-
Select the tab.
-
On the Cluster Options page, click the link in the Cluster Objects toolbar.
-
On the Resource Type page, select the radio button, then click .
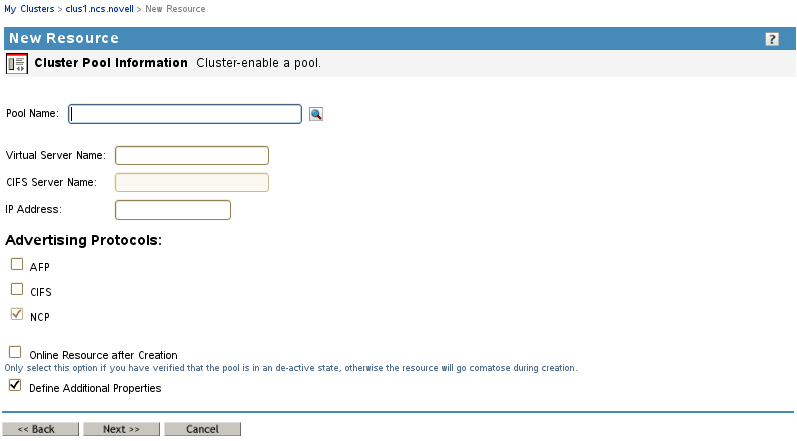
The Cluster Pool Information page opens.
-
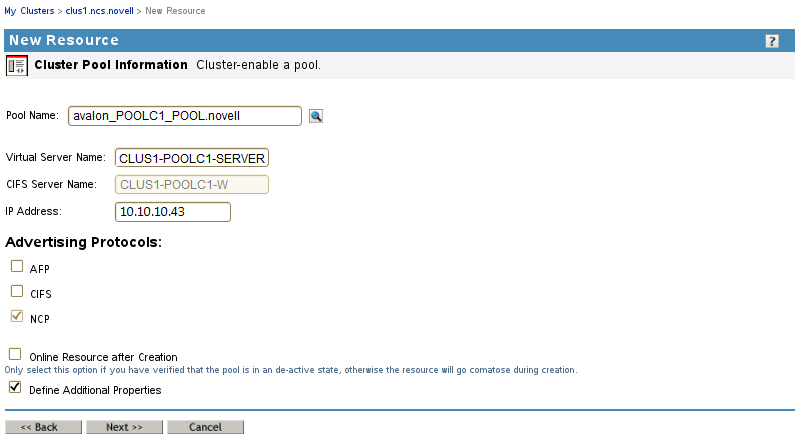
On the Cluster Pool Information page, specify the following resource setup information, then click :
-
Pool name
Browse to select the Pool Object of the pool.
-
Virtual server name
A default name is suggested based on the pool name. You can specify a different name for the virtual server.
-
IP address
This is the IP address to use for the resource’s virtual server.
-
Advertising protocols
-
NCP (default, mandatory)
-
AFP
-
CIFS
If you enable CIFS, a default name is suggested based on the NCP virtual server name. You can specify a different CIFS Server name.
-
-
Deselect the check box.
-
Select the check box.
-
-
On the Resource Policies page, configure the resource policies for the start, failover, and failback modes, then click .
See Configuring the Start, Failover, and Failback Modes for Cluster Resources.
-
On the Resource Preferred Nodes page, assign the preferred nodes to use for the resource, then click .
See Configuring Preferred Nodes and Node Failover Order for a Resource.
The pool cluster resource appears in the list on the Cluster Options page, such as POOL1_SERVER.
-
(Optional) View and modify the resource properties.
-
(Optional) Enable monitoring and configure the monitoring script.
-
Bring the resource online. Select the Cluster Manager tab, select the check box next to the resource, then click .
The pool is activated and its volumes are mounted on the primary preferred node that is configured for the pool cluster resource.
If the pool goes comatose, take it offline, check that the pool is deactivated on the local server, then try again.
-