10.4 Installing an OES 11 SP3 VM Guest
Creating an OES 11 SP3 virtual machine requires you to complete the following major tasks.
10.4.1 Specifying Options for Creating an OES 11 SP3 VM Guest
The Create Virtual Machine Wizard helps you through the steps required to create a VM guest and install the desired operating system.
-
Launch the Create Virtual Machine Wizard by using one of the following methods:
-
From the virtualization host server desktop, click YaST > Virtualization > Create Virtual Machines
-
From within Virtual Machine Manager, click New.
-
At the command line, enter vm-install.
If the wizard does not appear or the vm-install command does not work, review the process of installing and starting the virtualization host server. The virtualization software might not be installed properly.
-
-
After specifying that you want to create a virtual machine, click Forward.
-
Click Forward.
The option to set up a virtual machine based on an existing disk or disk image is supported only if the existing disk or disk image was originally set up through the Create Virtual Machine Wizard.
-
On the Type of Operating System page, select the most recent version of OES shown, then click Forward. The Summary page is displayed.
NOTE:Detailed explanations of the Summary page settings are available in
Virtualization: Configuration Options and Settings
in the Virtualization with Xen guide. -
Click Name of Virtual Machine.
-
Specify a name for the virtual machine in the Name field, then click Apply.
For example, you might specify hostname_vm, where hostname is the DNS name of the server you are installing in the VM.
-
Click Hardware.
-
Specify the amount of initial and maximum memory for the virtual machine to consume from the available memory. The initial memory should not be less than 1024 MB.
-
Specify the number of processors that you want the virtual machine to use.
-
Click Apply.
-
-
If you want to change the graphics adapter settings, click Peripheral Devices and select the type of graphic support desired, then click Apply.
-
Click Disks.
The Virtual Disks dialog box lets you create one or more virtual disks that the OES 11 SP3 VM guest has access to. If you are installing from a DVD on the host server or from an ISO image file copied to the host server’s storage devices, these are also listed as virtual disks.
Initially, a 10 GB file is specified for the partitions/volumes on the virtual server. The default location of the file is /var/lib/xen/images.
By default, this is a sparse file, meaning that although 10 GB is allocated, the size of the file on the disk is only as large as the actual data it contains. Sparse files conserve disk space, but they have a negative impact on performance.
The OES 11 SP3 installation guidelines recommend 10 GB for a server installation. Keep in mind, however, that you are defining the total local disk size for the server. You should allocate as much local space as you anticipate the server needing for data and other files after it is hosting user services.
-
Specify the hard disk space you want to be available to the virtual machine.
-
Click Apply.
-
To create additional virtual disks, click the Harddisk icon in the Disks wizard.
-
-
If you are installing SLES 11 SP4 from a downloaded ISO image file, click DVD, browse to the SLES 11 SP4 image file, then click Open > OK > Apply.
-
If you are installing OES 11 SP3 from a downloaded ISO image file, click DVD, browse to the OES 11 SP3 image file, then click Open > OK > Apply.
-
If you want to change the network adapter settings, click Network Adapters, view the default setting, then edit the default settings.
or
Click New and specify the setting for another network board of your choice, then click Apply.
-
Click Operating System:
-
If you are installing from a downloaded ISO image, make sure that the SLES 11 SP4 image is specified as the Virtual Disk installation source.
-
If you are installing from a network installation source, specify the URL for the SLES 11 SP4 network installation source.
You specify a network installation source for OES 11 SP3 during the install.
-
If you are using an AutoYaST control file to specify the settings for a virtual machine operating system, specify the path to the file in the AutoYaST File field or click the Find button to the right of the field to locate the file on the local host server.
-
If necessary, use the Additional Arguments field to specify additional install or boot parameters to assist the installation.
For example, if you wanted to specify the parameters for an IP address of 192.35.1.10, a netmask of 255.255.255.0, a gateway of 192.35.1.254 for the virtual server, and use ssh to access the installation from another workstation, you could enter the following parameters in the Additional Argument field:
hostip=192.35.1.10 netmask=255.255.255.0 gateway=192.35.1.254 usessh=1 sshpassword=password
-
Click Apply.
-
-
Click OK to start the virtual machine and launch the operating system installation program.
-
Continue with Section 10.4.2, Specifying the Installation Mode.
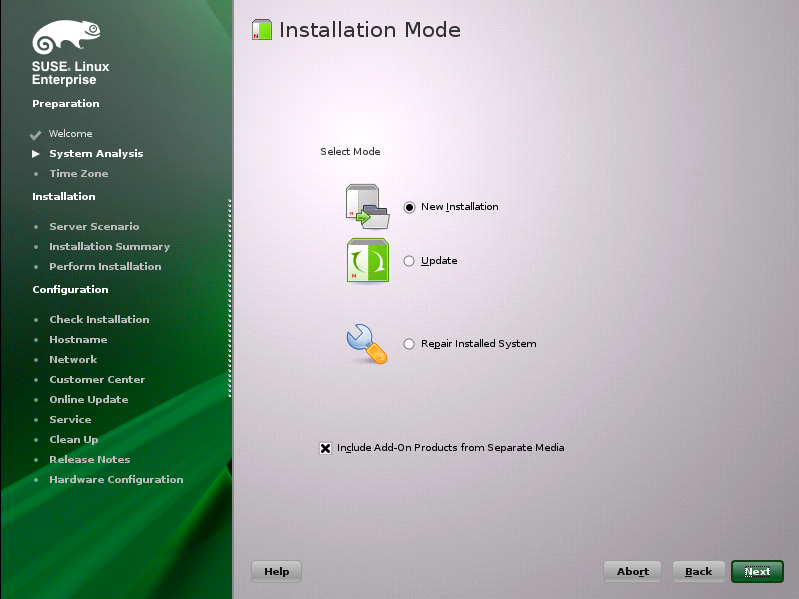
10.4.2 Specifying the Installation Mode
-
When the Installation Mode screen displays, select the following menu options:
-
New Installation
-
Include Add-On Products from Separate Media
-
-
Click Next.
-
Continue with Section 10.4.3, Specifying the Add-On Product Installation Information.
10.4.3 Specifying the Add-On Product Installation Information
When the Add-On Product Installation page displays:
-
Click Add.
-
If you are installing OES 11 SP3 from an ISO image file:
-
On the Add-On Product Media page, click Specify URL, then click Next.
-
In the URL field, type
hd:///?device=/dev/xvdc/
-
Click OK.
-
Skip to Step 4.
-
-
If you are installing from a network installation source, click the appropriate protocol for your situation, then click Next and supply the required information.
-
Read and accept the Novell Open Enterprise Server 11 license agreement, then click Next.
-
Confirm that the Add-On Product Installation page shows the correct path to the OES media, then click Next.
-
Continue with
Completing the OES 11 SP3 VM Guest Installation.
10.4.4 Completing the OES 11 SP3 VM Guest Installation
-
Follow the on-screen prompts, using the information contained in the following sections:
-
Section 3.7, Specifying the Installation Settings for the SLES Base and OES Installation.
-
Section 3.8, Specifying Configuration Information.
During the configuration portion of the installation, you might see additional prompts concerning hardware detection of the network cards, DSL, PPPoE DSL, ISDN cards, and modems.
When you specify the time source during the eDirectory configuration, use the same time source as the eDirectory tree you are installing the server into.
After the installation, enable the virtual machine’s Independent Wall Clock setting and reboot the virtual machine so it can synchronize its time correctly. For more information on this configuration issue,
Virtual Machine Clock Settings
in the Virtualization with Xen guide. -
Section 3.9, Finishing the Installation.
During the hardware configuration, graphics and sound cards are not recognized when installing OES 11 SP3 as a VM guest.
-
Complete the server setup by following the procedures in
Section 6.0, Completing OES Installation or Upgrade Tasks.