4.5 Using the NSS File Version Utility
To restore the versions NSS File Version Utility integrates with your OES 2 Linux workstation or Windows workstation.
Before using the NSS File Version Utility, ensure that you have met the following prerequisites:
-
Map the NSS primary volume configured for the Archive server to your local workstation.
-
Ensure that the administrator has assigned trustee rights to your file or the volume or the directory. For more information on assigning the trustee rights using the Novell Client, see the Novell Client 2.0 SP2 for Linux Administration Guide or .Novell Client 4.91 SP5 for Windows XP/2003 Installation and Administration Guide.
-
Ensure that the administrator has LUM-enabled the eDirectory user. For more information, see the OES 2 SP3: Novell Linux User Management Administration Guide.
The procedure for restoring versions using the NSS File Version Utility on Windows and Linux are similar. We have used Windows Vista for our example.
4.5.1 Accessing NSS File Version Utility
-
Right-click
 in the system tray, then click .
On the Gnome desktop the NSS File Version Utility icon is not displayed. To view the
in the system tray, execute the following steps:
-
To open the window, enter
gnome-session-properties
-
To open the window, click > .
-
Name: Restore Archive Versions
-
Command: /usr/bin/novell-versioning-client-system-tray
-
(Optional)Comment: NSS File Version Utility to restore versions
Click .
-
-
To enable the autostart, select , then click .
-
-
Select the Archive volume to view the versions of the files.
4.5.2 Searching for File Versions
-
In your file browser, browse to locate the network directory or file that stores the versions in the archive database.
-
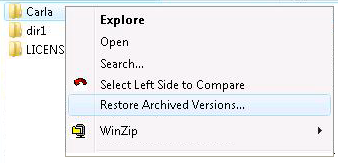
To view versions of the files and folders in the Carla directory, right-click the directory, then select or right-click the system tray, then select . Select the volume that contains Carla directory, then click to display the Window.
NOTE:If you are using File Version Utility on KDE Desktop, the is available under when you right-click a file or directory on a network drive.
-
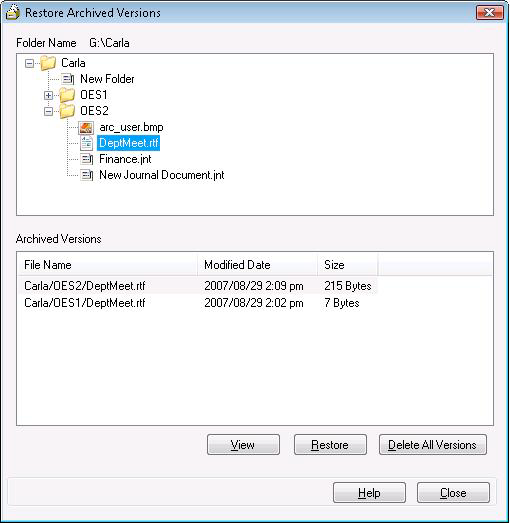
Browse the list to select the archived file you want to view the versions.
-
Click to view the contents of a selected versioned file.
NOTE:Your workstation must have the appropriate application software to open the file.
-
(Optional) Use to restore the versions of the archived file or directory. On restoring versions, the renamed file or folder, displays an unknown object icon in the GUI window. Double click the unknown object to view, the file or folder icon.
On restoring versions, the deleted folder, displays an unknown object icon in the GUI window. To browse the contents of the deleted folder save the folder to a different location.
For more, see Restoring a File Version or Restoring Directory Content.
-
(Optional) Use to delete all the file versions currently listed in the list. For more information, see Deleting All Versions of an Archived File.
4.5.3 Restoring a File Version
Use to view a selected file version from your local workstation.
By default, a selected file version is restored to the location where the source file existed when the file version was created. The default path and filename are displayed in the .
Figure 4-1 Restoration of a File
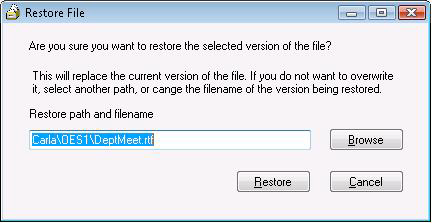
To restore the file to a different location, type the full path, including the filename, in the or browse to the location.You can restore the file only to an NSS volume on a OES 2 or later server, the restored file is assigned its most recent settings for file system attributes, trustees, and trustee rights.
IMPORTANT:The restored version overwrites any file by the specified name in the destination directory.
-
To restore the versions, select the file from a list of file versions.
-
To specify where you want to restore the selected file version, use one of these methods:
-
Use the default path displayed in the , which is the original location of the file at the time it was versioned.
To avoid overwriting an existing file with the same name in the destination location, specify a unique filename.
-
Click to find the desired location or type the full path, including the filename, indicating where to restore the file.
NOTE:Ensure that the filename is included in the path.
-
-
Click .
For a successful restore, a confirmation message affirms the location of the restored file.
-
Click to dismiss the confirmation message.
4.5.4 Restoring Directory Content
Select a directory and specify a date to restore the directory content for that time. You can also select a directory and specify a time period to search the archive for its files and subdirectories that were deleted, renamed, modified or file system trustee rights modified during that period. The search helps you locate the versions of interest.
The Archive volume contains versions of only those files and subdirectories that are eligible for versioning. All of the directory's file and subdirectory versions that were archived earlier than, but closest to, the specified snapshot time are candidates for restoration.
Use to view the versions of a selected directory on your workstation.
Figure 4-2 Restoring Directory Contents
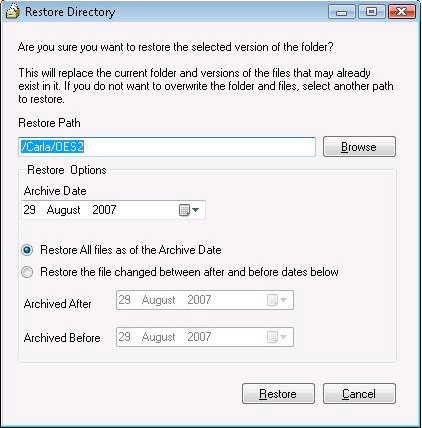
By default, a selected directory and its specified content are restored to the location where the source directory existed when the file versions and subdirectory versions were saved to the archive volume. The default path and directory name are displayed in the .
To restore the directory to a different location, type the full path, including the directory name, in the or browse to the location. You can restore the directory only to a NSS volume on a OES 2 or later server, the restored directory and its contents are assigned their most recent settings for file system attributes, trustees, and trustee rights.
-
Locate the directory you want to restore.
-
Use one of these methods to specify the restore location on the network:
-
Use the default path displayed in the , which is the original location of the directory at the time it was versioned.
To avoid overwriting an existing file with the same name in the destination location, specify a unique directory name.
NOTE:On Windows client, you cannot manually add a new path for restoring versions, instead you must click for the new path.
-
Click to find the desired network location where you want to restore the directory.
NOTE:Ensure that the directory name is included in the path.
-
-
Use one of these methods to specify the date to restore the archived folders and files:
-
Specify the date in the to restore files.
-
Specify the date in the and to search for the file versions between the specified date.
-
-
Click .
On successful restoring the versions, a confirmation message affirms the location of the restored directory.
-
Click to dismiss the confirmation message.
4.5.5 Deleting All Versions of an Archived File
Use to delete all file versions currently listed in the list.
WARNING:The listed file versions are immediately purged from the archive database and are no longer recoverable from the archive. If your administrator backs up the archive database or has configured a salvage area for deleted files on the archive volume, the deleted file versions might be available through other means. Contact your administrator, if needed.
-
From a list of file versions, verify that the displayed versions are the versions you want to delete, then click .
-
Click to confirm that you want to delete all versions.