14.5 Creating Software RAID Devices with iManager
-
In iManager, click .
For instructions, see Section 10.1.5, Accessing Roles and Tasks in iManager.
-
Select a server in the eDirectory tree where you are logged in.
For instructions, see Section 10.1.6, Selecting a Server to Manage.
-
Click New.
This opens a Wizard that steps you through the process.
-
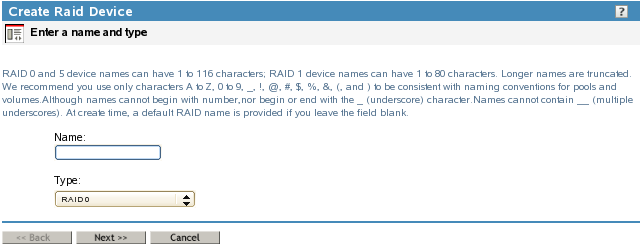
Device Type and Name: Specify the type of RAID device you want to create, type a name for the RAID device, then click .
If you leave the Name field blank, NSS creates a unique name for the device in the form of RAID <type> Device <sequential_number>. For information about choosing names, see Section 6.4, Naming NSS Storage Objects.
This opens the page.

-
Devices and Space: Select devices and the amount of space to use from each, then click .
-
In the field, type the amount of space in MB to use from each physical device.
NSS identifies devices that have enough free space to meet the partition-size requirements and are eligible for inclusion in the RAID. For information, see Determining the Partition Size.
If the amount you specify exceeds the amount of free space available on a minimum number of physical devices, the RAID creation fails and returns an error message.
-
Select the check box next to each of the storage devices you want to obtain space from.
You can obtain space from multiple devices. Select only devices that have enough space available to meet your needs. Each segment must be more than 12 MB. If any segment uses space from a device that is partitioned with the DOS partition table scheme, then the maximum segment size must be less than 2 TB. If all devices are using GPT, a RAID segment size can be more than 2 TB. Because pools are currently limited to 8 TB, RAID 1 sizes for pool objects are also limited to 8 TB.
If a device’s available space is smaller than the specified partition size, it is disabled (dimmed) so that you cannot select it.
IMPORTANT:Unallocated partitions (that is, partitions that are not mirrored and do not contain pools or other file systems), are deleted in order to present the unused space as free space for use by the RAID. No data loss occurs by this action.
A single physical device can offer multiple free space areas in the list. After you select a device, all other free space on that device is disabled for that RAID. Each device should contribute only one partition to the RAID; otherwise, it defeats the purpose of improved performance and data protection that a RAID affords.
If the server has both local and shared devices, the partitions of a RAID can reside only on shared devices or only on local devices. If you select the check box next to a local storage device, the shared devices are dimmed so that you cannot select them. If you select the box next to a shared storage device, the local devices are dimmed.
Only devices that have free space appear in the list. If no devices are listed, there is no space available to create a software RAID device. Cancel the Wizard, add more devices to the server or free up space on existing devices, then return to the page to create a RAID device.
-
If this is a RAID 0 or 5, click to go to the Stripe Size page. Otherwise, skip ahead to Step 7.
This opens the Stripe Size page.
-
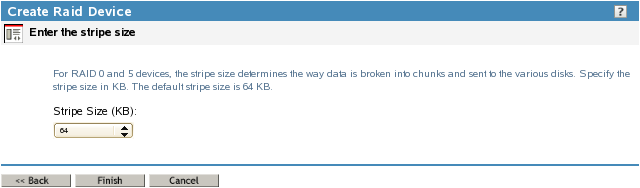
-
Stripe Size: If this is a RAID 0 or 5 device, set the stripe size. For information, see Determining the Stripe Size for RAID 0 and RAID 5.
-
Click . (Or click at any time to back out of the process.)
NSS creates the software RAID device, then opens to the Software RAIDs task. Your newly created RAID device appears in the list. The name you provided for the RAID appears in the Description field. This is the device name displayed when the RAID is listed in the NSSMU Software RAIDs page.
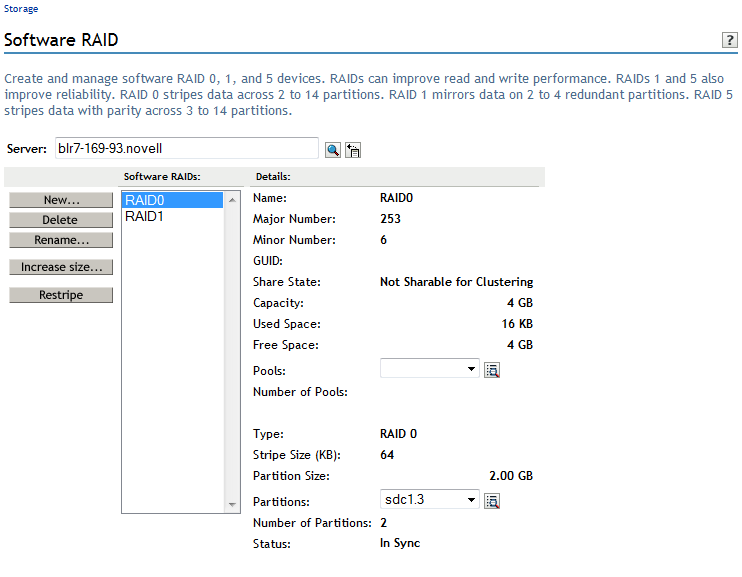
After you create the RAID, manage it as you would a physical device in terms of using it for pools and volumes. For information on configuring an NSS file system on your RAID, see Section 16.0, Managing NSS Pools.