4.2 Configuring CIS
The Cloud Integrated Storage (CIS) provides a console to configure CIS and its infrastructure components. This section covers the deployment configuration of CIS and its infrastructure components.
NOTE:Before configuring CIS or infrastructure services on any server, ensure to select CIS pattern using the YaST configuration.
4.2.1 Accessing the CIS Configuration Console
-
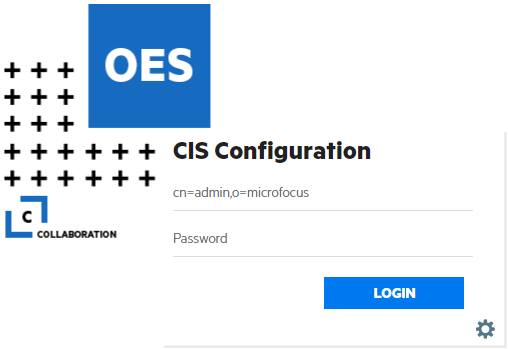
Point your browser to https://<OES server IP address or the host name>:8105.
-
Specify the user name or FQDN of the eDirectory administrator in the user name, specify the password, then click Login. For example, cn=admin,o=acme.
The CIS Configuration welcome page explains the configuration flow of CIS components.
-
Review the flow, and then select the type of deployment as per your requirement.
IMPORTANT:Before configuring the CIS, ensure that there is sufficient disk space available on the root file system for CIS to function properly.
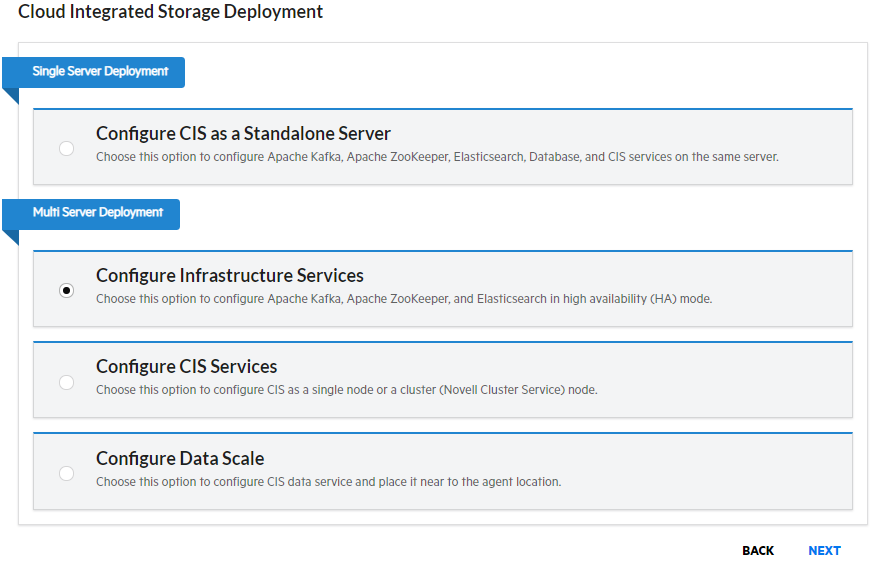
4.2.2 Deployment Types
It includes the following:
Configure CIS as a Standalone Server
Choose this option to configure Apache Kafka, Apache ZooKeeper, Elasticsearch, database and CIS services on the same server.
Prerequisites
-
Before you start with CIS configuration, ensure to meet the requirements mentioned in Section 3.3, CIS Requirements are met.
-
A local database is created during CIS Standalone server configuration. Ensure that there is no database already configured on this server.
Procedure
-
On the CIS deployment page, select Configure CIS as a Standalone Server deployment type and then click Next.
-
Configuration Location: Specify the following:
-
Hostname / IP Address: Specify the fully qualified domain name (FQDN) or IP address of the server where CIS will be configured. For example, wdccisserver.labs.wdc.acme.com.
-
Configuration Path: Specify the path to store CIS configuration files and log files. By default, the path is set to root (/). You can modify it to /home or /media/nss/VOLUMENAME depending on your requirement.
If you are using /media/nss/CISVOL, then it is recommended to create a new volume for CIS. When using an existing volume, ensure that the space available is 100 GB or more. You must LUM enable the cisuser and cisgroup. For more information, see Section 4.5, LUM Enabling CIS User and Group.
If /media/nss/CISVOL is a cluster volume, then you need to modify the resource to update the Load and Unload script with CIS service. For more information, see Modifying the Load, Unload, and Monitor Scripts.
-
-
Database: Specify the following:
Use external database: Enable this option to configure CIS with the already configured database server. By default, this option is disabled.
-
If this option is disabled, specify the MariaDB password to configure the local database.
-
If this option is enabled, specify the following:
-
Select either MariaDB or MS SQL database.
-
Specify the database host name or IP address and port. By default, the database port for MariaDB is 3306 and MS SQL is 1433.
-
Specify the user name and password for the database.
-
Use secure connection: Enables or disables the database connection to be secure. By default, this option is disabled.
If MariaDB database is selected, ensure to meet the following prerequisites before proceeding in the GUI:
-
Ensure to copy MariaDB client certificates to the CIS server at /etc/opt/novell/cis/db/certs.
-
In the MySQL configuration file (/etc/my.cnf) under the [mysqld] section, update the following paths:
[mysqld]
ssl=1
ssl-ca=/etc/opt/novell/cis/db/certs/ca-cert.pem
ssl-cert=/etc/opt/novell/cis/db/certs/client-cert.pem
ssl-key=/etc/opt/novell/cis/db/certs/client-key.pem
-
Client CA Certificate file path: Specify the path of client Certificate Authority (CA) file in .pem format.
-
Client Certificate file path: Specify the path of the client certificate file in .pem format.
-
Client Key file path: Specify the path of the key file associated with the client certificate in .pem format.
-
-
-
-
Infrastructure Server: Specify the following:
-
ZooKeeper: By default, it is configured with the CIS server IP and ZooKeeper port is 2181.
-
Elasticsearch: By default, it is configured with the CIS server IP and Elasticsearch port is 9400.
-
Kafka: By default, it is configured with the CIS server IP and Kafka port is 9092.
-
-
Click Next.
-
Admin Context: Specify the following:
-
CIS Admin Name with Context: Specify the LDAP distinguished name (DN) of the user who administers the CIS server. For example, cn=admin,o=acme.
-
Admin Password: Specify the password for the CIS administrator.
-
Agent Search Context: Specify the LDAP distinguished name (DN) of the container object under which the NCP server objects of the OES server resides that connects to the CIS server. The OES server includes the agents that connects to the CIS server. The CIS admin user must have supervisory rights on this server context.
-
-
Click Next. Review the configuration summary and then click Finish.
Modifying the Load, Unload, and Monitor Scripts
-
Log in to iManager.
-
Under Roles and Tasks, select Clusters > My Clusters, then select the cluster.
If the cluster does not appear in your personalized list of clusters to manage, you can add it. Click Add, browse and select the cluster, then click OK. Wait for the cluster to appear in the list and report its status, then select the cluster.
-
On the Cluster Manager page or Cluster Options page, select the cluster resource to view its properties, then click the Scripts tab.
-
Click the Load Script, Unload, or Monitor Script links to view or modify the scripts. If you modify a script, click Apply to save your changes before you leave the page.
Changes do not take effect until you take the resource offline, and bring it online again.
-
Edit the load script for the Cluster Pool. Add the following lines to the existing load script before the exit 0 statement.
# start CIS services exit_on_error /usr/bin/systemctl start oes-cis-fluentbit.service exit_on_error /usr/bin/systemctl start oes-cis-configuration.service # start CIS infra services exit_on_error /usr/bin/systemctl start oes-cis-zk.service exit_on_error /usr/bin/systemctl start oes-cis-elastic.service exit_on_error /usr/bin/systemctl start oes-cis-kafka.service # start CIS core services exit_on_error /usr/bin/systemctl start oes-cis-auth.service exit_on_error /usr/bin/systemctl start oes-cis-data.service exit_on_error /usr/bin/systemctl start oes-cis-metadata.service exit_on_error /usr/bin/systemctl start oes-cis-policy.service exit_on_error /usr/bin/systemctl start oes-cis-mgmt.service exit_on_error /usr/bin/systemctl start oes-cis-aggregator.service exit_on_error /usr/bin/systemctl start oes-cis-collector.service exit_on_error /usr/bin/systemctl start oes-cis-repaggregator.service exit_on_error /usr/bin/systemctl start oes-cis-repcollector.service exit_on_error /usr/bin/systemctl start oes-cis-gateway.service # check the services exit_on_error /usr/bin/systemctl is-active oes-cis-fluentbit.service exit_on_error /usr/bin/systemctl is-active oes-cis-configuration.service exit_on_error /usr/bin/systemctl is-active oes-cis-zk.service exit_on_error /usr/bin/systemctl is-active oes-cis-elastic.service exit_on_error /usr/bin/systemctl is-active oes-cis-kafka.service exit_on_error /usr/bin/systemctl is-active oes-cis-auth.service exit_on_error /usr/bin/systemctl is-active oes-cis-data.service exit_on_error /usr/bin/systemctl is-active oes-cis-metadata.service exit_on_error /usr/bin/systemctl is-active oes-cis-policy.service exit_on_error /usr/bin/systemctl is-active oes-cis-mgmt.service exit_on_error /usr/bin/systemctl is-active oes-cis-aggregator.service exit_on_error /usr/bin/systemctl is-active oes-cis-collector.service exit_on_error /usr/bin/systemctl is-active oes-cis-repaggregator.service exit_on_error /usr/bin/systemctl is-active oes-cis-repcollector.service exit_on_error /usr/bin/systemctl is-active oes-cis-gateway.service # restart firewall if its running systemctl status SuSEfirewall2.service if [ $? -eq 0 ]; then ignore_error systemctl restart SuSEfirewall2.service fi -
Edit the unload script for the Cluster Pool. Add the following lines to the existing unload script after the /opt/novell/ncs/lib/ncsfuncs statement:
# stop cis services
ignore_error /usr/bin/systemctl stop oes-cis-fluentbit.service
ignore_error /usr/bin/systemctl stop oes-cis-auth.service
ignore_error /usr/bin/systemctl stop oes-cis-data.service
ignore_error /usr/bin/systemctl stop oes-cis-metadata.service
ignore_error /usr/bin/systemctl stop oes-cis-policy.service
ignore_error /usr/bin/systemctl stop oes-cis-mgmt.service
ignore_error /usr/bin/systemctl stop oes-cis-aggregator.service
ignore_error /usr/bin/systemctl stop oes-cis-collector.service
ignore_error /usr/bin/systemctl stop oes-cis-repaggregator.service
ignore_error /usr/bin/systemctl stop oes-cis-repcollector.service
ignore_error /usr/bin/systemctl stop oes-cis-gateway.service
ignore_error /usr/bin/systemctl stop oes-cis-configuration.service

# stop infra services
ignore_error /usr/bin/systemctl stop oes-cis-kafka.service
ignore_error /usr/bin/systemctl stop oes-cis-elastic.service
ignore_error /usr/bin/systemctl stop oes-cis-zk.service
-
Edit the monitor script for the Cluster Pool. Add the following lines to the existing monitor script before the exit 0 statement.
exit_on_error /usr/bin/systemctl is-active oes-cis-fluentbit.service
exit_on_error /usr/bin/systemctl is-active oes-cis-zk.service
exit_on_error /usr/bin/systemctl is-active oes-cis-elastic.service
exit_on_error /usr/bin/systemctl is-active oes-cis-kafka.service
exit_on_error /usr/bin/systemctl is-active oes-cis-auth.service
exit_on_error /usr/bin/systemctl is-active oes-cis-data.service
exit_on_error /usr/bin/systemctl is-active oes-cis-metadata.service
exit_on_error /usr/bin/systemctl is-active oes-cis-policy.service
exit_on_error /usr/bin/systemctl is-active oes-cis-mgmt.service
exit_on_error /usr/bin/systemctl is-active oes-cis-aggregator.service
exit_on_error /usr/bin/systemctl is-active oes-cis-collector.service
exit_on_error /usr/bin/systemctl is-active oes-cis-repaggregator.service
exit_on_error /usr/bin/systemctl is-active oes-cis-repcollector.service
exit_on_error /usr/bin/systemctl is-active oes-cis-gateway.service
exit_on_error /usr/bin/systemctl is-active oes-cis-configuration.service
-
Configure Infrastructure Services
Choose this option to configure Apache Kafka, Apache ZooKeeper, and Elasticsearch in high availability (HA) mode.
A multi node high availability configuration of infrastructure server helps to increase the efficiency and availability of the infrastructure server. It is mandatory to configure atleast three HA nodes. You can configure up to seven nodes.
Prerequisites
-
Before you start with infrastructure services configuration, ensure that the requirements mentioned in Section 3.3, CIS Requirements are met.
-
Ensure that you allocate sufficient disk space for the infrastructure server.
-
Docker Swarm configuration is supported only on the ext4 file systems.
Procedure
-
To automatically make the server HA ready, click Start.
After successful configuration, click OK. Re-login to the console to view the steps to complete the Infrastructure service configuration (using CLI).
-
(Using CLI) To setup the Docker Swarm, perform the following on the terminal console of this server:
-
Open a terminal console, then log in as a root user.
-
Initialize a Docker Swarm using the following command:
docker swarm init
-
Create a token and add a manager to this swarm using the following command:
docker swarm join-token manager
Command output:
docker swarm join --token <token_value> <host_address:2377>
Make a note of this command output, because the same output must be executed on all other HA nodes to join this Docker Swarm.
-
After successful configuration, go to next HA node, perform step1 and then join this server to the Docker Swarm created on first node using the following command:
docker swarm join --token <swarm_token_gererated_from_first_node> <first_node_hostname>:2377
Repeat this step on all the infrastructure server nodes.
-
On the last HA node, start infrastructure services using the following command:
sh /opt/novell/cis/bin/cis_ext_service.sh start
After successful configuration of infrastructure services, continue with Configure CIS Services.
-
Configure CIS Services
Choose this option to configure CIS as a single node or a NCS (OES Cluster Services) cluster resource.
Prerequisites
-
Before you start with CIS configuration, ensure that the requirements mentioned in Section 3.3, CIS Requirements are met.
-
Ensure that the infrastructure services (in high availability mode) is configured.
-
For CIS server to function in a cluster environment, ensure that all nodes are configured with OES 2018 SP2. Novell Cluster Services must be installed and running on the servers that have CIS installed. For information, see Installing, Configuring, and Repairing OES Cluster Services in the OES 2018 SP2: OES Cluster Services for Linux Administration Guide.
-
Create a dedicated pool resource and volume to run the CIS service. Ensure to cluster-enable the pool resource.
Procedure
-
Configuration Location: Specify the following:
Configure CIS as a NCS cluster resource: Configures CIS in a cluster environment. By default, this option is enabled.
-
Hostname / IP address: Specify the server address for standalone and resource or virtual IP address or hostname of the NCS cluster resource where the CIS server is part of.
-
Configuration Path: Specify the NSS media path to store CIS configuration files and log files. For example, /media/nss/CISVOL.
-
-
Database: Specify the following:
-
Select either MariaDB or MS SQL database.
-
Specify the database host name or IP address and port. By default, the database port for MariaDB is 3306 and MS SQL is 1433.
-
Specify the user name and password for the database.
-
Connection Parameters: If your MS SQL is configured with connection parameters, specify the value.This is not a mandatory field.
-
Use secure connection: Enables or disables the database connection to be secure. By default, this option is disabled.
If MariaDB database is selected, ensure to meet the following prerequisites before proceeding in the GUI:
-
Ensure to copy MariaDB client certificates to the CIS server at /etc/opt/novell/cis/db/certs.
-
In the MySQL configuration file (/etc/my.cnf) under the [mysqld] section, update the following paths:
[mysqld]
ssl=1
ssl-ca=/etc/opt/novell/cis/db/certs/ca-cert.pem
ssl-cert=/etc/opt/novell/cis/db/certs/client-cert.pem
ssl-key=/etc/opt/novell/cis/db/certs/client-key.pem
-
Client CA Certificate file path: Specify the path of client Certificate Authority (CA) file in .pem format.
-
Client Certificate file path: Specify the path of the client certificate file in .pem format.
-
Client Key file path: Specify the path of the key file associated with the client certificate in .pem format.
-
-
-
Infrastructure Server Host name / IP address: Specify the host name or IP address of all the configured infrastructure server HA nodes. Separate multiple entries with a comma.
-
Click Validate. If there are errors, ensure to resolve them before you proceed.
-
CIS Admin Name with Context: Specify the LDAP distinguished name (DN) of the user who administers the CIS server. For example, cn=admin,o=acme.
-
Admin Password: Specify the password for the CIS administrator.
-
Agent Search Context: Specify the LDAP distinguished name (DN) of the container object under which the NCP server objects of the OES server resides that connects to the CIS server. The OES server includes the agents that connects to the CIS server. The CIS admin user must have supervisory rights on this server context.
-
Click Next. Review the configuration summary and then click Finish.
NOTE:If you have configured CIS on a single node, ignore the further steps. If you have configured CIS as a Cluster Resource, continue with Step 9.
-
When CIS is configured with cluster resource IP or hostname, you must replace the certificates in /etc/opt/novell/cis/certs with the certificate that you have created manually for CIS. To create the certificates manually, see Section C.1, Creating Certificates for CIS.
-
Modify the Load, Unload and Monitor script.
-
Log in to iManager.
-
Under Roles and Tasks, select Clusters > My Clusters, then select the cluster.
If the cluster does not appear in your personalized list of clusters to manage, you can add it. Click Add, browse and select the cluster, then click OK. Wait for the cluster to appear in the list and report its status, then select the cluster.
-
On the Cluster Manager page or Cluster Options page, select the CIS cluster resource to view its properties, then click the Scripts tab.
-
Click the Load Script, Unload, or Monitor Script links to view or modify the scripts. If you modify a script, click Apply to save your changes before you leave the page.
Changes do not take effect until you take the resource offline, and bring it online again.
-
Edit the load script for the Cluster Pool. Add the following lines to the existing load script before the exit 0 statement.
#update the links /bin/bash /opt/novell/cis/bin/update_cislinks.sh cis <New media path> # start the services exit_on_error /usr/bin/systemctl start oes-cis-fluentbit.service exit_on_error /usr/bin/systemctl start oes-cis-configuration.service exit_on_error /usr/bin/systemctl start oes-cis-auth.service exit_on_error /usr/bin/systemctl start oes-cis-data.service exit_on_error /usr/bin/systemctl start oes-cis-metadata.service exit_on_error /usr/bin/systemctl start oes-cis-policy.service exit_on_error /usr/bin/systemctl start oes-cis-mgmt.service exit_on_error /usr/bin/systemctl start oes-cis-aggregator.service exit_on_error /usr/bin/systemctl start oes-cis-collector.service exit_on_error /usr/bin/systemctl start oes-cis-repaggregator.service exit_on_error /usr/bin/systemctl start oes-cis-repcollector.service exit_on_error /usr/bin/systemctl start oes-cis-gateway.service # wait before checking their status sleep 5 # check the services exit_on_error /usr/bin/systemctl is-active oes-cis-fluentbit.service exit_on_error /usr/bin/systemctl is-active oes-cis-configuration.service exit_on_error /usr/bin/systemctl is-active oes-cis-auth.service exit_on_error /usr/bin/systemctl is-active oes-cis-data.service exit_on_error /usr/bin/systemctl is-active oes-cis-metadata.service exit_on_error /usr/bin/systemctl is-active oes-cis-policy.service exit_on_error /usr/bin/systemctl is-active oes-cis-mgmt.service exit_on_error /usr/bin/systemctl is-active oes-cis-aggregator.service exit_on_error /usr/bin/systemctl is-active oes-cis-collector.service exit_on_error /usr/bin/systemctl is-active oes-cis-repaggregator.service exit_on_error /usr/bin/systemctl is-active oes-cis-repcollector.service exit_on_error /usr/bin/systemctl is-active oes-cis-gateway.service # restart firewall if its running systemctl status SuSEfirewall2.service if [ $? -eq 0 ]; then ignore_error systemctl restart SuSEfirewall2.service fi -
Edit the unload script for the Cluster Pool. Add the following lines to the existing unload script after the /opt/novell/ncs/lib/ncsfuncs statement:
ignore_error /usr/bin/systemctl stop oes-cis-fluentbit.service

ignore_error /usr/bin/systemctl stop oes-cis-auth.service

ignore_error /usr/bin/systemctl stop oes-cis-data.service

ignore_error /usr/bin/systemctl stop oes-cis-metadata.service

ignore_error /usr/bin/systemctl stop oes-cis-policy.service

ignore_error /usr/bin/systemctl stop oes-cis-mgmt.service

ignore_error /usr/bin/systemctl stop oes-cis-aggregator.service

ignore_error /usr/bin/systemctl stop oes-cis-collector.service

ignore_error /usr/bin/systemctl stop oes-cis-repaggregator.service

ignore_error /usr/bin/systemctl stop oes-cis-repcollector.service

ignore_error /usr/bin/systemctl stop oes-cis-gateway.service

ignore_error /usr/bin/systemctl stop oes-cis-configuration.service
-
Edit the monitor script for the Cluster Pool. Add the following lines to the existing monitor script before the exit 0 statement.
exit_on_error /usr/bin/systemctl is-active oes-cis-fluentbit.service

exit_on_error /usr/bin/systemctl is-active oes-cis-auth.service

exit_on_error /usr/bin/systemctl is-active oes-cis-data.service

exit_on_error /usr/bin/systemctl is-active oes-cis-metadata.service

exit_on_error /usr/bin/systemctl is-active oes-cis-policy.service

exit_on_error /usr/bin/systemctl is-active oes-cis-mgmt.service

exit_on_error /usr/bin/systemctl is-active oes-cis-aggregator.service

exit_on_error /usr/bin/systemctl is-active oes-cis-collector.service

exit_on_error /usr/bin/systemctl is-active oes-cis-repaggregator.service

exit_on_error /usr/bin/systemctl is-active oes-cis-repcollector.service

exit_on_error /usr/bin/systemctl is-active oes-cis-gateway.service

exit_on_error /usr/bin/systemctl is-active oes-cis-configuration.service
-
-
-
To add a new node to this cluster:
-
Ensure that the CIS pattern is installed and updated with the latest patches.
-
Ensure this node is part of the same cluster.
-
Migrate the CIS resource to the new node.
-
Configure Data Scale
Choose this option to improve the latency of the data access.
Prerequisite
Before you start with CIS configuration, ensure that the requirements mentioned in Section 3.3, CIS Requirements are met.
Data and Gateway
Choose this option to configure the data and gateway service on this server. It is recommended to select this option if this is the first data scale server getting configured, because the gateway service provides load balancing on the data service.
-
Host names: Specify the following:
-
Data Server: Displays the host name or IP address of the local server.
-
Configure gateway as a NCS cluster resource: Enables or disables the gateway as a NCS cluster resource. By default, this option is enabled.
-
If this option is enabled, specify the IP address of the NCS cluster resource where gateway is configured.
-
If this option is disabled, the host name or IP address of the local server is displayed.
NOTE:It is recommended to configure gateway as a cluster to avoid interruption of the service.
-
-
-
General: Specify the following:
-
CIS Server Address: Specify the host name or IP address where the CIS server is configured.
-
Infrastructure Server Host name: Specify the host name or IP address of all the configured HA nodes. Separate multiple entries with a comma.
-
-
Certificates: Specify the following:
-
eDirectory Server: Displays the CIS server host name and port where the eDirectory server is configured. By default, eDirectory server port is 524.
-
Cluster Resource Host name: Specify the fully qualified domain name (FQDN) of a NCS cluster resource where the CIS server is part of. Separate multiple entries with a comma.
-
Cluster Resource IP Address: Specify the virtual IP address of the NCS cluster resource where the CIS server is part of. Separate multiple entries with a comma.
-
-
Click Next. Review the configuration summary and then click Finish.
Data
Choose this option to configure the server as a standalone data server or connect the data server to an existing gateway server.
-
Host names: Specify the following:
-
Connect to Gateway server: Enables or disables the data server to connect to gateway. By default, this option is enabled.
-
If this option is enabled, displays the host name or IP address of the local server that will be connected to gateway.
Gateway: Specify the host name or IP address of the server where gateway service is configured.
-
If this option is disabled, the host name or IP address of the local server is displayed.
-
-
-
General: Specify the following:
-
CIS Server Address: Specify the host name or IP address of the server that is configured with CIS.
-
Infrastructure Server Host name: Specify the host name or IP address of all the configured HA nodes. Separate multiple entries with a comma.
-
-
Certificates: Specify the following:
-
eDirectory Server: Displays the CIS server host name and port where the eDirectory server is configured. By default, eDirectory server port is 524.
-
Cluster Resource Host name: Specify the fully qualified domain name (FQDN) of a NCS cluster resource where the CIS server is part of. Separate multiple entries with a comma.
-
Cluster Resource IP Address: Specify the virtual IP address of the NCS cluster resource where the CIS server is part of. Separate multiple entries with a comma.
-
-
Click Next. Review the configuration summary and then click Finish.
Gateway
Choose this option to configure only the gateway service on this server. You can connect multiple data servers to this gateway server for load balancing between the OES agents and data services.
-
Host names: Specify the following:
-
Configure gateway as a NCS cluster resource: Enables or disables the gateway as a NCS cluster resource. By default, this option is enabled.
-
If this option is enabled, specify the IP address of the NCS cluster resource where the gateway is configured.
-
If this option is disabled, the host name or IP address of the local server is displayed.
-
-
-
General: Specify the following:
-
CIS Server Address: Specify the host name or IP address where the CIS server is configured.
-
Infrastructure Server Host name: Specify the host name or IP address of all the configured HA nodes. Separate multiple entries with a comma.
-
-
Certificates: Specify the following:
-
eDirectory Server: Displays the CIS server host name and port where the eDirectory server is configured. By default, eDirectory server port is 524.
-
Cluster Resource Host name: If gateway is configured as a NCS clustered resource, specify the fully qualified domain name (FQDN) of a NCS cluster resource where the gateway server is configured. Separate multiple entries with a comma.
Host name: Specify the fully qualified domain name (FQDN) of the local server. Separate multiple entries with a comma.
-
Cluster Resource IP Address: If gateway is configured as a NCS clustered resource, specify the virtual IP address of a NCS cluster resource where the gateway server is configured. Separate multiple entries with a comma.
IP Address: Specify the IP address of the local server. Separate multiple entries with a comma.
-
-
Click Next. Review the configuration summary and then click Finish.