3.2 Installing NCP Server
3.2.2 Installing NCP Server during OES 2018 SP2 Installation
NCP Server for Linux can be installed during OES 2018 SP2 installation. For general installation instructions, see the OES 2018 SP2: Installation Guide.
-
During the YaST install, on the page, click to view details.
-
Select option from the OES options.
When you select , the following additional options are automatically selected:
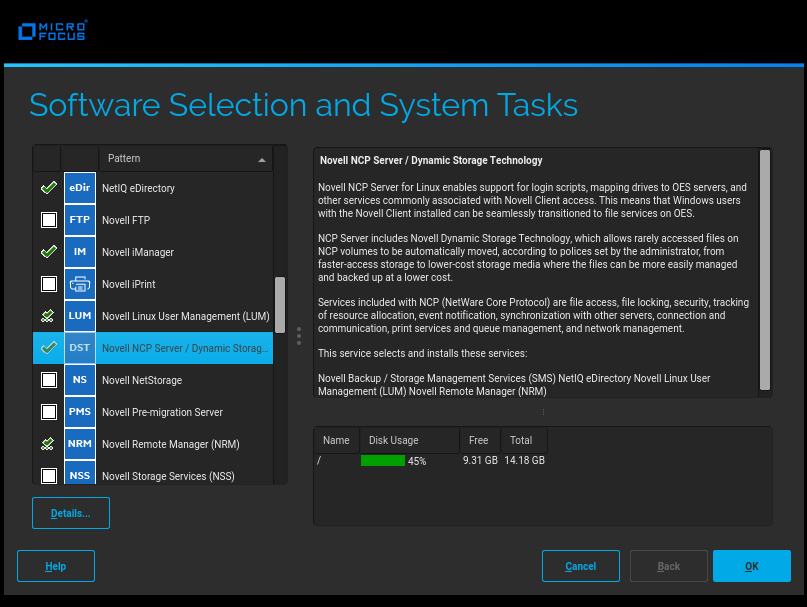
-
-
If you plan to use NSS volumes, select from the options.
IMPORTANT:DST shadow volumes are supported only for OES Storage Services volumes.
-
If you plan to provide access for CIFS users to NSS volumes on Linux or DST shadow volumes, select from the options.
-
(Optional) Select from the options.
You must install iManager somewhere in your network, but it is not necessary to install it on every server.
-
If you plan to configure NSS volumes on Linux, or DST shadow volumes on a cluster node, select from the options.
-
Click to continue with the installation.