3.3 Planning for Failure
After workloads are properly protected, it is necessary to periodically test the protection and be ready for catastrophic system failure. The following tasks show how to be ready and respond.
3.3.1 Workload Testing
Use Test Failover to confirm the integrity of a replicated workload. Typical Test Failovers take only an hour.
-
Click on the toolbar to navigate to the Workloads page.
-
Select the check box next to the workload you want to test.
Workload Commands are activated.
-
Click
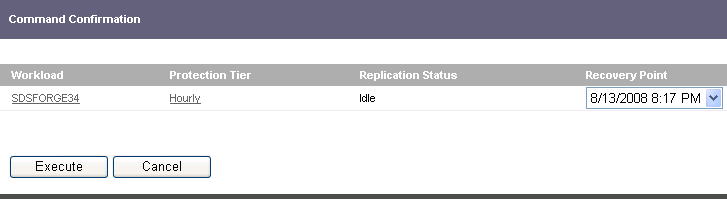
The Command Confirmation page is displayed.
-
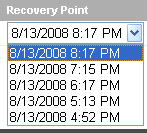
Select a to use for the test, if desired.
-
To run the Test Failover immediately, click . To continue, see Step 6. To cancel the Test Failover, click .
or
To view and optionally change any workload settings before running the Test Failover, click the workload name. Click at the bottom of the Web page to restart the Test Failover, then click .
-
Navigate to the Workloads page. When the workload’s changes to , the virtual machine is running.
-
Log in to the virtual machine by using Remote Desktop Connection or the VMware Virtual Infrastructure Client.
-
Inspect the virtual machine to verify that the recovery workload is functioning properly.
-
Shut down the virtual machine.
-
Navigate to the . Select or for the workload.
NOTE:PlateSpin Forge logs the success or failure of the test failover as an event. This event can later be retrieved as part of an Events report.
3.3.2 Preparing for Failover
When a protected workload fails, Preparing for Failover protects your workload, but gives you time to determine if the problem is trivial.
-
Click on the toolbar to navigate to the Workloads page.
-
Select the workload that requires a Failover.
-
Select .
The Command Confirmation page is displayed.
-
Select a to use for the test, if desired.
-
To run the Prepare for Failover immediately, click . To continue, see Step 6. To cancel the Failover, click .
or
To view and optionally change any workload settings before running Prepare for Failover, click the workload name. Click at the bottom of the Web page to restart the Test Failover, then click .
-
Navigate to the Workloads page. The workload changes to .
-
When the recovery workload is running and ready to be joined to the main network, its changes to .
3.3.3 Running a Prepared Failover
After preparing for a failover, carefully investigate the situation to make sure a failover is required. If it is required, bring the recovered workload on to the main network by running Failover.
-
Click on the toolbar to navigate to the Workloads page.
-
Select the workload that requires a failover.
-
Select .
The Command Confirmation page is displayed.
-
Select a to use for the test, if desired.
-
The workload changes to .
When the operation is complete and the recovery workload has taken the primary workload’s place on the network, the changes to .
3.3.4 Running an Unprepared Failover
In the rare case, such as natural disaster, where it is immediately obvious that a primary workload is irreparably disabled, run directly.
-
Click on the toolbar to navigate to the Workloads page.
-
Select the workload that requires a failover.
-
Select .
-
To run the Failover immediately, click . To continue, see Step 5. To cancel the Failover, click .
or
To view and optionally change any workload settings before running the Failover, click the workload name. Click at the bottom of the Web page to restart the Failover, then click .
-
Navigate to the Workloads page. The workload changes to .
When the failover is complete, the changes to . The workload is now running on the PlateSpin Forge Appliance Host.
3.3.5 Removing a Snapshot After Failover (Optional)
Forge leverages hypervisor snapshot technology to facilitate a rapid failover. Although it is not necessary, snapshots can be removed after the failover to improve performance and reclaim disk space.
NOTE:While the snapshot is being removed, the responsiveness of the workload is temporarily degraded. It is recommended that you perform this process during a scheduled down time.
-
Login to the VMware Infrastructure Client using the Host Appliance IP address. Ignore any warnings.
-
Expand the Virtual Machine list if necessary and locate the VM with the snapshot you want to remove.
NOTE:While it is not necessary, the removal is significantly faster when the host VM is powered off.
-
Right-click the VM and select > .
-
Select the snapshot you would like to remove and click .
All changes are merged into the base.