6.3 Exchange Module: Office365 or Hosted Exchange without LDAP
Use this section to configure your Exchange module if you use
-
Office 365
or
-
Hosted Exchange without LDAP
If your Exchange system is On-premise, see Exchange Module: Exchange On-premise.
This section contains the following:
6.3.1 Prerequisites of the Exchange Module
There are several prerequisites that need to be completed for setting up a job.
Make Sure That Autodiscover Is Working
If Autodiscover fails for users, serious errors occur when Retain attempts to archive the users’ messages. This option allows skipping users or immediately aborting the jobs.
The first thing to do is to test that autodiscover is enabled for the domain.
-
Go to the Microsoft Remote Connectivity Analyzer ( https://testconnectivity.microsoft.com/)
-
On the Office365 tab, select "Outlook Autodiscover" from the Microsoft Office Outlook Connectivity Tests
-
Enter your credentials and run the test. If the test fails, contact Microsoft and have them turn autodiscover on.
Get the SMTP URL
Retain needs to know what SMTP server to use for sending notifications.
Query the DNS for the MX record or
-
Go to the Microsoft Remote Connectivity Analyzer ( https://testconnectivity.microsoft.com/)
-
On the Office365 tab, select "Inbound SMTP Email" from the Microsoft Office Outlook Connectivity Tests
-
Enter your credentials and run the test.
-
Record the SMTP server URL for Retain.
Set up DNS SRV Record
Microsoft has an article describing how to set up a DNS SRV record titled " A new feature is available that enables Outlook 2007 to use DNS Service Location (SRV) records to locate the Exchange Autodiscover service".
In short, the process is:
-
Go to the DNS Manager
-
Expand Forward Lookup Zones
-
Locate and right-click the external DNS zone, then choose Other New Records
-
Click Service Location (SRV) and enter:
Service: _autodiscoverscreen
Protocol: _tcp
Port Number: 443
Host: [your SMTP host URL]
-
Click OK
-
Check that this works by opening a command prompt and try to ping autodiscover.yourdomain. This would be one of the successful ones from the Test Autodiscover step above. This should return a Microsoft IP address. If ping cannot connect, there is something mis-configured in DNS or a firewall is blocking the connection.
Set Up a Rolling In-Place Hold
IMPORTANT:Not all O365 licenses allow the setting of a hold, in such cases there is no way to prevent data loss.
To prevent data loss, we strongly recommend setting a rolling in-place hold so that users cannot remove items from disk before Retain has a chance to archive them.
How Message Deletion Works in Exchange
In Exchange by default, when a user deletes a message from Outlook, it is moved to the trash. When the user empties the trash, the item is moved to the mostly hidden Recoverable Items folder, where it is kept for 14 day before being removed from the disk. In the interim, the user can right-click the Trash to recover items but they can also purge the item, which immediately deletes it. With a hold in place, that item is moved to a Purged folder that is not user-accessible, and it is kept there until the hold is lifted.
Set Retain Profile/Miscellaneous to Include Recoverable Items
In Retain, set Profile/Miscellaneous to Include user's recoverable items.
Set Up a Distribution List
In the Exchange Admin Console, set up a distribution list. For example, create a list named All_Mailboxes that contains all mailboxes. Make sure to also create a policy that adds new users to this distribution list by default.
Placing the Distribution List under a 90-day Hold.
In the Exchange Management Shell:
An In-Place Hold can be set up for all mailboxes for 90 days:
New-MailboxSearch "Retain90DayHold" -ItemHoldPeriod 90 -InPlaceHoldEnabled $true -SourceMailboxes All_Mailboxes
It takes time for the hold to take effect.
Finding How Many Mailboxes Were Placed Under Hold
You can determine how many mailboxes were placed under hold with the script:
((Get-Mailbox).InPlaceHolds).Count
Set Up Users
NOTE:Retain uses PowerShell to connect to O365. PowerShell does not allow the following special characters in names or passwords: # $ ( ) * + . [ ] ? \ / ^ { } |
Create a Retain Impersonation User
In the O365 Exchange Admin Center, create a Retain Impersonation user with a mailbox, making sure to give it a license.
Give the Impersonation user the proper rights. Under Permissions, create a new Admin Role (e.g. Retain Impersonation Management), add the ApplicationImpersonation right and the Retain Impersonation user as a member.
Create a Retain Administrator User
Retain needs a user with Administrator rights to download the address book from Office 365 every day with the Office365 Address Book Synchronization Script. This can be an existing administrator account or you can create a separate one. It needs to have sufficient rights to see all the users in the address book.
Setting Up Access to Shared Mailboxes for the Impersonation User
Impersonation rights allow the Retain user to enter other mailboxes but those rights do not extend to shared mailboxes. To access a shared mailbox the Retain user needs rights to each shared mailbox that is to be archived. These rights can be granted through the Exchange Management Shell.
If the shared mailbox is owned by “John Doe” and your Retain impersonation account is "Retain", you would issue the following command in an Exchange Management Shell (EMC):
Add-MailboxPermission -Identity "John Doe" -User Retain -AccessRights FullAccess -InheritanceType All -AutoMapping $false
Address Book Synchronization
For Retain to authenticate users and access mailboxes for archiving, it needs to know what mailboxes are in Office365. There are two ways to do this, using PowerShell Scripts to download the domain address book, or populating the address book directly from Office 365 by using the Microsoft Graph API:
Synchronizing Using PowerShell Scripts
There are two scripts to do that both found under the Tools menu at the upper right of the Retain admin console.
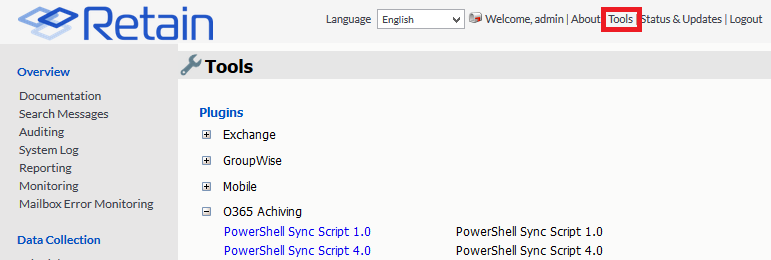
The two scripts do the same thing: download the address book from Office365.
PowerShell Sync Script 1.0 saves the username and password in plaintext in the script.
PowerShell Sync Script 4.2 encrypts the password to a separate file.
Retain cannot archive members of the distribution lists if the field: HiddenFromAddressListsEnabled is True.
If using multiple modules, you must create separate folders for the script and the resulting CSV files. The folder location that Retain should pull the CSV file data from is set in the module as detailed below. You must also create a scheduled task for each script.
PowerShell Sync Script 1.0
If the hosted system in use is an Office 365 system, further configuration on the Office 365 system is required. Because Office 365 Exchange Servers do not directly expose LDAP information, a PowerShell script must run periodically to cache user and group information.
The script requires PowerShell 2.0. Without this script, you cannot run jobs on Office365, or authenticate users. This script connects to O365 and downloads the address book and distribution group lists into two address book CSV files, exchangeuser.csv and exchangegroup.csv.
Setup Process Overview
-
Install PowerShell 2.0 or higher (not needed for Windows 7 or Windows Server 2008 R2)
-
Install the Office 365 PowerShell cmdlets
-
Allow PowerShell script execution policy
-
Adapt and execute the “sync365.ps1” script provided by Micro Focus
-
Automate the script to run regularly.
-
Place the two resulting csv files in Retain
Setup
-
Install PowerShell 2.0 or higher. (Windows 7 and Server 2008 R2 already come with PowerShell 2.0)
-
Enable Microsoft .NET Framework 3.5.1.
-
Install the Office 365 PowerShell cmdlets. Two packages are needed which can be downloaded from the Microsoft Azure Active Directory PowerShell Module Version Release History (which is currently found at: http://social.technet.microsoft.com/wiki/contents/articles/28552.microsoft-azure-active-directory-powershell-module-version-release-history.aspx#Where_can_I_find_the_latest_version_of_AAD_PowerShell) page:
Microsoft Online Services Sign-In Assistant for IT Professional RTW (this is the prerequisite to the Azure AD Module)
Azure Active Directory Module for Windows PowerShell (64-bit version)
-
You may need to change the execution policy to allow these scripts to function:
-
Allow PowerShell script execution
The Default Execution Policy is set to restricted, it can be viewed by entering this command in PowerShell:
Get-ExecutionPolicy
-
The script provided by Micro Focus must be run in PowerShell while running under Administrator rights:
Set-ExecutionPolicy RemoteSigned
-
-
Download the O365 Archiving Powershell Sync Script, found on the tools page. To access the tools page, select the 'tools' link from the top right of the Retain Server administration page.
-
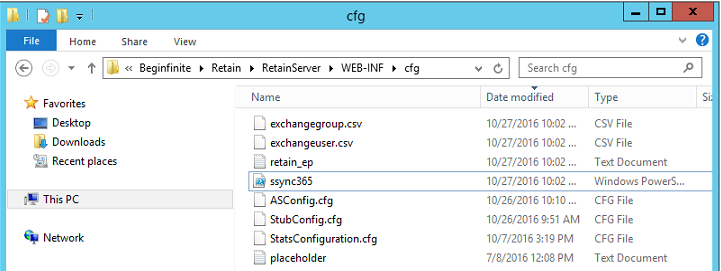
If using the script on the Retain server itself: Move the “sync365.ps1” script to the "~\Program Files\Beginifinite\Retain\RetainServer\WEB-INF\cfg" folder. Otherwise, make sure that the exchangeuser.csv and excahngegroup.csv end up in that directory on the Retain server.
-
Edit the “sync365.ps1” script with Microsoft Integrated Scripting Environment (ISE) editor.
-
At the top are 3 settings: $User, $PlainPassword, $ExportBasePath:
-
Set $User to the UPN of an administrator account in Office 365.
-
Set $PlainPassword to the plain text password of the administrator account.
-
Set $ExportBasePath to a directory where the two resulting csv files are saved. If the path does not yet exist, you must create it manually. Keep in mind that your backslashes must be quoted, and a final backslash is not needed. Example: $ExportBasePath="C:\\Program Files\\Beginifinite\\Retain\\RetainServer\\WEB-INF\\cfg"
NOTE:If it is unacceptable to set a password in clear text, please view the following solution or use the secure script below:
http://bsonposh.com/archives/338 -presents an alternative, which loads and saves encrypted credentials from file.
-
-
Execute the script by clicking the play button. This process can take a while if there are many users. Once the script has completed, a message indicating that the script is done should be displayed along the bottom status bar. The resulting files, exchangeuser.csv and exchangegroup.csv, must be placed in the "~\Program Files\Beginifinite\Retain\RetainServer\WEB-INF\\cfg" folder for Retain to access the address book.
-
-
Set Task Scheduler to run the script automatically once per day. If you create it at the Task Scheduler (Local) level, you can find it after it is created in Task Scheduler Library folder, center pane.
-
Create a New Task
-
On the General tab, give it a name; and, for the description, you may want it read something like "Retain address book synchronization script for Office365".
-
Under "Security options" section, choose: “Run whether user is logged in or not”.
-
Under the Triggers tab, click on "New..."
-
Under "Settings", set it to "Daily" and set the "Start" time: [set it to run an hour before the archive job is set to begin, but it doesn’t take that long, Exchange does maintenance between 1-5 AM]
-
Do not expire
-
Check Enabled
-
Under the Actions tab: Create a New action.
-
Set the Action to “Start a program”
-
Program/script: powershell
-
Add arguments: -NoProfile -ExecutionPolicy Bypass -file "[drive]:\Program Files\Beginfinite\Retain\RetainServer\WEB_INF\cfg\sync365.ps1" -Verb RunAs
-
Start In: (leave blank)
-
-
PowerShell Sync Script 4.2
The standard sync365.ps1 script requires entering a plaintext administrator password. If that is not acceptable by your security policy, there is the O365 Archiving PowerShell Sync Secure Storage Script: Save-CredentialsEncrypted.ps1 which allows you to securely save the password used by the admin user.
Requirements
-
The script can be found under O365 archiving under the Tools menu at the top-right of the Retain admin console.
-
This must be run on the same machine as it was created on as the encryption is dependent on the machine it was run on.
-
This script requires PowerShell 4.0 or higher or it aborts.
-
If using Windows Server 2008R2 or earlier, the script generates errors because the Task Scheduler cmdlets are not supported and the Scheduled Task must be created manually.
Running the Script
-
After downloading and extracting the script, open PowerShell and change to the directory the script is in and type .\Save-CredentialsEncrypted.ps1
1a. If you haven't run a PowerShell script before, you may have to change the Execution Policy to get a script to run. Set the execution policy to Set-ExecutionPolicy -ExecutionPolicy Bypass -Scope Process. If PowerShell 4.0 or higher is not installed the script aborts.

-
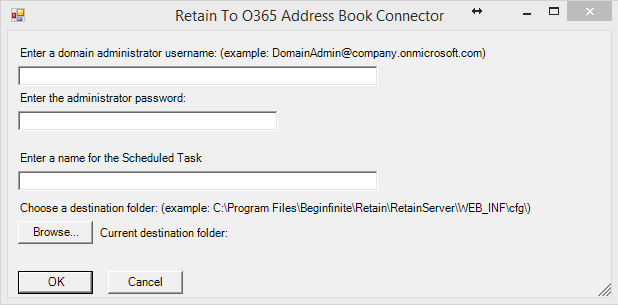
A dialog box displays, requesting the credentials for an administrator user and the destination folder of the address book files.
The administrator user must have sufficient rights to download the address book from O365. This would be the logon name and password of an administrator user (e.g. DomainAdmin@company.onmicrosoft.com).
Provide it with a name for the Scheduled task.
You can set the destination folder to anywhere you wish. However, the address book files exchangeuser.csv and exchangegroup.csv must end up in the ~\Program Files\Beginfinite\Retain\RetainServer\WEB_INF\cfg\ folder of the Retain Server. Retain looks for the address book files there when refreshing the address book.
If you are using a Linux-based Retain Server, you must set up a process to move the address book files to the Linux-based Retain Server's opt/beginfinite/retain/RetainServer/WEB-INF/cfg folder.
If you are running Retain with multiple modules, each module needs a separate task and destination folder.
-
The script then sets up a recurring task (SyncO365) in Task Scheduler to download the address book every day at 12:30am.
The script requests your logon credentials as it sets up the task. The script starts the task before exiting. If you are using Windows Server 2008, multiple errors appear because the Task Scheduler cmdlets do not exist, this is expected and the task can be created manually in Task Scheduler.
-
It takes a moment to download the address book files: exchangeuser.csv and exchangegroup.csv. For a small system (<100 users) it might take a few minutes, for a large system (>10k users) it can take more than half an hour. After the script completes, make sure that the address book files are filled with items. If this does not generate the files it may be an execution policy issue, see notes below.
Notes
-
We have found that Task Scheduler sometimes stop working, so we recommend monitoring the .CSV files so that they are updated every day.
-
Blank .CSV files: Office365 requires regular password changes. If the wrong credentials are entered or the password has expired two blank .CSV files are created. You must run this script again entering the Administrator logon name, the new password, and the destination folder. The script starts the task to update the address book files.
-
Common Errors:
-
If you see red text and the window closes immediately that means, there was an error of some kind. Open a PowerShell window, change to the script folder, and run the script manually:
.\Save-CredentialsEncrypted.ps1
-
It may be that the proper version of PowerShell is not installed. This script requires at least version 4.0. You can determine the installed PowerShell version by running the cmdlet:
$PSVersionTable.PSVersion
To change the execution policy manually, the following command in a PowerShell window allows execution for the current process:
Set-ExecutionPolicy -ExecutionPolicy Bypass -Scope Process
Then run the script from the same process window.
-
Using a Linux-based Retain Server with Office365
While there isn't a way to run Powershell scripts on a Linux server, you can run the sync365.ps1 script on any Windows computer with Powershell 2.0 or higher installed and copy the resulting CSV files to the Retain server.
Create a batch file to transfer the files
You can create a small Windows 7 VM that only runs the Powershell script and then you can copy the exchangeuser.csv and exchangegroup.csv to the Retain server.
You can use the free program WinSCP to copy from a Windows computer to a Linux server.
You can use windscp.com as the basis of a batch file to copy the resulting csv files to the Retain server.
Here is an example that we used:
retain.bat
"C:\Program Files (x86)\WinSCP\winscp.com" /command ^
 "option batch abort" ^
 "option confirm off" ^
 "open scp://[user]:[password]@[retain server address]" ^
 "cd /opt/beginfinite/retain/RetainServer/WEB-INF/cfg" ^
 "option transfer binary" ^
 "put [file location on windows]*.csv" ^
 "close" ^
 "exit"
Explanation of what each line does:
#Specify that all commands are run on the command line, while using ^ to split long lines for readability.
 "C:\Program Files (x86)\WinSCP\winscp.com" /command ^
# Automatically abort script on errors
 "option batch abort" ^
# Disable overwrite confirmations that conflict with the previous
 "option confirm off" ^
# Connect replacing your own username, password and retain server address
 "open scp://[user]:[password]@[retain server address]" ^
# Change remote directory
 "cd /opt/beginfinite/retain/RetainServer/WEB-INF/cfg" ^
# Force binary mode transfer
 "option transfer binary" ^
# Upload the file to current working directory
 "put [file location on windows]*.csv" ^
# Disconnect
 "close" ^
# Exit WinSCP
 "exit"
Automate the Script
You can now automate the running of this batch file in Task Scheduler as a simple task to run before the Retain archive job. Set the run time of the task so that it completes before the Retain job begins.
Synchronizing Using Office 365 (Microsoft Graph API)
To enable Retain for access to the Office 365 Address Book through the GraphAPI, it must first be registered on the Microsoft Azure Portal and then the information must be added to the Retain module:
-
Browse to the Microsoft Azure Portal:
https://portal.azure.com/#blade/Microsoft_AAD_RegisteredApps/applicationsListBlade -
Create a new app registration pointing it to your Retain Server url. For example:
https://retain.gwava.com/RetainServer
-
After creating the app registration, click > > > .
NOTE:Adding the following permissions requires Admin credentials, for which you are prompted the next time you log in.
-
Select the following permissions :
-
User.Read.All
-
Directory.Read.All
-
-
Click > > > .
-
Select the following permission :
-
full_access_as_app (Only needed for archiving data, not address book synchronization)
-
-
Go to and select to create a secret for Retain.
IMPORTANT:Take note of the Client secret value as it is only visible now.
-
Take note of the following information (along with the Client secret):
-
Application (client) id (found on the page)
-
Directory (tenant) id (found on the page)
-
-
Configure the Exchange module in the tab to populate the address book using Office 365.
Configure SharePoint Online/OneDrive for Archiving
In Office365 you can attach documents stored in SharePoint Online/OneDrive. However it doesn’t send the actual document but only a link to that document.
NOTE:As a cloud service these screens may change at anytime.
When Retain attempts to archive an attached document it often runs into trouble because the retain user, while it does have ApplicationImpersonation right, doesn’t have rights to anything outside of Exchange. So Retain generates an error because it knows there is supposed to be something there.
11:04:16, 704[Thread-4920] [ERROR] ExchangeAttachment: error while creating attachment. java.io.IOException: SharePointError - Impersonation has no access to: https://gwava-my.sharepoint.com/personal/user08_gwava_onmicrosoft_com1/Documents/Email attachments/office 365 users(1) (1).txt
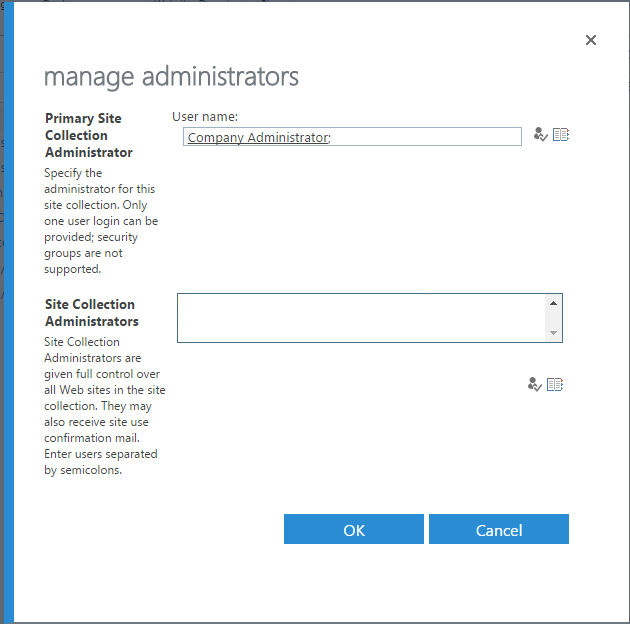
What needs to be done is the retain user needs be added as a “site collection administrator” in SharePoint/OneDrive. Start by going to the Office365 admin page and selecting SharePoint.

Go to the Site Collections, select the collection to add the retain user too, click the “Owners” tab.
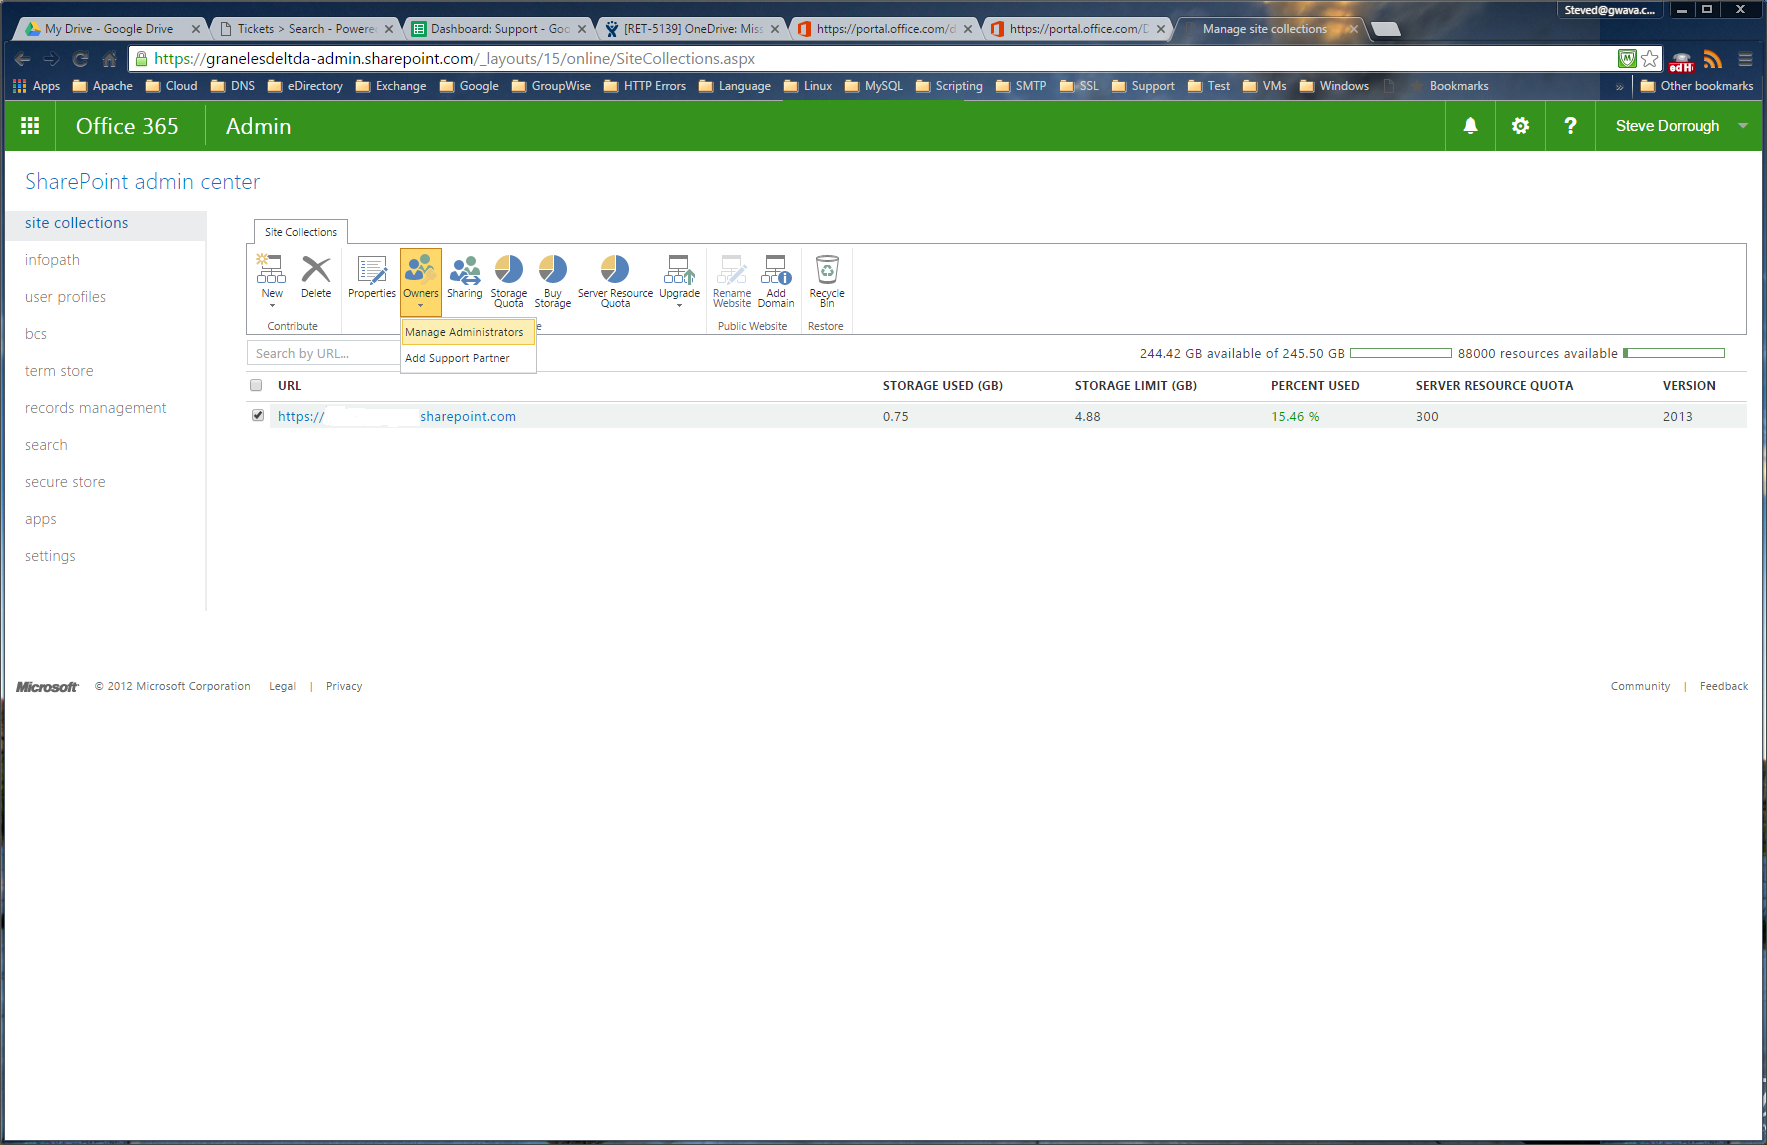
You can now add the retain user as a “Site collection administrator”. This way the retain user has rights to access the data.
This works for individual site collections, but it would be difficult to do that individually if you have many site collections. There is no way in SharePoint to change more than one collection at a time.
Changing Across The Domain However, there is a SharePoint Online Management Shell script that you could modify for your use to do all site collections at once.
6.3.2 Configure the Exchange Module for Office365
The Exchange module must be configured in the Retain Server before any communication between Retain and an existing Exchange message system can occur. Open the Retain management page on the Retain Server, and select Module Configuration.
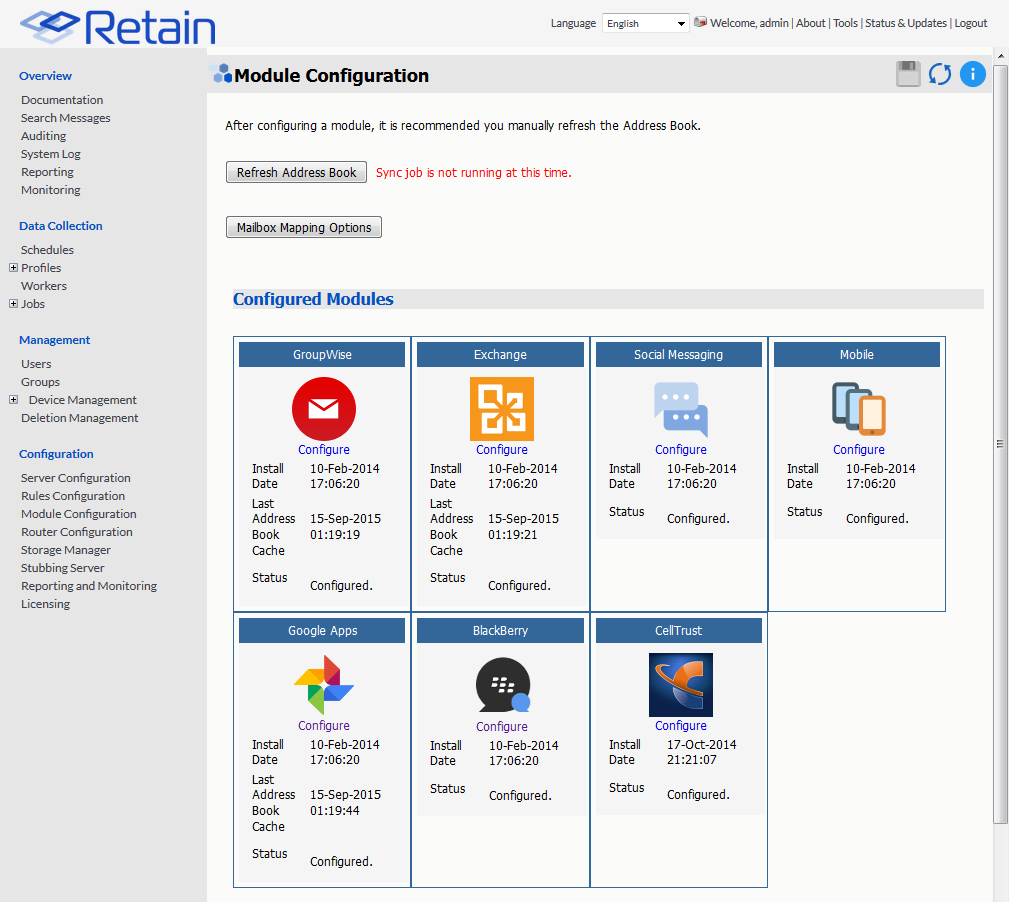
Select the ‘Configure’ option in the Exchange module. A new window or tab opens with the module configuration.
NOTE:Ensure that your Retain Server and your Exchange server use the same DNS server.
The Exchange module uses DNS settings to auto discover critical information about Exchange that is stored in Active Directory. It cannot work correctly unless both systems use the same DNS server.
6.3.3 Core Settings Tab
The Core Setting Tab allows you to disable all jobs and disable users logging into Retain.
The module needs to be enabled on this page to make it active in the Retain system.
The module can be given a name.
The Send Method option enables either the SMTP Forwarding or FTP features. For either feature to appear and function, the Module Forwarding tab must be configured on the Server Configuration page. See that section for more information.

Normally all the checkbox options on this tab are enabled. It is rare that you would ever deselect any of them. Two cases where you might, would be: troubleshooting (as instructed by Technical Support), and retiring an old email system.
The Enable Address Book Caching function allows Retain to regularly cache the online email systems address book and synchronize it with Retain. This is critical for administration, authentication, and archiving purposes. It is recommended to cache the Address Book once every 24 hours to keep the Retain storage system up to date. By default, maintenance is set to cache the Address Book once every 24 hours.
The Enable Authentication checkbox determines if end-user authentication is performed when the user logs into Retain. If it is deselected, the Retain system cannot authenticate the user against the email system and the user cannot log in unless another authentication method is enabled.
The Enable Jobs checkbox determines if configured data retrieval jobs are ever passed to the Worker. Even if the individual job is fully configured and enabled, if this checkbox is switched off, no jobs configured for this module can be processed.
The Message body allows the administrator to decide whether to store either the HTML or plain text message body, or both.
Send Method
The Send Method option enables either the SMTP Forwarding or FTP features. For either feature to appear and function, the Module Forwarding tab must be configured on the Server Configuration page. See that section for more information.
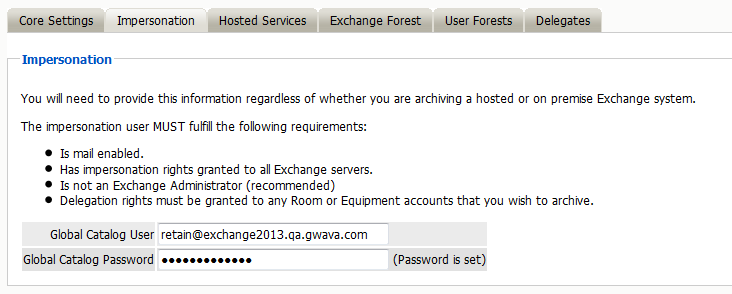
6.3.4 Impersonation Tab
If the Impersonation and Core Settings tabs are not completely configured with the correct information, the hosted system cannot be archived correctly.
Enter the Impersonation user credentials.
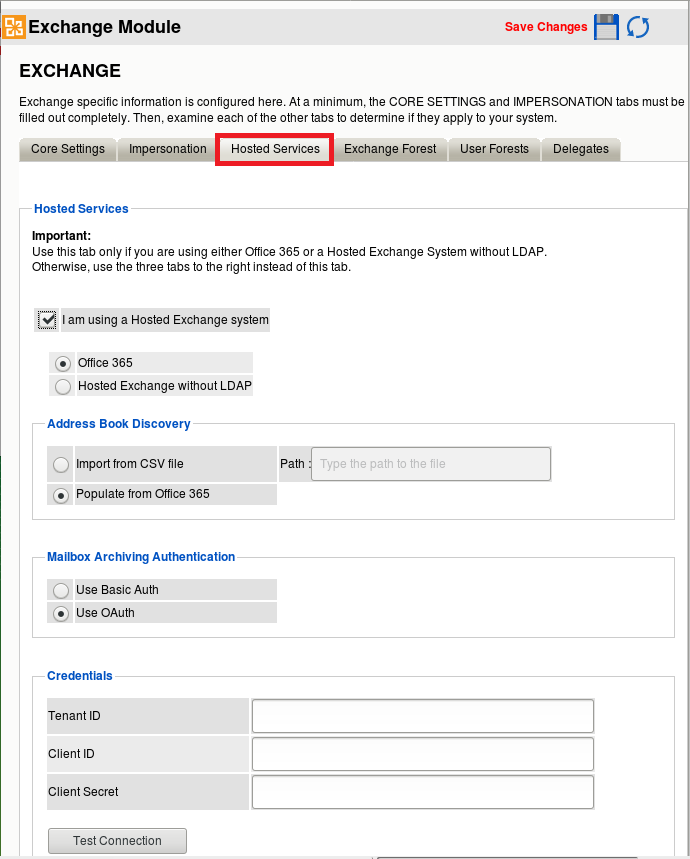
6.3.5 Hosted Services Tab
Path: Retain Server Manager > > >
Table 6-1 Using the Hosted Services Tab
|
Panels and Sub-panels |
Information and/or Action |
|---|---|
|
Hosted Services |
|
|
Address Book Discovery |
|
|
Mailbox Archive Authentication |
|
|
Credentials |
Hosted Services Panel
Path: Retain Server Manager > > > >
Table 6-2 Using the Hosted Services Panel
|
Option, Field, or Sub-panel |
Information and/or Action |
|---|---|
|
option |
Enable this option if you use hosted Exchange services. If you select this option, Retain ignores the Exchange Forest, User Forests, and Delegates tabs. IMPORTANT:Once you select this option and save the module, you cannot switch to the Office 365 option (below). You must create a new module instead. |
|
option |
Select this if you use Office 365. When you select this option, the Hosted Services tab panel expands to let you specify settings for address-book discovery, mailbox archiving authentication methods, and the credentials required for connecting with Office 365. IMPORTANT:Once you select this option and save the module, you cannot switch to the Hosted Exchange system option (above). You must create a new module instead. |
|
option |
Select this if you use a hosted Exchange service that doesn’t utilize LDAP directory services. Selecting this requires that you import your address book from a PowerShell-generated CSV file. See Synchronizing Using PowerShell Scripts. |
Address Book Discovery Sub-panel
Path: Retain Server Manager > > > > >
Table 6-3 Using the Address Book Discovery Sub-panel
|
Option, Field, or Sub-panel |
Information and/or Action |
|---|---|
|
option
|
Specify the path to where the PowerShell Sync script saves the CSV user lists. For example: C:\Program Files\Beginfinite\Retain\RetainServer\WEB-INF\cfg. This requires the procedures described in Synchronizing Using PowerShell Scripts. |
|
option |
Select this option to populate your archived address book directly from Office 365. This requires the procedures described in Synchronizing Using Office 365 (Microsoft Graph API). |
Mailbox Archiving Authentication Sub-panel
Path: Retain Server Manager > > > > >
Table 6-4 Using the Mailbox Archiving Authentication Sub-panel
|
Option, Field, or Sub-panel |
Information and/or Action |
|---|---|
|
option |
Select this option to use Basic Authentication for retrieving data from your Office 365 system. |
|
option |
Use this option if you want a more secure option for your mailbox archiving. |
Credentials Sub-panel
Path: Retain Server Manager > > > > >
Table 6-5 Using the Credentials Sub-panel
|
Option, Field, or Sub-panel |
Information and/or Action |
|---|---|
|
field |
This information is exposed when you complete the procedures described in Synchronizing Using Office 365 (Microsoft Graph API). |
|
field |
This information is exposed when you complete the procedures described in Synchronizing Using Office 365 (Microsoft Graph API). |
|
field |
This information is exposed when you complete the procedures described in Synchronizing Using Office 365 (Microsoft Graph API). |
|
button |
Click this to verify that the credentials you have entered are valid with your Office 365 system. |
6.3.6 Refresh Address Book
After saving changes, return to the Retain Server's Module Configuration page, and trigger a refresh of the Address Book.
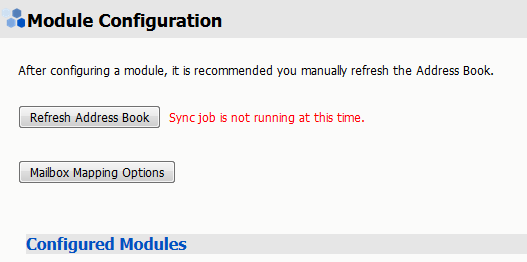
Depending on the size of the address book, it may take several minutes to return with information, but a successful configuration returns a correct address book cache date and no errors. The date should reflect the date when the address book refresh was triggered.
The Status may show “Address Book Cache Never Run” or may list commonly mis-configured or missed items if the Refresh job fails.
Once the status is configured and the Address Book has been cached, Retain can connect to and archive messages from the Exchange server. The system is ready to have workers, schedules, profiles, and jobs configured, and those options now appear on the main administrative interface.
The Address Book is refreshed whenever the button is pressed, during the nightly maintenance cycle, and before each job.