3.1 Users
User and Rights Management in Retain include:
-
Creating, deleting, and editing users
-
Allowing new user accounts, and restricting specific ones from being created
-
User expiration
-
Assigning users to groups, to conveniently grant rights or set initial settings on a multiple user basis
-
Granting access to mailboxes other than the user's personal mailbox
-
Changing the specific functions the user can perform
To access User and Groups Management, the user logging in needs the Manage users and groups or the Assign Rights administrative right.
3.1.3 Creating a new user
-
Begin by clicking on the “Add User” button
-
Enter a new user name and then fill out the options under each tab.
-
When you are done, click the save changes disk icon at the upper right
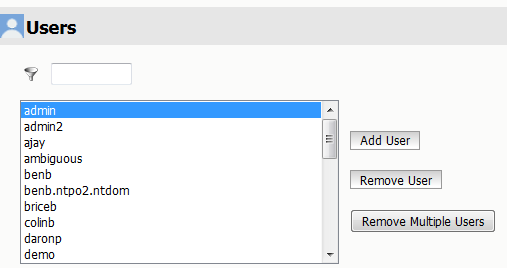
All previously created users are listed and can be edited or removed, by clicking on the user and editing the values, or through clicking on the Remove User button.
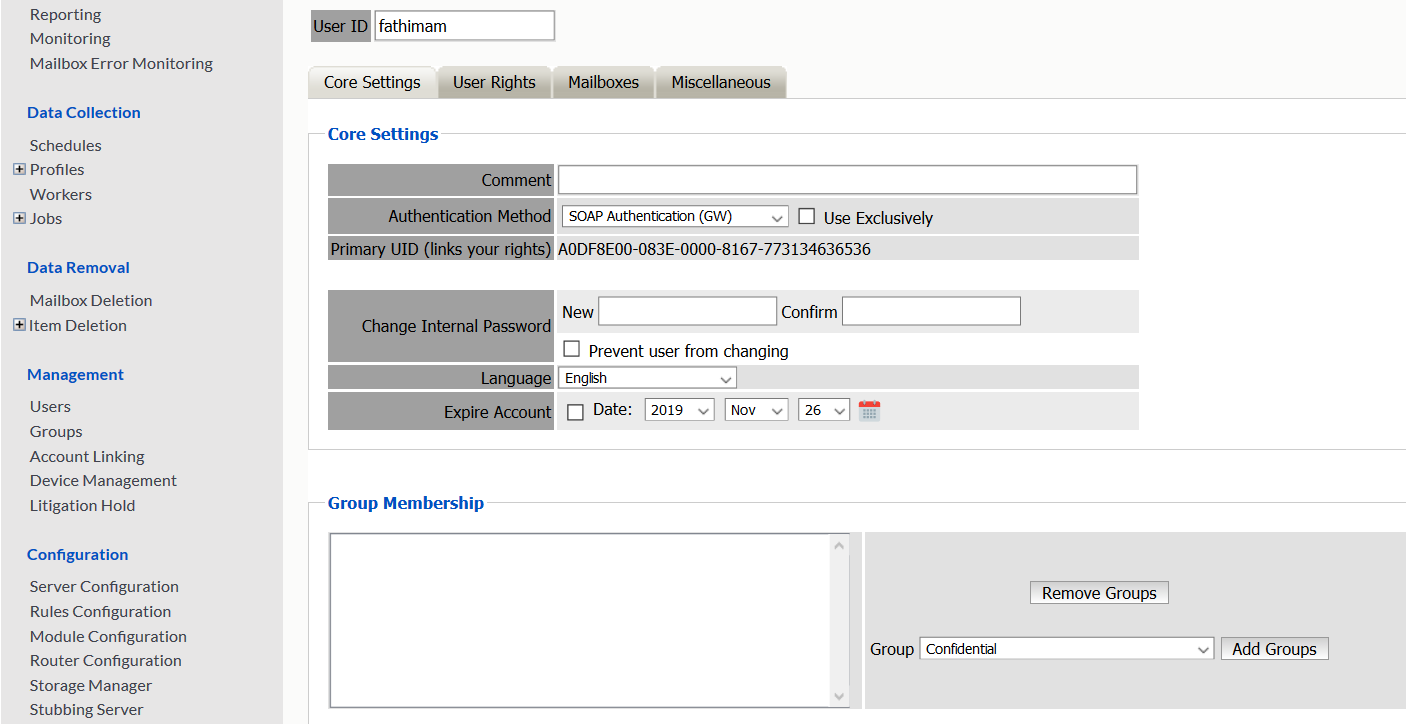
3.1.4 Core Settings Tab
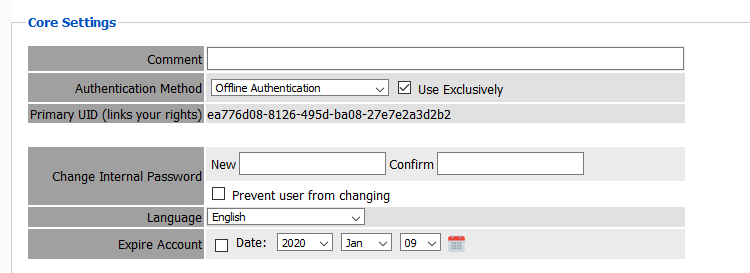
Authentication Method
-
Offline Authentication: Credentials stored within Retain, any type of user
-
LDAP Authentication (GW): Must be set up in the GroupWise module > LDAP Tab.
-
SOAP Authentication (GW): Users are automatically entered into Retain's user list
-
Exchange Authentication: Users are automatically entered into Retain's user list
-
Google IMAP: Google users are authenticated through IMAP to the Google system
-
Use Exclusively: Allows the user to only use one type of authentication. If this setting is not checked, it will try one authentication and if that is unsuccessful, it will try another
Primary UID
-
Offline only accounts usually won't have this.
-
The initial admin account is set to use offline exclusively, so it doesn’t have this.
Group Membership
-
Default is .
-
Create groups under and they appear as choices here.
-
Beginning with Retain 4.9, users can be assigned to multiple groups.
If you choose to assign users to multiple groups, make sure you understand how Retain derives certain attributes, such as language, authentication method, and so on, as explained in When Users Belong to Multiple Groups.
When Users Belong to Multiple Groups
Users inherit the rights assigned to each group they belong to, in addition to their explicitly assigned rights.
Furthermore, in addition to their primary mailbox, users have access to all mailboxes available to the groups that they belong to.
Several attributes that affect users can be assigned at either the user or the group level:
-
Language
-
Authentication Method
-
Forward Messages
-
Data/Time Format
-
Display Number
-
Message Age Display
-
Message HTML view
-
Session Timeout
How Retain Assigns Attribute Values
-
If a value is assigned at the user level to any of the attributes listed above, Retain applies the value, regardless of any group settings.
-
If a value is not assigned at the user level but it is assigned to the first group to which a user was assigned, chronologically, then that value is applied to the user.
Retain doesn’t check for assigned values beyond the first group to which a user was assigned chronologically.
-
Attribute values are dynamically applied and immediately honored by Retain.
Examples
To further illustrate:
-
Bob was assigned to Group-A, then to Group-B, and finally to Group-C.
Bob’s user account has no value assigned to the Language attribute, but Group-A’s Language attribute value is English.
Therefore, Retain uses English as Bob’s Language attribute.
-
The Retain administrator removes Bob from Group-A.
Group-B is now the first group to which Bob was assigned.
Group-B’s Language attribute is German.
Retain now uses German as Bob’s Language attribute.
-
The Retain administrator assigns French as the Language attribute in Bob’s user account.
Retain now uses French as Bob’s Language attribute because user-level rights take precedence over group-level rights.
Change Internal Password (Offline Authentication)
-
If you use this authentication method, store the password here.
-
It can be changed as needed.
-
You can prevent users from changing it.
-
Passwords are always stored in an encrypted format - never in clear text.
Language
-
Choose which language will be used in the Search Interface for this user.
Expire Account
-
This allows the admin to pick a date when the account will no longer be allowed to log in. The account is not deleted.
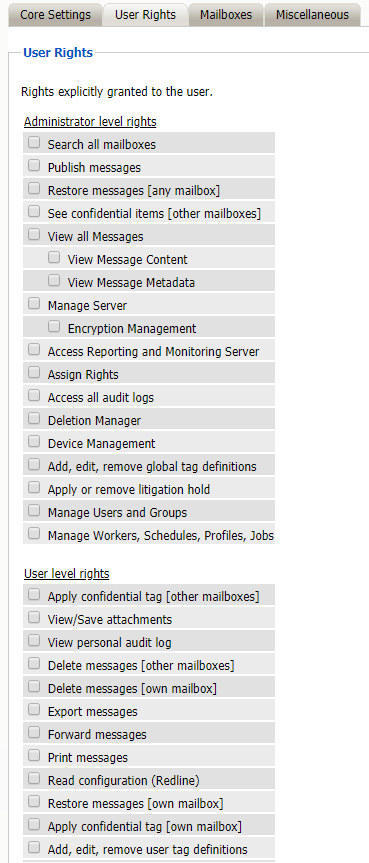
3.1.5 User Rights Tab
When an administrator-level right is granted to a user, that user will see that right in the management console when they log into Retain. If a right that the full Administrator can view is missing from the menu of that user, they are missing that right. To view and have access to that option, they must have the missing right granted to that user. If you have performed an upgrade and are missing options, check for a missing administrator right.
-
Control what rights you grant to the user here. Check the box to enable the right
-
These are extra rights
-
You don't need any of them for the user to access their mailboxes
-
You do need them to do “special things”. The first admin account gets them all
-
-
Retain first checks your assigned group and you start with the Group Rights
-
The rights you explicitly set here are added to the group rights for the user’s effective rights
-
This way, you can control users as a group and give different rights to different groups
-
If you don’t have rights to an administrative option, it won’t appear on the left
It should be clear from this screen that there is no such thing as an Administrator per se in Retain. Instead, some users simply have more rights to do more things than others. A distinction is made between Administrator level rights (which allow a user global system wide power) and User level rights, but any user can have zero or more rights in either category. The Administrator you created in the setup wizard was simply a user account with all of the Administrator level rights granted by default.
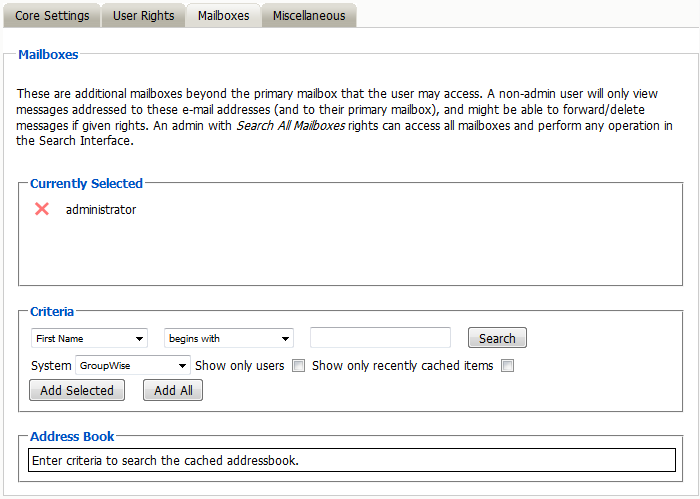
3.1.8 Mailboxes Tab
Select the mailboxes this user will be able to access in addition to their own. This allows one user to access another user’s mailbox.
Granting Rights to All Mailboxes
You may want some users to be able to search through more than just their own mailbox. Administrators have the “Search All Mailboxes” under User Rights as a right which gives them access to everything. If that is too much access for that user you can grant rights to individual mailboxes.
Granting Rights to Individual Mailboxes
You may grant rights to some users so they can access just certain mailboxes. For example we can give the facilities manager rights to two of his workers.
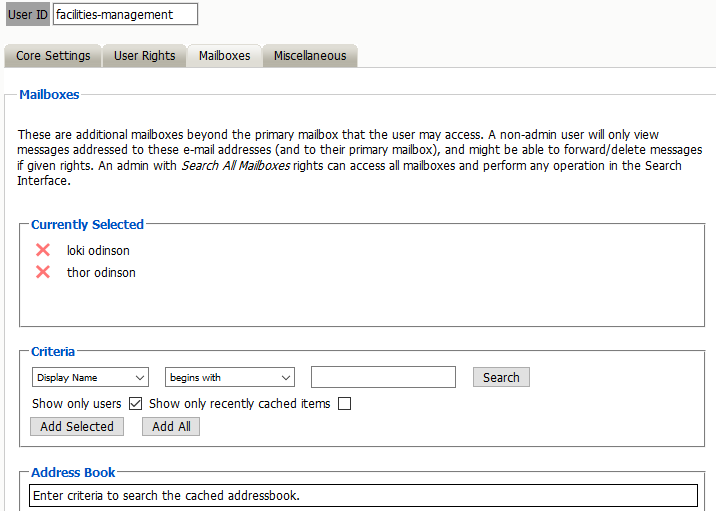
In the example above, the user has explicit rights to two mailboxes. These mailboxes can be taken away from the user simply by clicking on the red ‘X’.
3.1.9 Address Book Selector
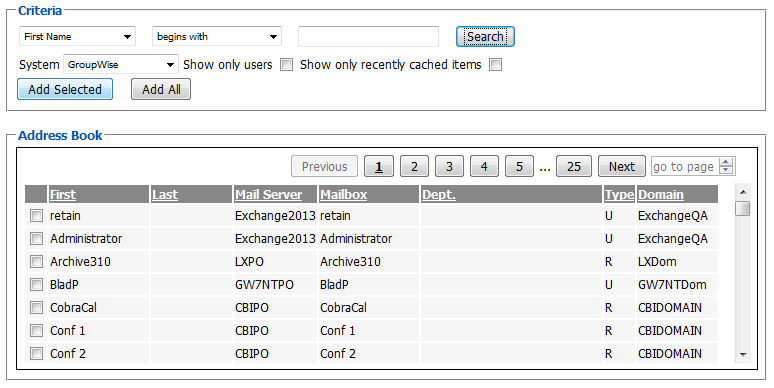
Adding users to the list is done using the Address Book selector. In the criteria section, you may enter information to search for a mailbox or a set of mailboxes. The search results will appear in the Address Book section. Each listed entry has a check box you can use to select that mailbox for addition to the list. Once you are done selecting, click Add Selected Items to add those mailboxes to your list of searchable mailboxes.
This interface is utilized in various other areas, but is described here.
It shows the currently selected items at the top, and lets you delete an item by clicking the red X.
(The New Mailbox selector in the Search Interface is an exception; just choose another item)
Adding Mailboxes
-
Choose between the configured module systems
-
Fill out basic criteria to narrow your search results (or no criteria for the first 100)
-
Click Search
-
The results up to a maximum of 100 are displayed
-
The user can then page back and forth among the first 5 pages of results
-
Choose which of the results you want to add to the selected list
-
Click Add Selected Items
Notes: You can restrict to just Users (skipping Resources). You can show only recently cached items (last 10 days). The search is not case sensitive.
About “Show only recently cached items”
This option restricts the list of items shown in the selector to those with items stored within the last 10 days. In user/group management, it restricts the list to users who have logged in to the live Mail system within the last 10 days. The idea is to show only current items. If you DO want to see all items regardless of whether they’ve shown activity within the last 10 days, just uncheck this option.
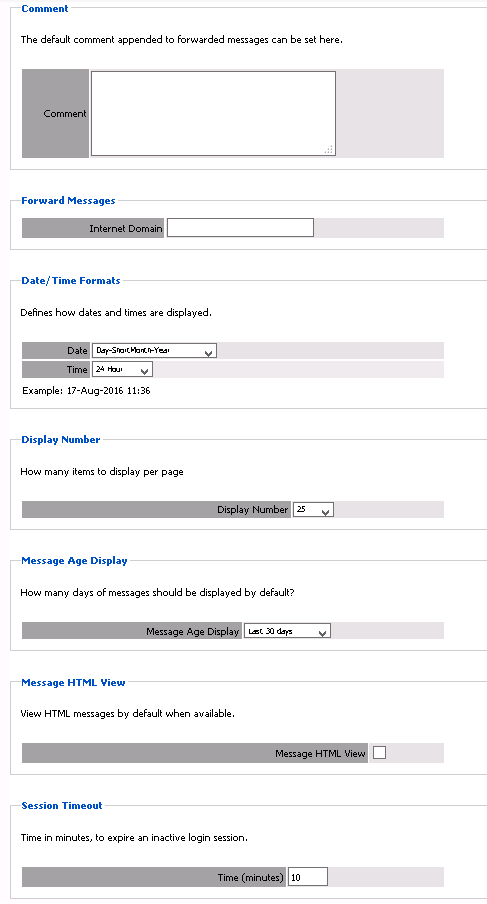
3.1.10 Miscellaneous Tab
This tab contains settings that mainly govern the way the Search Interface works for the selected user.
Note that the user can change any of these settings by using the User Options tab in the Search interface.
-
Comment: Default comment for forwarding messages
-
Date/Time Format: How you want your dates and times to be displayed
-
Display Number: How many items to display per page
-
Forward Messages: Automatically append the specified address to forwarded messages
-
Message Age Display: Default date filter for searching. May be changed on the fly
-
Message HTML View: Have Retain display HTML messages by default, when available
-
Session Timeout: Inactive session timeout. Can be between 10 and 480 minutes