KBA Requests for Approval
To guarantee the validity of content within the Knowledge Base (KB),
Organizations can enable the KB control setting within the Administrator
portal.
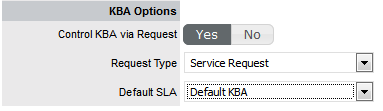
When the Control KBA via Request option is enabled in the Setup>Privileges>Request
tab, KB content with a Pending Publication status automatically generates
a Request that requires approval by Users with publishing privileges,
before the content is accessible in the Knowledge Base.
When the User has completed the content and the Article is ready for
publication, it is moved to the Article Status of Pending Publication,
which results in the generation of a Request. When the KBA is moved
to the Pending Publication state, the content of the Article can no longer
be edited.
Published KBA content that is edited, also results in generating a Request
for approval but the Article retains its published state and displays
the pre-edited content. Upon approval of the new content, the Article
is updated.
Setup KBA Approval Process
Requests generated as part of the KB content control process are managed
like all other Requests in the system. This means, when a change is made
to KB content, be it all new or edited material, a Request is created
that must have an SLA assigned to it, to ensure a Workflow and Team manage
the process efficiently.
Steps to set-up KBA Approval Process
The following steps are to be completed to implement the KBA Approval
process:
Supervisor User: Define the SLA to manage
the process
See: SLAs.
Administrator User: Enable the "Control
KBA by Request" option
Refer below.
Supervisor User: Define a KBA Workflow
Refer below.
Supervisor: Create KBA Approval Team and
assign Workflow States.
See: Creating Request
Teams
Enable KBA Control
To enable the approval process, as an Administrator:
Go to Setup> Privileges
>Requests tab
Select Yes to enable
the option
Define the Request Type
The Request Type defined here determines the type of Request that is
generated when new content is added to the Knowledge Base. The options
displayed are based on the licenses owned. That is, if Change Management
and Request Fulfillment licenses are used in the system, both options
will be displayed.
Set the Default SLA
As Requests are managed based on the SLA assigned to them, setting
the default SLA for the KB content control process determines the
Team and Workflow options for the Requests created as a result of
the KB change.
Select Save.
When
this option is enabled, the On Hold - KBA Rework is activated for
KBA Approval Workflows. This State is not visible within the Workflow
as it used by the system when the Revise button is selected within
a KBA Approval State. It can be re-named within the Workflow State
list, but cannot be customized.
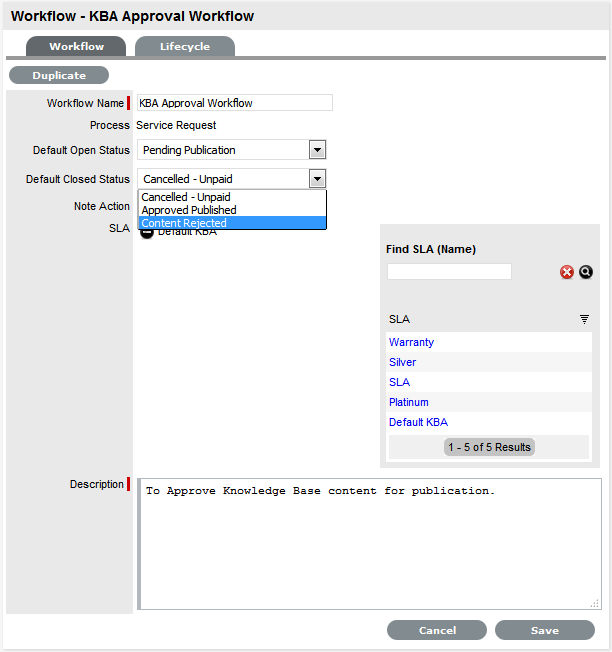
Build the KBA Approval Workflow
The Workflow built to manage the approval process should use the Process
that is defined as the Request Type in the Administrator Setting for this
process. (The example outlined below uses the Service Request Workflow.)
To create the Workflow, as a Supervisor:
Select Service >
Workflows
Click New
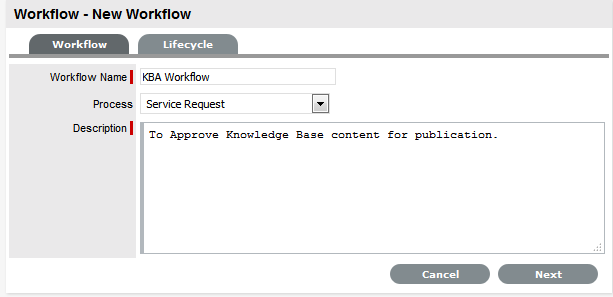
Enter the Workflow Name,
define the Process and enter the Description
Search and select the
KBA Approval SLA
The Default Open Status and Default Closed Status are to be defined
after the Lifecycle is built.
Click Save
Move to the Lifecycle
tab
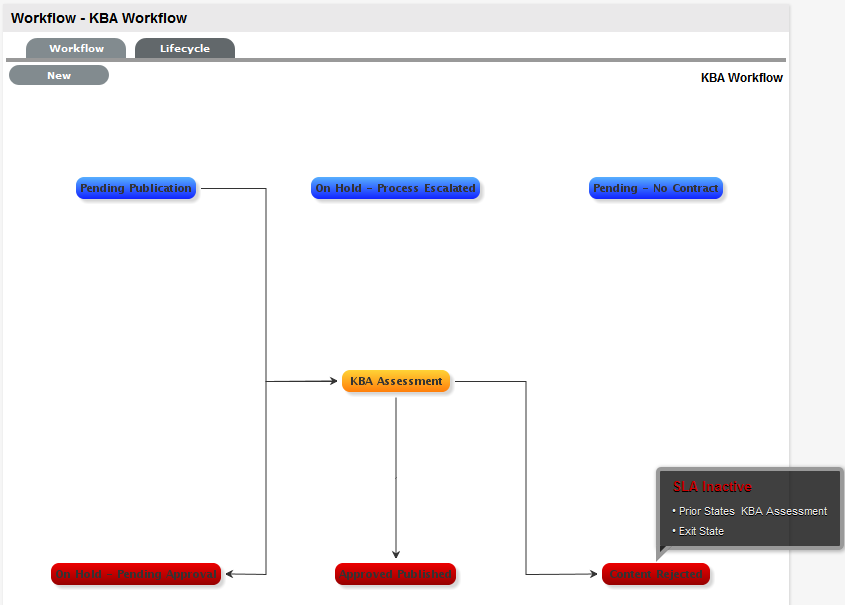
Within this tab the Lifecycle of Pending Publication>KBA Approval>Approved
Published/Content Rejected is to be built. Firstly the Pending State
will be renamed to Pending Publication, the KBA Approval State will
be created, Closed Resolved will be re-named to Approved Published
and Cancelled will be renamed to Content Rejected.
Default
Entry States can be removed from the Lifecycle by opening the State
and defining them as neither an Entry Point nor an Exit Point and
not mapping Previous or Next States
Click the Pending State
This is an Active State defined as the Workflow Entry Point.
Set the Name to Pending
Publication
If SLA targets are to be monitored and triggers fired when the Request
is assigned this Status, set the SLA Active option to Yes. The Next
State will be allocated when it is created.
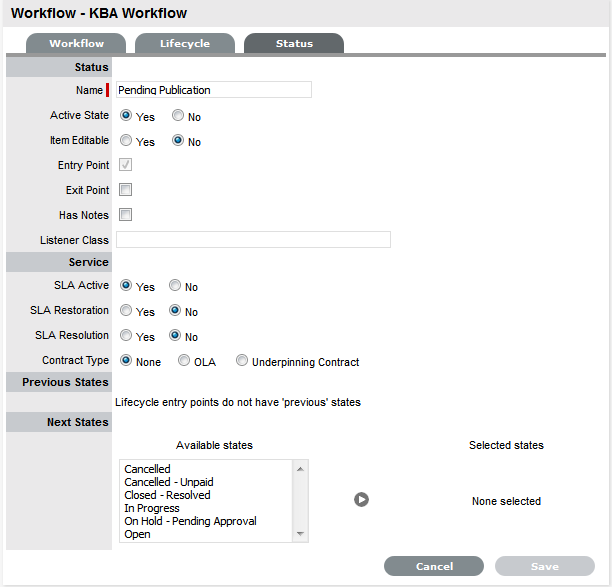
Click Save
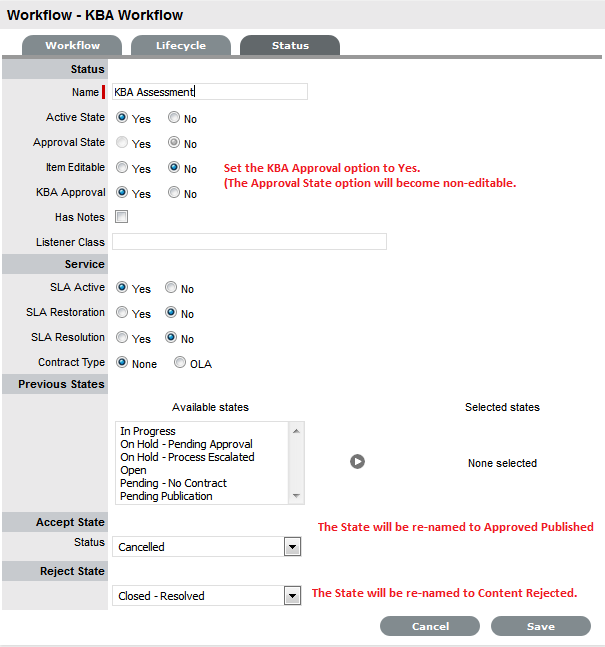
Select New, to create
the Approval State
For this example, the State will be labeled KBA Assessment and the
KBA Approval option is set to Yes. This will remove the Next State
option and replace it with the Accept State and Reject State drop-down
list. For this example, set Pending Publication as the Previous State,
Cancelled as the Accept State and Closed-Resolved as the Reject State.
When a Request moves into the Pending Publication State three buttons
will be displayed in the Request Summary tab Next Action Field:
Status |
Description |

|
When
selected the new content is approved for publication and the
Request is moved to the Accept State. (For this example it
will be Approved Published.)
An alert is sent to the KBA author informing them of the successful
publication. |

|
When
selected, the Request Summary screen displays the Notes field
to allow the User to add comments and the Request is moved
to the On Hold - KBA Rework state. The KBA is returned to
the In Development State.
The KBA author is sent an Alert, notifying
them that the KBA requires revision. When the edits have been
made and the KBA is returned to the "Pending Publication"
Status, the Request is re-activated and set to the Approval
State. |

|
This
option is to be selected when it is decided that the
KBA Content is not suitable for the KB.
The Request moves to the configured Reject State and a Notes
field is displayed allowing the User to record the reason
for the decision. The KBA returns to the In Development State,
which allows the author to delete the KBA, if desired. The
KBA author is sent an Alert, notifying them that the content
has been rejected. |
Only one Approval State can be set
per KBA Approval Workflow
Click Save
The Status window editor screen will close.
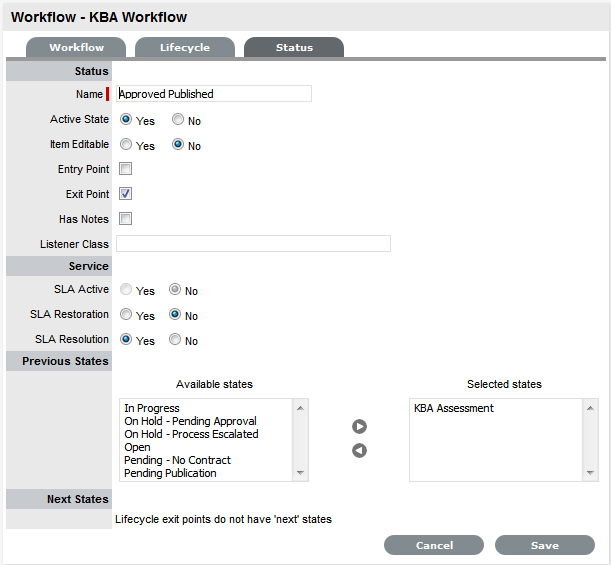
Click the Cancelled
link
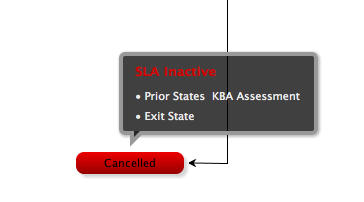
Re-name it to Approved
Published
This creates an Exit Point for when content is Accepted/Published and
will be the Exit Sate for when content is accepted for publication
in the Knowledge Base. For this example the default settings for this
State will be the Active State set to No, the SLA Resolution option
set to Yes, and the KBA Assessment State mapped as the Previous
State.
Click Save
Click on the Closed
- Resolved link to rename it Content Rejected
By default the settings on this State will be, the Active State and
SLA Active options set to No and KBA Assessment mapped as the Previous
State.
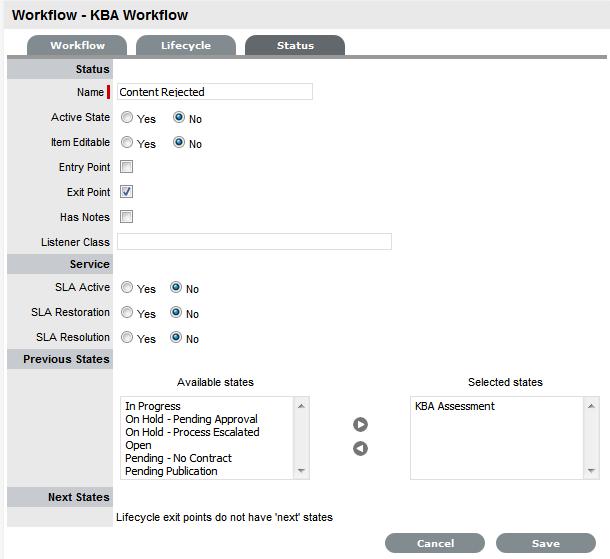
Click Save
The On-Hold - KBA Rework State
is not visible in the customized Workflow, but will be automatically
used by the system, when the Revise option is selected within the
KBA Approval Request
Select the Workflow
tab
Click Edit
The Default Open Status will be set to Pending Publication and the
Default Closed Status set to Content Rejected.
Refine the Default Closed
Status, if desired
If another State is required as a Default Closed State, return to the
Lifecycle tab, select New to create a new Default Closed State. Refine
the settings to be Active - No, Exit Point - Yes and click Save. Then
return to the Workflow tab to set the option in the Default Closed
Status field.
Click Save
Click Done.
Create the KBA Approval Team
When the KBA Approval Workflow has been successfully saved, the Supervisor
must create or assign the Change or Service Request Team that is to manage
the approval process and allocate the relevant Users to each stage of
the Workflow.
Go to User > Teams
Click New
Enter the Team Name
Define the Process of
Service Request or Change
For this example the Service Request Process is applied.
Modify the Team options,
as required
See: Creating Service
or Change Request Teams.
Assign Technicians,
and Managers if required
Click Next
The screen defaults to the Service screen
Move the KBA Approval
Workflow to the Selected Workflows field
The KBA Approval Workflow is automatically set at the Default Workflow.
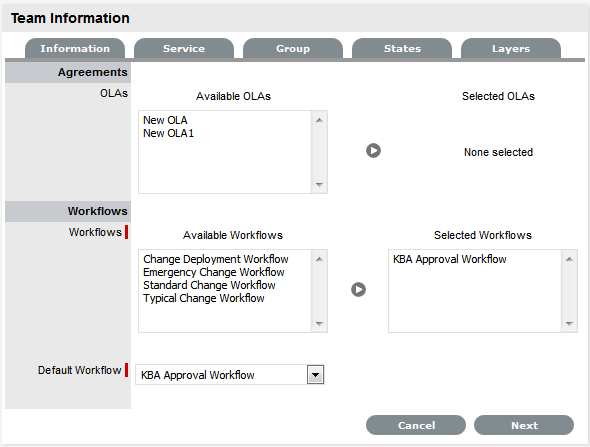
Click Next
The system defaults to the Group tab.
Select the Default Group
link
Rename and assign Users, as required. Create additional Technician
Groups, if required.
Click Save
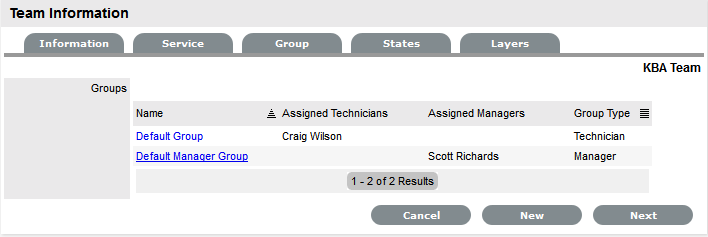
Select the Default Manager
Group link, if relevant
Rename and assign Managers, as required.
Click Save
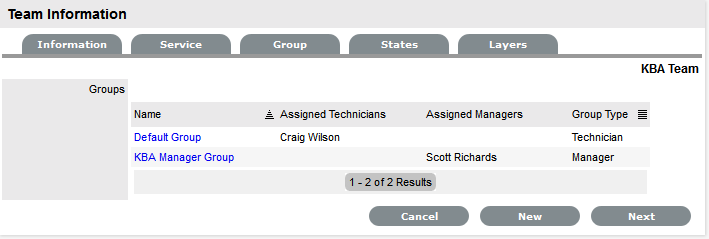
Click Next
The screen defaults to the States tab.
Assign the relevant
Work Groups to the Workflow States
Select the State Name link,
Click Next
The screen defaults to the Layers tab. Refine if necessary.
Click Done.