10.12 Performing a Folder to Folder Migration
A folder to folder migration has flexible target specification options that are not available in the other migration options. When you perform a folder to folder migration, you can either specify an existing target folder or create a target folder in the Data Migration Wizard. You can also decide whether to migrate all of the files at once, or skip some files and migrate them later.
The preferred time for performing a folder to folder migration is when all files located in the folders to be migrated are closed, such as during the weekend. However, if you have large data sets to migrate, some folder to folder migrations might need to be started during the week, when some of the files intended for migration are open. In cases such as these, we recommend a two-phased folder to folder migration:
Migrating Unopened Files: While users are still logged in, you migrate all of the unopened files in the source location. This will be the vast majority of your network files. Because the option is selected, open files are not migrated, but the filenames and paths of all of the open files are logged in a text file.
NOTE:If you perform a Cross-Empire Data Migration when all users are logged off, you do not need to migrate skipped files.
Migrating Skipped, New, and Modified Files: After having all users log off or all previously open files have been closed, migrate the skipped files, migrate the new and modified files, then compare the files on the source and target servers to verify that everything migrated correctly.
10.12.2 Migrating to an Existing Target Folder
Migrating Unopened Files
-
Make sure you have completed the prerequisites and have created a migration proxy account.
For more information on the prerequisites, see Section 10.3, Prerequisites. For more information on creating a migration proxy account, see Section 10.4, Creating the Migration Proxy Account.
-
(Conditional) If you want to migrate closed files now and skip some files to migrate later:
-
From the Utilities\CEDM folder on the Storage Manager ISO image, copy the CEDMScanCompare.exe utility to either the Windows target server or to a Windows server where you are going to administer the migration.
-
On each NetWare or Open Enterprise Server from which you are going to migrate data, create a new subdirectory and name it Open.
-
-
In SMAdmin, click the tab.
-
Select > .
-
Select > .
-
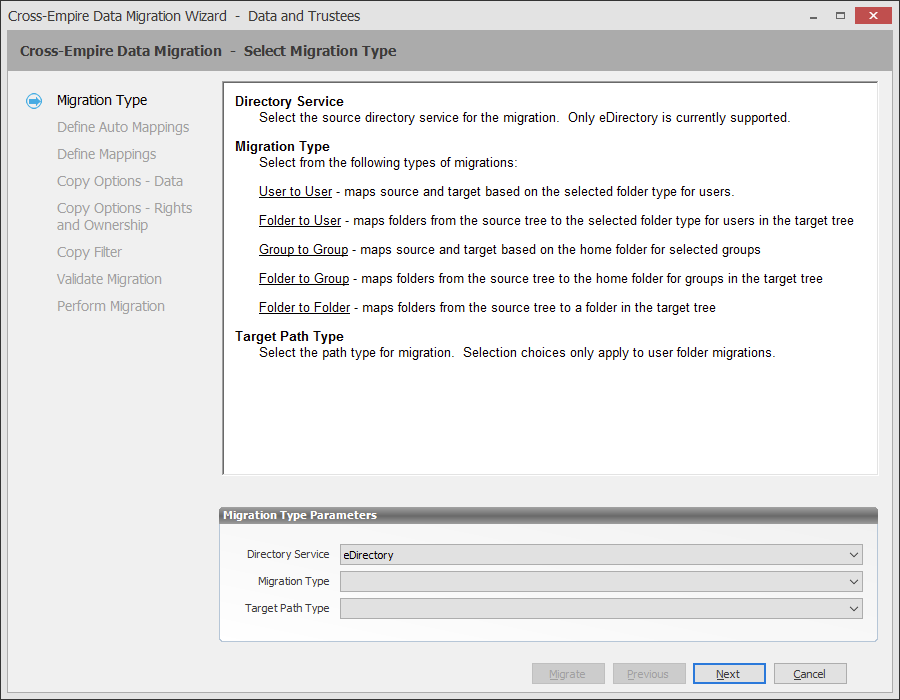
From the drop-down menu, select
-
Click .
-
Fill in the following fields:
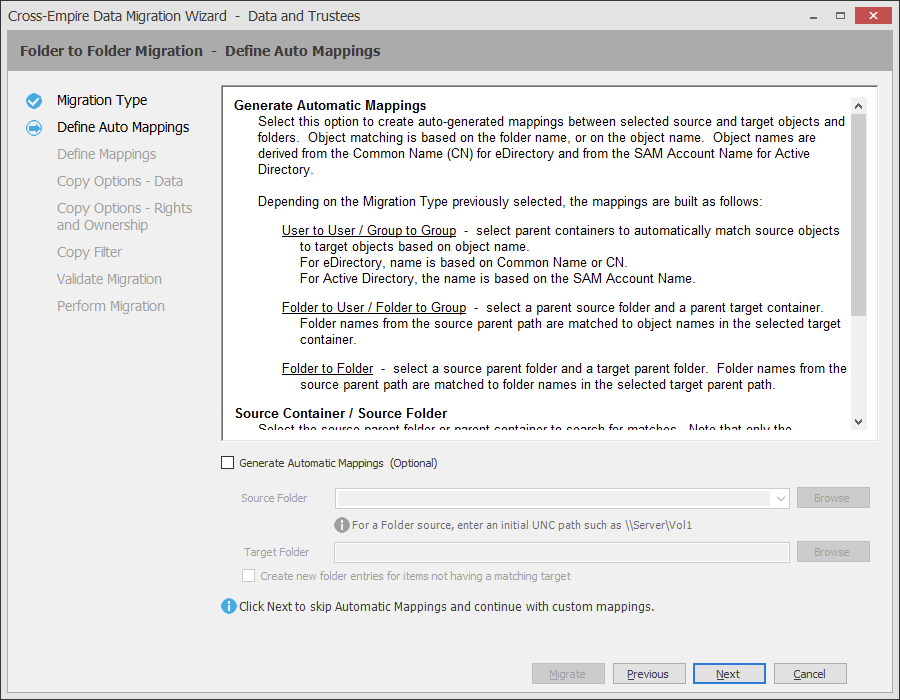
Generate Automatic Mappings: Select this check box to activate the other fields.
Source Folder: Specify an initial UNC path for a server and volume to browse.
For example, \\server_name\volume_name\ or \\ip_address\volume_name.
After a path is entered, you can click the button to browse to the folder you want.
Target Folder: Browse to select the target folder.
Create new folder entries for items not having a matching target: Selecting this check box indicates that you want Storage Manager to display both matching and non-matching source and target folders.
Selecting this check box also indicates that you want Storage Manager to create and populate any subfolders that do not exist in the target folder.
For example, assume that the source path at \\10.10.10.233\Vol2\Projects is being migrated to \\Corpserver\Projects and the Projects directory on the source server has a Stategov subfolder. If there is no Stategov subfolder in the target folder, a Stategov subdirectory is created to include the directory contents.
-
Click .
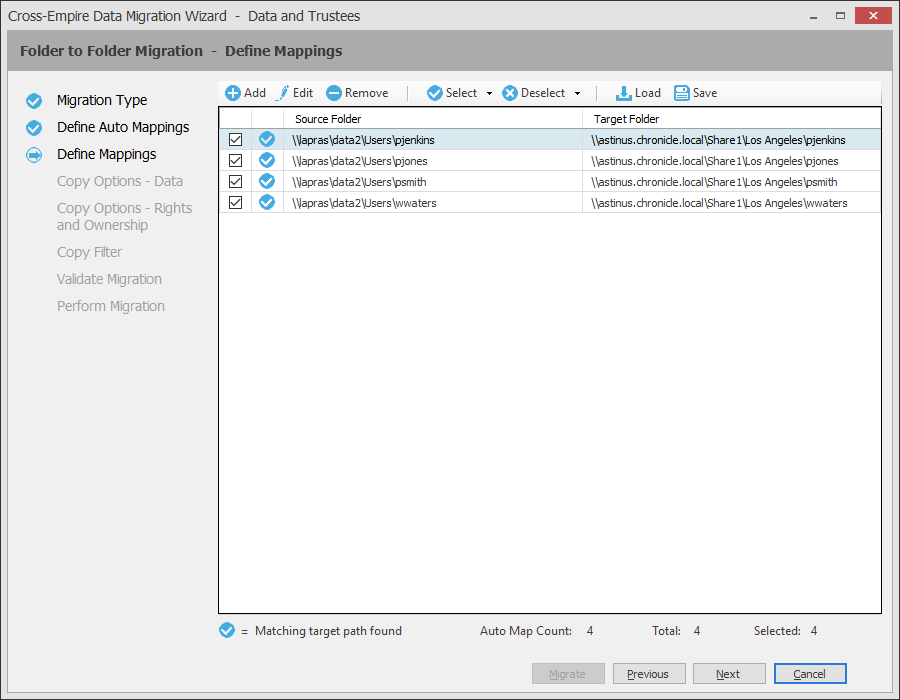
The Data Migration Wizard attempts to match the names of the subfolders of the source path with the subfolders of the specified target directory. If there is a match, the listed folder in the field is selected and a corresponding match is listed in the column.
-
Specify a target folder for each source folder that is not automatically matched by double-clicking the name to bring up the Modify Data Map Entry dialog box.
-
Click , specify the target folder, then click .
The target folder is placed in the column.
-
Click the check box corresponding to the listing with the new target.
-
When all of the folders you want to migrate are selected and have an associated target folder, click .
-
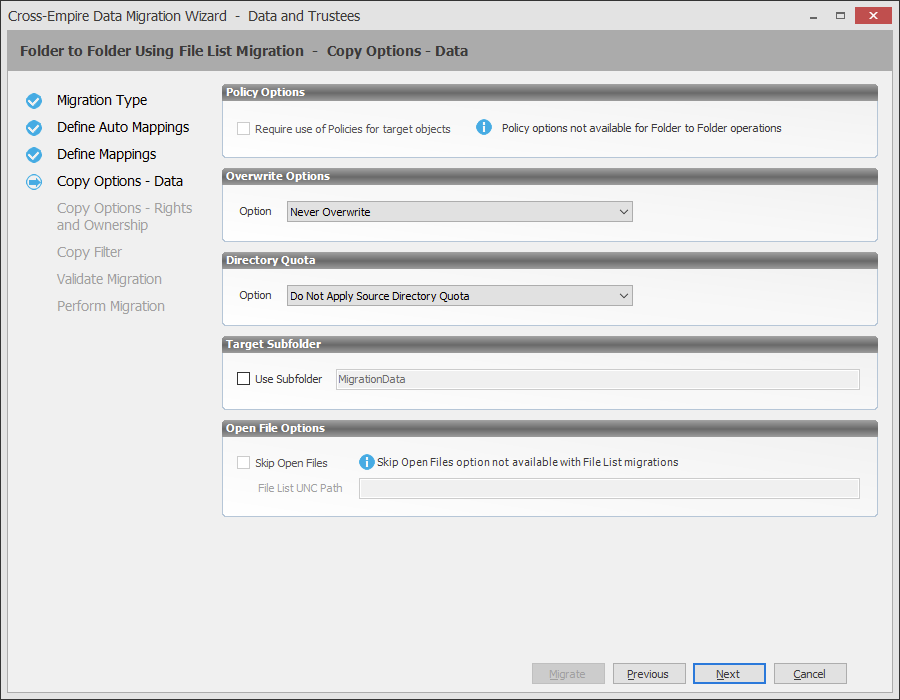
Fill in the following fields:
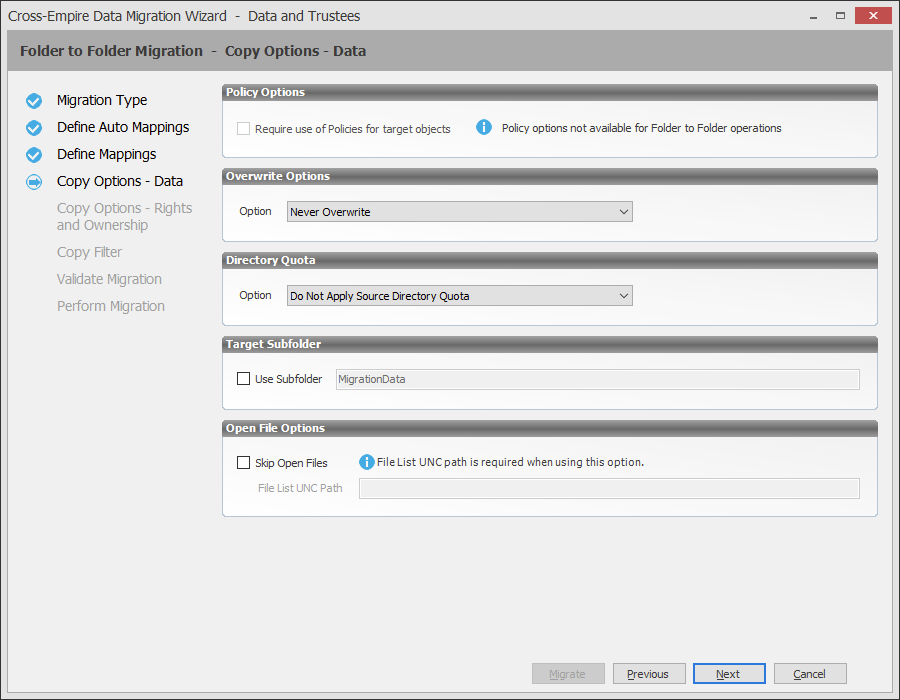
Overwrite Options: Indicate what you want to take place when duplicate filenames are encountered in the source and target.
Directory Quota: Specify how quota settings from the source NSS file system should be applied after the migration.
Target Subfolder: If you want migrated data to be placed in a subfolder, select the check box and specify the subfolder name in the field.
Open File Options: If you want the Cross-Empire Data Migration subsystem to skip all open files on the network and not migrate them, select .
Selecting activates the field where you specify the name and location of the log file listing all of the open files that are skipped during the migration.
Specify the UNC path for the Open directory you created along with a filename for the text file that will list the skipped files.
For example, \\server_name\volume_name\directory_name\Open\skip.txt
or
\\ip_address\volume_name\Open\skip.txt
The Cross-Empire Data Migration subsystem does not validate the path, so you must make sure that the path entered is correct. Otherwise, the migration fails.
-
Click .

-
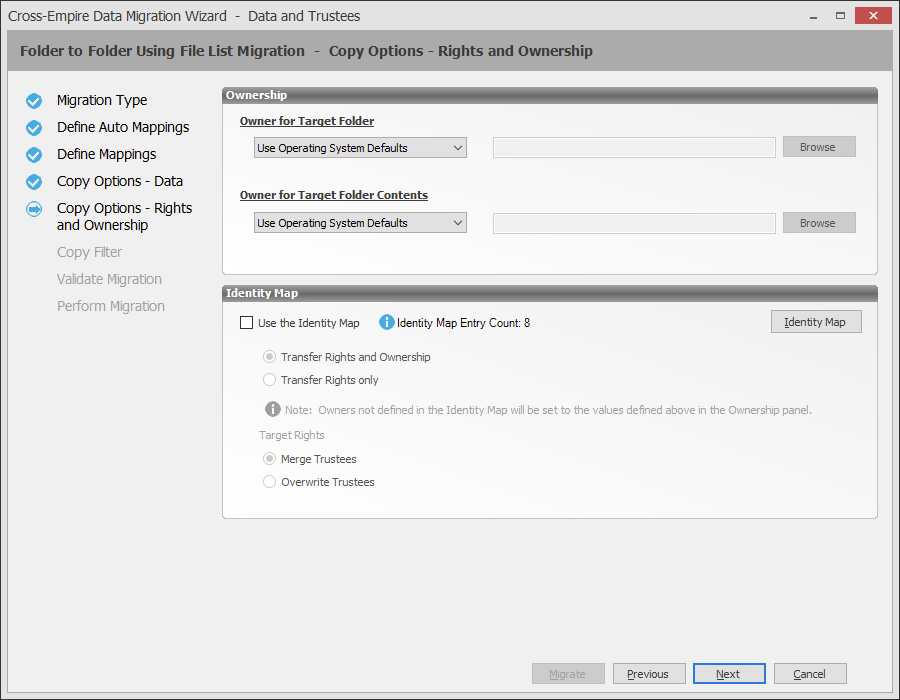
Fill in the following fields:
Owner for Target Folder: Use these settings to specify how ownership of the migrated folder is determined.
-
Use Operating System Defaults: This default setting allows the target Microsoft Windows Server to adjust the file ownership according to the setting on the target server.
-
Set Explicit Owner: Allows you to browse and select an object as the explicit owner of the migrated folder.
Owner for Target Folder Contents: Use these settings to specify how ownership of the migrated folder contents is determined.
-
Use Operating System Defaults: This default setting allows the target Microsoft Windows Server to adjust the file ownership according to the settings on the target server.
-
Set Explicit Owner: Allows you to browse and select an object as the explicit owner of all of the migrated files.
Use the Identity Map: Select this check box if you want Storage Manager to utilize the identity map you created earlier and use the corresponding IDs to copy security rights and file ownership from the Novell or Micro Focus network file system to the Windows network file system.
-
Transfer Rights and Ownership: Select this option if you want to transfer the file and folder security rights along with the ownership settings.
Be aware that when you transfer the ownership of a file or folder in a Windows network, you are granting the owner Full Rights, which you might not want to provide.
-
Transfer Rights Only: Select this option to transfer only the file and folder security rights.
-
Overwrite Trustees: Select this option to override any existing trustee assignments for a target file or folder with the established eDirectory trustee assignments for those files and folders.
-
Merge Trustees: Select this option to merge the established eDirectory trustee assignments with those of the target files or folders in the Windows network file system.
Identity Map: Clicking this button opens your identity map where you can make any desired changes.
-
-
Click .
-
(Conditional) If you want to use a filter to include or exclude specific files, select the check box and click the button.
-
Fill in the following fields:
Description: Specify a description of the filter.
Action: From the drop-down menu, select either or , based on whether the filter specifies to migrate files or folders or to ignore them.
Files, Folders: Specify if the filter applies to files or folders.
Masks: List the file types to migrate or ignore.
-
Specify any additional filter criteria in the menus and fields that remain.
For a detailed explanation of this region of the dialog box, see Section 6.5.8, Setting Vault Rules.
-
Click .
-
-
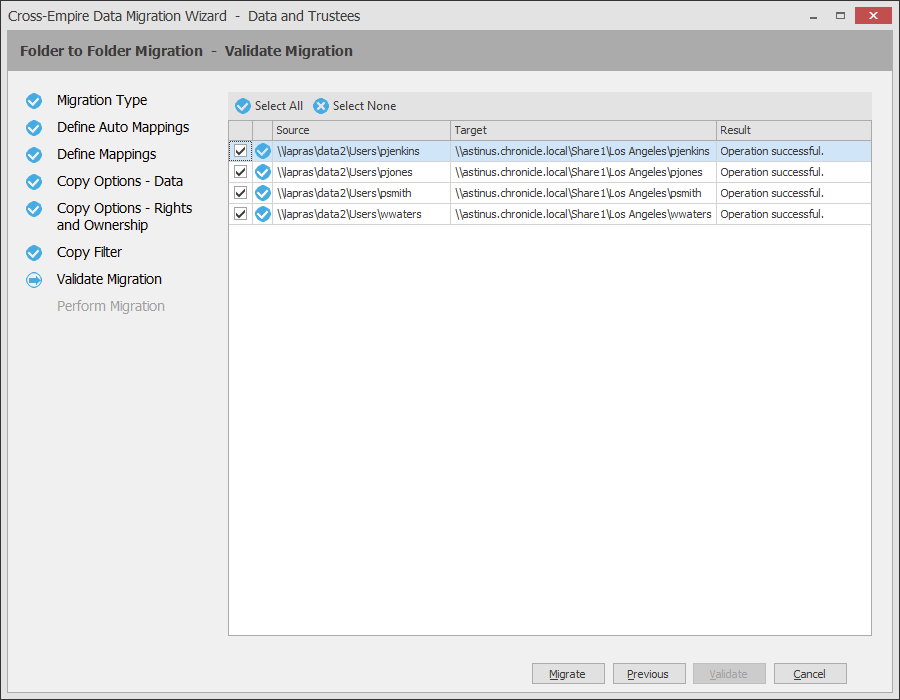
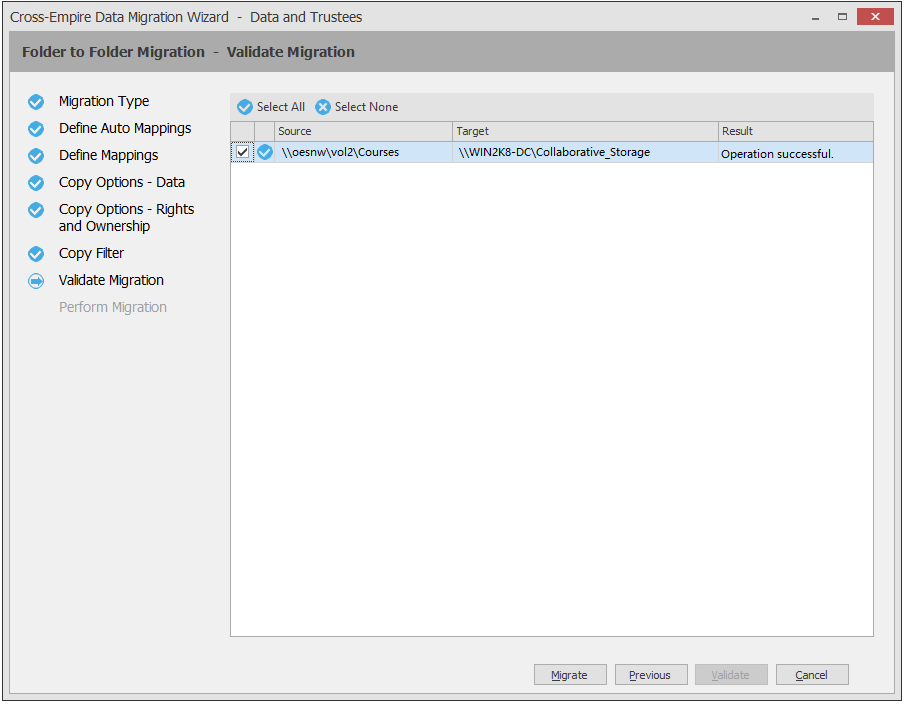
Click .
shows the result of certain checks that can be run prior to the migration. The column shows the status of the validation checks. If errors are displayed, you can choose to correct those errors prior to running the migration.
-
(Conditional) Take any necessary corrective action, click and then click again.
-
Click .
A page appears with details of the data migration events that are queued for processing. To view the status of migration events, click . For more information on Pending Events, see Section 13.1.7, Events.
-
Do one of the following:
-
If you skipped some files to migrate later, click and then continue with Migrating Skipped Files.
-
If you have migrated all of your data, click .
You are now finished with the folder to folder migration.
-
Migrating Skipped Files
The second phase of a folder to folder data migration is conducted when all of the users are logged off the network, so all network files are closed.
-
Have everyone log off the network so that there are no open files on the source NetWare or Open Enterprise Server machines.
-
Open the text file that you created in Step 14 and view the files that were skipped.
Do not make any changes to the file. Doing so causes errors during the migration.
-
Save a copy of the text file.
For example, if you named the file skip.txt, save a copy as skip_copy.txt.
After the Cross-Empire Data Migration subsystem migrates the skipped files, it deletes the text file. You can use the copy to verify that the files were migrated.
-
In SMAdmin, click the tab.
-
Select > .
-
Select > .
-
From the drop-down menu, select .
-
Click .
-
Skip the Automatic Mappings settings by clicking .
-
On the Define Mappings wizard page, click .
-
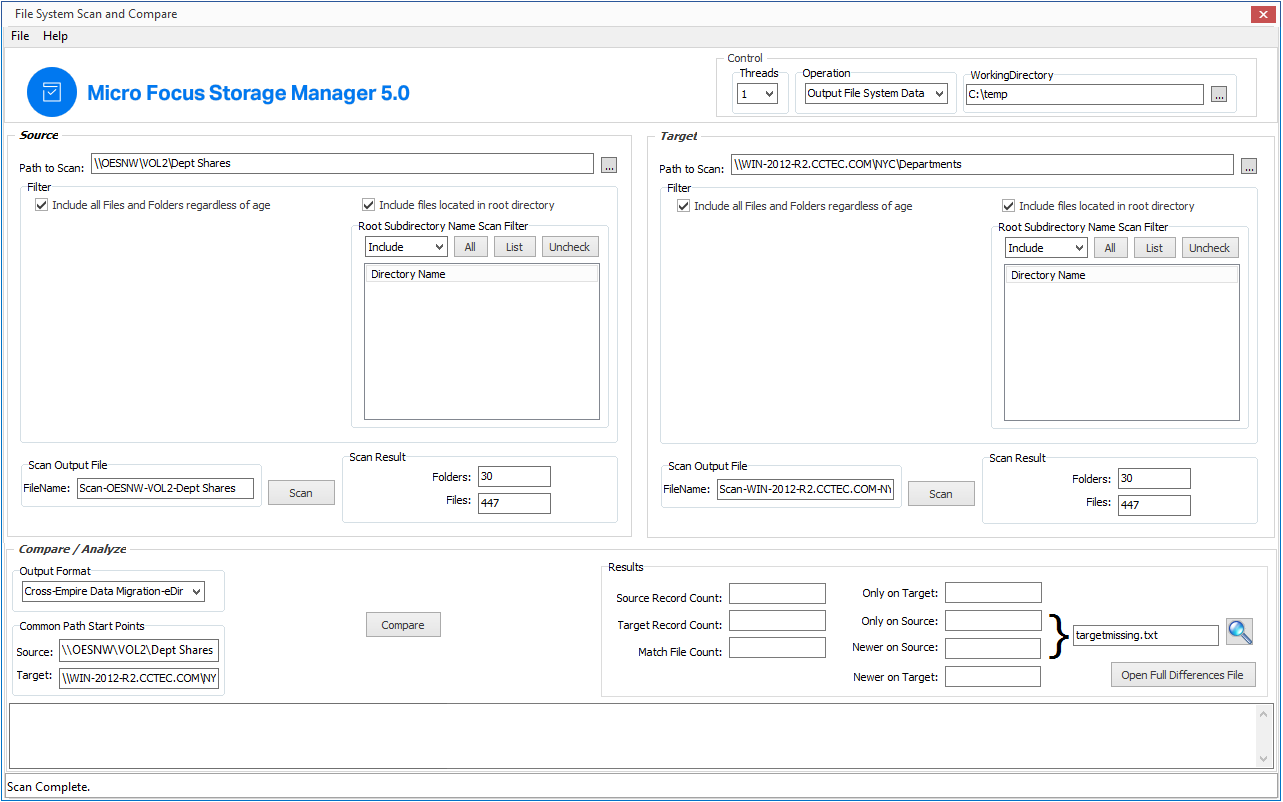
In the Add Data Entry dialog box, browse to and select the source and target folders.

-
Click .
-
On the Define Mappings wizard page, verify the source folder and the destination folder and click .
-
On the Copy Options - Data wizard page, from the drop-down menu in the region, select and click .
-
(Optional) On the Copy Options - Rights and Owners wizard page, from the drop-down menu of the region, select
-
(Conditional) If you chose to set an explicit owner for the folder, click the corresponding button and browse to specify an owner for the target folder.
-
(Optional) From the drop-down menu of the region, select .
-
(Conditional) if you chose to set an explicit owner for the folder contents, click the corresponding button and browse to specify an owner for the target folder contents.
-
Select the check box and click .
-
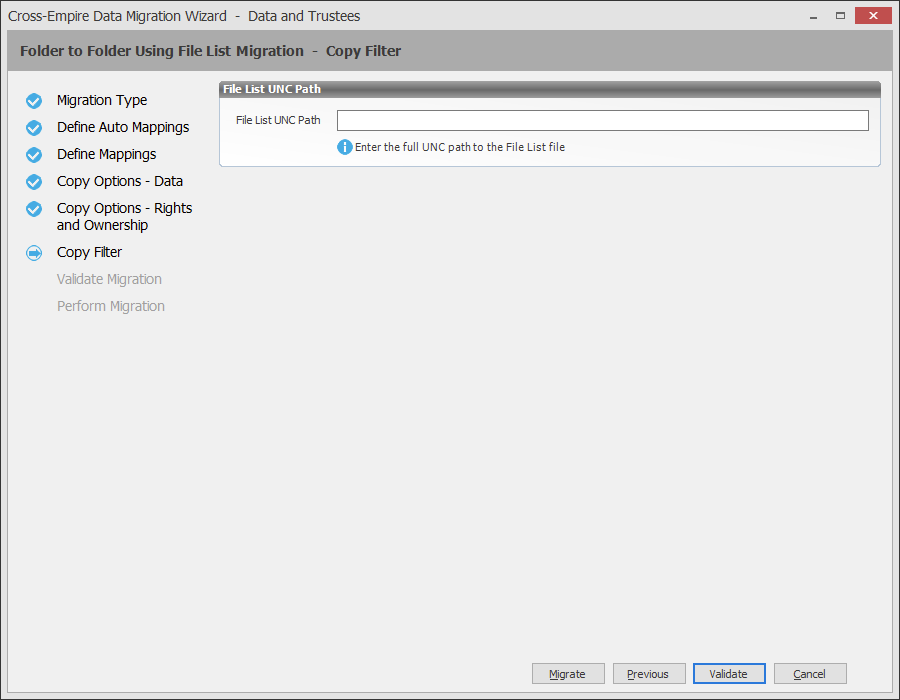
On the Copy Filter wizard page, specify the UNC path to the file you created in Step 14.
-
Click to confirm that the path is correct.
-
Click .
The skipped files are migrated and the text file that you created in Step 14 is deleted.
-
Click .
-
Continue with Scanning the Source Server for New or Modified Directories and Files.
10.12.3 Scanning the Source Server for New or Modified Directories and Files
Before you can migrate all of the new and modified directories and files since the first phase of the migration, you must first generate a list of these new and modified directories and files. This is done using the CEDMScanCompare utility.
-
Launch the CEDMScanCompare utility.
The following message appears:
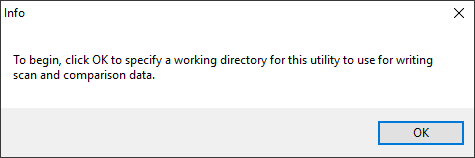
-
Click .
-
Browse to a folder where you want to store the comparison data and click .
The CEDMScanCompare utility interface is launched.
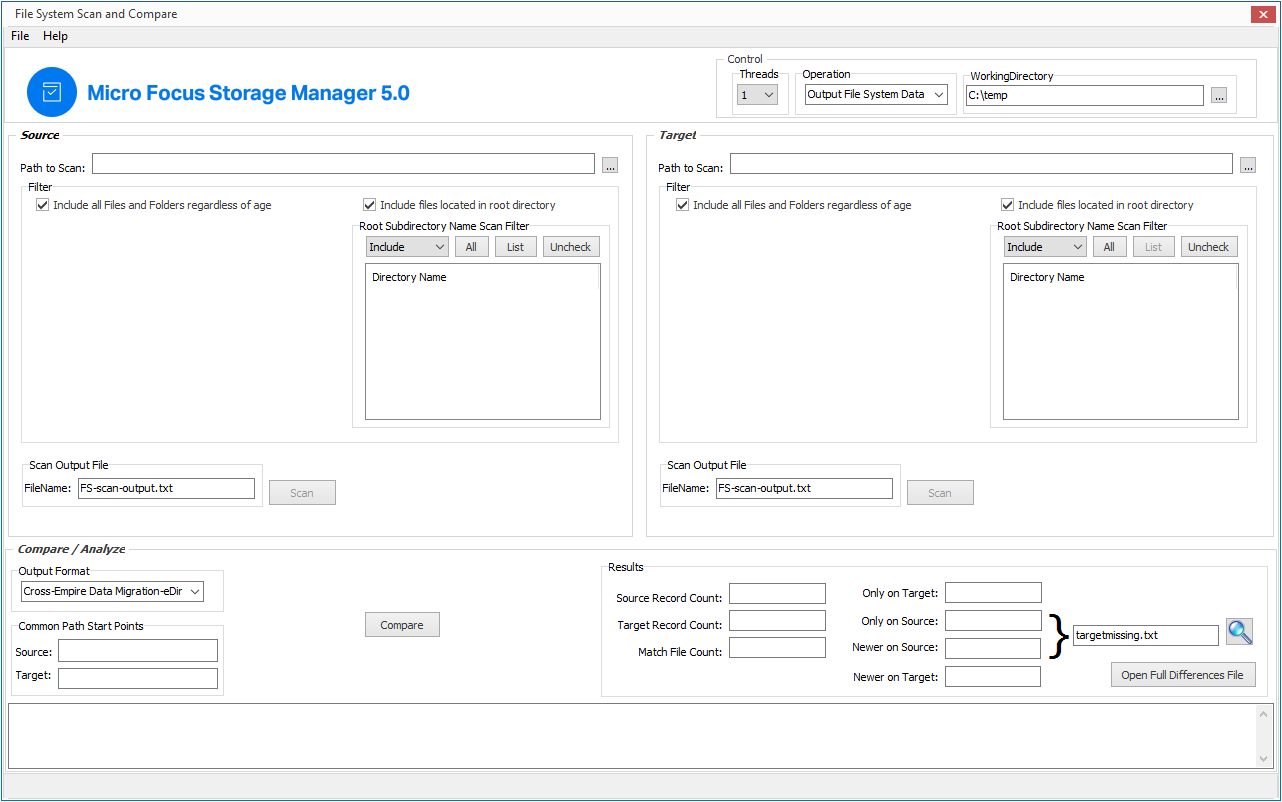
The selected folder location is specified in the field.
-
In the region, for the field, browse to specify the UNC path to the directory on the NetWare or Open Enterprise Server you want to scan.
For example: \\oesnw\vol2\dept_shares
You can scan both NetWare and OES Linux servers in your tree by using the above syntax. For example, to scan Vol2 of an OES Linux server, you would use a syntax like the following:
\\oeslinux\vol2
-
In the region, for the field, browse to specify the UNC path to the folder in the target forest you want to scan.
-
In the region, click .
-
In the region, note the findings in the and fields.
-
In the region, click .
-
In the region, note the findings in the and fields.
-
In the region, from the drop-down menu, select .
-
Click .
-
Do one of the following:
-
If the results show no discrepancies between the source and target, there are no new or modified directories and files. You are finished with the folder to folder data migration.
-
If the results show discrepancies between the source and target, follow the remaining procedures in this section.
-
-
Click .
A spreadsheet appears listing:
-
All files on the source that are newer than the same named files on the target, along with the source and target path of each file.
-
All files on the source that are missing from the target.

-
-
View the files that are newer on the source server as well as those files on the source server that were not migrated.
-
In the CEDMScanCompare utility interface, note the targetmissing.txt output file.
This is the file listing all of the new and modified directories and files on the source server.
-
Locate the targetmissing.txt file in the folder you specified earlier and copy the file to a location on the source server.
-
Have all of your network users close any open files in the source area, and then proceed to Migrating the New and Modified Directories and Files.
10.12.4 Migrating the New and Modified Directories and Files
Migrating all of the directories and files that are new or modified since the first phase of the folder to folder migration follows the same process as migrating the skipped files. The only difference is that you enter a different UNC path.
-
In SMAdmin, click the tab.
-
Select > .
-
Select > .
-
From the drop-down menu, select .
-
Click .
-
Skip the Automatic Mappings settings by clicking .
-
On the Define Mappings wizard page, click .
-
In the Add Data Entry dialog box, browse to and select the source and target folders.
-
Click .
-
On the Define Mappings wizard page, verify the source folder and the destination folder and click .
-
On the Copy Options - Data wizard page, from the drop-down menu in the region, select , then click .
-
(Optional) On the Copy Options - Rights and Owners wizard page, from the drop-down menu of the region, select .
-
(Conditional) If you chose to set an explicit owner for the folder, click the corresponding button and browse to specify an owner for the target folder.
-
(Optional) From the drop-down menu of the region, select .
-
(Conditional) If you chose to set an explicit owner for the folder contents, click the corresponding button and browse to specify an owner for the target folder contents.
-
Select the check box and click .
-
On the wizard page, specify the UNC path to the targetmissing.txt file that you copied to the source server.
-
Click to confirm that the path is correct.
-
Click .
The new and modified files are migrated.
-
Continue with Section 10.12.5, Verifying that All Directories and Files were Migrated by Comparing Source Server and Target Server Contents.
10.12.5 Verifying that All Directories and Files were Migrated by Comparing Source Server and Target Server Contents
With all of the directories and files now migrated, you should now compare the contents of the source server and target server to verify that everything migrated properly. The process is as follows:
-
Launch the CEDMScanCompare utility.
-
When the message appears about the need to specify a working directory for the scan and comparison data, click .
-
Browse to a folder where you want to store the comparison data and click .
The CEDMScanCompare utility interface is launched.
-
In the region, for the field, browse to specify the UNC path to the folder from the source server you want to scan.
-
In the region, for the field, browse to specify the UNC path to the folder in the target server you want to scan.
-
In the Source region, click .
-
In the Target region, click .
-
In the region, from the drop-down menu, select .
-
Click .
-
Do one of the following:
-
If the results show no discrepancies between the source and target, all of the folders and files were migrated. You can close the CEDMScanCompare utility as you are now finished with the folder to folder data migration.
-
If the results show discrepancies between the source and target, take measures to close the open files and repeat the procedures in Migrating the New and Modified Directories and Files.
-
10.12.6 Creating a Target Folder in the Data Migration Wizard
-
Make sure you have completed the prerequisites and have created a migration proxy account.
For more information on the prerequisites, see Section 10.3, Prerequisites. For more information on creating a migration proxy account, see Section 10.4, Creating the Migration Proxy Account.
-
(Conditional) If you want to migrate closed files now and skip some files to migrate later:
-
From the Utilities\CEDM folder on the Storage Manager ISO image, copy the CEDMScanCompare.exe utility to either the Windows target server or to a Windows server where you are going to administer the migration.
-
On each NetWare or Open Enterprise Server from which you are going to migrate data, create a new subdirectory and name it Open.
-
-
In SMAdmin, click the tab.
-
Select > .
-
Select > .
-
From the drop-down menu, select .
-
Click .
-
Click .
-
Click .

-
In the field, specify an initial UNC path for a server and volume to browse.
For example, \\server_name\volume_name\ or \\ip_address\volume_name.
After a path is entered, you can click the button to browse to the folder you want.
-
Click the button that corresponds to the field to locate the share where you want to create the new folder for the migrated data.
-
Right-click the share, select , name the new folder, and click .
-
Click to close the Target File System Path Browser.
-
In the Add Data Map Entry dialog box, click the button that corresponds to the field again, browse to and select the new folder, then click .
-
Click .
The defined source and target mappings are displayed.
-
Click .
-
Fill in the following fields:
Overwrite Options: Indicate what you want to take place when duplicate filenames are encountered in the source and target.
Directory Quota: Specify how quota settings from the source NSS file system should be applied after the migration.
Target Subfolder: If you want migrated data to be placed in a subfolder, select the check box and specify the subfolder name in the field.
Open File Options: If you want the Cross-Empire Data Migration subsystem to skip all open files on the network and not migrate them, select .
Selecting activates the field where you specify the name and location of the log file listing all of the open files that are skipped during the migration.
Specify the UNC path for the Open directory you created along with a filename for the text file that will list the skipped files.
For example, \\server_name\volume_name\directory_name\Open\skip.txt
or
\\ip_address\volume_name\Open\skip.txt
The Cross-Empire Data Migration subsystem does not validate the path, so you must make sure that the path entered is correct. Otherwise, the migration fails.
-
Click .
-
Fill in the following fields:
Owner for Target Folder: Use these settings to specify how ownership of the migrated folder is determined.
-
Use Operating System Defaults: This default setting allows the target Microsoft Windows Server to adjust the file ownership according to the setting on the target server.
-
Set Explicit Owner: Allows you to browse and select an object as the explicit owner of the migrated folder.
Owner for Target Folder Contents: Use these settings to specify how ownership of the migrated folder contents is determined.
-
Use Operating System Defaults: This default setting allows the target Microsoft Windows Server to adjust the file ownership according to the settings on the target server.
-
Set Explicit Owner: Allows you to browse and select an object as the explicit owner of the migrated folder.
Use the Identity Map: Select this check box if you want Storage Manager to utilize the identity map you created earlier and use the corresponding IDs to copy security rights and file ownership from the Novell or Micro Focus network file system to the Windows network file system.
-
Transfer Rights and Ownership: Select this option if you want to transfer the file and folder security rights along with the ownership settings.
Be aware that when you transfer the ownership of a file or folder in a Windows network, you are granting the owner Full Rights, which you might not want to provide.
-
Transfer Rights Only: Select this option to transfer only the file and folder security rights.
-
Overwrite Trustees: Select this option to override any existing trustee assignments for a target file or folder with the established eDirectory trustee assignments for those files and folders.
-
Merge Trustees: Select this option to merge the established eDirectory trustee assignments with those of the target files or folders in the Windows network file system.
Identity Map: Clicking this button opens your identity map where you can make any desired changes.
-
-
Click .
-
(Conditional) If you want to use a filter to include or exclude specific files, select the check box and click the button.
-
Fill in the following fields:
Description: Specify a description of the filter.
Action: From the drop-down menu, select either or , based on whether the filter specifies to migrate files or folders or to ignore them.
Files, Folders: Specify if the filter applies to files or folders.
Masks: List the file types to migrate or ignore.
-
Specify any additional filter criteria in the menus and fields that remain.
For a detailed explanation of this region of the dialog box, see Section 6.5.8, Setting Vault Rules.
-
Click .
-
-
Click .
shows the result of certain checks that can be run prior to the migration. The column shows the status of the validation checks. If errors are displayed, you can choose to correct those errors prior to running the migration.
-
(Conditional) Take any necessary action in the Windows network file system target and then re-run the Data Migration Wizard.
-
Click .
A page appears with details of the data migration events that are queued for processing. To view the status of migration events, click . For more information on Pending Events, see Section 13.1.7, Events.
-
Do one of the following:
-
If you skipped some files to migrate later, click and then continue with Migrating Skipped Files.
-
If you have migrated all of you data, click .
-
-
Scan the source server for new of modified directories and files by following the procedures in Section 10.12.3, Scanning the Source Server for New or Modified Directories and Files.
-
Migrate all new and modified directories and files by following the procedures in Section 10.12.4, Migrating the New and Modified Directories and Files.
-
Verify that all directories and files were migrated by following the procedures in Section 10.12.5, Verifying that All Directories and Files were Migrated by Comparing Source Server and Target Server Contents.