10.5 Creating and Modifying an Identity Map
Micro Focus Storage Manager for Active Directory uses an identity map to make associations between the users, groups, and containers that are the owners and trustees of the Novell or Micro Focus network data and the corresponding data owners on the Microsoft network target.
You create a single identity map for each eDirectory tree that you are migrating.
IMPORTANT:You must create an identity map so that file and folder rights, trustee assignments, and other metadata are maintained during the migration. If you do not want to maintain these rights, trustee assignments, and other metadata, you can skip this section and migrate through using the option from the menu.
10.5.1 Creating an Identity Map
-
In SMAdmin, click the tab.
-
Click
-
Click > .
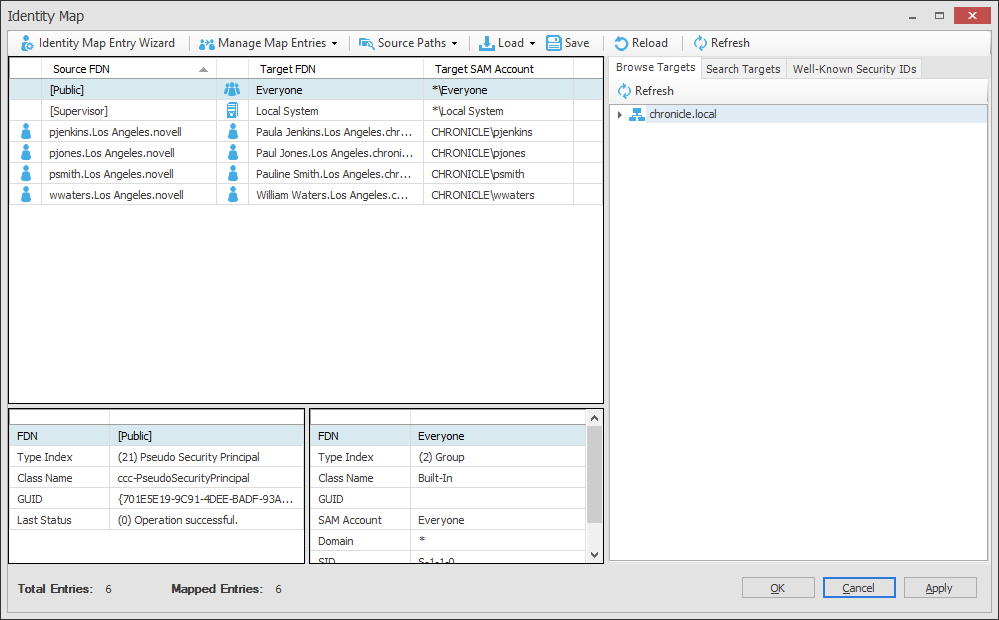
The following page appears:

The page displays an initial identity map with a small number of suggested entries that you can append.
-
Do one of the following:
-
To import associations between users in eDirectory and Active Directory using a delimited text CSV file, go to Importing Identity Associations through Delimited Text.
-
To associate the users between the two directory services yourself, go to Creating Object Associations.
-
Importing Identity Associations through Delimited Text
If you have a delimited text CSV file that associates eDirectory user and group objects with Active directory user and group objects, you can import it into the identity map using the option.
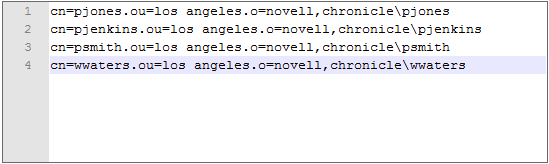
The CSV file can have entries using either typeful or typeless Fully Distinguished Names (FDNs).
-
Select > .
-
Click .
-
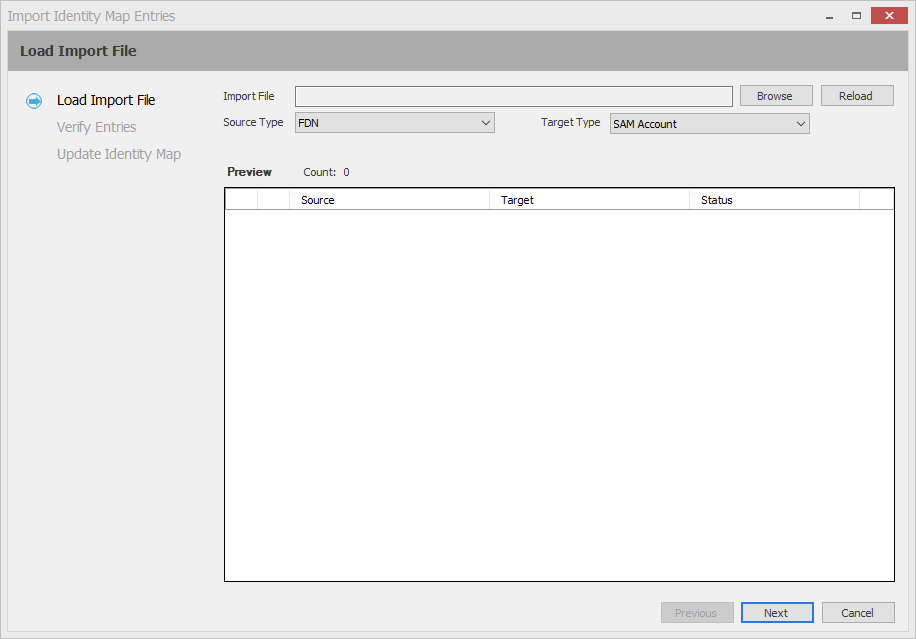
Select the CSV file, then click .
The following page appears and specifies whether the names in the CSV file are formatted properly.

-
(Conditional) If incorrect options in the or fields are displayed, select the correct options.
-
Click .
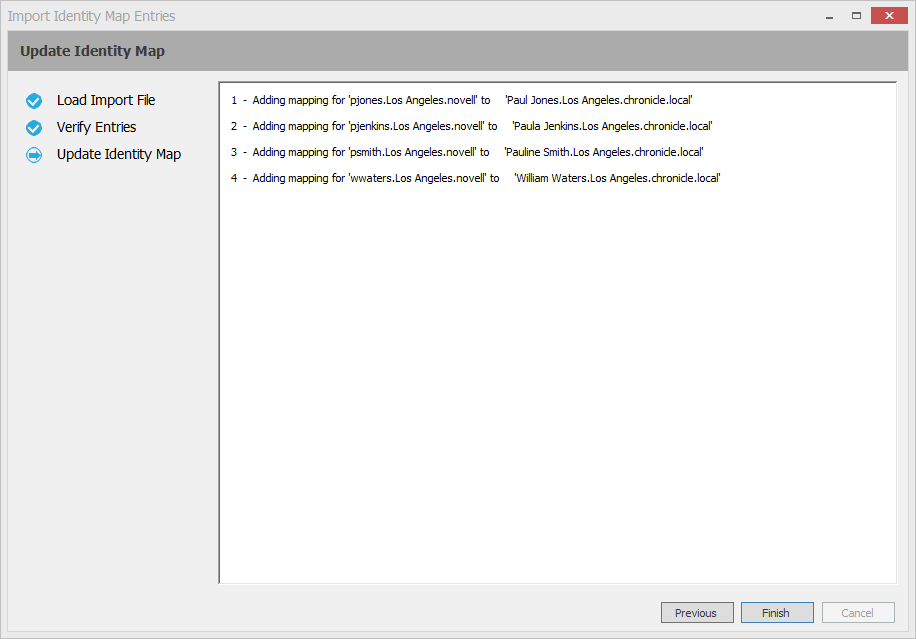
The following page appears and specifies whether the user and group objects exist in eDirectory and Active Directory.

-
Click .
-
Click .
-
Click to save the updated identity map.
-
(Conditional) If you have additional users to import from another delimited text CSV file, select the new CSV file and repeat the procedures in this section.
-
(Conditional) If you need to add additional users that were not listed in the CSV file, proceed to Creating Object Associations.
Creating Object Associations
-
Click .
-
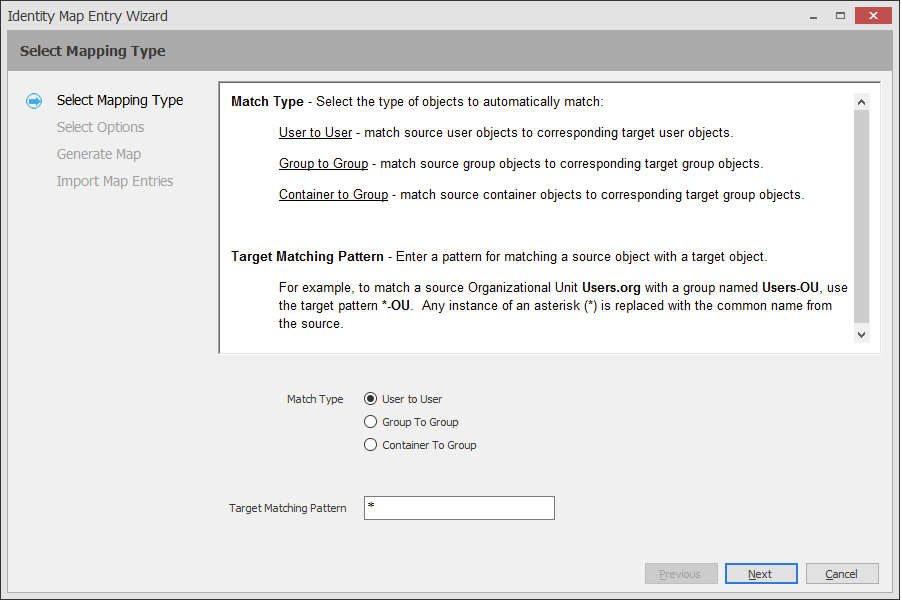
Leave the option selected and click .
-
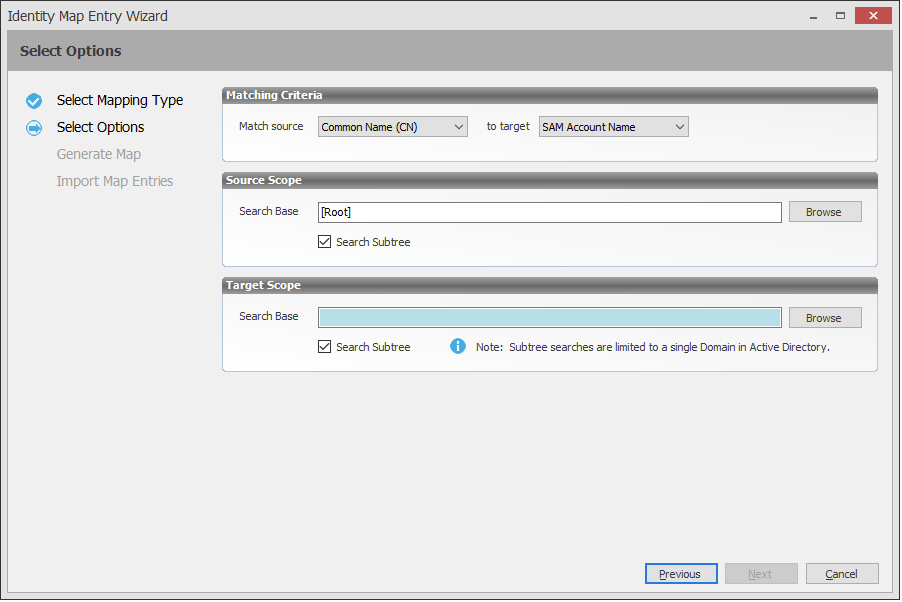
In the region of the page, use the drop-down menu to specify if the target accounts to locate are SAM accounts or Common Name (CN) accounts.
If you need to match using both account types on your target server, you can choose one option now and then run the wizard again and choose the other option. You might need to run the wizard multiple times in order to add all of the users, groups, and containers to the identity map.
-
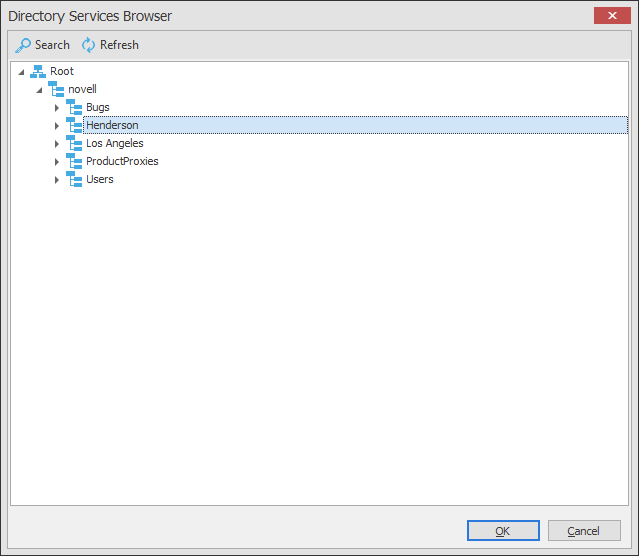
In the region, browse to and select the source container with the users you want included in the identity map.
-
In the region, browse to and select the target container with the users you want included in the identity map.
-
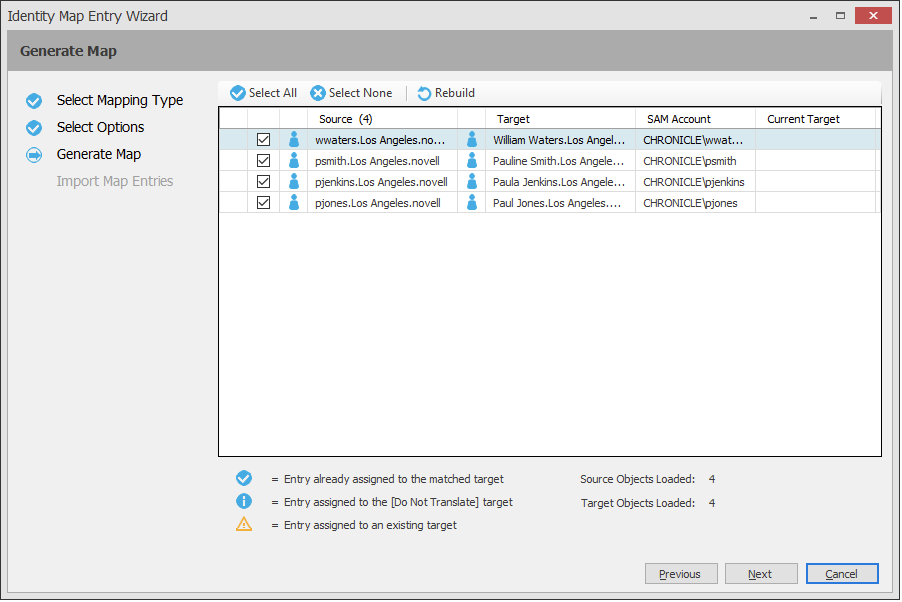
Click .
-
(Conditional) Deselect any names you do not want appended to the identity map file.
-
Click .
-
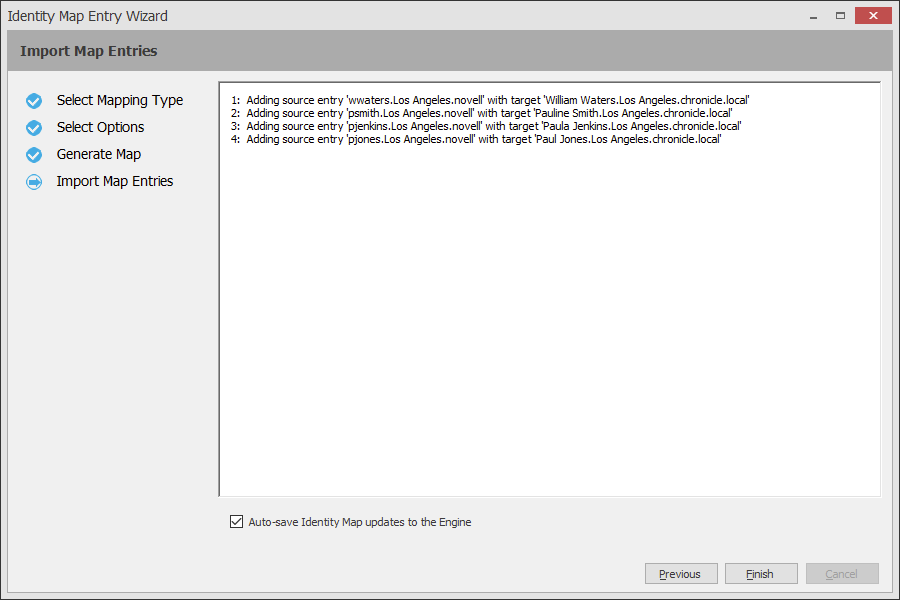
Click .
The identity map is appended with the new entries.
-
Click to save the updated identity map.
-
Repeat Step 4 and Step 5 and select the account type you did not select previously.
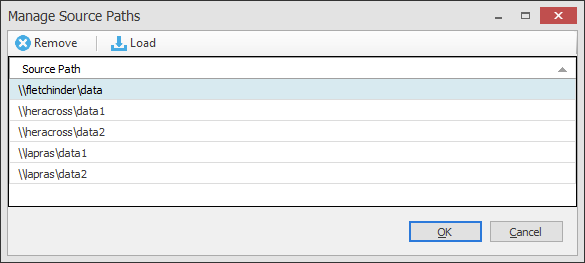
10.5.2 Importing a Source Path List
Depending on the size of your network, you might need to specify a significant number of different source paths as you build your identity map. You can easily import a list of your UNC paths from a text file so that these paths are accessible from a drop-down menu. Additionally, the search is filtered so that it can locate the specific UNC path as you type.
-
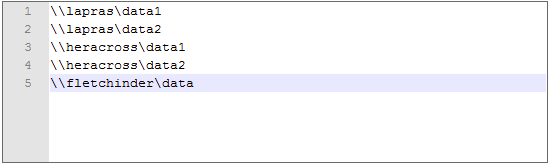
Using a text editor, create a file with UNC paths for each server and volume that you want to import, then save the file.
-
In SMAdmin, click the tab.
-
Click >
-
Select > .
-
Click , browse to and select the text file, then click .
-
Click .
10.5.3 Adding Source Entries to the Identity Map
Once the identity map has been created, you can add new users or groups at any time.
-
In SMAdmin, click the tab.
-
Select > .
-
Select > .
-
Select > .
-
In the Add Source Objects page, use the , button, , and fields to locate and select the container you want to use for your search.
If you wish to limit your search to a selected set of object types, under the heading, deselect those object types you do not want included in the search.
-
Click .
-
On the Add Source Object page, click .
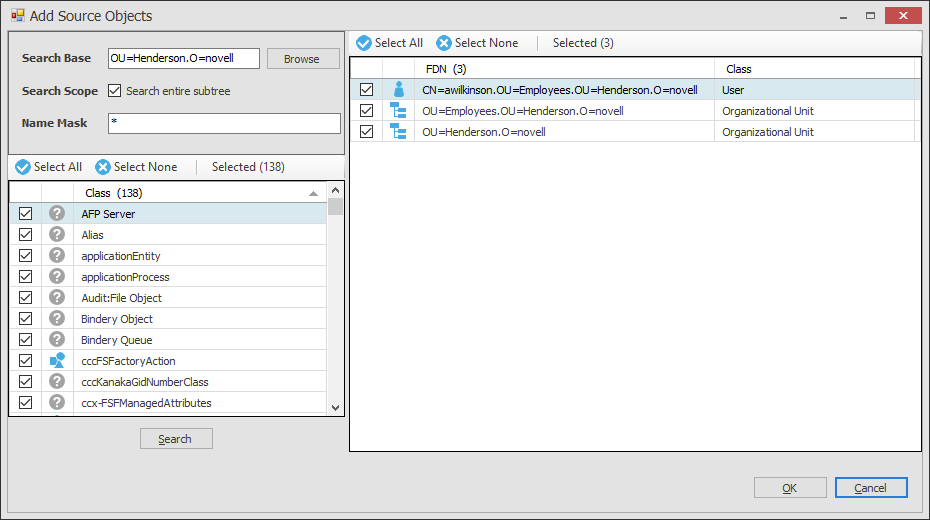
By default, all located objects are selected.
-
Deselect the objects you do not want to append to the identity map.
-
Click .
10.5.4 Adding or Modifying Target Entries to the Identity Map
-
In SMAdmin, click the tab.
-
Select > .
-
Select > .
-
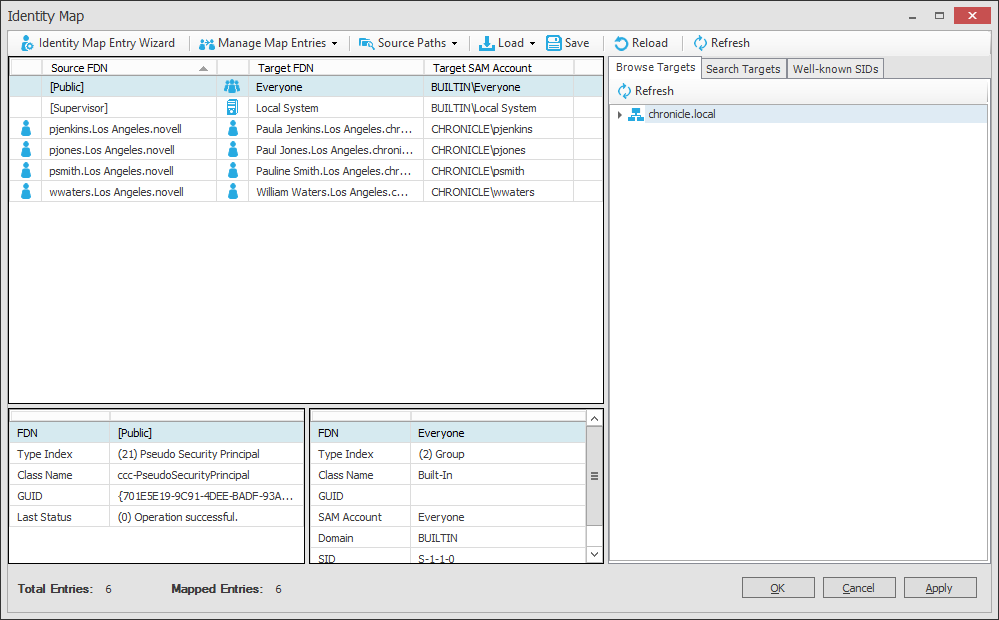
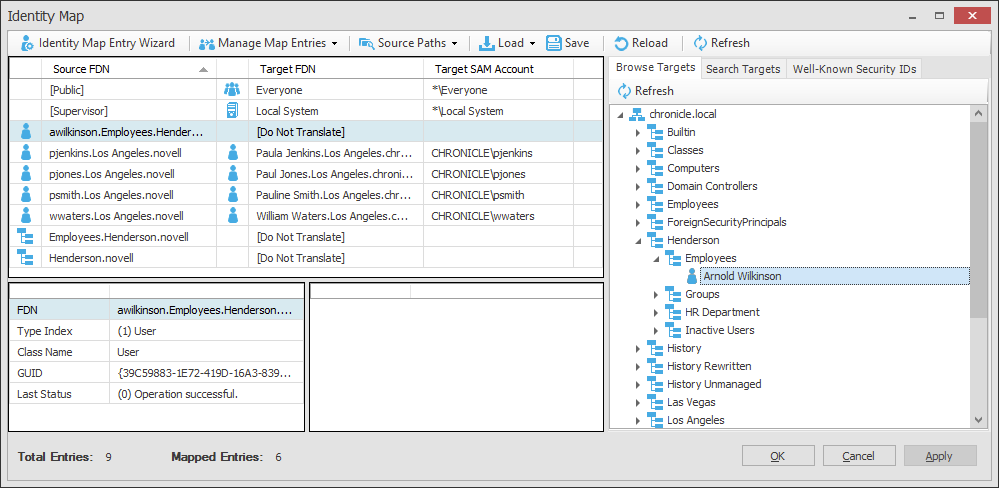
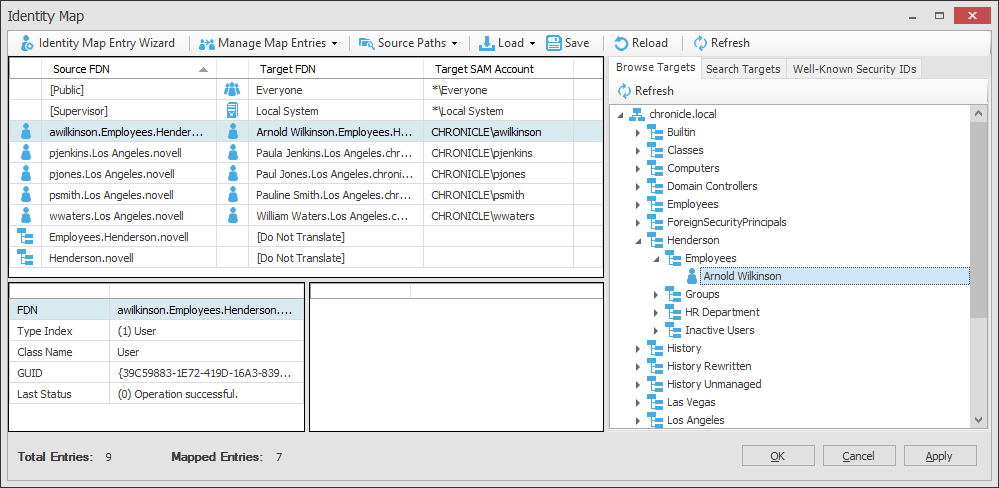
In the Identity Map page, select the listing for the source entry to which you want to add a target or that you want to modify.
-
Use one of the tabs in the right panel of the Identity Map page to locate and select the desired target.
-
Specify the object as the new target object.
For example, if you were using the tab in the example above, you could right-click or drag the object to place it in the field of the selected source object.
-
Click to save the modified identity map.
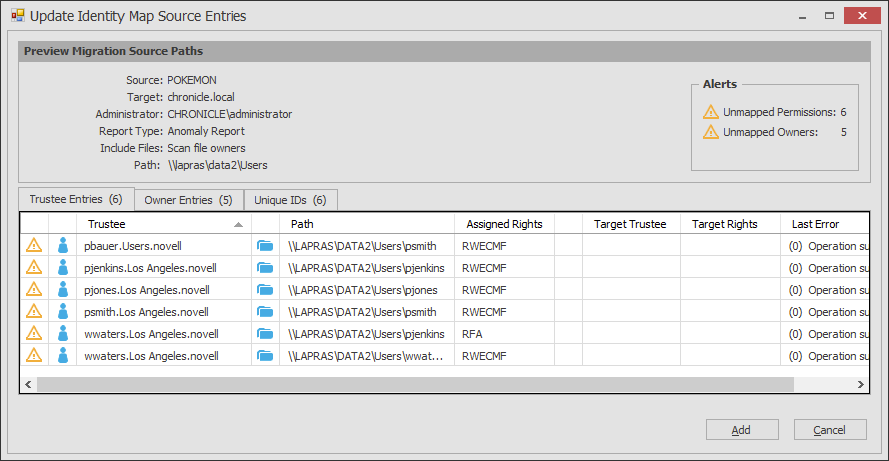
10.5.7 Generating a Migration Preview Report
Before performing a Cross-Empire Data Migration, you should generate a preview report. The report indicates any concerns that might need to be addressed such as objects which have file rights but which have not yet been mapped in the identity map.
The preview report uses your identity map, and searches file and folder rights assignments and ownership of the actual data which you will be migrating to indicate which objects actually have ownership or rights, and if an object is mapped in the identity map.
-
In SMAdmin, click the tab.
-
Select > .
-
Select > .

-
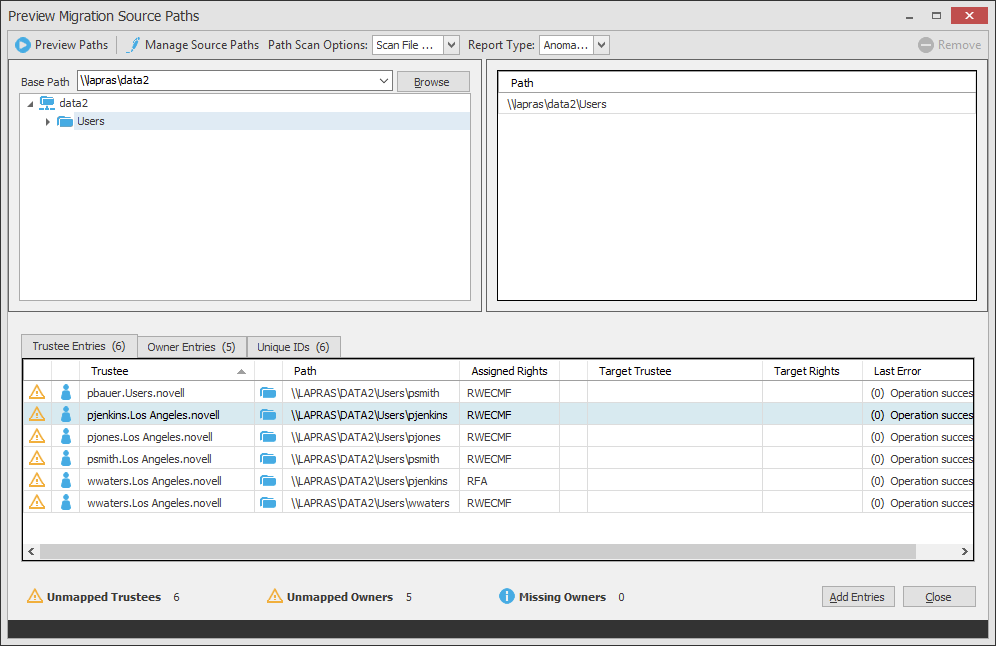
In the field, specify an initial UNC path for a server and volume to browse.
For example, \\server_name\volume_name\ or \\ip_address\volume_name.
After you enter a path, you can click the button to browse to the folder you want, such as the Users folder.
-
Drag the selected folder to the pane.
-
From the drop-down menu, choose one of the following:
-
: Select this option to view the trustee assignments and owners of folders.
-
: Select this option to view the trustee assignments and owners of folders, along with the owners of files.
-
: Select this option to view the trustee assignments and owners of folders, as well as the trustee assignments and owners of files.
Depending on the number of files and folders on your Novell or Micro Focus network, the option can take a significant amount of time to generate. We recommend using one of the other options first.
-
-
From the drop-down menu, choose one of the following:
-
: Depending on which of the is selected, this generates a report of all of the folders and files that have trustees or owners that are not mapped to a target object in the identity map.
-
: Depending on which of the are selected, this generates a report of all of the folders and files, along with their corresponding owners and trustees, and indicates whether they are mapped to a target object in the identity map or not.
Depending on the number of files and folders on your Novell or Micro Focus network, generating a full report can take a significant amount of time. We recommend generating an Anomaly report instead.
-
-
Click .
-
Use the tabbed reports to preview targets according to trustees, owners, and unique IDs.
For example, in the graphic above, the tab displays the source IDs that have a trustee assignment to a folder but a target ID has not yet been created in the identity map.
The tab displays owners of files and folders that do not have a corresponding target in the identity map.
The tab displays a single entry for each ID that is mapped in the identity report.
-
Click to add the entries to the identity map.
The entries are added to the identity map and you can now add target entries by following the procedures in Section 10.5.4, Adding or Modifying Target Entries to the Identity Map.
10.5.8 Adding Entries from Preview Reports
In Step 10, you added entries to the identity map by using the Preview Migration Source Path page’s button. You can also use the option to retrieve any preview report that you have generated for the directory tree you are working with, and add those entries to the identity map.
-
In SMAdmin, click the tab.
-
Select > .
-
Select > .
-
From the Browse Migration Preview Reports dialog box, select the preview report you want to add, then click .
At this point, you can view the preview report according to the tabbed options.
-
Click to add the entries to the identity map.
The entries are added to the identity map and you can now add target entries to each by following the procedures under Section 10.5.4, Adding or Modifying Target Entries to the Identity Map.
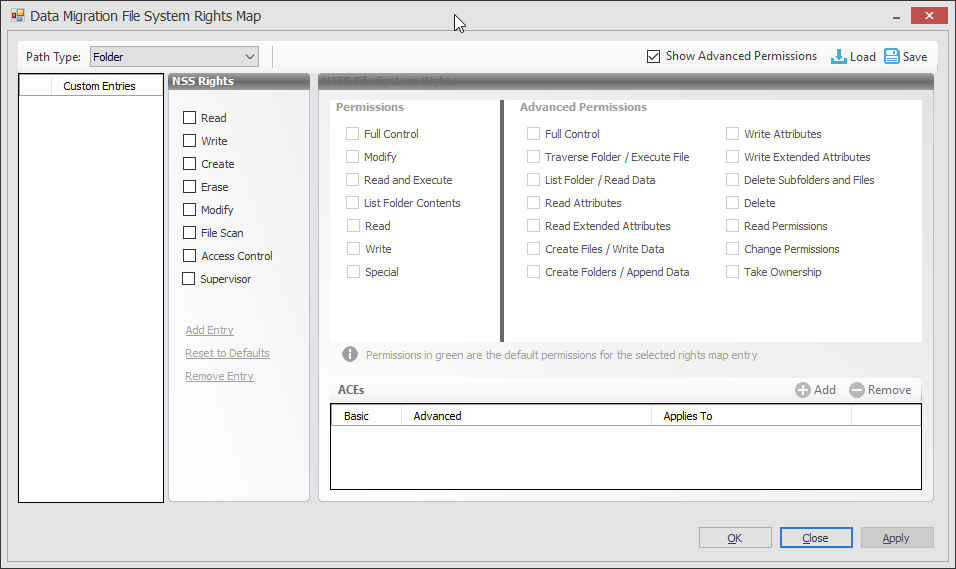
10.5.9 Review Rights and Trustee Assignment Mappings
Despite the inherent differences in rights, trustee assignments, and permissions between Novell or Micro Focus and Microsoft networks, the Cross-Empire Data Migration subsystem of Storage Manager for Active Directory does its best to match the Novell or Micro Focus rights and trustee assignments with the equivalent Microsoft permissions and advanced permissions.
When you generate a Preview Report, you should pay particular attention to the actual rights in the column and the proposed file and folder rights listed in the column.
You can modify the rights mappings by using the File System Rights Map. When you do this, you specify a mapping between one particular set of rights on the Novell or Micro Focus servers to one particular set of rights on the Microsoft Windows servers. As an example, the default mapping is to map the Novell or Micro Focus NSS rights RWECMF to the Windows NTFS rights MELRW. As a further example, perhaps when files have this set of rights you do not want to grant the E (erase) right to files on the target. You could modify the mapping using the procedures below to change the mapping of Novell or Micro Focus NSS rights RWECMF to the Windows NTFS rights MLRW. When you do this, you change the mapping for every file that has that exact set of rights, but it does not change the E mapping in any other set of rights. For instance, if you had trustees that had RWCEF, that mapping would not be changed because you changed the mapping for RWCEMF.
To view or modify these rights:
-
In SMAdmin, click the tab.
-
Select >
-
Select > .
-
In the column, click the rights to see the equivalent NTFS permissions and advanced permissions.
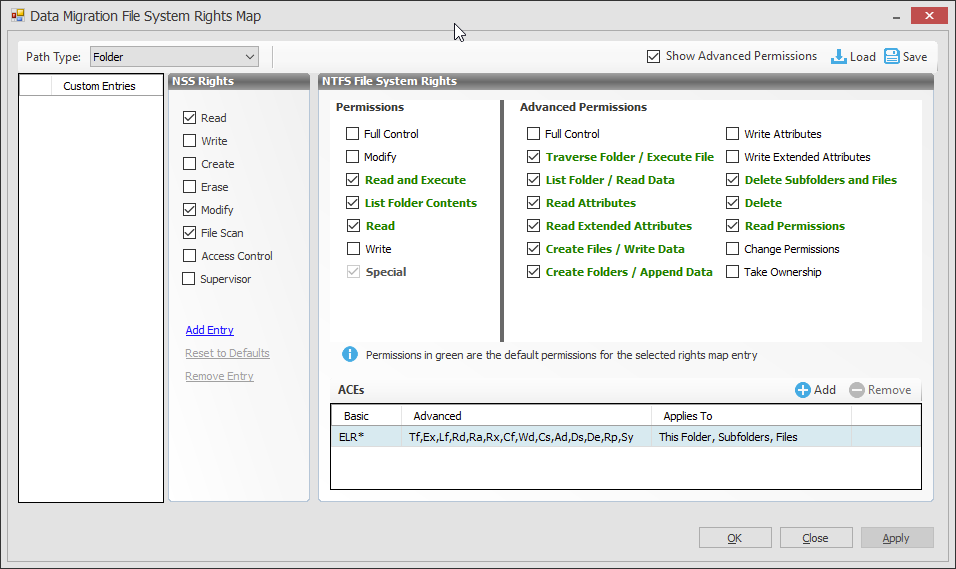
The default permissions are indicated in green.
-
Select or deselect permissions as needed.
-
Click to save the settings.