11.1 Linux: Installing and Setting Up a Basic Vibe Site
You should already have reviewed Section 8.0, Planning a Basic (Single-server) Vibe Installation and filled out the Single-server Installation Planning Worksheet. The following sections step you through the process of installing and starting OpenText Vibe on Linux:
11.1.2 Running the Linux Vibe Installation Program
When you run the Vibe installation program for the first time, you typically want to use the GUI interface. However, if you are installing Vibe on a server where the X Window System is not available, a text-based installation program is also available. After you are familiar with the Vibe installation process, you can use a silent installation to automate the process.
Using the GUI Installation Program
-
In a terminal window, enter su - to become the root user, then enter the root password.
You need root permissions in order to install the Vibe software, but you should not run the Vibe software as root.
-
Change to the directory where you downloaded and extracted the Vibe software.
-
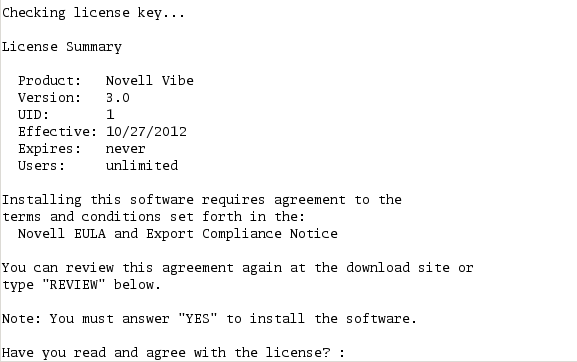
Ensure that you have a license-key.xml file in the same directory with the Vibe installation program.
more license-key.xml
The Vibe installation program does not start without a license file in the same directory. If you have not already, rename the license file to be called license-key.xml.
For more information about licensing, see Section 13.0, Updating Your Vibe License.
-
Enter the following command to start the Vibe installation program:
./installer-teaming.linux
-
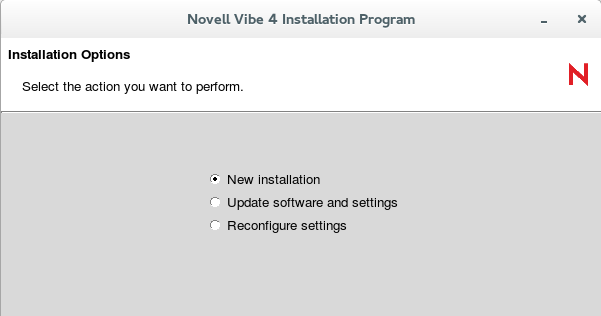
Accept the License Agreement, then click .
-
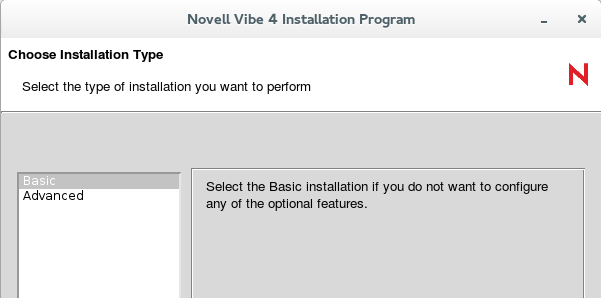
Click to accept the default of .
-
Click to accept the default of .
-
Use the information that you have gathered on the Single-server Installation Planning Worksheet to provide the information that the Vibe installation program prompts you for:
- Installation Locations
- Additional Extensions for View as HTML
- Default Locale for OpenText Vibe
- User ID for OpenText Vibe
- Built-In Administrator Name for Vibe
- Network Information
- WebDAV Authentication Method
- Database Selection
- Database Type
- JDBC URL
- Credentials
- Setup
- Encryption Algorithm
- Outbound Email Configuration
- Protocol
- Host, Port, and Time Zone
- User Name, Password, and Authentication
- Allow Sending Email to All Users
- Inbound Email Configuration
The installation program stores the information that it gathers in the installer.xml file in the same directory where you started the installation program.
-
After you have provided all the requested information, click to begin the Vibe installation.
-
Verify that the JCE is properly configured.
-
When the installation is complete, click to exit the Vibe installation program.
Information about the installation process is written to the installer.log file in the same directory where you ran the Installation program. If a problem arises during the installation, the installer.log file provides information that can help you resolve the problem.
-
Continue with Creating the Vibe Database.
Using the Text-Based Installation Program
If you try to start the GUI Vibe installation program in an environment where the X Windows System is not running, the text-based Vibe Installation program starts.
If you want to use the text-based installation program in an environment where the GUI starts by default, use the following command in the directory where the installation program is located:
./installer-teaming.linux --text
IMPORTANT:The text-based Vibe installation program must be run in the same directory where the Vibe license file is located. If the license file is not in the same directory, the text-based installation program cannot find it.
The text-based installation program gathers the same configuration information as the GUI installation program does. This information is stored in the installer.xml file in the directory where you run the installation program.
The installation program does not write the information it gathers into the installer.xml file until you exit the installation program, and you cannot go back when you use the text-based installation program. Therefore, when you use the text-based installation program, you should plan your installation carefully in advance, using the Single-server Installation Planning Worksheet or the Advanced Vibe Installation Summary Sheet. If you make a mistake during the installation, continue to the end of the installation process and exit the installation program normally, so that all information is saved. Then run the text-based installation program again. Your previous information is supplied as defaults, and you can change the information as needed.
Performing a Silent Installation
If your Vibe system expands beyond one server, you might need to repeatedly install the same Vibe components. A silent installation makes this an easy process.
-
Edit an existing installer.xml file so that it has the hostname of the server where you want to perform the silent installation and copy it to that server.
-
In the directory where the installation program is located, use the appropriate command to run the Vibe installation program, depending on the action that you want the silent installation to perform:
./installer-teaming.linux --silent --install
./installer-teaming.linux --silent --upgrade
./installer-teaming.linux --silent --reconfigure
The Installation program obtains all the information it needs from the installer.xml file and completes the installation without user interaction. If you have manually modified index server scripts, such as the indexserver-startup.sh file as described in Installing the Lucene Software, all modifications will be lost when you perform a silent upgrade. To retain your modifications, you should upgrade with the GUI installation program, as described in Using the GUI Installation Program.