REQUESTS
The newly introduced Requests tab provides Enhanced request listing with modern look and feel, with added features and advance Search and Filtering capabilities.
This Request page offers various actions that can be performed to make this page more user friendly.
Based on requirements, you can refer to any of the following links:
Request List
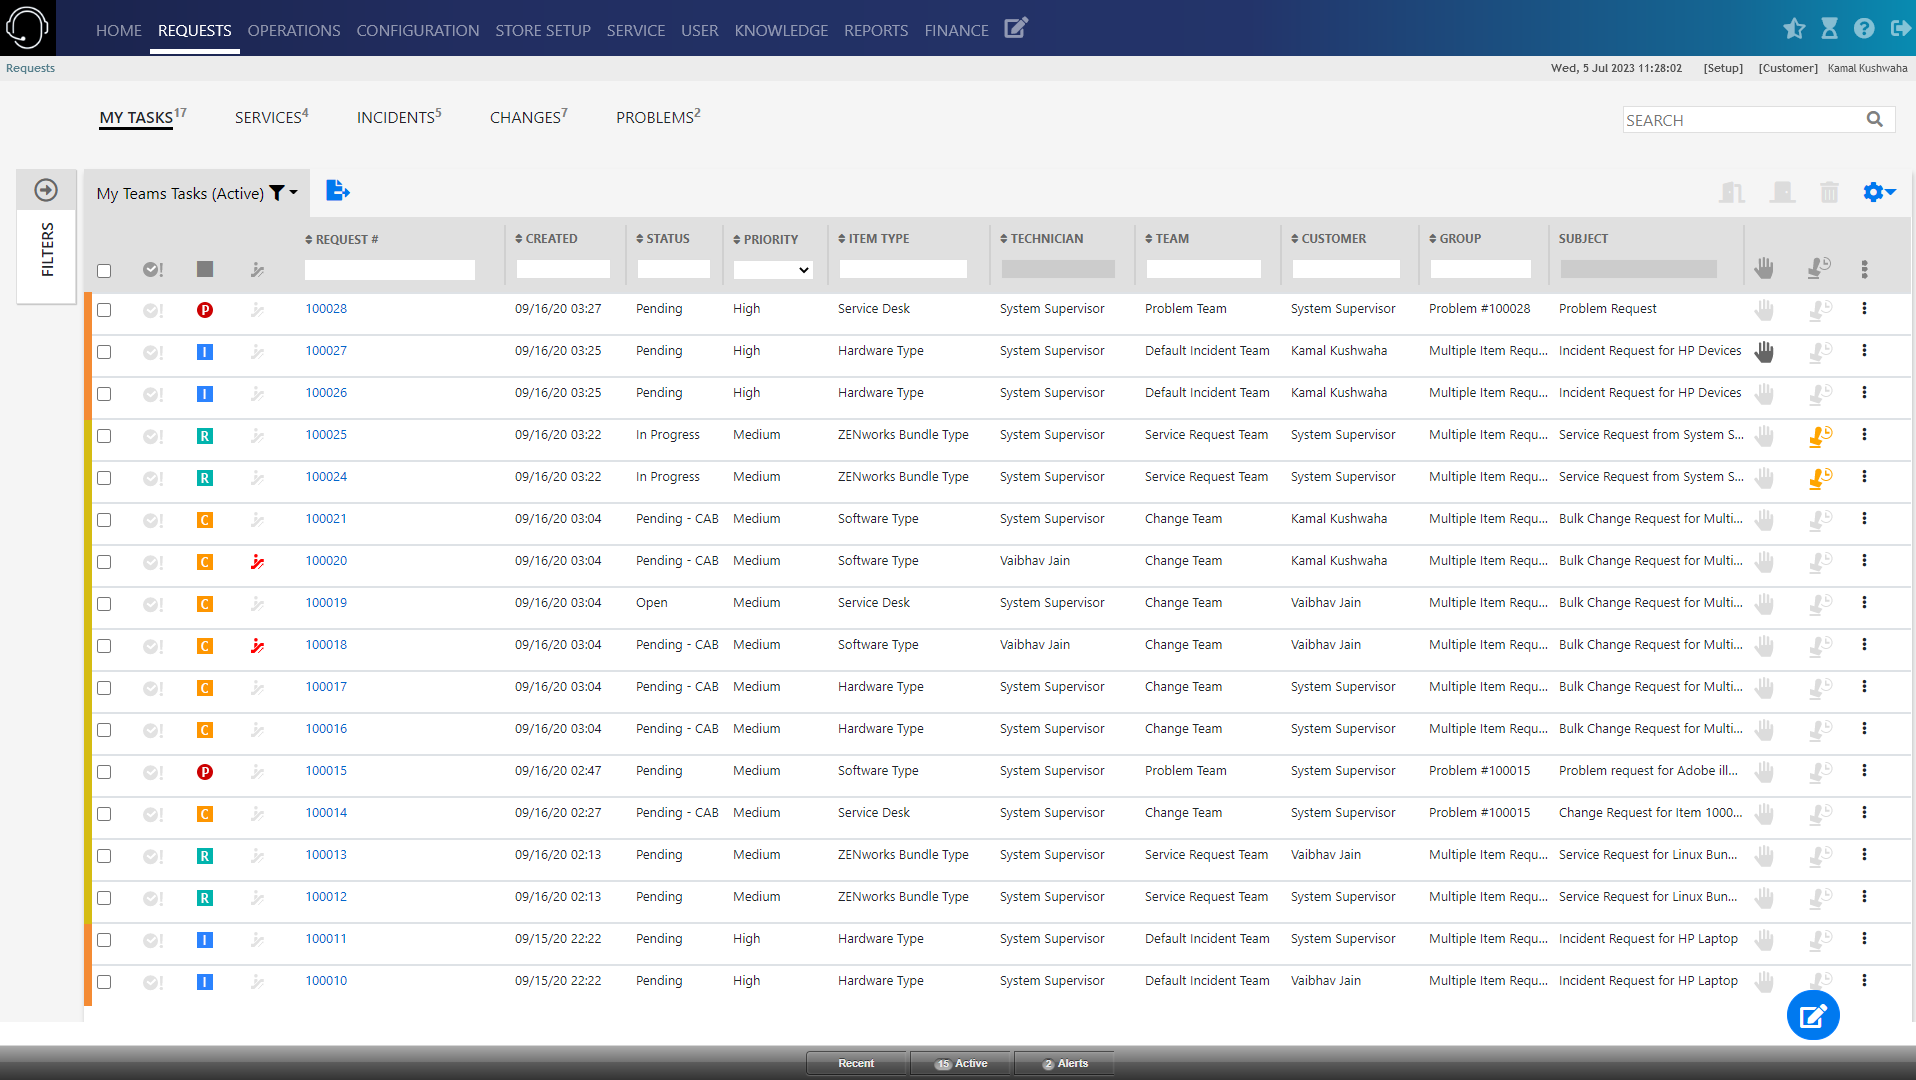
The Request List page displays all the requests. The requests can be identified based on the associated icon:
 Service Request
 Incident
  Change Request
 Problem
The following table provides information on various actions that can be performed in all the requests pages:
|
Actions |
Description |
|---|---|
|
Create Requests |
|
|
Export Data |
The list can be exported into a PDF or Excel by clicking After clicking the icon, the following pop-up will be displayed. 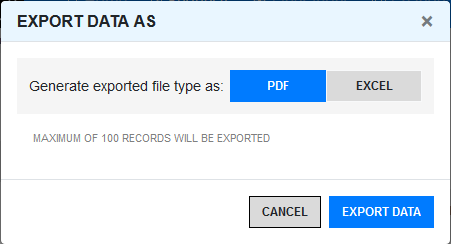
While exporting to excel, you have an option to select the columns that should be included in excel. 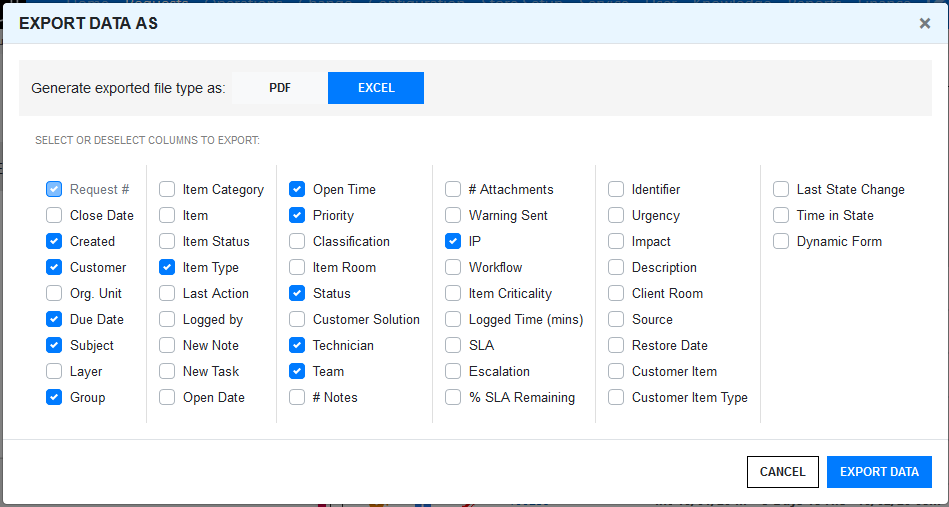
Note: By default, the displayed columns in the list view will be selected while exporting the data. |
|
Link |
To link (Group) requests, select the required requests, Click This is a bulk operator, you can select multiple request to link. However, If any selected request is part of an existing group, then the remaining requests will be added to the same group. The linking (grouping) fails, if you have selected requests that are part of more than one group. For instance, if you have two Groups (A and B) each with two requests (A1, A2, B1 and B2), and you want to add two unlinked requests to Group A, select the check boxes for the unlinked requests and either A1 or A2 or both. If B1 or B2 is also clicked, the linking process will fail as the system cannot decide to which group the two new requests should be added. The link icon is not displayed in the Problems tab. However, you can link the Problem Requests with other type of non-grouped requests in the My Tasks tab. |
|
Close |
Click This is a bulk operator, you can select multiple request to close. However, if you have selected multiple requests, then the operation will be performed only on the requests that are applicable. |
|
Reopen |
Click This is a bulk operator, you can select multiple request to reopen. However, if you have selected multiple requests, then the operation will be performed only on the requests that are applicable. |
|
Delete |
Click This is a bulk operator, you can select multiple request to delete. However, if you have selected multiple requests, then the operation will be performed only on the requests that are applicable. |
|
Customizing Columns |
To customize the displayed columns, you can drag or drop the column in the required place. To add more columns, click the
Note: For older request, Time in State and Last State Change columns will not display any data. After modifying the requests, the data will be displayed in these two columns. For more information, see Customizing Columns section. |
|
Awaiting Inputs |
The |
|
Awaiting Approval |
The |
|
SLA Breached |
The |
|
Escalated |
The |
|
More Actions |
Click the Depending on the privileges, the option enabled might vary.
|
|
Search |
On the top-right corner of the request list page, you can find the search field. Using this field, you can search for Requests. For more information, see Full Text Search Options. |
|
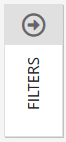
Filters |
Click the arrow icon to view filter panel. Using this panel, you can filter requests based on various available options. For more information on the available filter options, see the Filters section. |
|
Messages |
If a user adds a note to the technician in the request, then the message will be displayed along with the request, as shown in below image.
|
 icon represents that the request is awaiting inputs from the customer.
 icon represents that the request is Awaiting My Approval.
 icon represents that the request is escalated.
 icon to view actions that can be performed on the request.


My Tasks
My Tasks displays current active requests allocated to the logged in User. They can also view a list of active or all tasks assigned to the Team(s) the User is associated with, by selecting the relevant My Teams Tasks Filter.
To view a request details, select the Request #hyperlink.
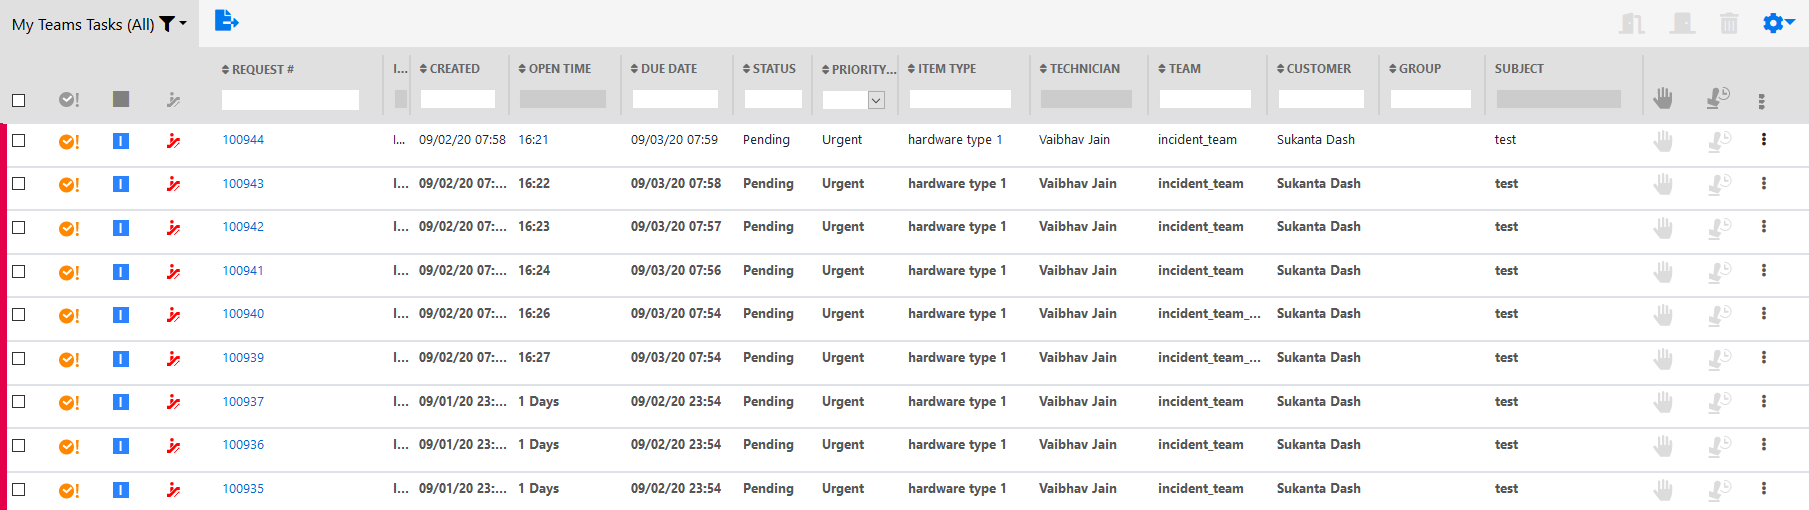
If a request row is in bold, then the request has not been viewed by the technician.
For more information on the tasks that can be performed in this page, see Request Actions
Service Requests
This page lists all the associated service requests.
To view a request details, select the Request #hyperlink.
If a request row is in bold, then the request has not been viewed by the technician.
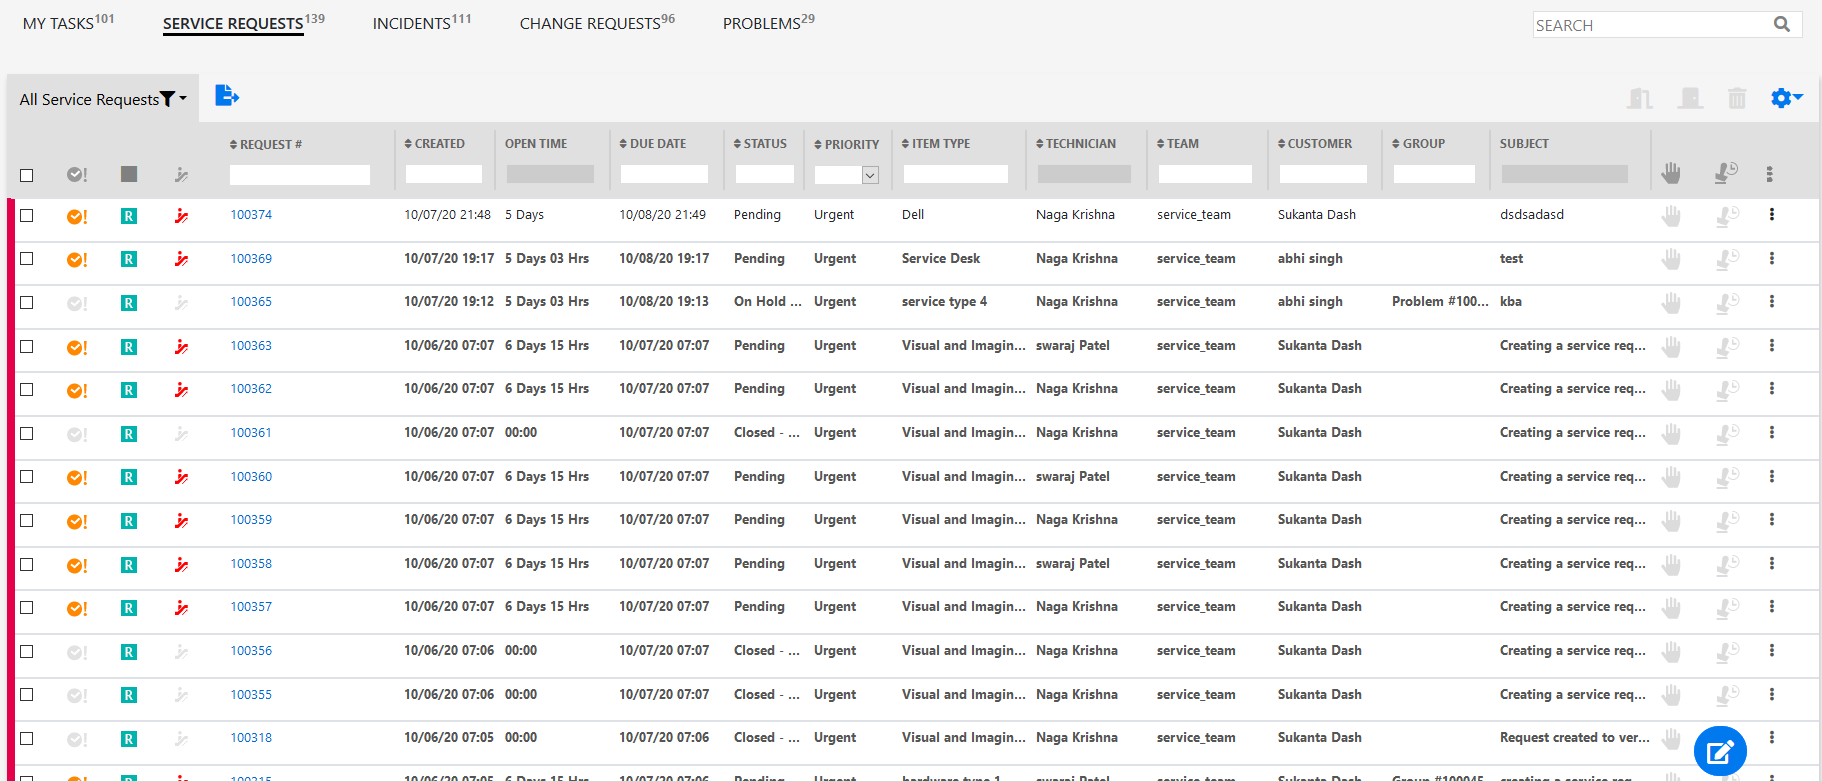
For more information on the Service Request, see Service Requests.
For more information on the tasks that can be performed in this page, see Request Actions .
For more information on the Request Summary page, see Request Summary .
Incidents
This page lists all the associated incident requests.
To view a request details, select the Request #hyperlink.
If a request row is in bold, then the request has not been viewed by the technician.

For more information on the Incident Request, see Incident Requests.
For more information on the tasks that can be performed in this page, see Request Actions .
For more information on the Request Summary page, see Request Summary .
Change Requests
This page lists all the associated change requests.
To view a request details, select the Request #hyperlink.
If a request row is in bold, then the request has not been viewed by the technician.
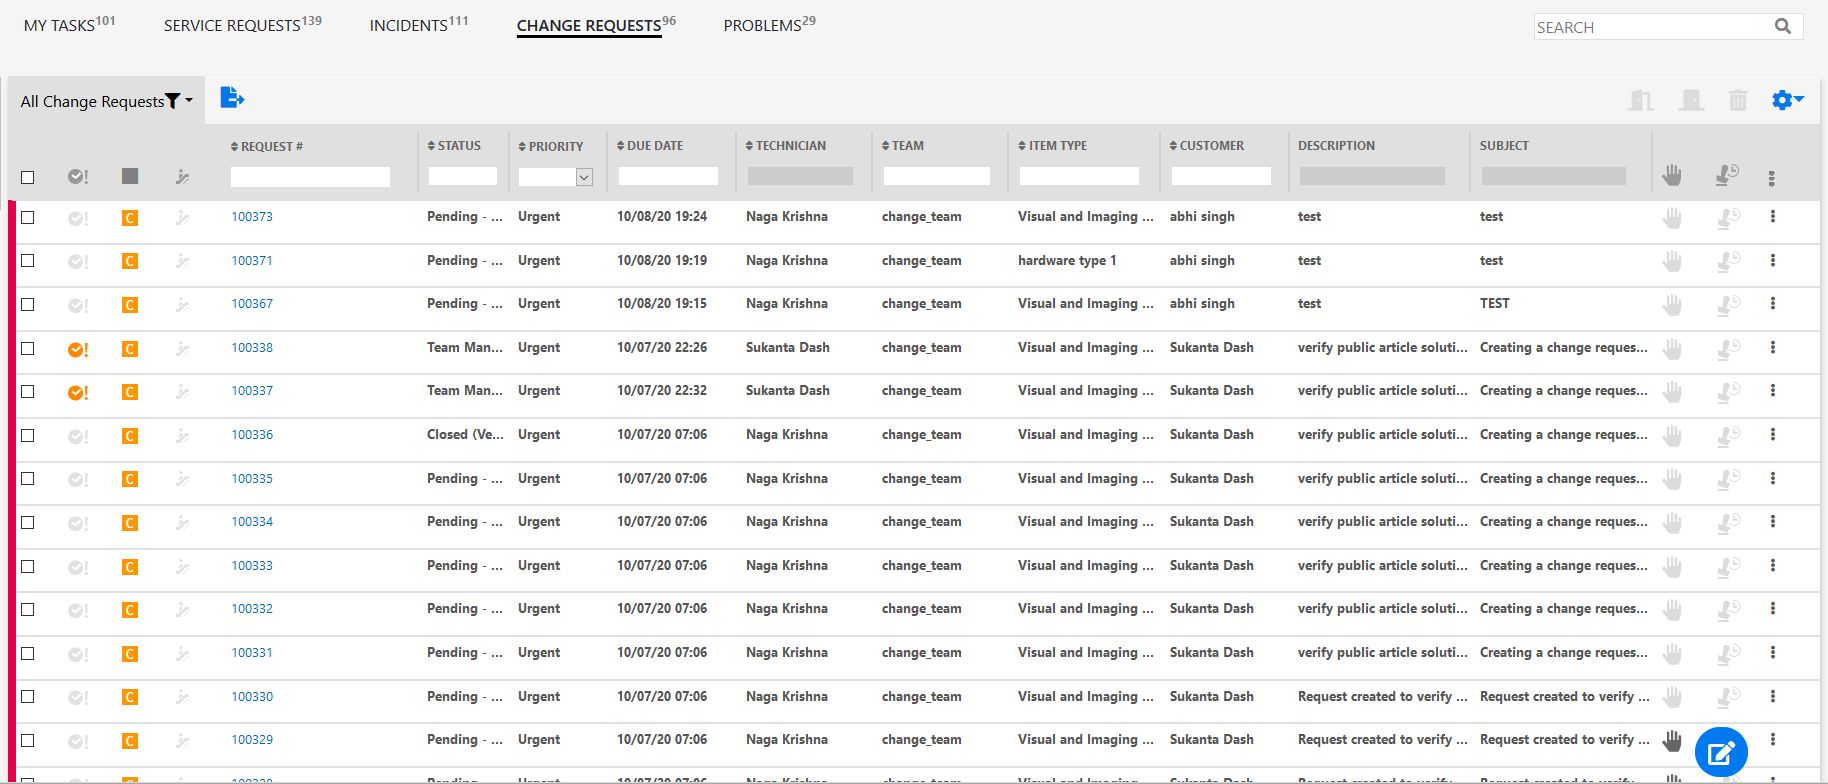
For more information on the Change Request, see Change Requests.
For more information on the tasks that can be performed in this page, see Request Actions .
For more information on the Request Summary page, see Request Summary .
Problems
This page lists all the associated problems logged with the system.
To view a request details, select the Request #hyperlink.
If a request row is in bold, then the request has not been viewed by the technician.
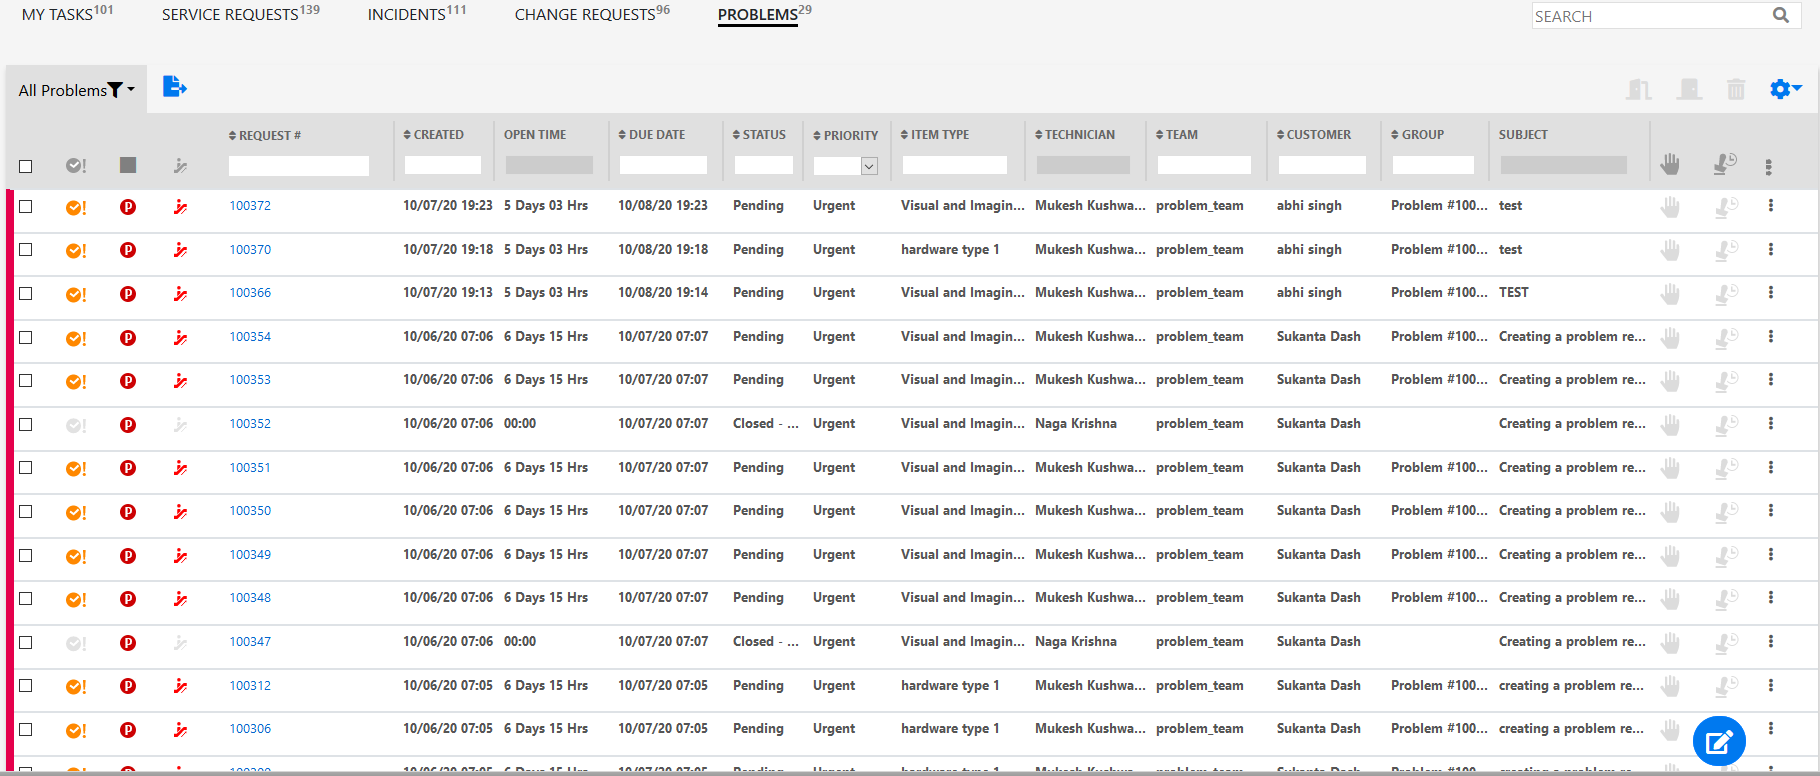
For more information on the Problem Request, see Problem.
For more information on the tasks that can be performed in this page, see Request Actions .
For more information on the Request Summary page, see Request Summary .
Request Summary
The Request Summary page section provides comprehensive details related to a Request.
The Following table provides a brief introduction on the information displayed in the Request Summary page:
|
Field/Section |
Description |
|---|---|
|
Subject |
Displays the priority of the request, Request types, Request Number and Request subject.
|
|
Description |
|
|
Notes |
Displays the Note associated with this request.
For more information on Adding Note, see the Add Note section. |
|
General |
In the General panel, generic information about the request is displayed. For more information that is displayed in this panel, see the General section. |
|
Impact |
In the Impact panel, impact information of the request is displayed. For more information that is displayed in this panel, see the Impact section. |
|
Audit |
In the Audit panel, audit information about the request is displayed. For more information that is displayed in this panel, see the Audit section. |
|
Delete |
Click |
|
Duplicate |
Click |
|
Assign to Me |
Click |
|
Convert To |
Click Only the following requests can be converted: Incident to Service Request: To convert Incident to Service Request, Item should not be unknown, item should belong to the service category, incident should not have solution/ workaround applied, there is at least one user in ZSD with "Service Request" process assigned. Service Request to Incident: To convert Service Request to Incident, Item should not be unknown. |
|
Export as PDF |
Click After clicking the icon, a pop-up is displayed. In the pop-up, you can select the options to include all notes or last note associated with this request, and to include Private Notes associated with this request.
|
|
Print Preview |
Click In the preview pop-up, Click the Print button to print the request. |
|
Similar Requests |
Click After clicking the icon, a pop-up is displayed. In the pop-up, you can select any required request and the request opens in a new browser tab.
|
|
Alerts |
Alerts are used by Administrators, Supervisors and Technicians to notify Users and Customers about important issues relevant to them or their environment. This panel displays the alerts associated with this request.
For more information, see the Alerts section. |
|
Service Terms |
The Service Terms sidebar displays the Service Level Agreement (SLA) assigned to the Service Request and provides details of key dates.
For more information, see the Service Terms section. |
|
OLA/UPC Configuration |
The UPC panel displays the support services provided to the Service Desk by external service providers.
For more information, see the UPC Configuration section. |
|
Solutions |
The Solutions panel displays the proposed solutions and Workarounds that are applicable to the request. It also displays the applied solution, Workaround or backout procedure.
For more information, see the Solutions section. |
|
Linked Requests |
In the Linked Request panel, you can link requests or group with the current request. The requests that are already linked with the request will also be displayed in this panel.
For more information, see the Linked Requests section. |
|
ZENworks Tools |
The ZENworks Tools panel enables you to perform Bundle Management and Remote Control operations.
For more information, see the ZENworks Tools section. |


 to export the Request details into a PDF file.
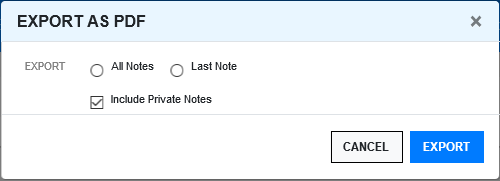
 to preview the Request for printing.
 to view Requests similar to this request.
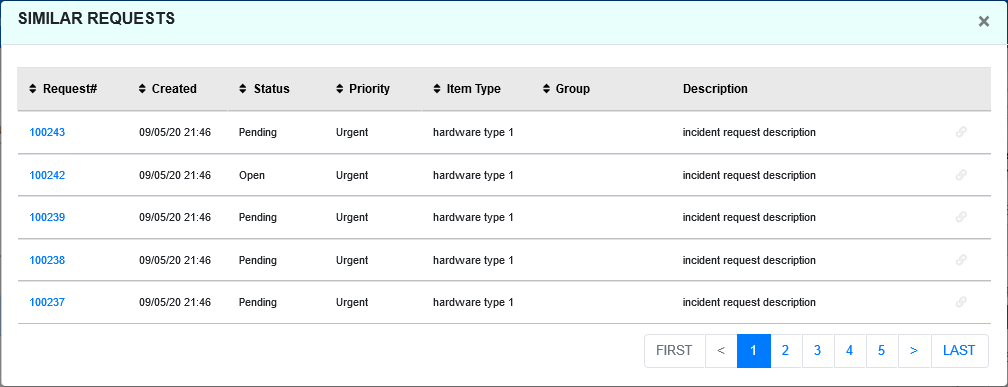
General
The General panel displays the following information:
|
General Section |
Description |
|---|---|
|
Details |
The following details are displayed:
After making the modifications, click the save button. |
|
Escalation |
The following details are displayed:
|
|
Notification |
The following details are displayed:
|
|
Additional Information |
The following details are displayed:
|
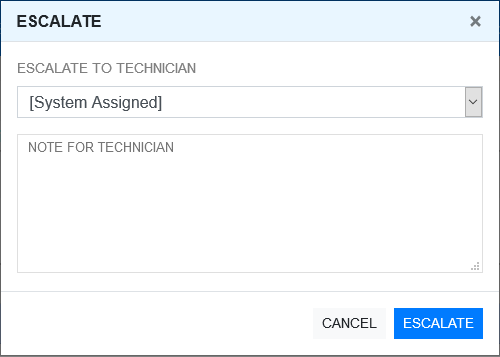
 icon to de-escalate the request. After clicking the icon, a pop-up is displayed as shown below.
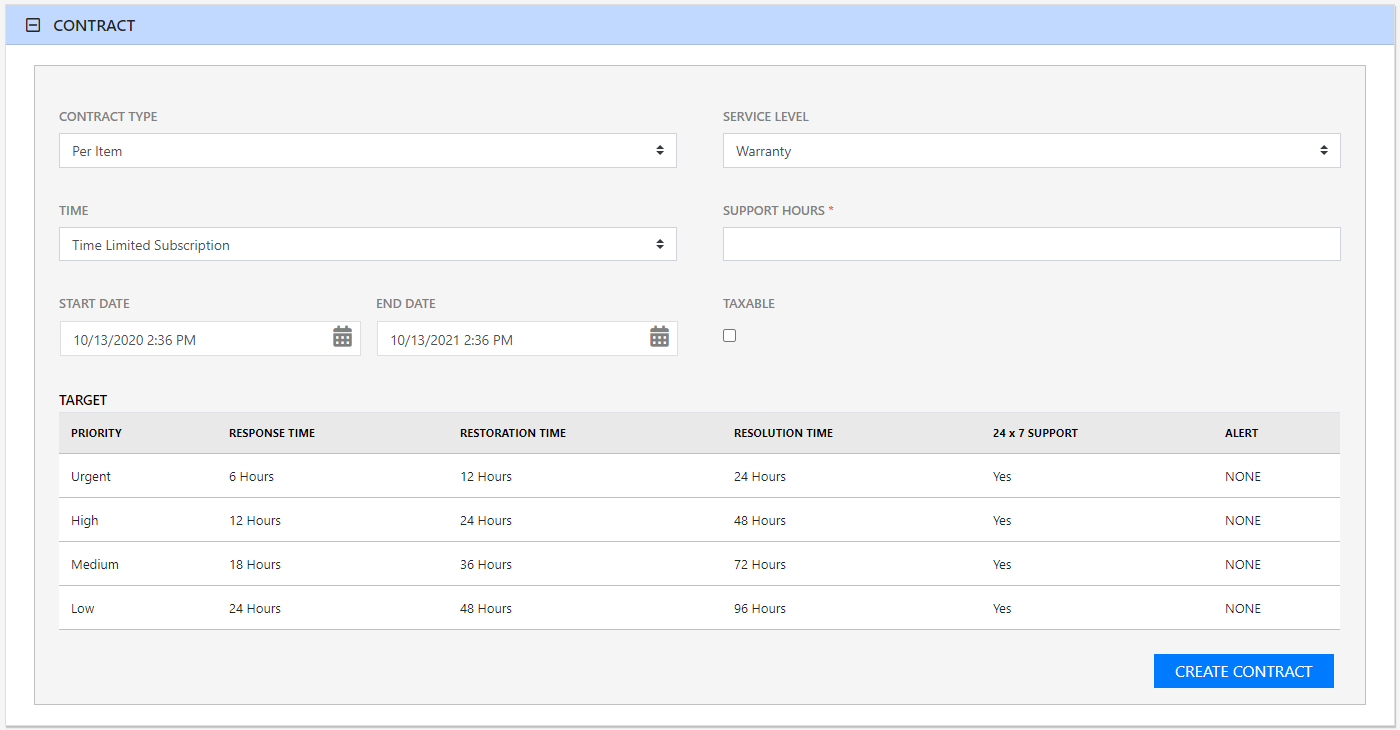
Contract
If the Contracts are enabled for the system, the Contract tab is displayed in the Request Summary page.
When Contract is enabled, the request is in non-edit mode. To change the request to edit mode, you need to create contract - per Item base or Per request base.
If the Contract panel is not enabled, then go to Setup > Billing > Setup > Enable Contracts to enable the Contracts panel.
For more information on Contracts, see Contracts.
Impact
The Impact section provides the capability to measure the progress of a Service Request relative to agreed Service Level targets and Workflow time estimates. It also includes a quick reference for identifying other Services or Items affected by the Request.
This section displays a summary of the following:
Options |
Description |
|---|---|
Service Targets |
Displays the target response, restoration and resolution times based on the Service Level Agreement/OLA assigned to the Request. |
Service Level Breaches |
Displays service level breaches that have occurred and allows Users to assign a breach code and explanation for the breach. |
Services Affected |
Displays the Service Item Number, the Service SLA and number of Affected Users for any Services related to the Item associated with the Request. |
Estimates |
Provides a summary of the time estimated for each state of the Workflow based on the OLA assigned to the Request. |
Planned Outages
|
Provides a list of all the Planned Outages for the Item assigned to the Request. Click New to create planned outages. |
Contract Monitor
|
If the current Service Request Workflow State is assigned an Underpinning Contract or OLA, a table is displayed outlining the response, restoration and resolution milestones. When a milestone is met, the User is required to check the relevant checkbox. The application will automatically calculate the actual time accrued to achieve the milestone. The value displayed here is used for the Contract reports. |
Purchases |
When Purchase Orders are enabled in the system, any Purchase Orders associated with Items assigned to the Request are accessible through this option. |
Services Affected
When the request is logged against an Item that is associated with Services within the Item Relationships tab, the Services Affected option displays the Service Item Number, the Service SLA and number of Affected Users.
This panel displays the following information:
Options |
Description |
|---|---|
Item Number |
Displays the item number associated with the service. |
Type |
Displays the name of the item type. |
Service Level |
Displays the associated service level. |
Affected Users |
Displays the number of affected users. |
Category |
Displays the category details. |
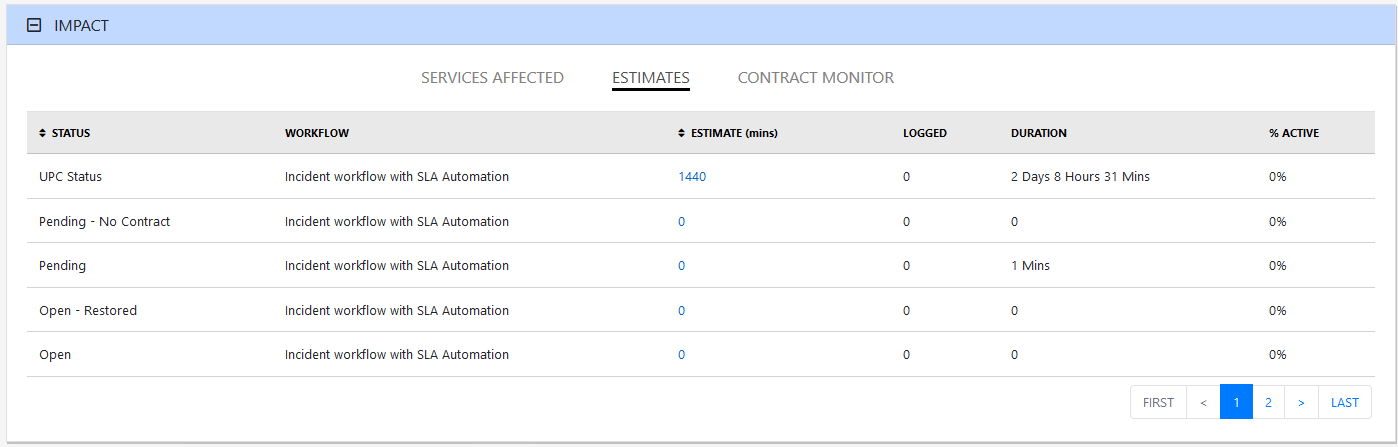
Estimates
The Estimates option allows Users to view an indication of the approximate time a Request should remain in each State of the Service Request Workflow, the amount of time logged in each State and the length of time the Request resided in each State.
Options |
Description |
|---|---|
Status |
Displays the status of the estimates. |
Workflow |
Displays the name of the workflow associated with this estimate. |
Estimate |
Indicates the approximate length of time the Request will spend in the Workflow State. This field is automatically completed if an OLA or UC is assigned to the Workflow State. |
Logged |
Is a combination of time accrued against the Request when in edit mode with the automatic timers enabled, and the sum total of Note Times manually entered by Users. Note: The Automatic timer is not applicable for the redesigned request page. |
Duration |
The total time a Request has resided in the Workflow State. |
% Active |
The percentage of the Total time that the Request was actively worked on when in the State. The calculation is, (Logged Time divided by Total Time) x 100. |
The Estimate Times are drawn from the OLA and Underpinning Contract assigned to the current State.
Contract Monitor
When a Workflow State with an OLA or Underpinning Contract is assigned to the Request, the Contract Monitor displays the details of the Contract. The information is used for reporting purposes and includes:
Details |
Description |
|---|---|
Contract Type |
Specifies if the Contract Type is an OLA or Underpinning Contract. |
Start Time |
Auto-generated time the request moved to the current Workflow State. |
Milestones |
|
Expected Response Time |
Response Time calculated using the Contract target parameters. |
Responded |
Actual Response Time auto-calculated when the User checks the box. |
Expected Restoration Time |
Restoration Time calculated using the Contract target parameters. |
Restored |
Actual Restoration Time auto-calculated when the User checks the box. |
Expected Resolution Time |
Resolution Time calculated using the Contract target parameters. |
Resolved |
Actual Resolution Time auto-calculated when the User checks the box. |
Comments |
Allows for additional comments, if required. |
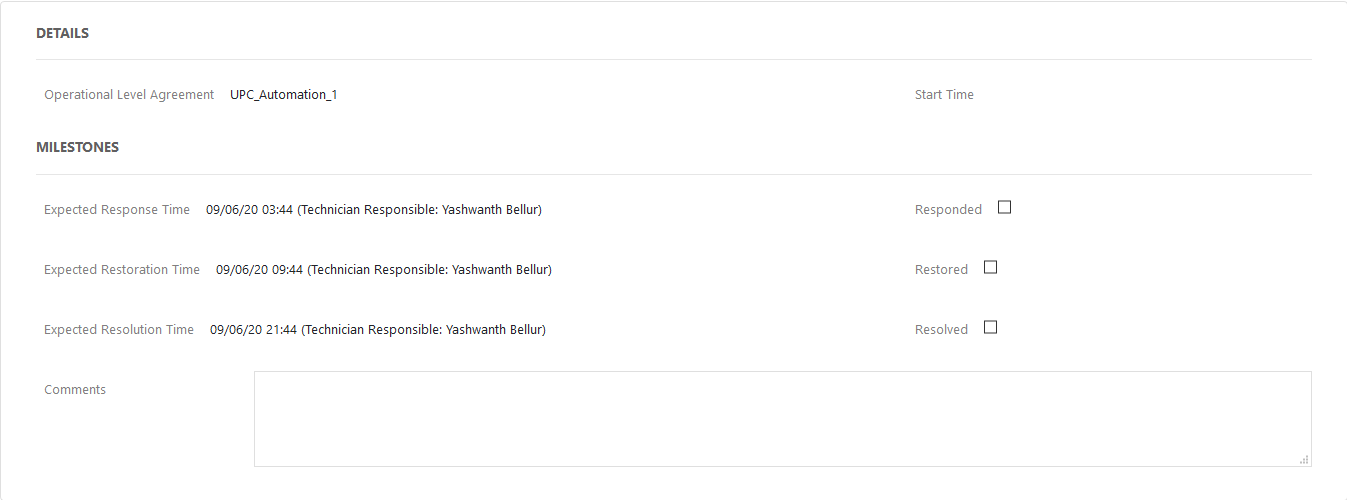
If Milestones are breached the Response, Restoration and Resolution times are assigned a red marking.
Audit
The Audit Trail section lists all activities that occur within the lifecycle of a Request, the resources used and the history of the Request.
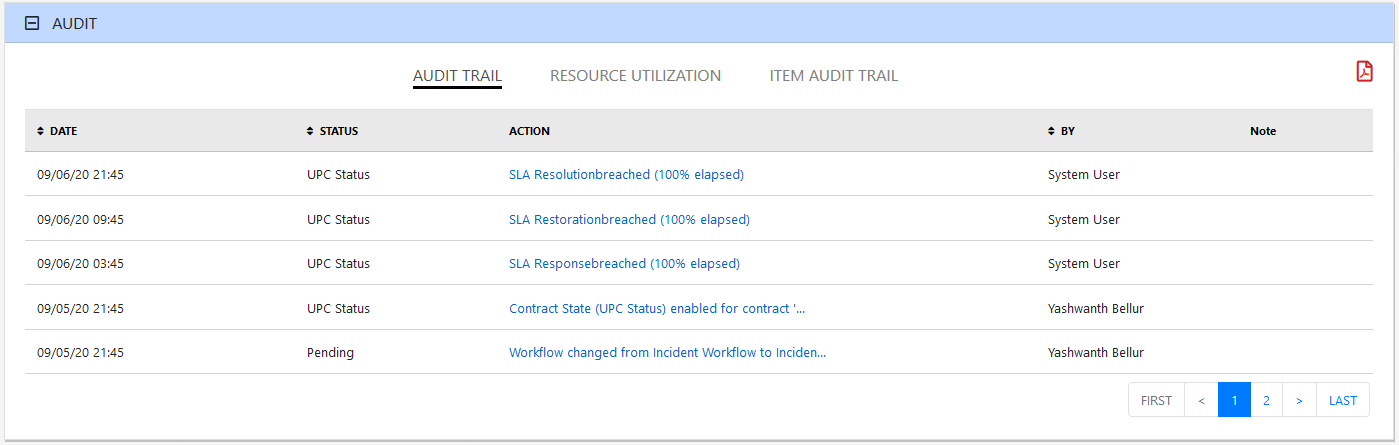
Audit Trail
The
Audit Trail tab records all changes made to a Request. The logged changes can be exported to a PDF by clicking the  icon. The PDF includes the following information:
Date and time the Request was assigned and/or reassigned to Technicians.
When the Request was escalated to a new layer of support, or had its priority or due date changed
Details of Notes added
Attachments activity
Status change
Classification change
Logged time.
Resource Utilization
The Resource Utilization tab displays a breakdown of the time a Request was worked on at each level of support. It details the User's name, the escalation layer they belong to and the amount of time they have spent on the Request.
Item Audit Trail
The history of the Item associated with the Request is detailed within Item Audit Trail.
Click the  icon at the end of the request page to copy the link to the request.
Add Note
The Request Information page displays all the notes associated with the request.
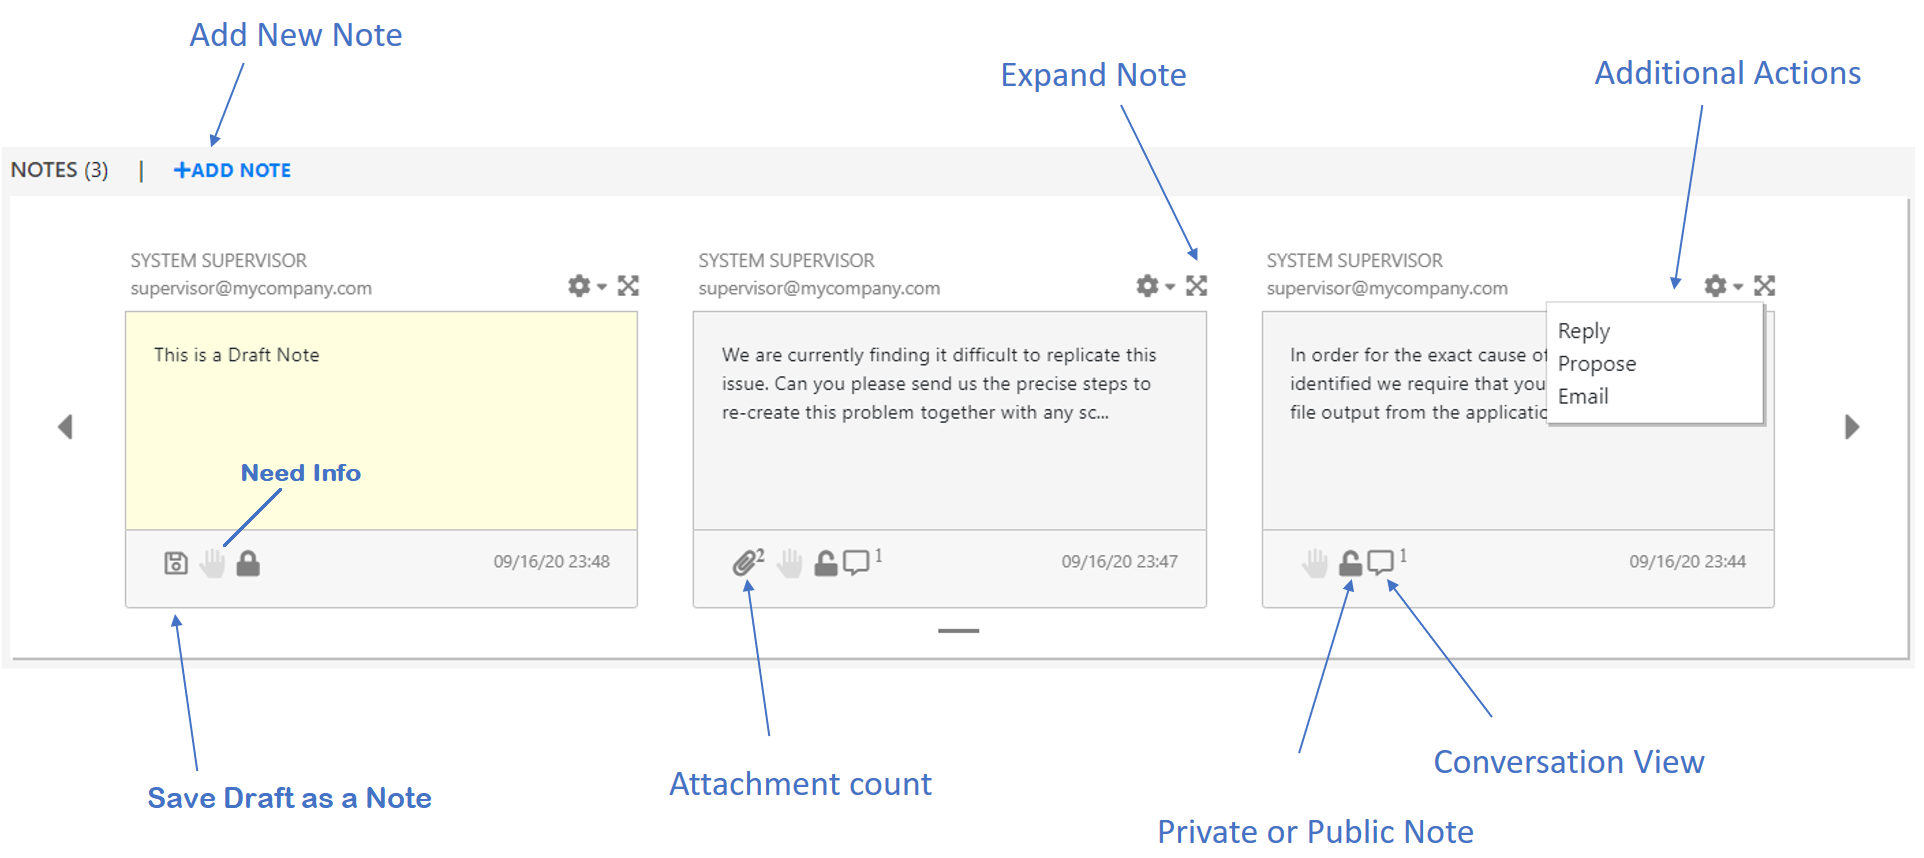
To add a new note, click +ADD NOTE. After clicking the +ADD NOTE, an Add Note pop-up is displayed. Depending on the privileges, following fields will be displayed.
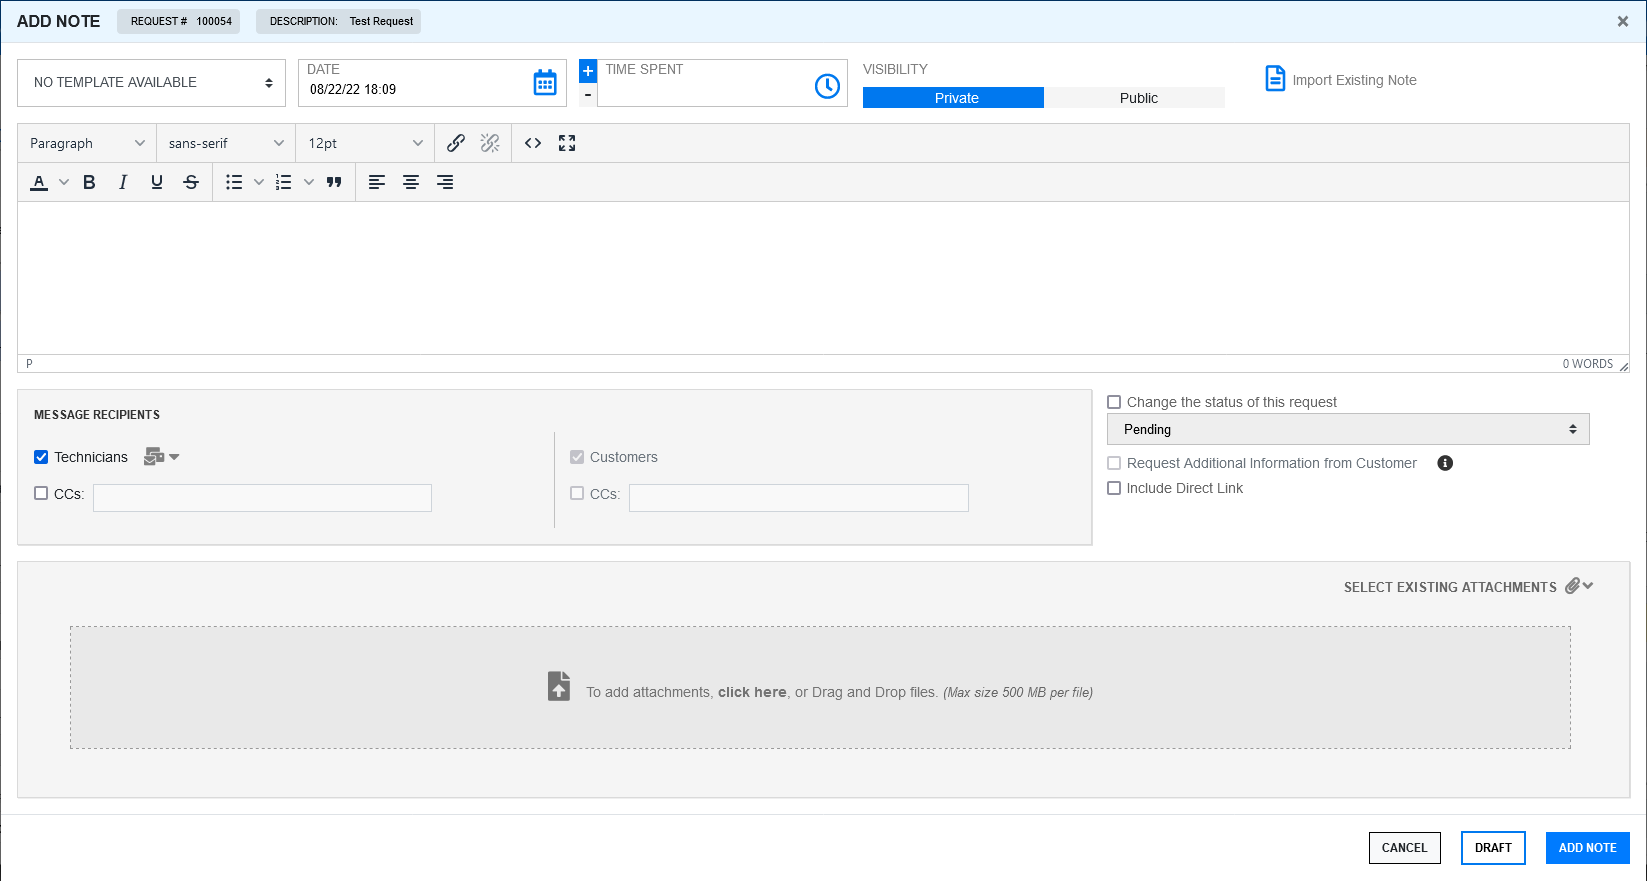
Update the following required information and then you can either add the note or save the note as a draft.
Select Template: In this drop-down, select a predefined template that should be added as a note description.
Time Spent: In this field, specify the time spent on the request. The specified time will be included in the overall time spent on the request.
Visibility: Select if the note should be Private or Public.
Import Existing Note: In this field, you can view other notes added to this request.
Description: In this field, specify the description for the note.
Message Recipient: In this field, select or specify email IDs to whom the addition of note should be notified.
Change the status of this request: In this field, select this checkbox, and then select the next status of the request that should be changed after adding the note. If the status change checkbox is selected, Draft, Propose and Solution will be disabled .
Request Additional Information from Customer: Select this option, if you need any additional information from the customer.
Include Direct Link: Select this option, if you want to include the direct link of the request in the Note.
Create Knowledge Base: Click this option, if you want to convert this Note as a Knowledge Base.
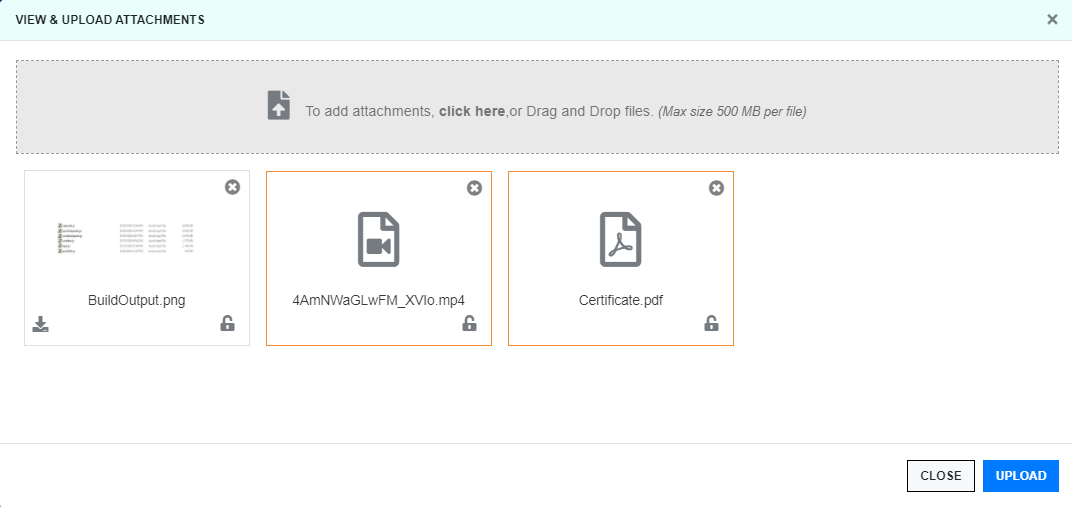
Select Existing Attachments: If required, you can add an attachment associated with the Request to the note. To add an attachment, click the attachment icon, and then select the available attachment.
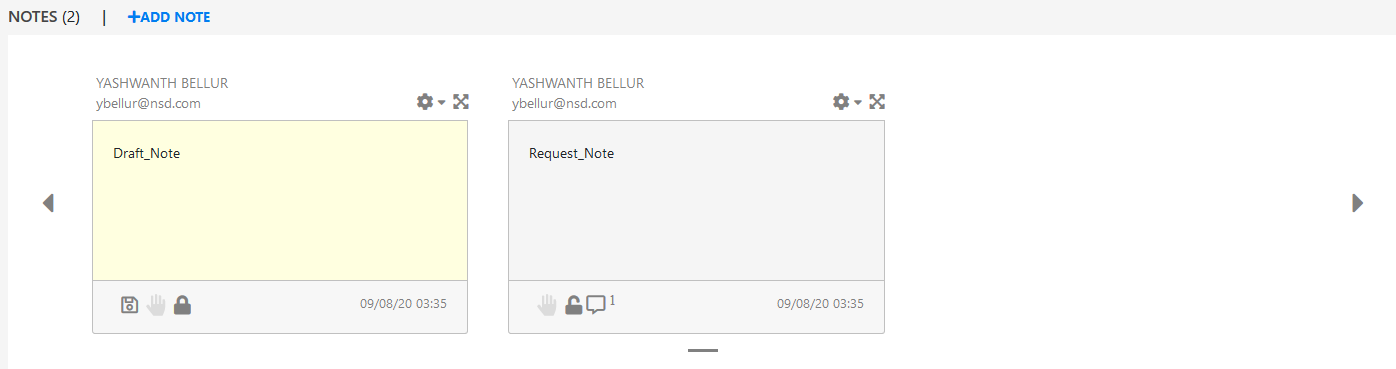
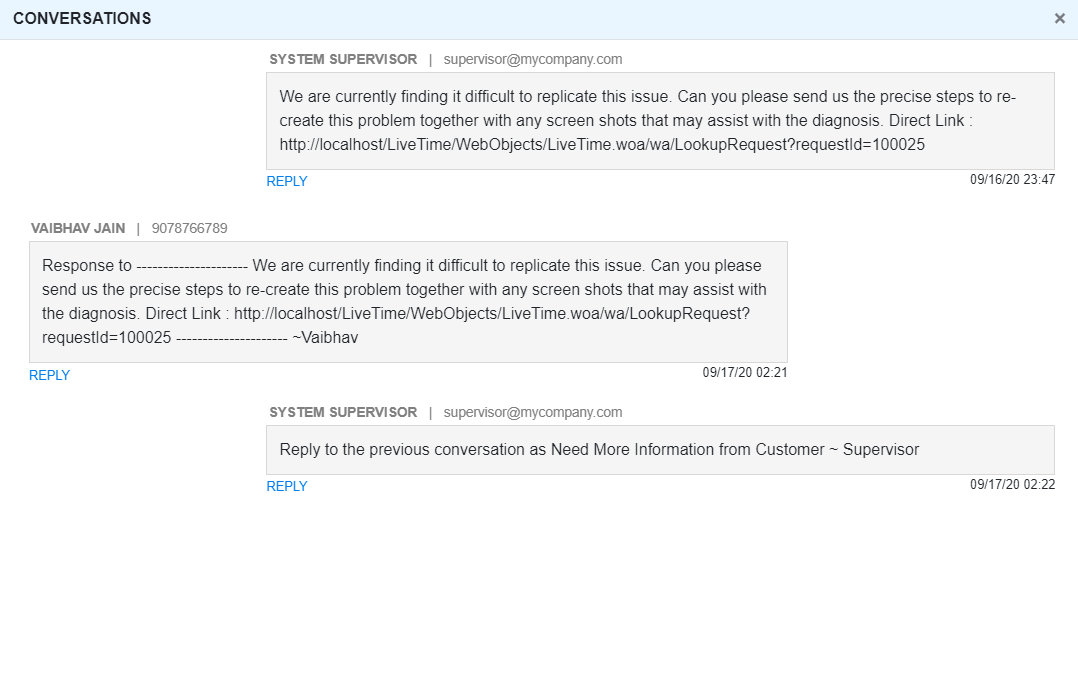
The conversational view of the notes will be displayed as shown in the following image:
Alerts
Alerts are an internal mechanism used by Administrators, Supervisors and Technicians to notify Users and Customers about important issues relevant to them or their environment.
This panel displays the alerts associated with this request.
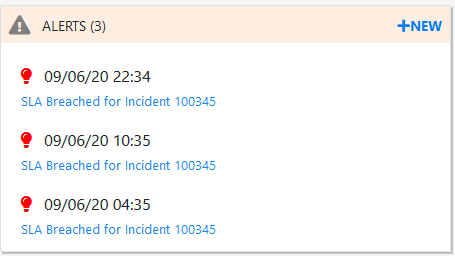
If required, you can create a new Alert by clicking the Add button.
After clicking the Add button, a pop-up is displayed as shown below:
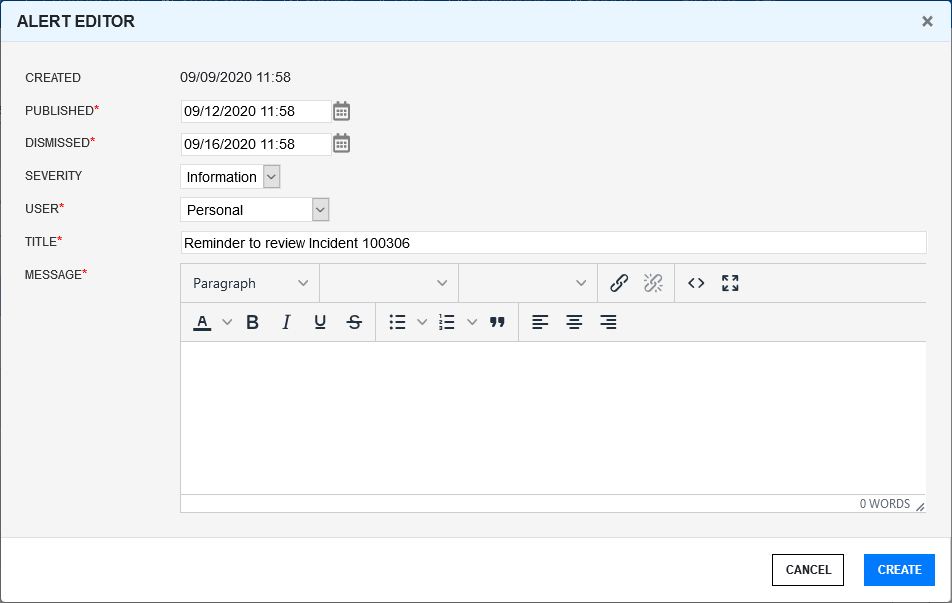
Specify the following information, and then click Create:
Created: The current date and time.
Published: The date the Alert is published. Use the calendar icon to the right of the field, to select a Publish date.
Set to a date in the future, or use the default to publish the Alert immediately.
Dismissed: The date the Alert ceases to be available. Use the calendar icon to the right of the field, to select a Publish date. On this date, the Alert will disappear from a User's Alert list.
Severity:The type of Alert to be published. The choices are:
Information – for general Alerts
Warning – to warn Users of potential issues
Urgent – to publish an urgent actionable message.
User: The User type to receive the Alert, which include:
Specific Customer or User - In the Find User or Customer list, click search to select the recipient from the drop-down list.
User Role - An Alert sent to a User Role will go to all Users with that Role.
Personal - A personal Alert appears on the User's own screen at the Publish date.
Organizational Unit - In the Find Org. Unit field, search and select the recipients.
Public - A Public Alert appears when the Public Alert link is selected on the Login Page.
Title: Specify a title for the Alert
Message: Enter a main content of the Alert.
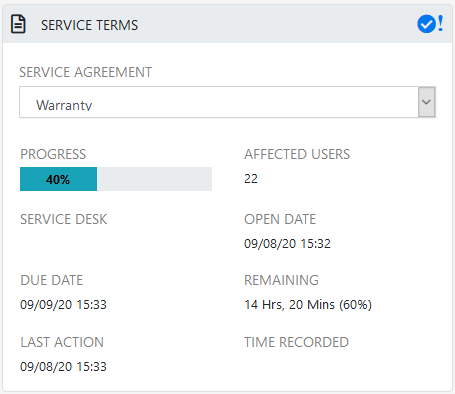
Service Terms
The Service Terms sidebar displays the Service Level Agreement (SLA) assigned to the Service Request and provides details of key dates.
By default the application calculates the Due Date based on the Priority of the SLA assigned to the Customer, Organizational Unit or Item. The email reminders and escalations are then managed accordingly. If an SLA is not associated with the Service Request via the Customer, Org Unit or Item, the system default SLA will be automatically assigned to the Service Request but can be manually adjusted by the Technician. Once the Workflow is moved from the default Open State, the SLA can no longer be edited.
Service Agreement: Displays the Service Level Agreement assigned to the Request. The service level is derived from either the Customer, Organizational Unit or Item.
When Contracts are not enabled, the Agreement field can be edited, when the Request is in edit mode.
Progress: Visually displays how the Request is tracking against the assigned SLA. The grey progress bar is gradually filled in based on the status of the SLA:
Workflow is in an SLA paused State. Triggers will not fire.
Workflow is in an SLA timers on State. Triggers will fire.
Workflow is in an Exit State and the SLA has been successfully maintained.
Assigned SLA has been breached and Workflow is in an Exit State.
Affected Users: Number of Customers assigned to the Item associated with the Request.
Open Date: The open date field is automatically populated when the Request is created.
Due Date: By default the application calculates the Due Date based on the SLA Target for the Priority assigned to the Request, and email reminders are sent accordingly.
Fixed Date: Auto-filled when the Request moves into a Workflow State that is defined as meeting the SLA Resolution Time.
Remaining: Auto-filled and visible when there is SLA time remaining.
Time Overdue: Auto-filled and visible when the SLA is overdue.
Close Date: Auto-filled when the status of a Request is set to Closed. This date is fixed.
Resolution Time: Auto-filled with the number of minutes it took for the Request to move from the first SLA active state to a Workflow State that is defined as meeting the SLA Resolution Time.
Last Action: Auto-filled when Done or Save is selected after the Request has been modified or opened in edit mode. As changes may be made to a Request after it has been Closed, this date may fall after the Close Date.
Time Recorded: Displays the total time spent on a request that is specified by a technician.
Note: The Automatic timer is not applicable for the redesigned request page.
OLA/UPC Configuration
Underpinning Contracts (UPCs) are used to manage support services provided to the Service Desk by external service providers. These Contracts ensure the external parties maintain their service obligations to the Service Desk, which ensures the Service Desk meets the SLA expectations of its Customers.
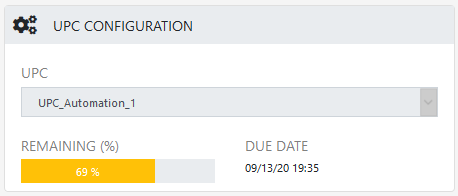
UPC: Displays the UPC assigned to the Request. The UPC is derived from either the Customer, Organizational Unit or Item.
When Contracts are not enabled, the Agreement field can be edited, when the Request is in edit mode.
Remaining: Auto-filled and visible when there is UPC time remaining.
Due Date: By default the application calculates the Due Date based on the SLA Target for the Priority assigned to the Request, and email reminders are sent accordingly.
Solutions
The Solutions panel displays the proposed solutions and Workarounds that are applicable to the request. It also displays the applied solution, Workaround or backout procedure.
Solutions are Knowledge Base Articles that could be existing in the Knowledge Base or that could have been generated as fixes for the request.
Workarounds are temporary fixes applied to a request.

To view the details, you can click the Solution, Workaround or backout procedure. The article will be displayed in a pop-up window.

In the Solutions panel, you can perform the following actions:
Search: In the Search field, specify any keyword. Depending on the specified keyword, results will be displayed.
Apply Solution or Workaround: To apply a solution or Workaround, click the Apply button.
Relevance is displayed along with All Solutions and Workarounds. Based on requirements and relevance, you can apply the solution or Workaround.
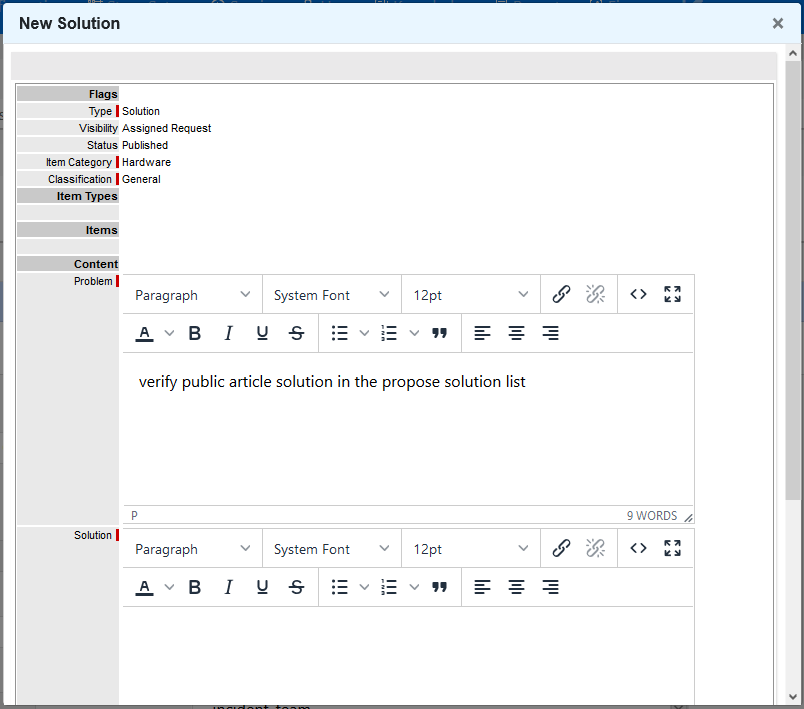
Create Solution, Workaround or Backout procedure: To create a Solution, Workaround or a Backout procedure, click the New button in the panel, and then select the required option.
Specify all the required details in the new pop-up window and then click Save.
You have an option to remove the applied Solution, Workaround or Backout procedure. To remove, click the

If you have already applied a solution, Workaround or Backout procedure, then you will not be able to link other solution, Workaround or backout procedure. To add new solution, Workaround or backout procedure, remove the existing solution, Workaround or backout procedure.
The note saved as a solution will also be displayed here. You also have an option to create a Knowledge Base out of that by clicking on that solution and selecting "Create Article".
Some of the options might not be applicable based on certain criteria.
Linked Requests
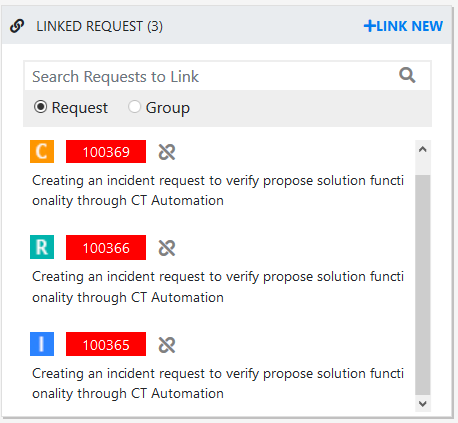
The Linked Requests panel lists the requests that are linked to the request. In the Linked Request panel, you can link requests or group with the current request. The requests that are already linked with the request will also be displayed in this panel.
In the Linked Request panel, you can perform the following actions:
To link a new request, click Link New and then select the required request type. This will create a new request of selected type, using the information for the current request, and will link with the current request.
To link with an existing request or group, specify the respective ID in the search field and then click the link icon.
To unlink a request, click the unlink icon associated with the request.
Note: If the current requests is part of a group, then linking with group, or with existing request that is part of another group is not applicable.
ZENworks Tools
The ZENworks Tools panel enables you to perform Bundle Management and Remote Control operations. Depending on the privileges, the tools will be displayed.
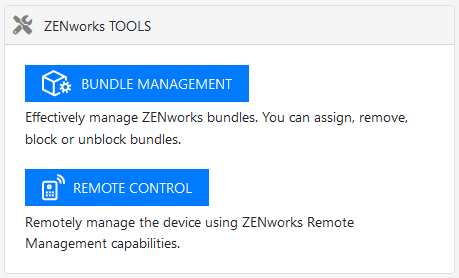
Bundle Management: Using this option, you can assign, remove, block and unblock bundles.
Remote Control: Using this option, you can remote control devices associated with the request.
Create Quick Request
From ZENworks Service Desk 8.2 onwards, the Create Quick Request icon is displayed in pages of the Requests tab.
To create a quick request, click the ![]() icon displayed at the bottom of the page.
icon displayed at the bottom of the page.
The Create Quick Request window is displayed as shown below.
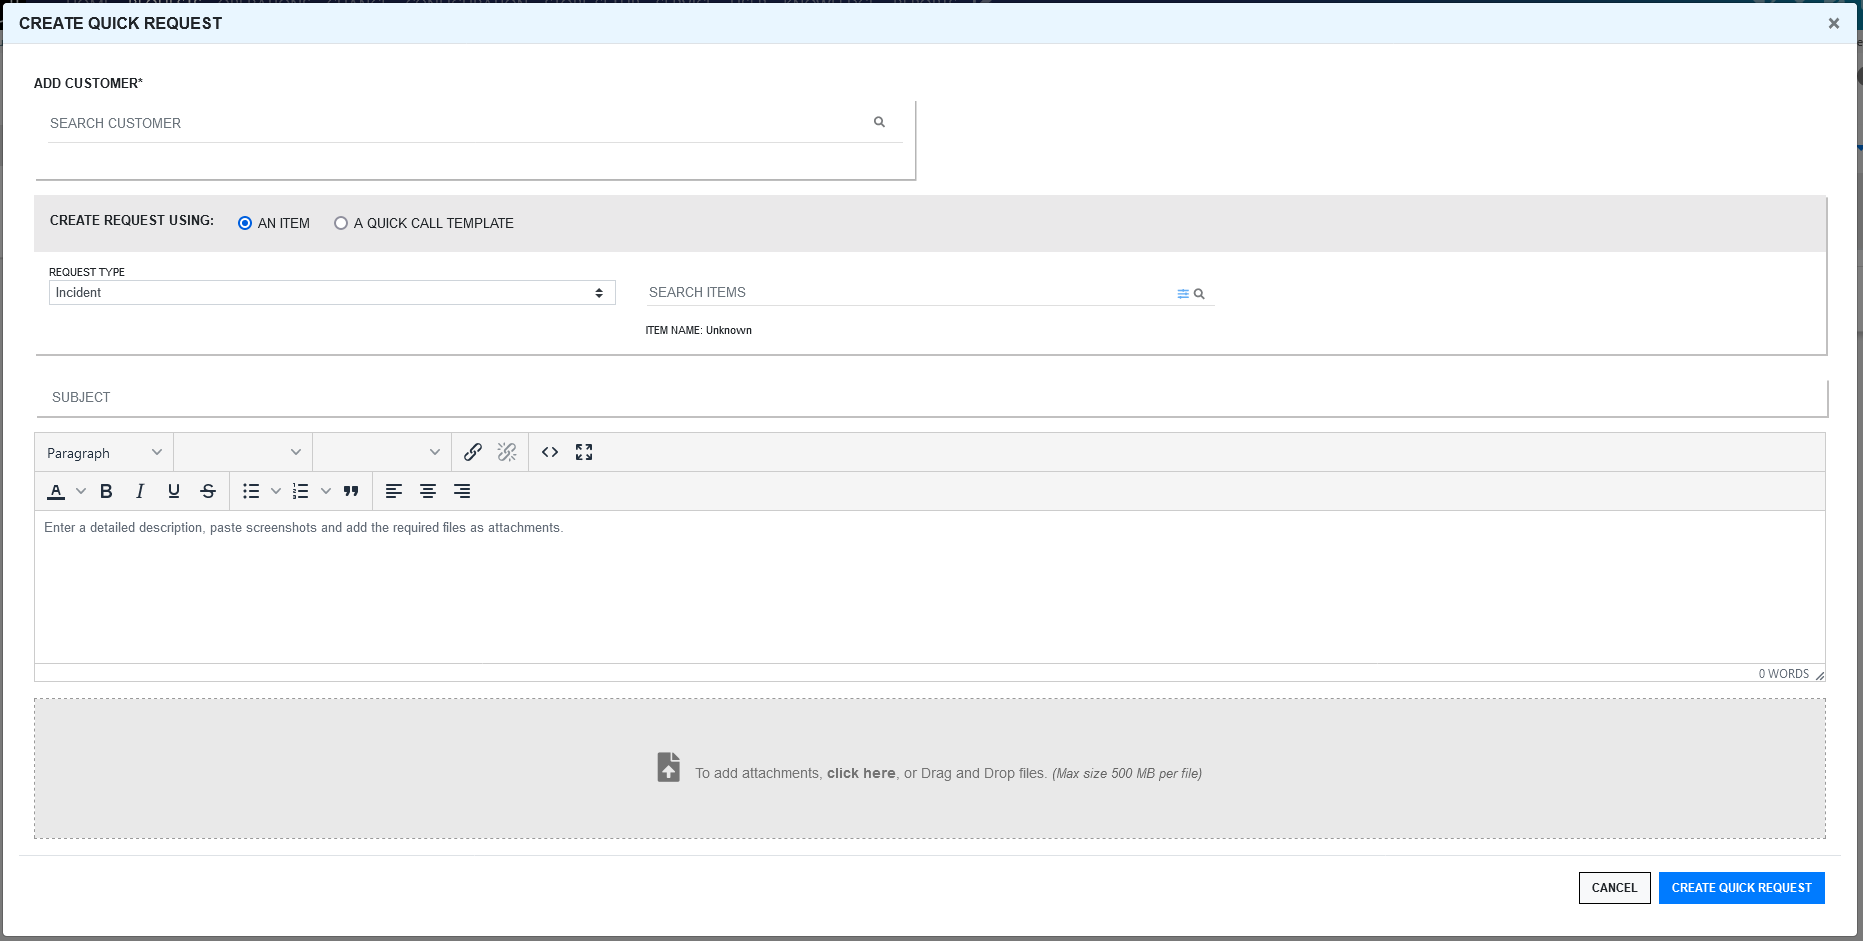
In the Create Quick Request window specify the following information:
Search Customer: In the Search Customer field, specify the customer name and then select the required customer from the displayed result.
Only one customer can be added for the request. If you try to add one more customer, then the previously added customer will be replaced with the new customer.
Create Request Using: You can create a request either using an Item or a Quick Call Template.
Based on requirements, select An Item or A Quick Call Request:
If you select An Item, then following options are displayed:
Request Type: In this field, select the relevant request type. The available options are: Incident, Service, Problem and Change.
Search Items: In this field, specify the required category of the item. Click
 to view Advanced Item Search. In the Advanced Item Search pop-up, you can search items based on various parameters.
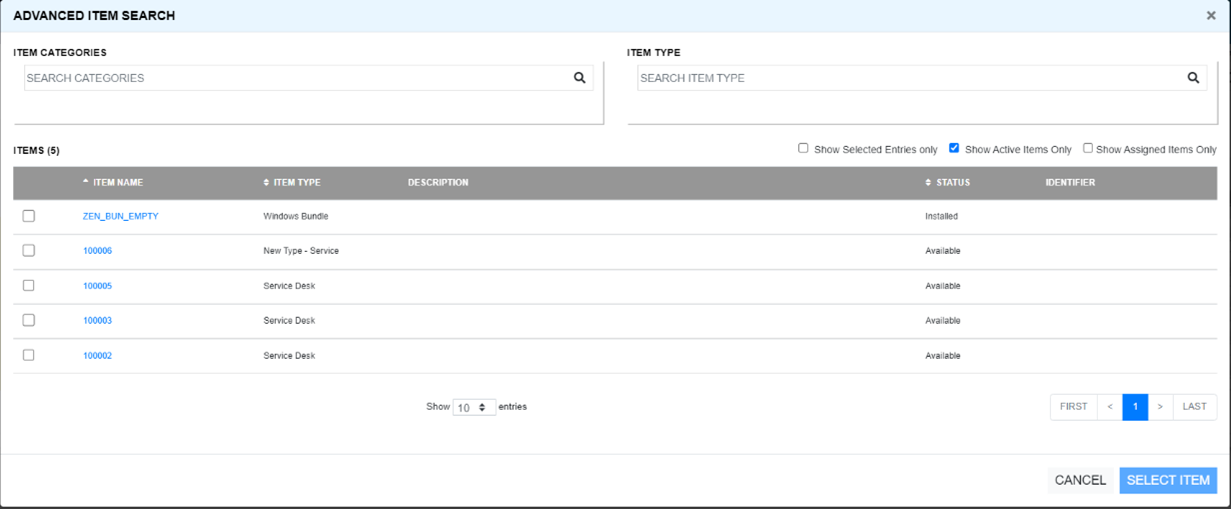
Only one item can be added for the request. If you try to add more items, then the previously added item will be replaced with the new item.
Description: In this field, specify a description for the request.
Subject: In this field, specify a subject for the request.
Attachment: If you want to provide any attachments with this request, you can either drag and drop the attachment or click the Attachment field, and then upload the required fields.
If you select the A Quick Call Request option, then a list of Quick Task templates (Quick Calls and Group Templates) will be displayed. In the search field, you can search for the required quick call template.
To create a request using a quick call or group quick call temple, click the required quick call or group quick call. Specify the required information, and then click CREATE QUICK REQUEST.
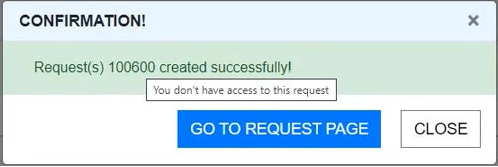
After creating the request, a pop-up is displayed with request number with a link to the request.

To open the request in a new tab, press and hold the Ctrl key and then click the request link.
If you do not have access to the request, then the link will be disabled.
Customizing Columns
To customize the displayed columns, you can perform any of the following actions:
Reorder Columns: To reorder columns, you can drag and drop the required column to the required position. The reordered column changes will be saved and displayed when you revisit the page.
Resizing Columns: To resize the column width, you can drag the required column edge left of right. The resized column changes will not be retained.
Add or Remove Columns: To add or remove columns, click the
 icon, and then select the required field that should be displayed.
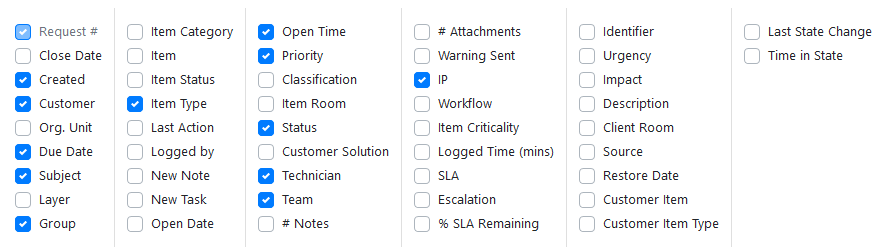
Note: Minimum 8 and maximum 15 columns can be added in the display grid. The added or removed column changes will be saved and displayed when you revisit the page.
From ZENworks Service Desk 8.3.1 onwards, minimum 2 and maximum 15 columns can be added in the display grid.
Search: To search an item within a column, specify the keyword in the search field provided below the field name.

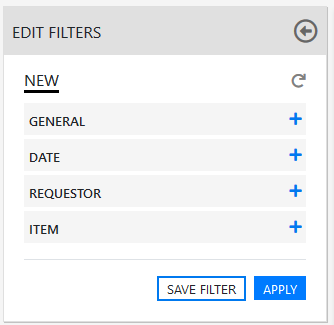
Filters
On the left-hand side of the Request page, the Filters panel is displayed. Using the options available in this panel, you can filter the unrelated data so that only the required data is displayed in the grid.
General Filters
This section of the filter includes the following options:
Type: In this field, select the type of the request. The available options are Service, Incident, Problem and Change.
Scope: In this field, select if you want to view My Tasks or My Team's Tasks.
Request#(S):In this field, specify the request number.
Group Name: In this field, specify the name of the group.
Logged By: In this field, specify the a name who logged the request.
Team: In this field, select the required team. To select multiple teams, press and hold the Ctrl key, and select the required options.
Status: In this field, select the status of the request. The available options are Active, Inactive and All.
Priority: In this field, select the priority of the request. The available options are Urgent, High, Medium and Low.
Date Filter
Action: In this field, select the required action. The available options are Reported Date, Closed Date and Reported & Closed Date.
Range: In this field, select a date range. Following are the available options.
Start Date
End Date
Recent In this field, select how recent requests should be displayed. The available options are Last Week, Last 2 Weeks, Last 30 days and Last 3 Months.
No. Of days Since Status Change: In this field, select a date to view the request since their last status changed.
This option will not provide accurate result, if the status was changed before upgrading to ZENworks Service Desk 8.2.
Requestor or Requester Filter
In this filter set, specify the details of the Requestor or requester.
First Name: In this field, specify the first name of the Requestor or requester.
Last Name: In this field, specify the last name of the Requestor or requester.
Email: In this field, specify the email ID of the Requestor or requester.
Org. Unit: In this field, specify the name the Organizational Unit, be it a Company or Department with which the Customer is associated.
Room: In this field, specify the location of the request.
City: In this field, specify the name of the city.
Location: In this field, specify the location details of the Requestor or requester.
ITEM Filter
Selected By: In this field, select an option, who had selected the item. The available options are Technician or Customer.
Item Number: In this field, specify the item number.
Room: In this field, specify the room to which the request belongs.
Category: In this field, select the category to which the request belongs.
Following are some of the actions that can be performed in this Filters panel:
Apply Filters: After making the required modifications to the filter panel, click Apply to view the results.
Reset Filter: To reset the data displayed in the grid and clear the filter fields, click the
 icon.
icon.Save Filter: After modifying the filters, if required, you can save the filter for future use. To save the filter, click the Save Filter button.
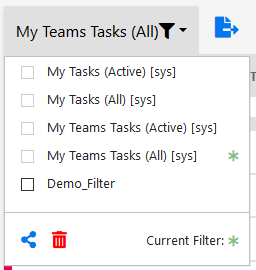
Load Saved Filters: To load or apply the saved filters, click the filter list panel, and then select the required filter.
Share Filter: To share the filter, click the share icon, and then select the required option in the displayed pop-up.
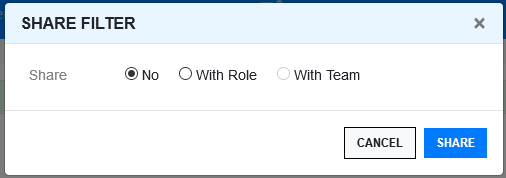
The available options are:
No: Select this option to stop sharing the filters that was shared earlier.
With Role: Select this option to share the filter with those who have same roles.
With Team: Select this option to share the filter with your team.
Delete Filter: Click the Delete button to delete the filter.
Note: Only the custom filters can be shared and deleted.
Note:You will additionally see filters for My Delegate Tasks if you are assigned as Delegate for Org Units or customers.
For more information about the delegate role, see Delegate