Creating a Table View Component
-
In the View Builder - Basic Configuration dialog box, click Add > Table View.
-
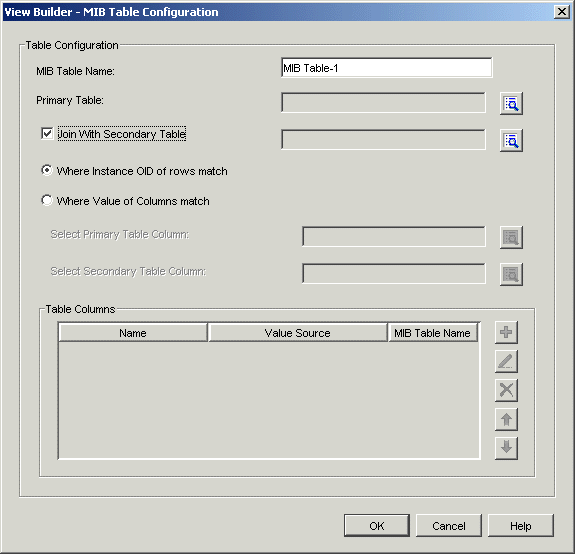
Specify the MIB Table name.
-
Click
 to select the MIB table that will be your primary table. Go to Step 7.
 -
Join the primary table with the secondary table.
-
Check the Join With Secondary table option if you want to join the primary and secondary table. Click
to select the secondary table. -
Set the conditions to join the primary and secondary table
Where Instance OID of Rows Match: Joins the primary and the secondary table based on matching instance OIDs.
Often extension tables are created for standard tables. The extended table does not have an explicit index and uses the index of the standard table. For example, you can join the tables hrSWRunTable(1.3.6.1.2.1.25.4.2) and hrSWRunPerfTable (1.3.6.1.2.1.25.5.1).
Where Values of Columns Match: Joins the primary and the secondary table based on matching columns OIDs. You must select the primary table column and the secondary table column to meet this condition. Click
to select the Primary table column and the second table column. For example, you can join the ifTable(1.3.6.1.2.1.2.2) and ipAddrTable(1.3.6.1.2.1.4.20) with the matching columns being ifIndex:1.3.6.1.2.1.2.2.1.1 from primary table and ipAdEntIfIndex 1.3.6.1.2.1.4.20.1.2 from the secondary table.
-
Under Table Columns perform any of the following operations:
-
Click OK.
 .
.  .
. .
. or
or  to change the order of display.
The table view component you created is displayed in the Basic Configuration View dialog box.