11.6 Importing Roles Defined in CSV Files
The Role Catalog provides a wizard for importing roles defined in a comma-separated values (CSV) file. For example, if you define the set of roles you want to implement using a spreadsheet, you can export the definitions of those roles to a CSV file format, then use the Import Roles wizard to add the roles to the Role Catalog. This section includes the following topics:
11.6.1 Setting Up the File to Import
When you create a file to use as input to the Import Roles wizard, you must follow the column layout defined in Table 11-9. In addition, you must also follow the CSV file format described in Section 11.6.2, Required CSV File Format.
Table 11-9 Import Record Format
General Field Formatting Rules
-
Multi-value properties: Use the | symbol as the delimiter between values.
-
DN properties: Specify in dot notation. Designer validates these properties on deploy to ensure that the values correspond to existing Identity Vault objects.
-
Character set encoding must be UTF-8
11.6.2 Required CSV File Format
When you create your spreadsheet to use as input to the Import Roles wizard, keep in mind that the wizard expects a specific format. It expects a twelve-column document with the columns defined in the order described in Table 11-9. The wizard also expects the input file to follow the CSV format rules defined in RFC4180. This format is briefly summarized below:
-
Each role record is on a separate line.
-
Each field in a role record is separated by a comma and is quoted.
-
Each line is delimited by a line break (CRLF)
-
The first line of the file can be a header line, but this is optional. The wizard allows you to identify whether the file contains a header line.
-
If your file contains a header line, then it must contain the role record’s field names. The header line field count must correspond to the field count of each line in the file.
-
Quotes on numbers are not required.
-
A role record example:
20," ","Doctor","en~Doctor|it~Dottore|fr~Docteur","en~Doctor|it~Dottore|fr~Docteur","doctor",,"admin.novell|ablake.users.medical-idmsample.novell",,"Groups.GroupEntitlementLoopback.TestDrivers.novell~Medical Operations|Groups.GroupEntitlementLoopback.TestDrivers.novell~Pharmacy",,
-
Quotes and nested quotes: You can use single quotes within a text field (such as Display name). Use double quotes to enclose a column.
NOTE:For optional fields, the line must include an empty string ““ as a placeholder.
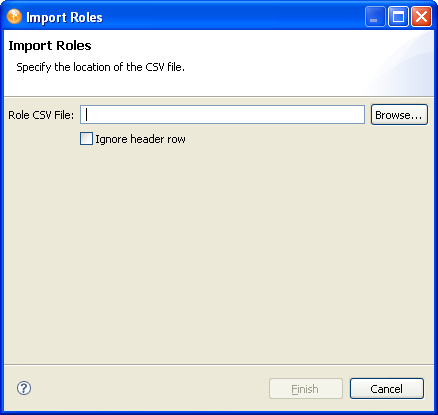
11.6.3 Using the Wizard to Import Roles
-
Open the Provisioning view of the Designer project where you want to import the roles.
-
Select , the node, or a role level (such as ), right-click then select .
Designer launches the wizard.
If you select a role level, the wizard imports only the roles for that level and ignores the other roles in the file.
-
Fill in the fields as follows:
-
Click .
The wizard reads the CSV file and adds all of the roles that meet the criteria for import. If the wizard encounters an error (see Error Handling for a list of possible errors), the wizard writes the role record to an error file.The wizard creates the error file in the same location as the Role CSV file to import, and it names the file the same name as the Role CSV file with the _errors appended to the name.
Only the errors identified in Error Handling are severe enough to prevent the wizard from creating the role. If the wizard encounters other types of errors, it adds the role, but you must make corrections before the role can be deployed. For example, if the category specified in the role is not yet added to the directory abstraction layer role category list, the role can be added, but Designer displays the role with an informational message as shown in Figure 11-1.
Figure 11-1 Role Imported with Invalid Category Specified

Roles that are created with errors like this cannot be deployed until the errors are corrected. The Project Checker notifies you of the errors if you attempt to deploy the roles or if you validate the roles objects.
HINT:If the role has no category, then the wizard adds the Default category. If the category supplied does not exist, then it causes the error shown in Figure 11-1.
11.6.4 Error Handling
Table 11-10 describes the cases where a role cannot be imported. When the wizard encounters these errors, it generates an error file and writes the complete role record to the file. It maintains the role’s original column order except that it inserts a new column as the first column in the record. This column includes the error code. You can modify the associated role to fix the error directly within the error file, delete the error code column, then specify this error file as input to the wizard.
Table 11-10 CSV Import Wizard Error Codes