24.3 Preferences: Designer for IDM
24.3.1 Versions, Updates, Prompts, and Browsers
Versions
Figure 24-2 Preferences: Versions

Specifies the Identity Manager version running on a server.
Updates
Figure 24-3 Preferences: Updates
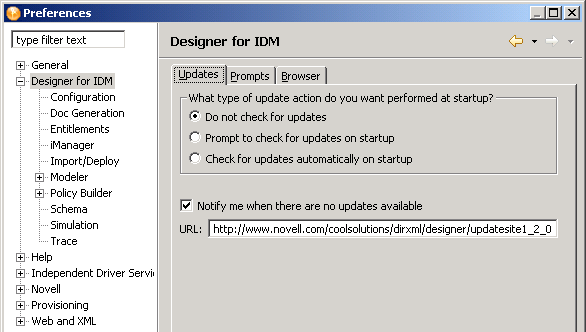
Table 24-11 Preferences: Automatic Updates
Prompts
Table 24-12 Preferences: Prompts
Web Browsers
You can use Designer to open a Web browser. The Web browser button is available from the main toolbar.
Figure 24-4 The Web Browser button

When you first launch the browser, you are prompted for a home page.
Figure 24-5 The Prompt for a Home Page

After you enter the URL, Designer stores it.
To change the URL, type a new one in , then click .
24.3.2 Configuration
Each driver has a startup parameter. If it is disabled, the driver never starts until you change the setting. By default, Identity Manager drivers are disabled when you create them in the Modeler or start Designer. You must start them manually.
For more information, see Section 10.4, Configuring Driver Sets.
General
These general settings specify how drivers start up and how their global configuration values (GCVs) act on specified target servers. The default state uses and .
Figure 24-6 Configuring General Driver Settings
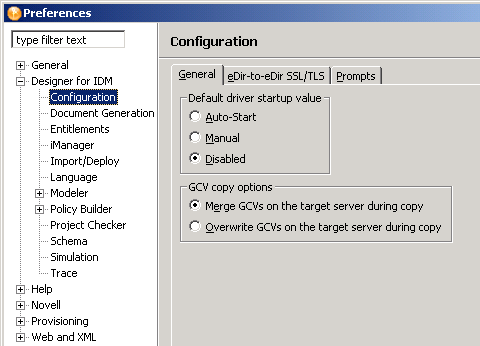
Table 24-13 Driver Settings: General
eDir-to-eDir SSL/TLS
This setting configures how two eDirectory drivers communicate with each other over a secure channel. For more information, see Section 22.6, Configuring TLS for eDir-to-eDir Drivers.
Figure 24-7 Configuring eDir-to-eDir Drivers

Table 24-14 eDir-to-eDir and SSL/TLS Settings
When you create certificates, Designer reads the preferences, including Preferred Key Size, Preferred Secure Hash Algorithm, and Preferred Validity Period. These options are also available through > .
Figure 24-8 The Advanced TLS Configuration Dialog Box

NOTE:Designer reads these preferences after you first set them. If you subsequently change the preferences by using the driver’s configuration page, those changes override the settings in Preferences.
After you change default settings and click , that configuration information is recorded. When you deploy the driver, Designer creates the certificates, or deletes and creates new certificates with a new time stamp.
Prompts
These settings specify how users are prompted to manage driver certificates on the target server. All are selected in the default state.
Figure 24-9 Configuring Certificate Prompts

Table 24-15 Configuration Prompts
24.3.3 Document Generation
The Document Generator comes with the following settings:
Figure 24-10 Document Generation Settings
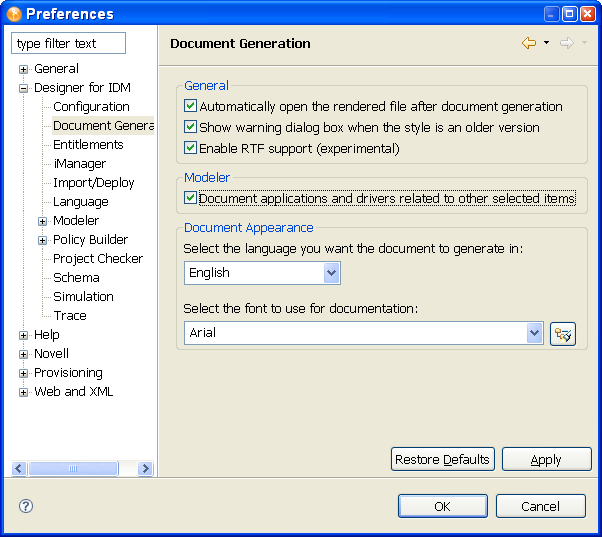
Table 24-16 Document Generation Preferences
24.3.4 Entitlements
Figure 24-11 Entitlements Settings
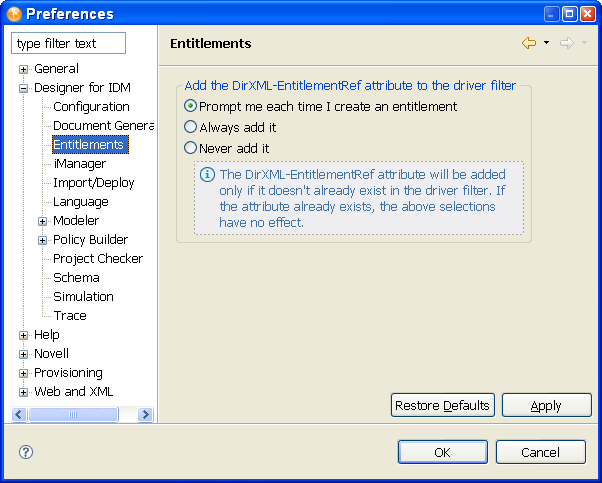
Controls whether or how often you receive a prompt whenever you add the DirXML-EntitlementRef attribute to a driver filter. The default is , but because this attribute is added only if it doesn’t already exist on the driver filter, you can select to not see the pop-up window.
24.3.6 Import/Deploy
The Import/Deploy preference window contains five tabs: , , , , and . The following table describes their options.
Table 24-18 Preferences: Deploy
Table 24-19 Preferences: Import
|
Setting |
Description |
|---|---|
|
|
Displays the prompt. If you select to the prompt, you must then enter information in required fields while configuring the driver. If you select , you temporarily disable this setting and can skip required fields. |
|
|
Imports the eDirectory application schema when you select this option. You might not want to import all the associated data. The default is Off. See Section 16.4.3, Importing a Schema. |
|
|
Allows you to view what’s being imported in a summary screen. The default is On. |
Table 24-20 Preferences: Export
|
Setting |
Description |
|---|---|
|
|
Selected by default, this option saves you the trouble of manually inputting cross-driver policy references. |
Table 24-21 Preferences: Prompts
Table 24-22 Preferences: Trace
24.3.7 Changing the Language Setting
When you installed Designer, you selected a language to display Designer’s UI. If you need to change that setting, use Preferences.
-
Select > > > .

-
Select a language, then click .
The and buttons set the language and prompt you to restart Designer.
reads the config.ini file, detects the previous language setting, and then defaults to that setting. When the changed property is written back to the .ini file, all comments are removed from the file. To preserve these comments, Designer copies the original config.ini to config.ini.bak and uses the backup to determine the default setting.
-
Restart Designer.
24.3.8 Modeler
Modeler Tabs
Behaviors
Table 24-23 Preferences: Modeler Behaviors
Display
Table 24-24 Preferences: Modeler Display
 on the line that represents a driver in the Modeler.
Guidance
Table 24-25 Preferences: Modeler Guidance
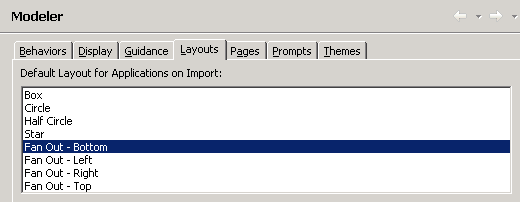
Layouts
Layout settings determine how applications are displayed in the Modeler. To set a default layout when you import projects, select an option (for example, ).
Figure 24-12 Preferences: Modeler Layouts
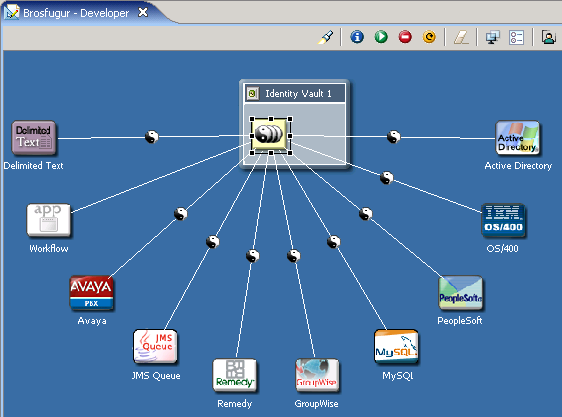
The following figure illustrates a half-circle layout:
Figure 24-13 A Sample Layout
To arrange existing applications in a particular layout:
-
Right-click a Driver Set object in the Modeler.
-
Select .
-
Select a layout.
Pages
Figure 24-14 The Pages Properties Page

Determines whether the Architect, Dataflow, and Table pages display as tabs at the bottom of the Modeler. By default, the Developer page (mode) appears in the Modeler. Displaying the additional tabs enables you to quickly toggle among pages.
Prompts
Table 24-26 Preferences: Modeler Prompts
Themes
Defines themes for the Developer and Architect modes. Customizes the colors of the background, text, line, Domain Group background, and Domain Group title in the Modeler.
Figure 24-15 The Themes Property Page

Dataflow
Specifies the number of columns per page that the Dataflow editor saves in the HTML reports.
To view or use the Dataflow editor, select the tab in the Modeler.
Figure 24-16 The Dataflow Tab

24.3.9 Policy Builder
Policy Builder creates and manages the policies in the drivers.
Table 24-28 Preferences: Policy Builder

Policy Description
The allows you to add comments about the policy.
Figure 24-17 Preferences: Policy Description

24.3.10 Project Checker
Allows you to validate your project.
24.3.11 Schema
Allows you to manage the Identity Vault and connected system’s schema.
Table 24-31 Preferences: Policy Builder > Schema
24.3.12 Simulation
The Simulation setting enables you to test a policy.
Table 24-32 Preferences: Simulation
24.3.13 Trace
The Trace view is useful in the following situations:
-
To trace internal errors and messages, so that you can find out why something might not work as expected.
-
To provide information for Novell Support, engineers, or other consulting resources.
All Designer-specific trace messages go to the Trace view if this view is open. Otherwise, no trace messages are sent.
Warnings and error messages are sent to the .log file, found in the run-time workspace metadata directory. Use the Error view to view this information.
Table 24-33 Parameters: Trace