13.2 The Dataflow Editor
Figure 13-5 The Dataflow Editor
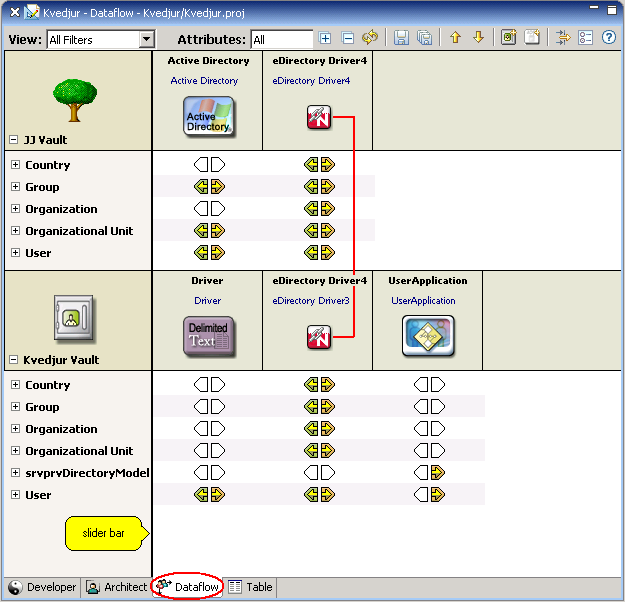
The Dataflow editor enables you to do the following:
-
Use filters to display how data flows between all systems and Identity Vaults.
-
View how passwords flow from each server.
-
Generate reports of the data.
When object additions, deletions, changes, and selections synchronization occur, the Dataflow editor synchronizes with the Modeler and the Outline view.
To access the Dataflow editor, click the Dataflow tab.
To adjust the area for the Identity Vaults, move the slider bar. This setting persists and is restored the next time you run the editor.
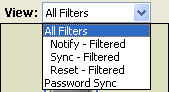
13.2.1 Filtering Views
By default, the Dataflow editor shows all dataflows. The View drop-down list, in the upper left corner of the Dataflow editor, enables you to view notification, synchronization, reset, or Password Sync information. These filtered views do not allow you as much editing capability as the main view, but just what is necessary in that filter. For example, you can’t add attributes, vaults, or applications, because by default they wouldn’t appear in the filter.
Figure 13-6 Options to Filter Views in the Dataflow View
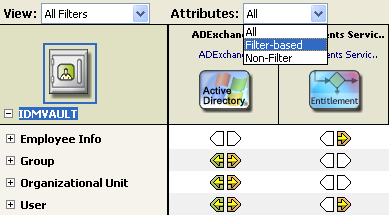
If you are in the All Filters view, you can further filter with the list. Because the Dataflow editor provides non-filter attributes, you can choose to view regular filter-based attributes, non-filter attributes, or both.
Figure 13-7 Options on the Attributes Combo Box
Synchronizing Passwords
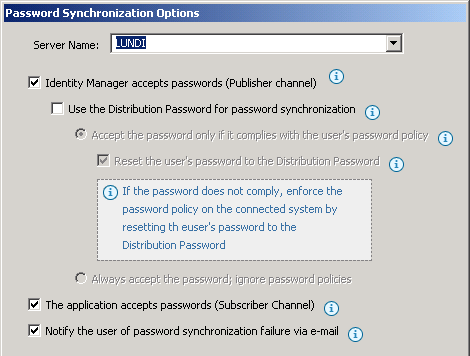
The Password Sync view enables you to see and edit how all passwords flow in the project. Designer displays the information on a per-server basis and shows how passwords flow among all of the applications.
Figure 13-8 The Password Flow
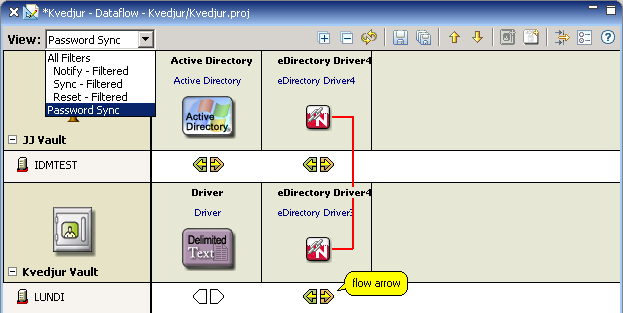
To edit the password flow:
-
Select in the filter.
-
Double-click the flow arrow.
You can also right-click, then select .
-
Edit the password synchronization options.
For more information about password synchronization, see “Password Synchronization across Connected Systems” in the Novell Identity Manager Administration Guide .
-
Click .
13.2.2 Filtering Identity Vaults and Applications
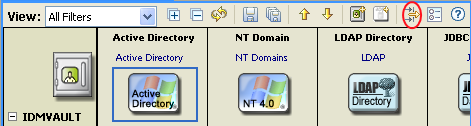
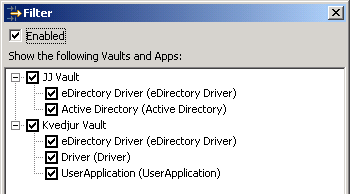
You can select the Identity Vaults and applications that you want to view in the editor.
-
In the Dataflow editor, click the icon.
-
Select .
The Identity Vaults and applications that you select here are included in the HTML reports. For more information, see Section 13.5, Generating HTML Reports.
You can scroll and resize the dialog box. Also, you can interact with the Dataflow editor in the background, in any mode. This is convenient if you want to scroll a different section into view while this dialog box is up.
13.2.3 Pinning the Identity Vault
To change the scope of the editor to show a single Identity Vault, right-click the vault, then select .
Figure 13-9 Pinning an Identity Vault
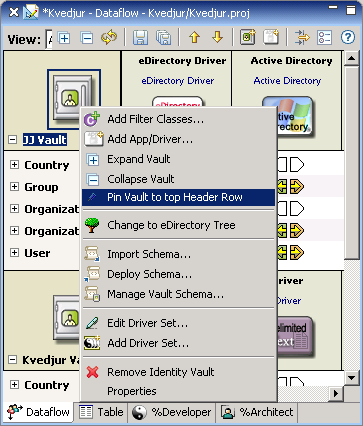
With a medium or large-sized project, the dataflow table can contain hundreds of rows and thousands of items. If you have multiple vaults and want to narrow the scope to more easily edit a vault without excessive scrolling, you might want to pin a vault. When an Identity Vault is pinned, a pin icon displays in the upper right corner.
Figure 13-10 A Pinned Identity Vault
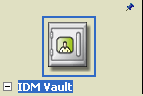
To unpin the vault, right-click the Identity Vault, then select .
13.2.4 Expanding and Collapsing the Identity Vault
Expanding an Identity Vault
When the editor first loads, all vaults are expanded at the top level by default.
To collapse or expand the list of classes and attributes in an Identity Vault, do one of the following:
-
Click the - or + icon below the Identity Vault icon.
Figure 13-11 Icons to Expand or Collapse the List of Classes
-
Select the Identity Vault, then press the Right-arrow key to expand the information, or press the Left-arrow key to collapse the information.
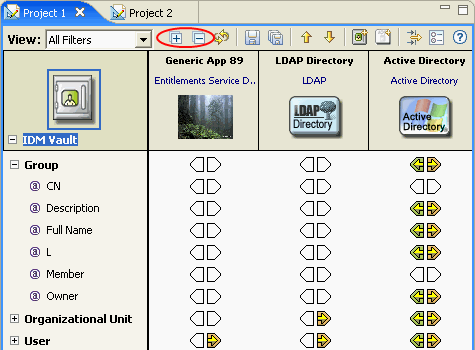
Expanding All Identity Vaults
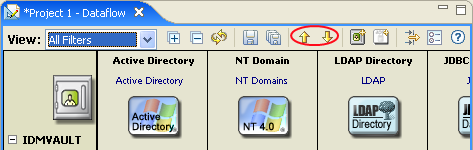
To expand or collapse the list of classes and attributes for all Identity Vaults, click the + or - icon on the toolbar.
Figure 13-12 Icons to Expand All Identity Vaults
Expanding Classes
To view all attributes in a class, select the class, then press the Right-arrow key. To collapse the list of attributes, press the Left-arrow key.
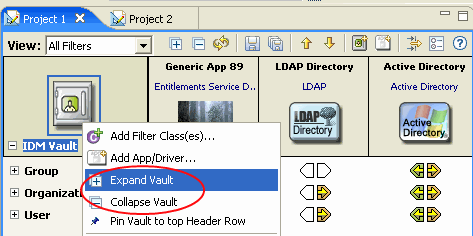
To view all classes and attributes in an Identity Vault, right-click the Identity Vault icon, then select To list just classes in an Identity Vault, right-click the Identity Vault, then select .
Figure 13-13 Menu Options to Expand an Identity Vault
13.2.5 Switching to an eDirectory Icon
To switch from an Identity Vault icon to an eDirectory™ tree icon, right-click the Identity Vault, then select
Figure 13-14 Changing to an eDirectory Tree

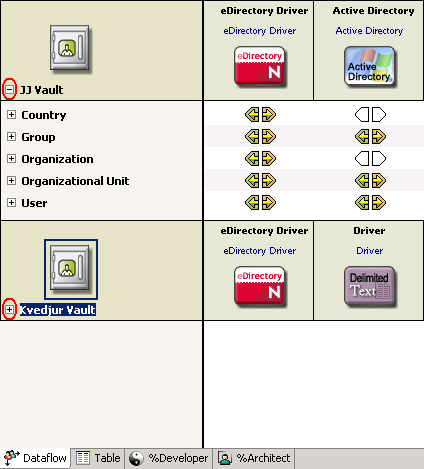
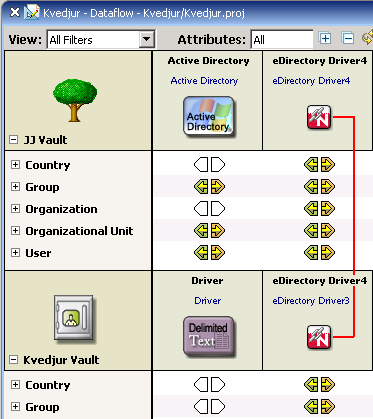
13.2.6 Viewing an eDir-to-eDir Driver
You can easily view both ends of an eDir-to-eDir connection so that you can configure the dataflows on both sides. Designer automatically detects the two eDirectory applications and aligns them in the same table column. A red line connects them.
Figure 13-15 An eDir-to-eDir Connection
13.2.7 Keyboard Support
You can navigate by using the Up-arrow, Down-arrow, Left-arrow, and Right- arrow keys as well as PageUp, PageDown, Home, and End. In addition, you can navigate from one Identity Vault to another by clicking the Up-arrow or Down-arrow on the toolbar.
Figure 13-16 Navigation Icons