Installing or Upgrading Novell eDirectory on NetWare
This section contains the following information:
- Installing or Upgrading Novell eDirectory 8.7.3 on NetWare
- Installing NMAS Server Software
- Installing NMAS Client Software
- Installing into a Tree with Dotted Name Containers
Installing or Upgrading Novell eDirectory 8.7.3 on NetWare
-
At the server console, enter nwconfig.nlm.
-
Select Product Options > Install a Product Not Listed.
-
Press F3 (F4 if you're using RCONSOLE) and specify the path to the NW directory where the installation program can find the nds8.ips file.
- If you downloaded eDirectory from the Web, enter the path to the NW directory you extracted from the downloaded file (for example, sys:\edir\nw).
- If you are installing from a CD, mount the CD as a volume and enter volume_name:NW (for example, edir_871:NW).
For information on mounting a CD as a volume, see "CD-ROMs as Logical Volumes" in the Novell Storage Services Administration Guide.
-
Follow the on-screen prompts concerning license agreements, the Readme file, and tips.
-
Enter the administrator's login name (for example, Admin.VMP) and password.
IMPORTANT: This window might close before you enter this information. If it does, toggle (Alt+Esc) to the screen and enter the information. Otherwise, the installation will not be complete.
-
In the LDAP Configuration screen, specify which LDAP ports to use, then click Next.
For more information, see Communicating with eDirectory through LDAP.
-
Select the NMASTM login method you want to install, then click Next.
See Installing NMAS Server Software and Installing NMAS Client Software for more information.
-
Select a language for the installation, then click Next.
-
Select the ConsoleOne components you want to install, then click Next.
-
Click Finish to start the eDirectory installation.
ConsoleOne 1.3.6 is installed as part of the eDirectory installation.
-
To complete the installation, remove any diskettes or CDs when prompted, then click Yes to restart the server.
Installing NMAS Server Software
Novell Modular Authentication ServiceTM (NMAS) server components are installed automatically when you run the eDirectory installation program. You will need to select the login methods you want to install.
Select the login methods that you want to install into eDirectory by checking the appropriate check boxes. When you select a login method, a description of the component appears in the Description box. For more information on login methods, see "Managing Login and Post-Login Methods and Sequences" in the Novell Modular Authentication Service Administration Guide.
Click Select All if you want to install all the login methods into eDirectory. Click Clear All if you want to clear all selections.
The NDS login method is installed by default.
Installing NMAS Client Software
The NMAS client software must be installed on each client workstation where you want to use the NMAS login methods.
-
At a Windows client workstation, insert the Novell eDirectory 8.7.3 CD.
-
From the NMAS directory, run nmasinstall.exe.
-
Select the NMAS Client Components checkbox.
Optionally, you can select the NICI checkbox if you want to install this component.
-
Click OK and follow the on-screen instructions.
-
Reboot the client workstation after the installation completes.
Installing into a Tree with Dotted Name Containers
You can install a NetWare server into an eDirectory tree that has containers with dots in the names (for example, O=novell.com or C=u.s.a). Using containers with dotted names requires that those dots be escaped with the backslash character. To escape a dot, simply put a backslash in front of any dot in a container name. For example:
O=novell\.com
You cannot start a name with a dot. For example, you cannot create a container named ".novell" because it starts with a dot ('.').
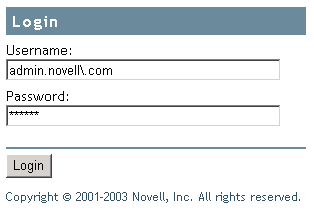
IMPORTANT: If your tree has containers with dotted names, you much escape those names when logging into utilities such as iMonitor, iManager, and DHost iConsole. For example, if your tree has "novell.com" as the name of the O, enter username.novell\.com in the Username field when logging in to iMonitor (see Figure 1).
Figure 1iMonitor Login Screen