4.8 Installing the DSI (Conditional)
These procedures are necessary only if you are installing and configuring the NFR Engine in an Active Directory managed network environment that does not include Novell Storage Manager.
-
Double-click the install.html file located on the mounted drive, CD, or DVD that you noted in Step 3.
This launches the installation interface.
-
Under , select .
-
Under , select .
-
In the region, under , click .
-
When you are asked if you want to run or save this file, click .
-
On the Welcome page, click .
-
Review the License Agreement, accept the terms, and click .
-
Accept the installation path or indicate a new path by using the button.
-
Click .
-
Click .
-
Verify that the check box is selected and click .
The Directory Service Interface Setup Wizard is launched.
-
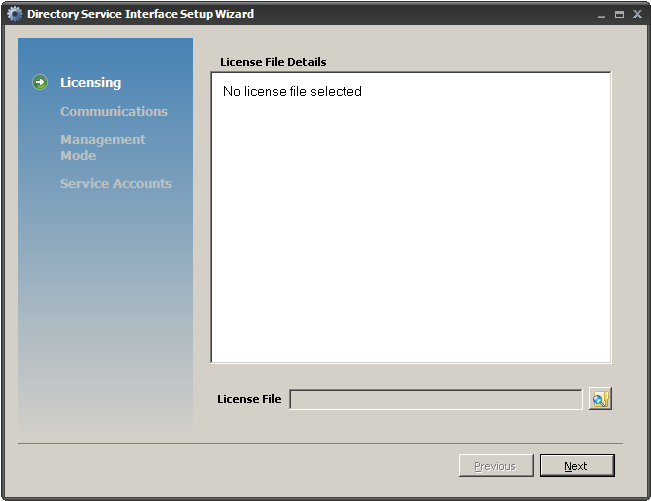
Click the folder button to browse to the location where you stored the license file in Step 7, select the license file, and click .
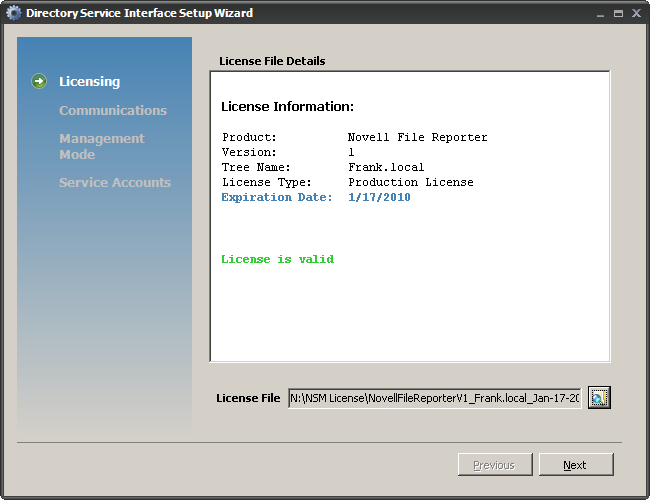
The license file details are displayed on the page.
-
Click .
The following screen appears:
-
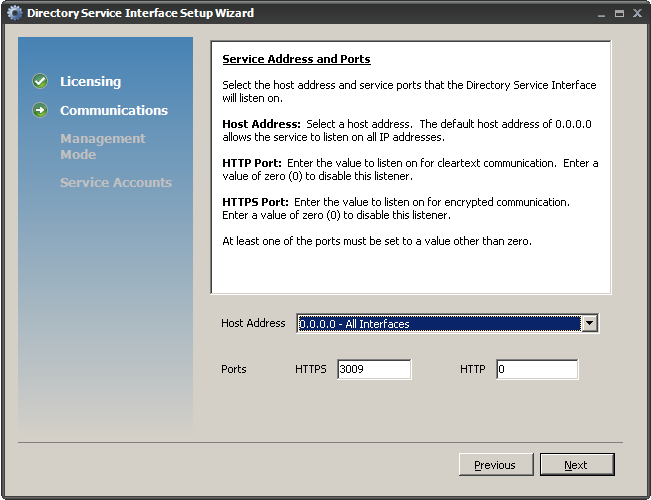
In the field, leave the setting as it is.
This indicates that Novell File Reporter listens to all server network interface cards (NICs).
-
Unless there is a conflict, leave the field set to port 3009.
If you do change this setting, you also need to change it during the installation of the NFR Engine.
-
Click .
The following screen appears:
-
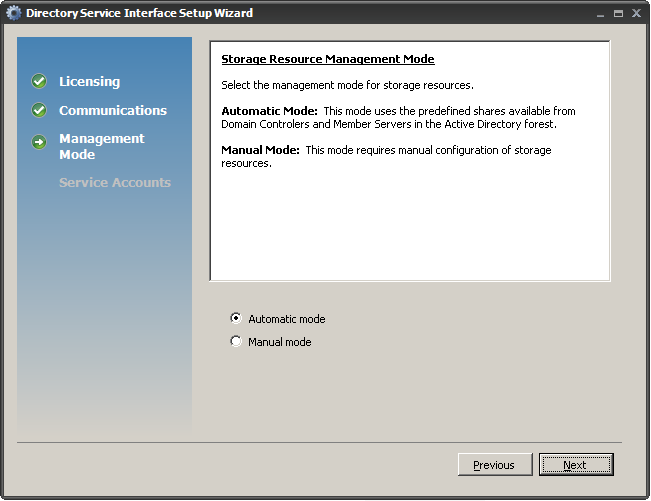
Do one of the following:
-
Accept the default option
-
Click the option
A Novell File Reporter deployment configured with the Manual mode option cannot be upgraded to Automatic.
-
-
Click
The following screen appears:

-
Leave the and settings as they are.
If you have a technical support issue, this helps the Novell Support representative to quickly locate and review the settings.
-
Do one of the following:
-
Accept NFRAdmins as the name of the group of users who have administrative rights within Novell File Reporter. When this group is created, you will need to add members to the group.
-
If you have an admin group in Active Directory, and you want administrative rights to be assigned to the group within Novell File Reporter, indicate the name of the existing group in the field.
-
-
Do one of the following:
-
Accept NFRUsers as the name of the group of users who have limited administrative rights within Novell File Reporter. When this group is created, you will need to add members to the group.
-
If you have a group in Active Directory that consists of limited-responsibility admins such as help desk workers, and you want them to have limited administrative rights within Novell File Reporter, indicate the name of the group in the field.
-
-
Click .
A message appears, informing you that all accounts have been successfully provisioned.
-
Click .
-
When you are asked if you want to start the DSI-AD Service, click .
-
Click .
-
Proceed with Section 4.9, Installing the NFR Engine.