2.6 Configuring the MTA for Address Book Synchronization
After you have completed the tasks listed in Section 2.5, Preparing for Address Book Synchronization, you are ready to configure the MTA for address book synchronization.
-
In the GroupWise Admin console, browse to and click the MTA that you want to configure for address book synchronization, then click the tab.

-
Select .
You receive the following notification:
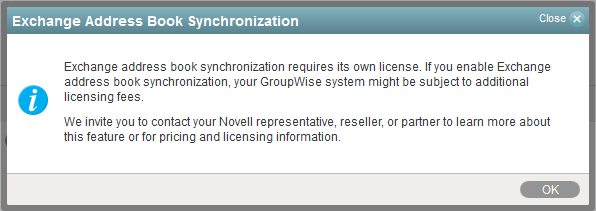
-
Click to confirm your acceptance of licensing terms for the Exchange synchronization feature.
-
On the tab, fill in the following fields to configure address book synchronization for this MTA:
-
Create an Exchange synchronization profile:
-
Above the list, click .

-
On the tab, fill in the following fields:
-
Click .
If the connection fails, verify and correct the information that you have provided on the tab and repeat the test until the connection succeeds.
-
On the tab, fill in the following fields:

-
On the tab, fill in the following fields:

-
Click to save the Exchange synchronization profile.
The Exchange synchronization profile is added to the list of profiles for the MTA.
-
Repeat Step 5 to create additional Exchange synchronization profiles as needed.
-
-
On the tab, click , then click to save the synchronization settings.
The MTA restarts automatically.
When you enable address book synchronization, it causes all MTAs in your GroupWise system to restart. This is not a noticeable process unless notifications are automatically sent to administrators whenever MTAs restart.
The first automatic address book synchronization takes place according to the synchronization settings that you established in Step 4.
-
Continue with Performing the Initial Address Book Synchronization.