3.5 Adding and Configuring a GroupWise Server
In addition to communicating with a GroupWise authentication source, GroupWise Mobile Server also needs to communicate with a POA to synchronize GroupWise PIM data from GroupWise mailboxes to mobile devices. You can select the same POA that you are using as a GroupWise authentication source to provide this function, or you can select a different POA. The selected POA must be configured for SOAP, as described in Section 2.2, Enabling POAs for SOAP. Configuring a GroupWise server for GroupWise Mobile Server includes the following tasks:
3.5.1 Providing Server Information
-
In the WebAdmin Console, click > > .
-
On the tab, click .
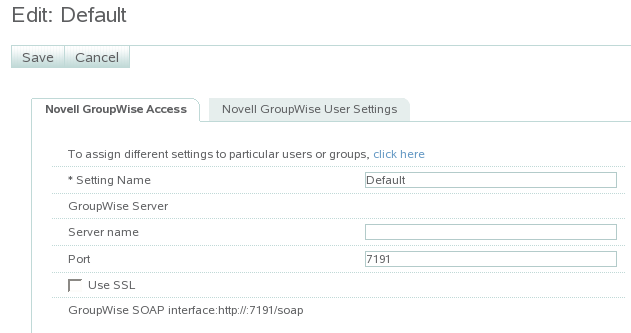
The steps in this procedure guide you through creating the default profile for a GroupWise server. If you have groups of users that need settings different from the default, you can repeat this procedure multiple times, as described in Section 3.5.5, Creating Multiple Profiles.
-
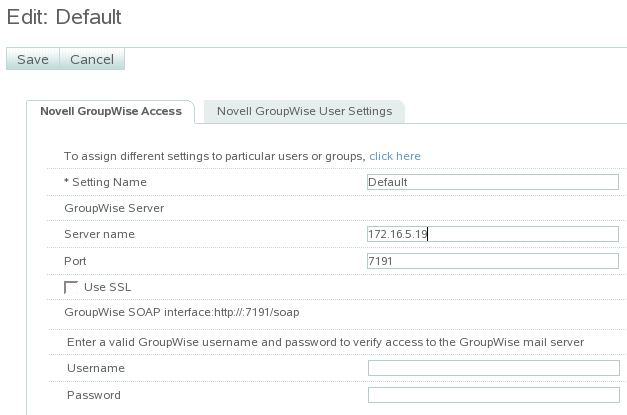
In the field, specify the POA’s IP address or DNS hostname.
Additional fields appear on the page.
-
In the field, specify the SOAP port if it is different from the one you specified for the GroupWise authentication source.
-
Select if the POA is configured to require a secure SSL connection with GroupWise Mobile Server, as described in Section 2.2, Enabling POAs for SOAP.
-
Specify a valid GroupWise username and password, so that GroupWise Mobile Server can connect to your GroupWise system.
-
Continue with Configuring GroupWise Mobile Server Access to GroupWise.
3.5.2 Configuring GroupWise Mobile Server Access to GroupWise
-
Under the heading on the tab, select how you want GroupWise Mobile Server to authenticate to the POA.
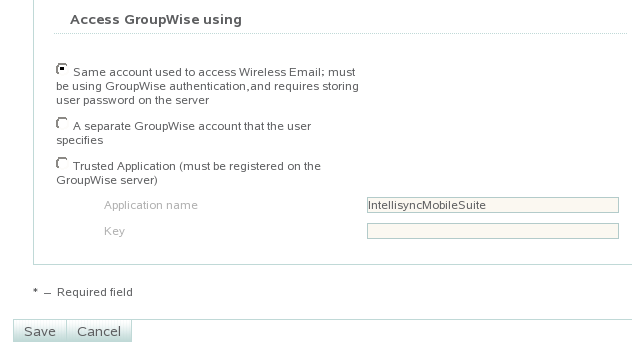
Same Account Used to Access Intellisync Mobile Suite: Select this option if you want GroupWise Mobile Server to use the same usernames that users are already using to access GroupWise. This is the recommended option.
Separate GroupWise Account: This option provides an additional layer of security by having your mobile device provide a generic GroupWise password to GroupWise Mobile Server. GroupWise Mobile Server, then it prompts you for your personal GroupWise password each time synchronization is required. However, the option provides this additional layer of security much more conveniently. Therefore, the option is not recommended unless you require the additional security and prefer not to set up GroupWise Mobile Server as GroupWise trusted application.
Trusted Application: To review the benefits of setting up GroupWise Mobile Server as a GroupWise trusted application, see
Trusted Applications
inSystem
in the GroupWise 8 Administration Guide. For instructions to set up GroupWise Mobile Server as a trusted application, see Section 3.8.1, Creating a Trusted Application on Linux.If you want to use the access method, you must select the access method for your initial configuration. After you have started GroupWise Mobile Server and set up GroupWise Mobile Server as a trusted application, repeat this procedure to select this option and specify the trusted application key.
-
Click to save the access settings for the default profile.
-
Continue with Configuring User Options.
3.5.3 Configuring User Options
-
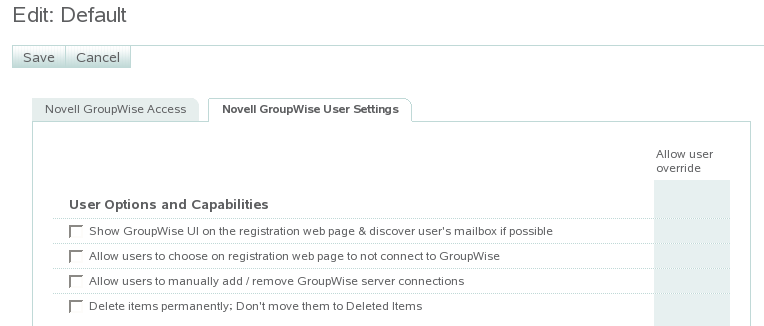
Continuing under , click the tab, then click .
-
Select the first three options.
-
If you want more information about these options, click .
-
Continue with Configuring GroupWise Address Book Synchronization.
3.5.4 Configuring GroupWise Address Book Synchronization
-
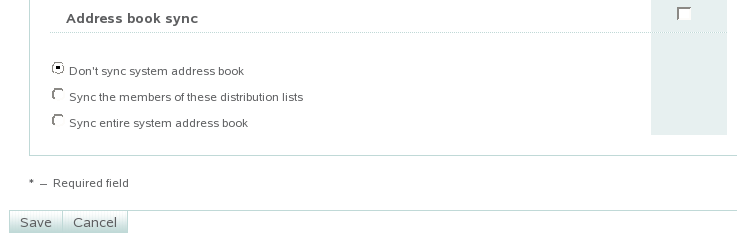
Under the heading on the tab, select how you want to synchronize the GroupWise Address Book to the GroupWise Mobile Server Web PIM, where users select the GroupWise PIM data that will be synchronized to their mobile devices.
NOTE:In GroupWise Mobile Server, the GroupWise Address Book is referred to as the “system address book” or the “global address list.”
-
If you do not want to synchronize the full GroupWise Address Book to the Web PIM, select .
In the Web PIM, users can still select the personal address book to which their Contacts folder is mapped. Typically, this is the Frequent Contacts address book. Users can map a different address book to the Contacts folder if they prefer a different personal address book rather than the Frequent Contacts address book. For more information, see Section 6.3, Using the Web PIM to Configure Device Synchronization Settings.
-
If you have selected or created GroupWise distribution lists that contain subsets of the GroupWise Address Book, as described in Section 2.4, Using Distribution Lists for Address Book Synchronization, complete the following steps:
-
Select .

-
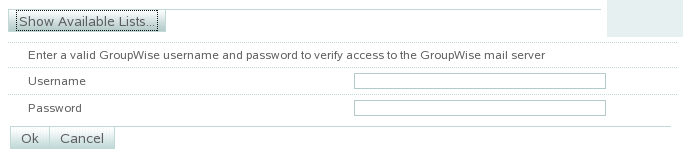
Click .
-
Specify a valid GroupWise username and password so that GroupWise Mobile Server can log into the post office and retrieve a list of available GroupWise distribution lists.
-
Select distribution lists in the , then click to move them to the .
The selected GroupWise distribution lists will be synchronized to the Web PIM.
-
-
If you want to synchronize the full GroupWise Address Book to the Web PIM, select .
-
If you want users to be able to override your synchronization setting when they use the Web PIM, select the check box to the right of the heading in the column.
-
Click to save the address book synchronization settings for the default profile, then click .
-
If you want all users to use the default profile, skip to Section 3.6, Completing the GroupWise Mobile Server Installation,
or
If you want to create multiple customized profiles, so that different users can have different settings, continue with Creating Multiple Profiles.
or
If you have already created a customized profile, proceed to Step 5 in Creating Multiple Profiles.
3.5.5 Creating Multiple Profiles
After creating the default profile:
-
On the tab, click .
-
Click .
-
In the field, specify a meaningful name for the customized profile.
This can be any name you want. For example, if you want users to access a different POA, you might want to include the name of the post office that the POA services.
-
Repeat to Step 3 through Step 5 in Section 3.5.1, Providing Server Information to create the customized profile, then return to this point.
-
Observe that your customized profile has been added to the list.
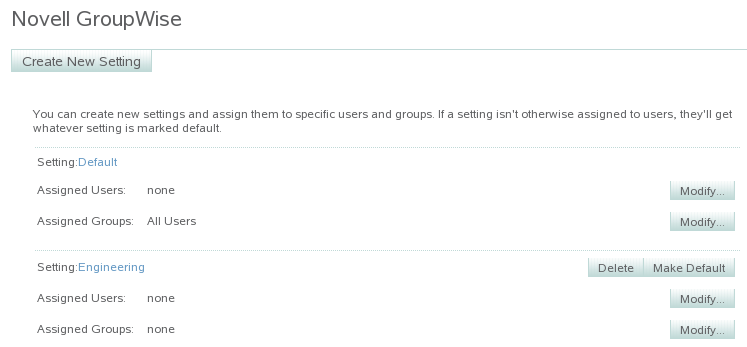
The field displays the name of the profile that you defined in Step 3 above.
-
Assign users and groups to the first customized profile:
-
In the field for the new profile, click , assign users to the customized profile as needed, then click .
-
In the field for the new profile, click , assign groups of users to the customized profile as needed, then click .
-
When you have finished assigning users and groups to the first customized profile, click to create additional customized profiles as needed.
-