Addressing Rules
Addressing rules let you search for text in an address and replace it with other text. Most addressing rules are used in conjunction with GroupWise® gateways to simplify addressing syntax. For specific details, see your GroupWise gateway guide. For an example of an addressing rule used with the Internet Agent, see Creating a Customized Addressing Rule.
Addressing rules are created at the system level and enabled by domain.
If you are using Internet-style addressing (see Internet-Style Addressing), any addressing rules that include an @ in the search string and a colon (:) in the replacement string is ignored.
Creating an Addressing Rule
-
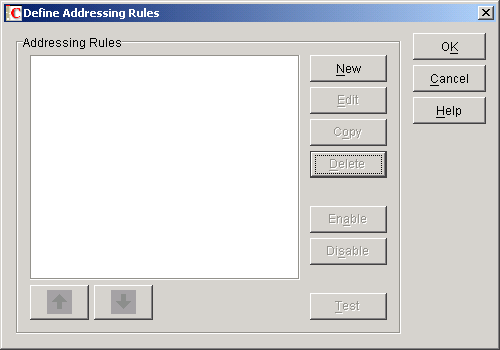
In ConsoleOne®, click the Tools menu > GroupWise System Operations > Addressing Rules.
-
Click New to display the New Addressing Rule dialog box.

-
Fill in the following fields:
Description: Enter a short description for the rule. The description is what appears when the rule is listed in the Addressing Rules dialog box.
Name: Enter the name you want to use for the rule.
Search String: Enter the text string that determines which addresses the rule is applied to. You can use an asterisk as a wildcard to represent one or more characters. For example, if you want the rule to apply to all addresses with JSmith as the userID, enter jsmith.*.* (the first asterisk represents the post office and the second represents the domain).
Replace With: Enter the replacement text. You can use variables (%1, %2, and so forth) to reference the wildcard text used in the search string. For example, if you use two wildcards in the search string, you could use two variables (%1 and %2) to insert the matched wildcard text into the replacement string. %1 (replace string 1) replaces the first wildcard in the search string, %2 replaces the second wildcard, and so on. The replacement variables must be placed in the string according to the order required for the explicit address, not according to their numerical order (for example, %2 could come before %1).
Using the jsmith.*.* example, assume that you want to replace jsmith with jjones. You would enter jjones.%1.%2. The resulting addressing would include the same post office and domain but a different userID.
-
If desired, you can test the rule on an address. To do so, enter an address in the Test Address dialog box (the address does not have to be real) > click Test to see the results.
-
Click OK to add the rule to the list.
The rule is automatically enabled, which means that it is available for use. To apply it to a domain, however, you need to enable it in the domain. For instructions, see Enabling an Addressing Rule.
-
If necessary, select the rule, then use the up-arrow and down-arrow to move the rule to the position in which you want it executed.
Addressing rules are executed in the order they are listed. When an addressing rule is applied to an address, no further addressing rules are applied.
-
When you are finished creating rules, click OK to close the Define Addressing Rules dialog box.
Enabling an Addressing Rule
After you create an addressing rule, you need to enable it in the domains where you want it applied.
-
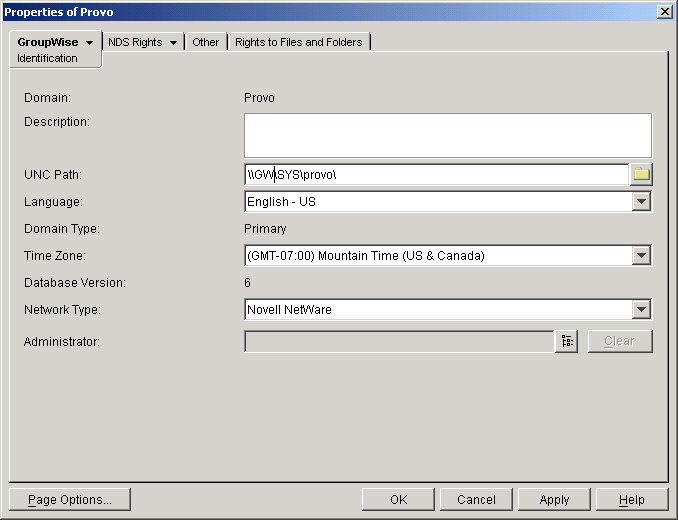
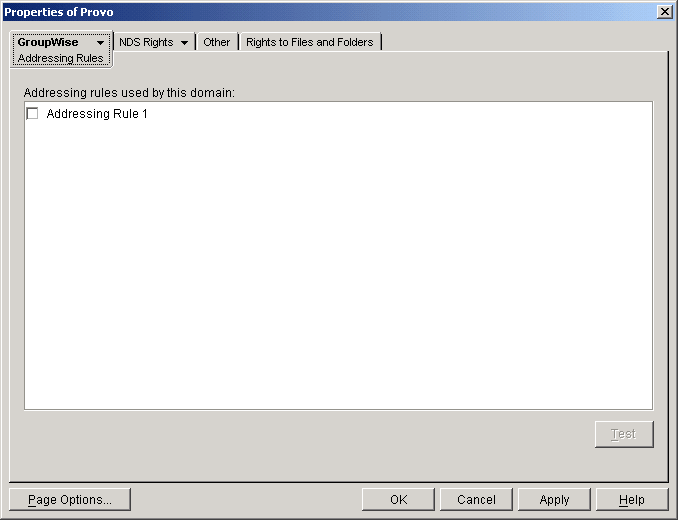
In ConsoleOne, right-click the Domain object, then click Properties.
-
Click GroupWise > Addressing Rules.
The list displays all addressing rules that have been made available in the system. However, an addressing rule does not apply to the domain until you enable it.
-
Click the check box in front of an addressing rule to enable it.
-
When you are finished enabling rules, click OK to save your changes.