11.3 Setting Up the New Post Office
You should have already reviewed Section 11.2, Planning a New Post Office and filled out Section 11.5, Post Office Worksheet. Complete the following tasks to create a new post office.
11.3.1 Creating the New Post Office
-
Make sure you are logged in to the tree where you want to create the post office.
This must be the same tree as the domain that the post office belongs to (worksheet item 3).
-
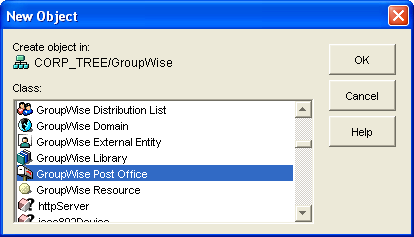
In ConsoleOne, browse to and right-click the eDirectory container where you want to create the post office (worksheet item 1), then click > .
-
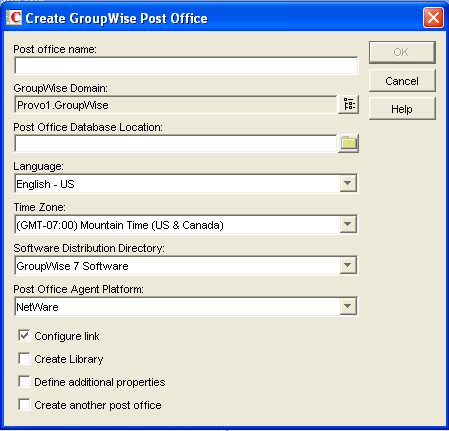
Double-click GroupWise Post Office, then fill in the fields in the Create GroupWise Post Office dialog box (worksheet items 2 through 8).
-
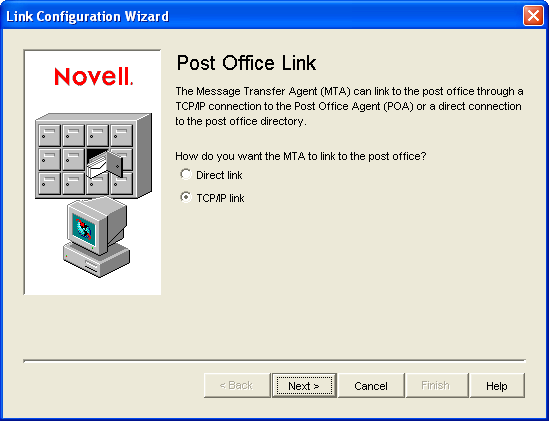
Make sure the and options are selected, then click to display the Link Configuration Wizard.
-
Follow the on-screen instructions to define how the post office links to its domain. When you finish defining the link, ConsoleOne creates the Post Office object and displays the post office Identification page.
-
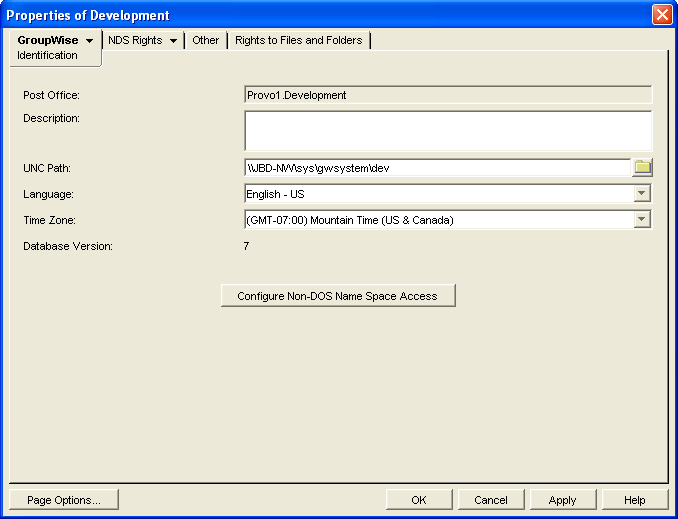
Fill in the field (worksheet item 9).
-
Click > to display the Post Office Settings page.

-
Provide the network type for the post office location (worksheet item 10).
-
Select the software distribution directory for the post office (worksheet item 7).
-
If the POA will run on a different server from where the post office directory, a library, or a document storage area is located, provide a username and password that enables the POA to access the remote location (worksheet item 12).
-
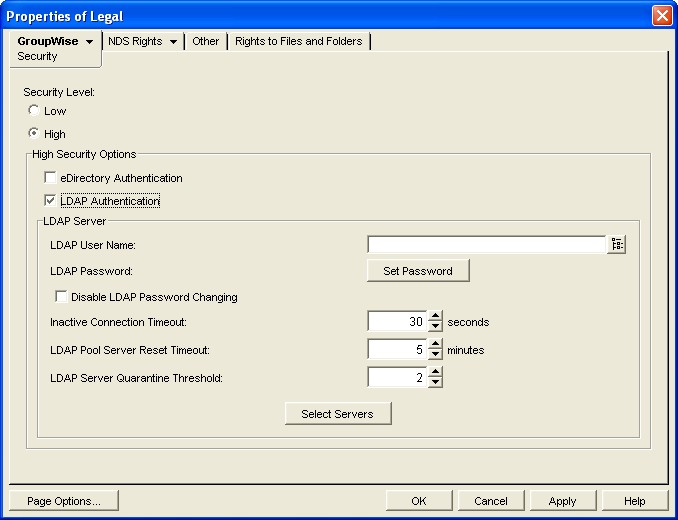
Click > to display the Security page.
-
Provide the post office security level and authentication type for the post office (worksheet item 11). For additional LDAP instructions, see Section 36.3.4, Providing LDAP Authentication for GroupWise Users.
-
Click to save the post office information.
11.3.2 Configuring the POA for the New Post Office
Although there are many POA settings, the default settings are sufficient to get your post office operational. However, there are a few important settings that you can conveniently modify before you install the agent software.
-
In ConsoleOne, double-click the new Post Office object.
-
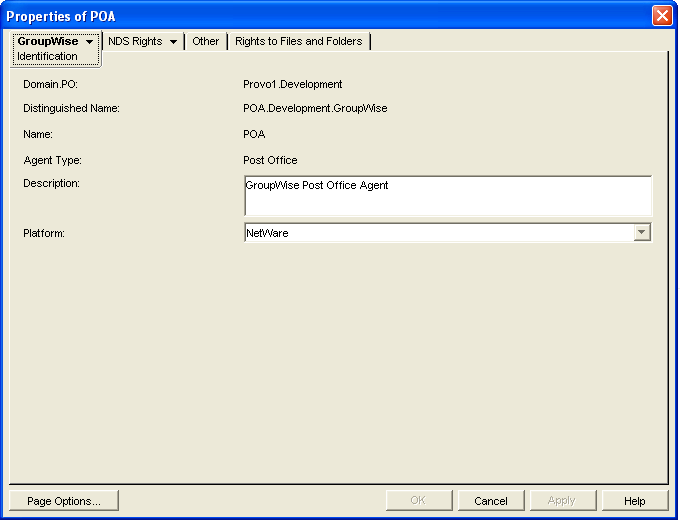
Right-click the POA object, then click to display the POA Identification page.
-
Provide a description for the POA.
The description displays on the POA agent console as the POA runs.
-
Select the platform where the POA will run (worksheet item 12).
-
If you have created the post office in a clustered environment, follow the instructions in the appropriate section of the GroupWise 7 Interoperability Guide.
-
For more POA configuration options, see Section 12.10, Changing POA Configuration to Meet Post Office Needs.
-
Click OK to save the POA configuration information.
11.3.3 Installing and Starting the New POA
To install the POA for the new post office to the location recorded under worksheet item 11, follow the instructions in Installing GroupWise Agents
in the GroupWise 7 Installation Guide.
11.3.4 Setting Up User Access to the New Post Office
The post office access mode determines how GroupWise client users access their mailboxes. By default, the GroupWise Windows and Cross-Platform clients use client/server access to the post office. Client/server access provides the following benefits:
-
Client/server access provides the greatest level of security. Users do not need rights to the post office directory because the GroupWise client does not write directly to databases in the post office. All database updates are performed by the POA.
-
Client/server access eliminates the need for separate network logins and passwords. This avoids problems with login restrictions, changing passwords, and insufficient network rights.
-
Client/server access allows the GroupWise client to maintain multiple simultaneous connections to the post office.
-
With client/server access mode, proxy rights can be granted to any user visible in the Address Book.
Historical Note: In GroupWise 5.x, the GroupWise client allowed the user to enter a path to the post office directory to facilitate direct access mode. The GroupWise 6.x and later clients no longer offer the user that option. However, you can force the GroupWise 6.x and later client to use direct access mode by starting it with the /ps switch and providing the path to the post office directory.
Continue with Section 11.4, What’s Next.