4.12 Trusted Applications
Trusted applications are third-party programs that can authenticate to Post Office Agents (POAs) and Internet Agents in order to access GroupWise mailboxes without needing personal user passwords. Trusted applications might perform such services as message retention or synchronization with mobile devices. The Trusted Application feature in ConsoleOne allows you to configure and delete trusted applications that are in use in your GroupWise system.
For security guidelines for managing trusted applications, see Section 81.6, Protecting Trusted Applications.
4.12.1 Creating a Key for a Trusted Application
For information about creating and installing trusted applications, see GroupWise Trusted Application API at the Novell Developer Kit Web site.
When a trusted application is created by a third party, the application must create a key that the application uses to authenticate to the GroupWise system. Although the trusted application itself can run on NetWare, Linux, or Windows, creating the trusted application key must currently take place on Windows. Creating the key causes the trusted application to be listed in ConsoleOne.
4.12.2 Configuring a Trusted Application
By default, a trusted application can authenticate to your GroupWise system from any network address. For tighter security, you can specify a particular IP address or DNS hostname from which the trusted application is allowed to authenticate. In addition, you can require a secure SSL connected, as needed.
-
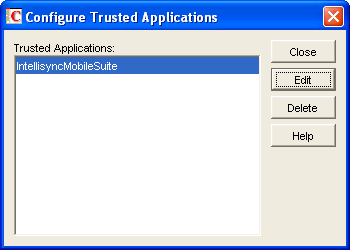
Click > > to display the Configure Trusted Applications dialog box.
-
In the list, select the application you want to edit, then click .
-
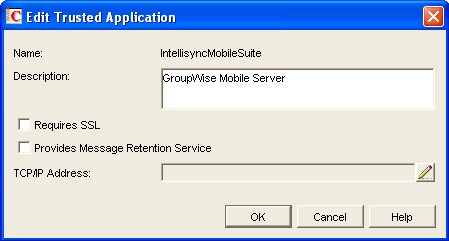
Modify any of the following fields:
Name: This field displays the trusted application’s name. You cannot change the name. It is provided by the third-party program.
Description: Specify a description for the trusted application.
Requires SSL: Select this option to require a secure SSL connection between the trusted application and POAs and Internet Agents.
Provides Message Retention Service: Select this option if the purpose of the trusted application is to retain GroupWise user messages by copying them from GroupWise mailboxes (user databases) into another storage medium.
Turning on this option only defines the trusted application as a Message Retention Service application. In order for GroupWise mailboxes to support message retention, you must turn on the option in the GroupWise Client Options ( menu> > > > ). You can enable individual mailboxes, all mailboxes in a post office, or all mailboxes in a domain by selecting the appropriate object (User, Post Office, or Domain) before selecting GroupWise Client Options. For more information, see Section 65.0, Setting Defaults for the GroupWise Client Options.
For information about the complete process required to use a trusted application for message retention, see Section 33.0, Retaining User Messages.
TCP/IP Address: If you want to restrict the location from which the trusted application can authenticate to your GroupWise system, specify the network address of the server where the application runs. In the field, click , then specify the IP address or DNS hostname of the trusted application’s server.
If you want to allow the trusted application to authenticate from any server, do not specify an IP address or DNS hostname.
For information about how the POA handles trusted application processing of message files, see Section 36.3.6, Configuring Trusted Application Support.
4.12.3 Deleting a Trusted Application
-
Click > > to display the Configure Trusted Applications dialog box.
-
In the list, select the application you want to delete, click , then click to confirm the deletion.