39.2 Setting Up Your Messenger System in a Heartbeat Cluster
You should have already reviewed Section 22.1, Planning Your Messenger System in a Linux Cluster and filled out the Messenger Clustering Worksheet and the Novell Messenger Worksheet
in the Messenger 2.0 Installation Guide.
39.2.1 Setting Up Native Heartbeat Resources for the Messenger Agents
-
Start the HA Management Client, as described in Section 31.1, Starting the HA Management Client.
-
Create a one or two cluster resource groups for the Messenger agents (Messenger Clustering Worksheet item 2 and item 3), as described in Section 31.2, Creating a Cluster Resource Group.
-
Create the EVMS container resource, the file system resource, and the IP address resource for the cluster resource group (Messenger Clustering Worksheet item 4), as described in Section 31.3, Creating Native Heartbeat Resources.
As opposed to native Heartbeat resources, Messenger resources for the Messenger agents must be created after you install the Messenger software, so that the GroupWise script is available to enhance the capabilities of the HA Management Client. By creating native resources before you install the Messenger software, you can use them to conveniently fail over the nodes as you install the Messenger agent software on multiple nodes.
-
Set up constraints on the nodes where the Messenger agents can fail over (Messenger Clustering Worksheet item 5), as described in Section 31.4, Creating Heartbeat Constraints
-
Continue with Creating Your Messenger System and Installing the Messenger Agents.
39.2.2 Creating Your Messenger System and Installing the Messenger Agents
The Messenger Installation program walks you through setting up your Messenger system and installing the Messenger agents. The first time you run the Messenger Installation program, you create your Messenger system, which includes creating various Messenger objects in eDirectory and installing the Messenger software on the node where you run the Messenger Installation program. After that, you run the Messenger Installation program on each node where you want the Messenger agents to be able to fail over, in order to install the Messenger software on each node, but you do not create any more objects in eDirectory.
Running the Messenger Installation Program on the Initial Node
-
In the HA Management Client, start the resources in the Messenger resource group (Messenger Clustering Worksheet item 2) in order to mount the shared storage partition.
-
From the Messenger 2 Administrator for Linux CD, run the Messenger Installation program, following the steps provided in
Starting the Messenger Installation Program on Linux
inInstalling a Novell Messenger System
in the Messenger 2.0 Installation Guide. -
When asked if you are installing to a cluster, enter y for .
-
From the options list, enter 1 for .
-
Specify the mount point for the shared storage partition (Messenger Clustering Worksheet item 4).
-
When asked if you want to start the agents, enter n for .
-
Set up your Messenger system, following the steps provided in
Configuring Your Messenger System on Linux
inInstalling a Novell Messenger System
in the Messenger 2.0 Installation Guide. -
Continue with Running the Messenger Installation Program on Subsequent Nodes.
Running the Messenger Installation Program on Subsequent Nodes
-
In the HA Management Client, select a different node where you want to run the Messenger agents (Messenger Clustering Worksheet item 6), then click .
-
From the Messenger 2 Administrator for Linux CD, run the Messenger Installation program.
-
When asked if you are installing to a cluster, enter y for .
-
From the options list, enter 2 for .
-
Specify the mount point for the shared storage partition (Messenger Clustering Worksheet item 4).
The Messenger Installation program then accesses the Messenger files that were created on the shared storage partition when the Messenger agents were installed on the initial node. From these files, the Messenger Installation program lists the probable configuration for the Messenger agents you are installing on the current node.
-
Enter 1 for .
or
Enter 2 for , then modify the configuration for the Messenger agents as needed.
-
When asked if you want to start the agents, enter n for .
-
Repeat Step 1 through Step 7 for each node where you want the Messenger agents to fail over.
-
Continue with Creating and Configuring Messenger Cluster Resources for the Messenger Agents.
Creating and Configuring Messenger Cluster Resources for the Messenger Agents
Now that you have installed the Messenger agent software, you can create and configure Messenger resources in the cluster resource group you created in Section 39.2.1, Setting Up Native Heartbeat Resources for the Messenger Agents:
Creating Messenger Resources for the Messenger Agents
-
In the HA Management Client, select the Messaging Agent cluster resource group (Messenger Clustering Worksheet item 2}, then click .
-
In the field, select , then click .

-
In the field, specify a unique name for the Messenger resource (Messenger Clustering Worksheet item 2).
-
In the field, select the Messenger cluster resource group.
-
In the list, select .
The OCF Resource Agent script (GroupWise) adds this item to the list. If no GroupWise agents are installed on this node, you can copy the GroupWise script from the /usr/lib/ocf/resource.d/novell directory from another node to this node so that the resource type appears in the list.
-
In the list, set the value of the object_name parameter to the identifier for the Messaging Agent (Messenger Clustering Worksheet item 4).
For the Messaging Agent, the identifier is the full eDirectory object name of the Messaging Agent.
-
Click to create the Messenger resource.
-
If desired, create another Messenger resource in the cluster resource group for the Archive Agent.
-
Continue with Enabling Automatic Messaging Agent Restart.
Enabling Automatic Messaging Agent Restart
If you want Heartbeat to automatically restart a Messaging Agent that has stopped:
-
In the HA Management Client, select the Messenger resource for the Messaging Agent, then click .
-
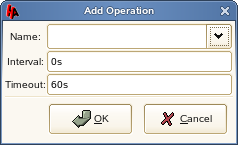
Click , then select .
-
Select the time interval for how often you want the Messaging Agent to be polled to see if it is still running.
The GroupWise script causes the Messaging Agent to restart, using the GroupWise High Availability service. (GWHA)
-
Click to save the monitoring setting.
-
If necessary, repeat the process for the Messenger resource for the Archive Agent.
Because Heartbeat can perform such agent monitoring, you do not need to set up GroupWise Monitor to perform this task, as described in
Configuring the Monitor Agent to Communicate with the High Availability Service
inInstalling GroupWise Monitor
in the GroupWise 7 Installation Guide. Heartbeat and the GroupWise High Availability Service can work together to keep the Messenger agents running on Linux. -
Continue with Preventing Messaging Agent Failback.
Preventing Messaging Agent Failback
If you do not want the Messaging Agent cluster resource group to automatically fail back when the initial node is on-line again:
-
In the HA Management Client, select the Messenger cluster resource group for the Messaging Agent, click , then click .
-
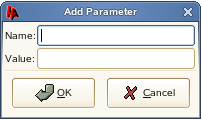
In the field, specify resource_stickiness.
-
In the field, specify INFINITY.
-
Click to save the setting.
-
If necessary, repeat the process for the Archive Agent.
-
Continue with Testing Your Messenger Agent Installation on Each Node.
Testing Your Messenger Agent Installation on Each Node
-
Test the Messenger agents by starting them as daemons, as described in
Starting the Linux Messenger Agents
inInstalling a Novell Messenger System
in the Messenger 2.0 Installation Guide./etc/init.d/novell-nmma start /etc/init.d/novell-nmaa start /etc/init.d/novell-nmma status /etc/init.d/novell-nmaa status -
Stop the Messenger agents.
/etc/init.d/novell-nmma stop /etc/init.d/novell-nmaa stop /etc/init.d/novell-nmma status /etc/init.d/novell-nmaa status -
Repeat Step 1 and Step 2 for each node where you installed the Messenger software.
-
After you have tested the Messenger agents on all nodes manually, start and stop the each Messenger agent resource in the HA Management Client to make sure that it is properly configured.
If you receive the error Unmanaged on node, then you have failed to test the Messenger agents on one or more nodes. On each node, view the gwha.conf file in the /etc/opt/novell/groupwise directory. Each Messaging Agent section should be preceded by:
.messagingagent.server_nameserver.messengerservice.organization
Each Archive Agent section should be preceded by:
.archiveagent.server_nameserver.messengerservice.organization.
If any section is preceded by a startup file name (for example, @strtup.ma), then that Messenger agent has not yet been initialized by being run manually. To resolve the problem, you can run the Messenger agent manually on that node, or you can replace the @strtup.ma or @strtup.aa with:
.messagingagent.server_nameserver.messengerservice.organization
.archiveagent.server_nameserver.messengerservice.organization
being sure to follow the same format as the other Messenger agent section headings in the gwha.conf file.
-
When you have installed the Messenger agents on all of the nodes where you want them to fail over, continue with Changing Messenger Paths to Locations on the Messenger Partition.
39.2.3 Changing Messenger Paths to Locations on the Messenger Partition
During installation, various Messenger paths are set to locations on the node where the software is installed. After installation, you need to set these paths to locations on the shared storage partition, so that the files stored at these locations are available to the Messenger agents regardless of which node in the cluster the agents are running on:
After setting these locations, continue with Section 22.3, Testing Your Clustered Messenger System.
Setting the Store Path
The store path is the location where you want the archive created.
During installation, the default store path is created in /var/opt/novell/messenger/aa/store on each node, but you need the archive to be stored on the shared storage partition.
-
Choose a directory where you want to store the archive and create that directory on the shared storage partition.
-
In ConsoleOne®, browse to and select the Novell Messenger Service object (MessengerService), then click .
-
Right-click the File Module object, then click .
-
In the field, specify your archive store path, then click .
Setting the Messaging Agent Queue Path
When archiving is enabled, the Messaging Agent passes conversations to the Archive Agent when the conversations are completed. If the Messaging Agent cannot communicate with the Archive Agent when it has a conversation to archive, it saves the conversation in its holding directory (queue) until it can communicate with the Archive Agent again.
During installation, the default Messaging Agent queue path is created in /var/opt/novell/messenger/ma/queue, but you need the queue directory to be located on the shared storage partition.
-
Choose a directory for the Messaging Agent queue and create that directory on the shared storage partition.
-
In ConsoleOne, browse to and select the Novell Messenger Service object (MessengerService), then click .
-
Right-click the Messaging Agent object, then click .
-
Click .
-
In the field, specify the Messaging Agent queue path, then click .
Setting the Archive Agent Queue Path
When the Archive Agent receives a conversation to archive, if it is already busy processing other conversations, it temporarily stores the conversation in its holding directory (queue).
During installation, the default Archive Agent queue path is created in /var/opt/novell/messenger/aa/queue, but you need the queue directory to be located on the shared storage partition.
-
Choose a directory for the Archive Agent queue and create that directory on the shared storage partition.
-
In ConsoleOne, browse to and select the Novell Messenger Service object (MessengerService), then click .
-
Right-click the Archive Agent object, then click .
-
Click .
-
In the field, specify the Archive Agent queue path, then click .
Setting the Messaging Agent Log Path
During installation, the default Messaging Agent log path is created in /var/opt/novell/log/messenger/ma, but you need the log file directory to be located on the shared storage partition.
-
Choose a directory for the Messaging Agent log files and create that directory on the shared storage partition.
-
In ConsoleOne, browse to and select the Novell Messenger Service object (MessengerService), then click .
-
Right-click the Messaging Agent object, then click .
-
Click .
-
In the field, specify the Messaging Agent log path, then click .
Setting the Archive Agent Log Path
During installation, the default Archive Agent log path is created in /var/opt/novell/log/messenger/aa, but you need the log file directory to be located on the shared storage partition.
-
Choose a directory for the Archive Agent queue and create that directory on the shared storage partition.
-
In ConsoleOne, browse to and select the Novell Messenger Service object (MessengerService), then click .
-
Right-click the Archive Agent object, then click .
-
Click .
-
In the field, specify the Archive Agent log path, then click .