15.2 Setting Up the Internet Agent in a Linux Cluster
You should already have reviewed Section 15.1, Planning the Internet Agent in a Linux Cluster and filled out Section 15.5, Internet Agent Clustering Worksheet. You are now ready to complete the following tasks to set up the Internet Agent in a clustering environment:
15.2.1 Creating a Domain for the Internet Agent
The Internet Agent domain will be a secondary domain. To create it, follow the instructions in Section 14.2, Creating a New Secondary Domain in a Linux Cluster, taking your information from the Internet Agent Clustering Worksheet, rather than the System Clustering Worksheet, then return to this point.
Do not create any post offices in the Internet Agent domain.
After you have created the domain, continue with Installing the MTA for the Internet Agent Domain.
15.2.2 Installing the MTA for the Internet Agent Domain
The MTA for the Internet Agent domain can be installed just like any other MTA in your clustered GroupWise system. Follow the instructions in Section 14.4.1, Installing and Setting Up the Agents in Your Cluster, then return to this point.
You do not need to edit the MTA startup file. You do not need to modify the Cluster Resource object properties until after you have installed the Internet Agent.
After you have installed the MTA, continue with Installing and Configuring the Internet Agent in a Cluster.
15.2.3 Installing and Configuring the Internet Agent in a Cluster
After you have created a domain for the Internet Agent and installed the MTA for that domain, you are ready to install and configure the Internet Agent.
Installing and Setting Up the Internet Agent Software in Your Cluster
The Internet Agent must be installed on each node in its failover list (Internet Agent Clustering Worksheet item 3).
Running the Internet Agent Installation Program on the Preferred Node
-
Make sure that the Internet Agent software is available in the software distribution directory you created in Step 6 in Section 14.1, Setting Up a New GroupWise System in a Linux Cluster.
-
Mount the Internet Agent partition (Internet Agent Clustering Worksheet item 1) where the Internet Agent message queues are located.
-
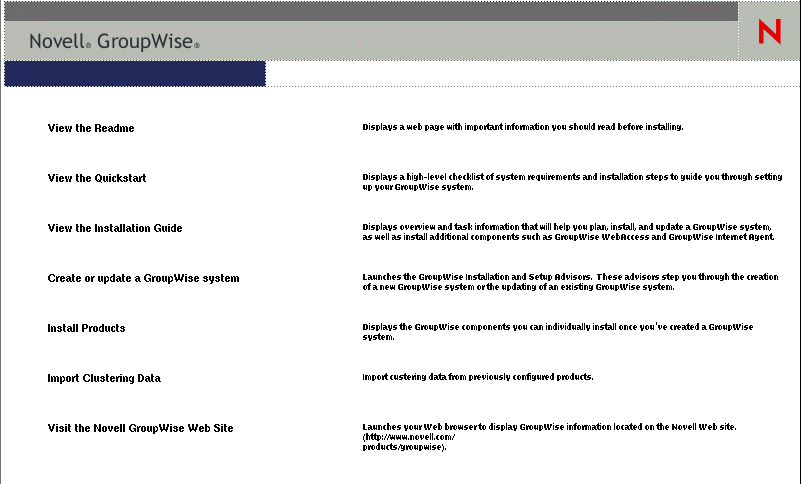
From the software distribution directory, start the GroupWise Installation program and select .
-
Install the Internet Agent software, following the steps provided in
Linux: Installing the Internet Agent Software
inInstalling the GroupWise Internet Agent
in the GroupWise 7 Installation Guide. -
Configure the Internet Agent according to the
GroupWise Internet Agent Installation Worksheet
that you filled out in Section 15.1, Planning the Internet Agent in a Linux Cluster, paying special attention to the cluster resource information on the Server Information page.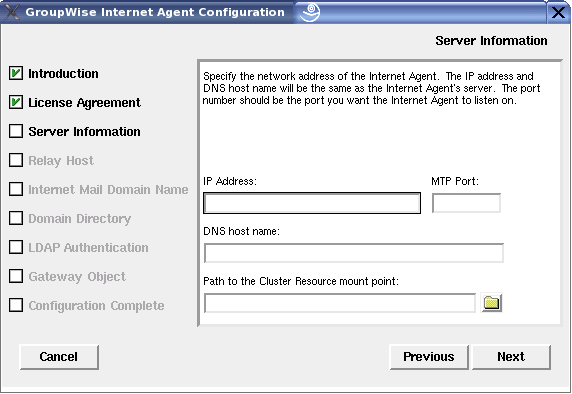
As a result of selecting on the preferred node, the following cluster-specific configuration actions are performed:
-
The Internet Agent startup file (gwia.cfg) is created in mount_point/groupwise/agents/share on the shared resource so that the Internet Agent uses the same startup file regardless of which cluster node it is running on. The --home switch includes the mount point and the path to the database so that the startup file is valid when mounted to each cluster node.
-
The --cluster switch is added to the Internet Agent startup file to inform the Internet Agent that it is running in a cluster.
-
The --ip startup switch is set to the secondary IP address of the shared resource where the domain is located. This ensures that the Internet Agent runs with the same IP address regardless of which cluster node it is running on.
-
The --log startup switch is set to a location on the shared resource (mount_point/groupwise/agents/log) so that Internet Agent logging information is written to the same log file regardless of which cluster node it is running on.
-
If this is the first GroupWise agent installed on this cluster node, the GroupWise High Availability service is automatically configured and its configuration file (gwha.conf) is created in the /etc/opt/novell/groupwise directory. If another GroupWise agent has already been installed on this cluster node, the gwha.conf file is updated to include the Internet Agent.
-
The clusterimport.conf file in the gwinst subdirectory of the software distribution directory from which you ran the GroupWise Installation program is updated, so that the cluster-specific information collected when you configured the Internet Agent on the preferred node is available when you install the Internet Agent on subsequent nodes.
-
The Internet Agent is not configured to start automatically on system startup. In a cluster, you do not want the Internet Agent to start automatically whenever a node restarts.
-
-
Configure the Internet Agent to run as a non-root user, as described in the applicable section of the GroupWise 7 Installation Guide:
-
Continue with Running the Internet Agent Installation Program on Subsequent Nodes.
Running the Internet Agent Installation Program on Subsequent Nodes
-
On the next node in the Internet Agent failover list, mount the Internet Agent partition (Internet Agent Clustering Worksheet item 1) where the Internet Agent message queues are located.
-
From the software distribution directory you created in Step 6 in Section 14.1, Setting Up a New GroupWise System in a Linux Cluster, start the GroupWise Installation program and select .
Because of the existence of the clusterimport.conf file in the gwinst subdirectory of the software distribution directory, a new installation option, , is now available on the main GroupWise Installation program page.
-
Install the Internet Agent software on the cluster node as usual, but do not use the option.
-
On the main page of the Installation program, click , then click .
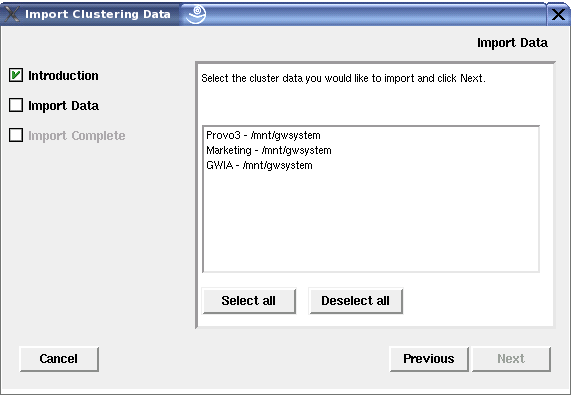
All GroupWise agents that you have installed from the software distribution directory are listed, based on the information stored in the clusterimport.conf file.
-
Select the GroupWise agents that you want to configure on the current cluster node, then click .
The option performs the following configuration actions for each subsequent node where you run it:
-
The grpwise script is created in the /etc/init.d directory on the current cluster node. It is configured specifically for the agents you just selected.
-
The GroupWise High Availability service is automatically configured on the current cluster node and its configuration file (gwha.conf) is created in the /etc/opt/novell/groupwise directory. It is configured specifically for the agents you just selected.
Because the agent startup files and log files are stored on the shared resource, they do not need to be customized for each cluster node.
-
-
Configure the Internet Agent to run as a non-root user, as described in the applicable section of the GroupWise 7 Installation Guide:
-
Repeat Step 1 through Step 6 for each cluster node in the Internet Agent failover list.
After you install and configure the Internet Agent on each node in its failover list, the cluster node is ready for the Internet Agent to fail over to it.
-
Continue with Testing Your Internet Agent Installation on Each Node.
Testing Your Internet Agent Installation on Each Node
-
Test the Internet Agent by starting it with a user interface, as described in
Linux: Starting the Internet Agent
inInstalling the GroupWise Internet Agent
in the GroupWise 7 Installation Guide./opt/novell/groupwise/agents/bin/gwia --show @gwia.cfg &
-
Stop the Internet Agent by clicking .
-
After you can see that the Internet Agent stopped successfully, test it by starting it as a daemon, as described in
Starting the Linux GroupWise Agents as Daemons
inInstalling GroupWise Agents
in the GroupWise 7 Installation Guide./etc/inet.d/grpwise start domain.gwia /etc/inet.d/grpwise status domain.gwia
-
Stop the Internet Agent.
/etc/inet.d/grpwise stop domain.gwia
/etc/inet.d/grpwise status domain.gwia
-
Make sure you have completed all the tasks described in
Installing the GroupWise Internet Agent
in the GroupWise 7 Installation Guide.A few tasks, such as assigning a postmaster, are not dealt with in this cluster-oriented section.
-
Repeat the steps in Running the Internet Agent Installation Program on the Preferred Node for each node in the Internet Agent failover list.
When you have installed the Internet Agent on all of the nodes in the Internet Agent failover list, continue with Configuring the Clustered Internet Agent for SSL.
Configuring the Clustered Internet Agent for SSL
If you plan to enable SSL, as described in Securing Internet Agent Connections with SSL
in Internet Agent
in the GroupWise 7 Administration Guide, you must make the SSL certificate file and key file available to the Internet Agent in the cluster. The default locations for the SSL certificate file and key file are on the cluster nodes along with the GroupWise software, rather than being located with the domain and post office on one or more GroupWise partitions. To avoid having multiple copies of these files in multiple locations, you should set the locations in ConsoleOne®.
-
On the Internet Agent partition, create the directory where you want to store the certificate and key file required for SSL.
-
Copy the certificate file and key file into the new directory.
If you need assistance obtaining these files, see
Server Certificates and SSL Encryption
inSecurity Administration
in the GroupWise 7 Administration Guide. -
In ConsoleOne, browse to and select the Domain object.
-
Right-click the Internet Agent object, then click .
-
Click .
-
In the field, browse to and select the certificate file.
-
In the field, browse to and select the key file.
-
Click .
-
Continue with Configuring the Internet Agent Cluster Resource to Load and Unload the Internet Agent and Its MTA.
Configuring the Internet Agent Cluster Resource to Load and Unload the Internet Agent and Its MTA
The properties of the Cluster Resource object define how the Internet Agent partition functions within the cluster, how the Internet Agent is loaded and unloaded, and how failover and failback situations are handled. Complete the following tasks for the Internet Agent cluster resource:
Modifying the Cluster Resource Load Script for the Internet Agent and Its MTA
The cluster resource load script executes whenever the Internet Agent cluster resource comes online.
To set up the load script in iManager:
-
Expand Clusters, then click .
-
In the field, browse to the Cluster object where the Internet Agent cluster resource is located.
-
Click the Cluster object to display the cluster resources that belong to the cluster.
-
Select the Internet Agent cluster resource that you created when you set up the Internet Agent partition, then click .
The default load script from a generic IP service template appears as follows:
#!/bin/bash
. /opt/novell/ncs/lib/ncsfuncs

# mount the file system
exit_on_error mount -t reiserfs /dev/evms/vol /mnt/generic

# add the IP address
exit_on_error add_secondary_ipaddress a.b.c.d

# start the service
exit_on_error /etc/init.d/myservice start

# return status
exit 0
-
If this is an NSS volume or a shared pool, make the following changes to set up the Internet Agent load script:
-
As needed, in the mount command, change reiserfs to whatever file system type is in use on nodes in the cluster.
-
In the mount command, change vol to the actual device name in use on nodes in the cluster.
-
In the mount command, change /mnt/generic to the mount point directory in use on nodes in the cluster.
-
In the add_secondary_ipaddress command, change a.b.c.d to the secondary IP address of the Internet Agent partition (Internet Agent Clustering Worksheet item 1)
-
In the start service command, change myservice start to the command to start the Internet Agent and its MTA.
/etc/init.d/grpwise start domain
/etc/init.d/grpwise start domain.gwia
-
-
If this is a traditional Linux volume, use the following load script:
#! /bin/bash
. /opt/novell/ncs/lib/ncsfunc

# define the IP address
RESOURCE_IP=123.123.1.

# define the file system type
MOUNT_FS=reiserf

# define the device
exit_on_error evms -f /var/opt/novell/ncs/ContainerActivate -rl
                                                 Share ‘uname -n‘
MOUNT_DEV=/dev/evms/Share/dat

# define the mount point
MOUNT_POINT=/mnt/mount_point

# mount the file system
exit_on_error mount -t $MOUNT_FS $MOUNT_DEV $MOUNT_POINT

# add the IP address
exit_on_error add_secondary_ipaddress $RESOURCE_IP

/etc/init.d/grpwise start domain
/etc/init.d/grpwise start domain.gwia

exit 0
Make the following changes to set up the load script for the Internet Agent:
-
On the RESOURCE_IP line, change 123.123.1.1 to the secondary IP address of the GroupWise partition (Internet Agent Clustering Worksheet item 1).
-
As needed on the MOUNT_FS line, change reiserfs to whatever file system type is in use on nodes in the cluster.
-
On the MOUNT_DEV line, change /dev/evms/Share/dat to the actual device name in use on nodes in the cluster.
-
On the MOUNT_POINT line, change /mnt/mount_point to the mount point directory in use on nodes in the cluster.
-
If you created a domain on the partition, use the following command to start the MTA:
/etc/init.d/grpwise start domain -
Use the following commands to start the Internet Agent and its MTA:
/etc/init.d/grpwise start domain
/etc/init.d/grpwise start domain.gwia
-
-
Click to save the load script.
Modifying the Cluster Resource Unload Script for the Internet Agent and Its MTA
The cluster resource unload script executes whenever the Internet Agent cluster resource goes offline. Programs should be unloaded in the reverse order of how they were loaded. This ensures that supporting programs are not unloaded before programs that rely on them in order to function properly.
-
On the Cluster Resource Properties page of the Internet Agent cluster resource, click .
The default unload script appears as follows:
#!/bin/bash
. /opt/novell/ncs/lib/ncsfuncs

# request service stop
ignore_error /etc/init.d/myservice stop

# stop service otherwise
sleep 8
ignore_error fuser -k /mnt/generic

# del the IP address
ignore_error del_secondary_ipaddress a.b.c.d

# umount the file system
exit_on_error umount /mnt/generic

# return status
exit 0
-
If this is an NSS volume or a shared pool, make the following changes:
-
In the stop service command, change myservice stop to the command to stop the Internet Agent and its MTA.
/etc/init.d/grpwise stop domain.gwia
/etc/init.d/grpwise stop domain
-
Adjust the sleep command as needed so that the Internet Agent and its MTA can shut down normally on your system without being inadvertently killed by the kill service command.
-
In the kill service command (used if the Internet Agent and its MTA do not stop normally), change -k to -mk.
The -m parameter obtains the PID numbers of the processes to kill.
-
In the kill service command, change /mnt/generic to the mount point directory used in the load script.
-
In the del_secondary_ipaddress command, change a.b.c.d to the secondary IP address used in the load script.
-
In the umount command, change /mnt/generic to the mount point directory used in the load script.
-
-
If this is a traditional Linux volume, use the following unload script:
#!/bin/bash
. /opt/novell/ncs/lib/ncsfuncs

/etc/init.d/grpwise stop domain.gwia
/etc/init.d/grpwise stop domain

# define the IP address
RESOURCE_IP=172.16.5.18

# define the mount point
MOUNT_POINT=/mnt/mount_point

sleep 8

ignore_error fuser -k $MOUNT_POINT

# del the IP address
ignore_error del_secondary_ipaddress $RESOURCE_IP

# umount the file system
exit_on_error umount $MOUNT_POINT

# return status
exit 0
Make the following changes to set up the unload script for the Internet Agent.
-
Use the following command to stop the Internet Agent:
/etc/init.d/grpwise stop domain.gwia
-
Use the following command to stop its MTA:
/etc/init.d/grpwise stop domain -
On the RESOURCE_IP line, change 172.16.5.18 to the secondary IP address used in the load script.
-
On the MOUNT_POINT line, change /mnt/mount_point to the mount point directory used in the load script.
-
Adjust the sleep command as needed so that the agents can shut down normally on your system without being inadvertently killed by the fuser -k command that follows.
-
In the fuser -k command (used if the agents do not stop normally), change -k to -mk.
The -m parameter obtains the PID numbers of the processes to kill.
-
-
Click to save the unload script.
Setting the Failover List and Policies for the Internet Agent and Its MTA
-
On the Cluster Resource Properties page of the Internet Agent cluster resource, click .
The default policy settings are often appropriate. By default, a cluster resource:
-
Fails over automatically if the node it is running on fails
-
Starts automatically on the next node in its failover list
-
Continues running at its failover location, even after its most preferred node is again available
If you are considering changing these defaults, see
Setting Start, Failover, and Failback Modes
inInstallation and Setup
in the OES Novell Cluster Services 1.8.2 Administration Guide for Linux.
-
-
Under , arrange the nodes in the cluster into the desired failover list for the Internet Agent (Internet Agent Clustering Worksheet item 3).
-
Click .
Enabling Internet Addressing for Your Clustered GroupWise System
Setting up Internet addressing for a clustered Internet Agent is no different from setting it up for an Internet Agent in any other environment. Follow the instructions in Configuring Internet Addressing
in Internet Agent
in the GroupWise 7 Administration Guide, then return to this point.
Verifying Internet Agent Object Properties
During installation of the Internet Agent, the Internet Agent object should have been configured correctly. However, it can be helpful to verify certain cluster-specific information in order to familiarize yourself with the configuration of a clustered Internet Agent.
Accessing Internet Agent Object Properties
-
In ConsoleOne, browse to and select the Internet Agent domain in order to display its contents.
-
Right-click the Internet Agent object, then click .
-
Continue with Verifying the Reference to the Internet Agent Cluster Resource.
Verifying the Reference to the Internet Agent Cluster Resource
In the Internet Agent object properties pages:
-
Click .
-
Verify the contents of the field.
It displays the hostname as currently configured in DNS. It should display the hostname that corresponds to the secondary IP address of the Internet Agent cluster resource. For more information, see Section 15.1.5, Preparing DNS for the Clustered Internet Agent.
-
Make changes if necessary.
-
Continue with Verifying the Reference to the Mount Point Directory.
Verifying the Reference to the Mount Point Directory
In the Internet Agent object properties pages:
-
Click .
-
Verify that the displayed directories match the mount point directory and the domain directory.
-
Make changes if necessary.
-
Continue with Verifying Post Office Links.
Verifying Post Office Links
In the Internet Agent object properties pages:
-
Click .
-
Verify that the column displays (for client/server mode) for all post offices serviced by the Internet Agent.
-
Verify that the column displays the secondary IP addresses of the GroupWise partitions where post offices reside, not the IP addresses of any nodes in the cluster.
-
Make changes if necessary.
-
Continue with Forcing Use of the Internet Agent Secondary IP Address.
Forcing Use of the Internet Agent Secondary IP Address
If you want the Internet Agent to send outgoing messages on its secondary IP address, rather than using the default of its primary IP address:
-
Click .
-
In the field, provide the secondary IP address (Internet Agent Clustering Worksheet item 1) for the Internet Agent to use for sending outgoing messages.
-
Select .
-
Click .
-
Continue with Testing the Internet Agent in a Linux Cluster.