12.1 About the Detail portlet
The Detail portlet provides users with a detailed view of an entity’s attributes and their values. The portlet has two modes: display and edit. When accessing the Detail portlet, users can take advantage of its built-in capabilities to work with this information, including:
-
Section 12.1.3, E-Mailing Entity Data (display mode only)
-
Section 12.1.4, Linking to an organization chart (display mode only)
-
Section 12.1.5, Linking to Details of Other Entities (display mode only)
-
Section 12.1.6, Printing Entity Data (display mode only)
-
Section 12.1.7, Setting Preferred Locale (display mode only)
12.1.1 Displaying Entity Data
When accessed, the Detail portlet displays attribute data about a selected entity, such as a user or group. For example, Figure 12-1 displays what the Detail portlet might display when user Bill Brown selects the action.
Figure 12-1 Sample MyProfile Data
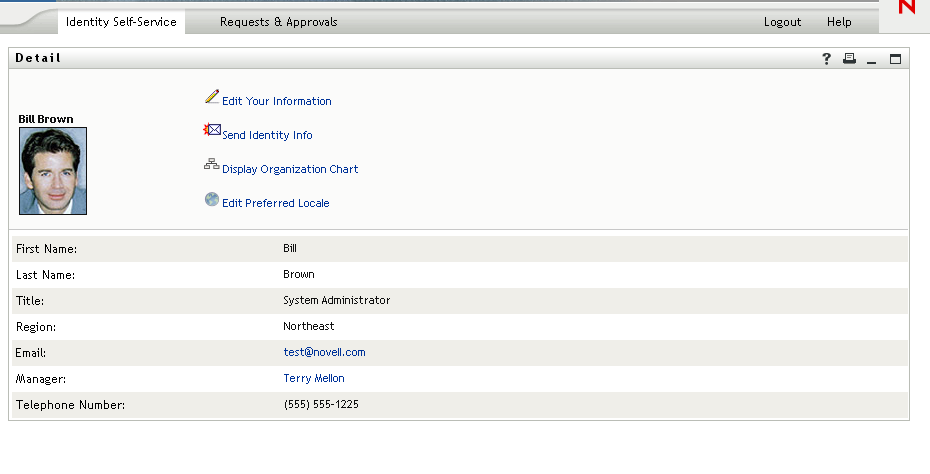
User images. By default, the Detail portlet is configured to include the User Photo attribute. However, if your Identity Vault does not include this attribute or it is not populated, a default image is displayed at runtime. If you store your user images in a different location, you can configure the portlet to display them from that location instead.
For more information, see Dynamically loading images..
Determining Which Attributes Display
The Detail portlet (display mode) displays the attributes that
-
Your directory abstraction layer data definitions make available for viewing.
For more information on directory abstraction layer configuration, see Section 1.2.2, Directory Abstraction Layer.
-
Are specified in the preference.
To learn about specifying which attributes display in the Detail portlet, see Section 12.5, Setting Preferences.
-
The current user has rights to view.
For instance, managers with rights to the salary attribute will see that data, but other users won’t.
For more information, see Section 12.2.2, Assigning rights to entities.
-
Are currently populated with a value.
Determining How Attributes Display
When displaying attributes, Detail formats the data as text, with some exceptions. Exceptions are listed in Table 12-1.
Table 12-1 Detail Portlet: Attributes That Do Not Display As Text
Determining What the Heading Area Displays
You can lay out the heading area of the Detail portlet using standard HTML features.
Figure 12-2 Detail Portlet: Heading Area

The Detail preferences provide an HTML Layout Editor that you can use to create the look and content you want:

Using the HTML Layout Editor
The HTML Layout Editor provides the typical features of an HTML editor for defining text formatting and lists, and for specifying anchors, images, and so on.
Keywords. When designing your layout, you can use the drop-down list to insert variables within the heading area of the Detail portlet to be replaced at runtime with specific attribute values. You can also type them using this syntax:
$[[keyword]]
Where keyword is the value of an attribute such as LastName.
You can concatenate attributes using this syntax:
$[[keyword+keyword]]
For example:
$[[FirstName+LastName]]
You can concatenate as many attributes as you want and can also include quoted strings like this:
$[[keyword+”sample text”+keyword]]
This renders the values of the keywords and the quoted text.
NOTE:When manually typing a keyword placeholder instead of selecting it from the dropdown list, make sure that it does not contain HTML formatting. It is recommended that you use the View Source mode for manual entry of keywords. When. a keyword is mistyped in a layout, it is rendered as-is at runtime (including the $[[]]).
Dynamically loading images. To display images that are stored in your Identity Vault (such as user photos), you can add the attribute name using the HTML Layout Editor. For example, adding the User Photo attribute displays the user’s photo. If you store images outside the Identity Vault, you’ll need to use the IMG: tag (from the View Source mode of the HTML Editor) as follows:
-
Go to the portlet’s preferences and access the HTML Editor.
-
Click .
-
Use the IMG: tag to combine a location, an attribute key, and a file extension using a syntax like this:
$[[IMG:”URL” + attribute-key-name + ”fileextension”]]
The following example shows the syntax you would use if you stored employee photos as JPG images by Last Name in the /images subdirectory of your application server:
$[[IMG:"http://myhost:8080/images/"+LastName+".jpg"]]
At runtime, the portlet concatenates the URL with the LastName attribute and the file extension.jpg.
The HTML Editor supports a flexible syntax. It supports any combination of text and attributes so that the syntax is
$[[IMG:”some text” + attribute-key-name + ...]]
12.1.2 Editing Entity Data
The Detail portlet automatically provides an link (such as or ) to switch from display mode to edit mode. This enables users with appropriate rights for the current entity to change its attribute values and save those changes.
For example, here’s what Detail might display when user Bill Brown (who has the necessary rights) edits his own information:
Figure 12-3 MyProfile Edit Mode
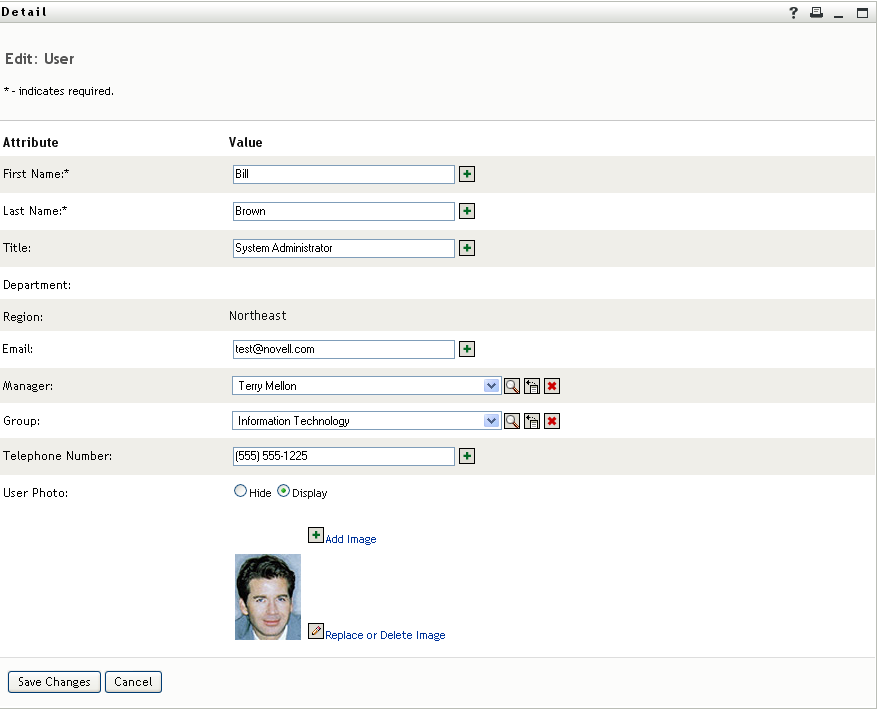
NOTE:For Boolean attributes, when both radio buttons are unselected it means that the attribute does not exist for the user. Selecting or creates the attribute for the user and also sets its value.
Determining Which Attributes Display
In edit mode, you can specify the attributes to display and their display order by using the Detail portlet’s preference. In addition, the Detail portlet displays only attributes that
-
Are defined as viewable in the directory abstraction layer data definitions.
For more information on data definitions, see Section 1.2.2, Directory Abstraction Layer.
-
The current user has rights to view.
For instance, managers with rights to the salary attribute will see that data, but other users won’t.
For more information, see Section 12.2.2, Assigning rights to entities.
Determining How Attributes Display
In edit mode, Detail formats each editable attribute as a text box, except in the following cases:
Table 12-2 Detail Portlet: Recognizing Non-Text-Box Editable Attributes
Attributes that can’t be edited (either by definition or because of inadequate user rights) display as or .
Validating Changes
During editing, data validation is automatically performed for the following attribute type specifications:
-
Format: email
-
Data type: Integer
-
Control type: Range
When using a control type of local or global list, it is possible for the displayed list to include values that are outside of an attribute’s specified bounds. However, such values are flagged as out-of-range, and validation prevents them from being submitted.
12.1.3 E-Mailing Entity Data
The Detail portlet automatically provides a link named . Users can click it to e-mail the URL of the current entity’s Detail to one or more other users. By e-mailing the Detail URL rather than the actual information, security is maintained because anyone receiving the URL will need appropriate authority to use it.
12.1.4 Linking to an organization chart
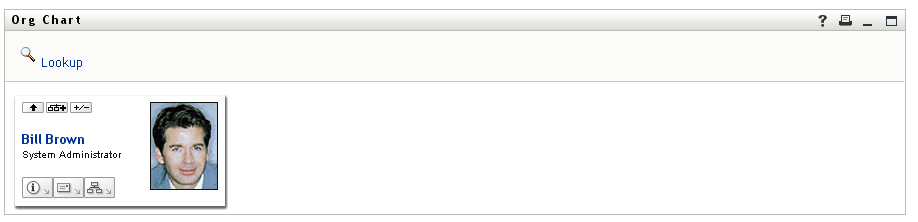
The Detail portlet automatically provides a link named . Users can click it to display the Org Chart portlet for the current entity.
For example, if you’re viewing Detail for user Bill Brown, clicking this link displays:
Figure 12-4 My Profile: Linking to Org Chart
You can suppress automatic linking to the Org Chart by setting Detail’s preference to false. See Section 12.5, Setting Preferences.
12.1.5 Linking to Details of Other Entities
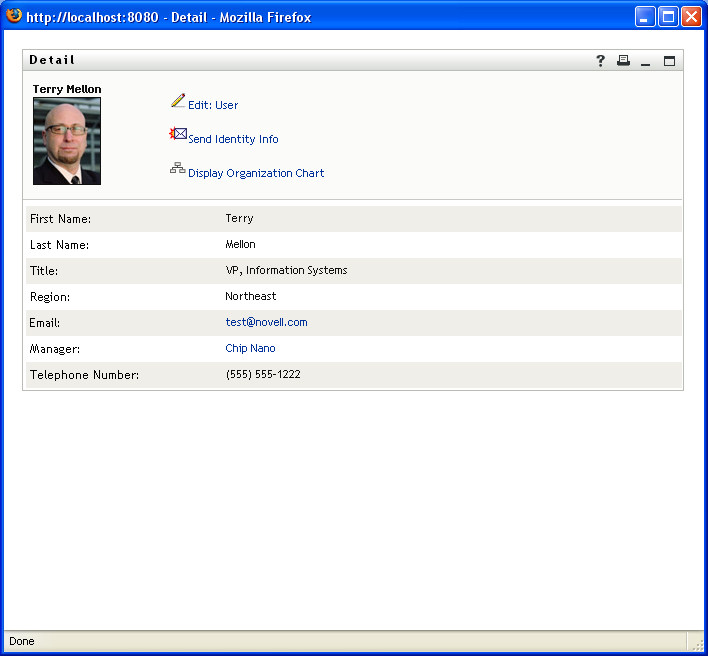
When configuring the Detail portlet, you might want to enable users to link to related entities from the current one. You can do that by including attributes that are defined with the control type DNLookup (in your directory abstraction layer).
When the Manager attribute is displayed in a user’s Detail, it appears as a link. Clicking that link displays Detail for the Manager.
Figure 12-5 Linking to Other Entities from My Profile
For more information on the directory abstraction layer, see Section 1.2.2, Directory Abstraction Layer.
To learn about specifying which attributes display in the Detail portlet, see Section 12.5, Setting Preferences.
12.1.6 Printing Entity Data
By default, the display settings for the Detail portlet enable the Print option on the portlet’s title bar. If you keep enabled, users can click it to display a printer-friendly version of the Detail content.
To change this or other settings for the Detail portlet, use the tab to update the Portlet Registration for DetailPortlet (on the Portlet Administration page).
For more information, see Section 7.0, Portlet Administration.
12.1.7 Setting Preferred Locale
The Detail portlet automatically provides a link named . It appears for an administrator or for a user editing their own information. Users can click it to display the settings, and they can use the dialog to change it. Changes to the preferred locale require that the user logout and log back in for the proper locale to display, otherwise, inconsistent locales can be displayed. For example, if you are viewing Detail for user Bill Brown, clicking this link displays:
Figure 12-6 Sample Edit Preferred Locale Dialog
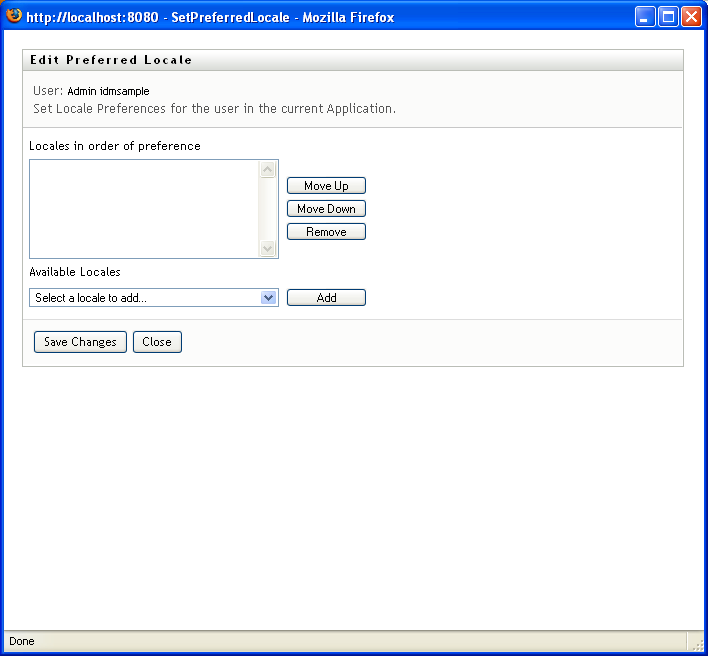
You can suppress the link by setting the preference to false.