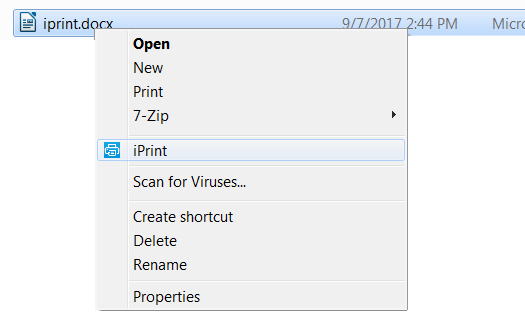
12.6 Windows: Context Menu-based Desktop Printing
iPrint option is now available as a context menu on Windows. This feature is only available with iPrint Appliance server 3.0 and later.
To print from the context menu, do the following:
-
Install the iPrint client. For more information, see Installing iPrint Client. On successful installation an iPrint option is available when you right-click a file.
-
Right-click on a file or files, then select iPrint, an iPrint dialog is displayed.
You can print without opening a document. For example, if you received a document in an email, and no application is available to view it, you can still print with the context menu option.
-
Click .
-
The recently used printers are populated in the drop-down menu of . Select a previously used printer or Click to select a different printer.
-
Specify an iPrint server and click .

For secure or a WalkUp printer, you must login to the server. On logging in, printers are displayed through ACLs set for that user. You can login using only the username or in a LDAP format (comma separated).
-
-
Click . The documents are successfully printed.
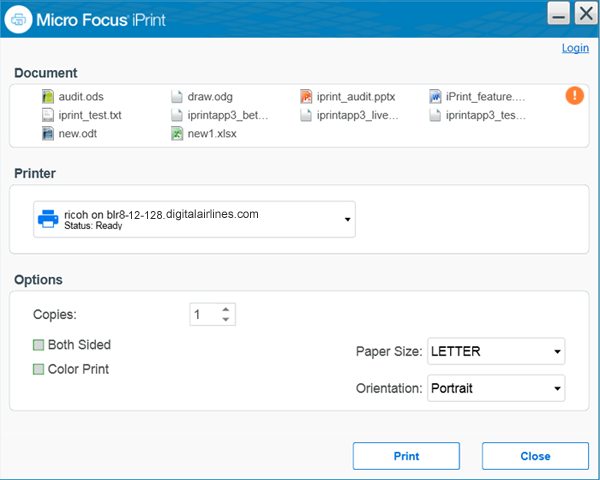
The displayed are set in the page of the Management Console. The values can be changed as per your printing requirements.
NOTE:If some file formats are not supported for printing, the file will not be listed for printing. The info icon
 lists the unsupported files.
To see the list of supported file formats, see TID 7022058.