5.1 Setting Up iPrint Appliance
You can set up iPrint Appliance as a new copy, or you can upgrade from an earlier version.
-
On a Web browser, use either the DNS name or the IP Address to access the Management Console. For example, https://10.0.0.1:9443 or http://iprint.example.com/admin.
Ignore the security certificate warning, and continue to the iPrint Appliance Management Console. To avoid the security warning prompt every time you access the iPrint Appliance Management Console, you can add the certificate to the trusted certificates list on your browser.
-
Specify vaadmin or root as the user name.
-
Specify the password, then click .
The Management Console page is displayed.
-
Click.
The window is displayed.
-
Select or , then click .
5.1.2 Upgrade
When upgrading to a new version of iPrint Appliance from an older version, ensure that the newly deployed version of iPrint Appliance has the same network configuration, passwords, and time zone as that of the older version of iPrint Appliance from which you exported the iprintconfig.zip configuration file. For more information about iprintconfig.zip, see Section 3.6.1, Exporting the Configuration File.
-
On a web browser, use either the DNS name or the IP Address to access the Management Console. For example, https://10.0.0.1:9443 or http://iprint.example.com/admin.
Ignore the security certificate warning, and continue to the iPrint Appliance Management Console.
-
Specify vaadmin or root as the user name.
-
Specify the password.
The Management Console page is displayed.
-
Click.
The window is displayed.
-
Select , then click .
-
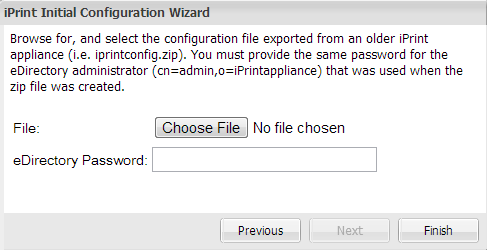
In the option, click , then select the configuration file exported from a previous copy of iPrint Appliance.
-
Specify the .
NOTE: is the password that you specified when exporting the configuration file from the previous copy of iPrint Appliance.
-
Click .
IMPORTANT:If you have an existing remote renderer with the iPrint appliance, then post-upgrade of this appliance, you must download, install, and register the new remote renderer from the Management Console. You must upgrade the renderer, else it remains in inactive state.
If you are using a FireFox browser, on successful upgrade, you might not receive a completion message, even if the upgrade is successful.