4.4 Establishing a VPN Connection
The VPN client for Linux lets you establish a connection with a Nortel* Contivity* server or Standard IPsec gateway. You can do this using either the Graphical User Interface (GUI) or the Command Line Interface (CLI).
IMPORTANT:The CLI and GUI options might not interact properly. We do not recommend using them at the same time.
4.4.1 Using the Graphical User Interface
The following section describe how to use the graphical user interface
Connecting to a Standard IPsec Gateway
Copying the User Certificate
Copy your user certificate in .pfx format to the following path:
/ user's home directory/.turnpike/usercerts
Connecting to the Gateway
-
Open the VPN client for Linux dialog.
GNOME: Click .
KDE: Click the main menu > .
-
Select a profile from the drop-down list.
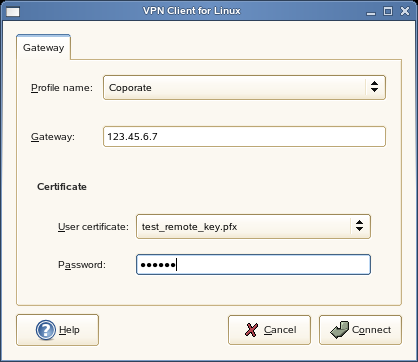
All the fields in the upper section of the dialog are automatically displayed.
-
In the field, specify the certificate password.
-
Click .
The tabbed page displays the progress of the connection.
-
Click if you want to end the connection.
NOTE:For the VPN connection to a Standard IPsec gateway, after Phase 1 is established, any data going to the network is encrypted.
Connecting to a Nortel Contivity Server
-
Open the VPN client for Linux dialog.
GNOME: Click .
KDE: Click the main menu > .
-
Select a Nortel Contivity Server profile from the drop-down list.
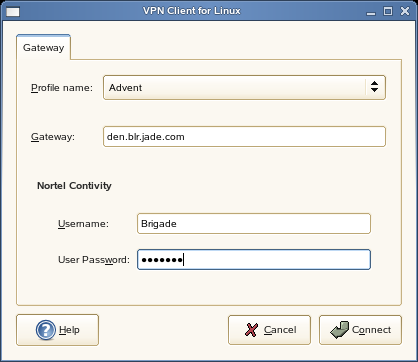
The Gateway information is automatically displayed.
-
In the section, specify the following details:
-
Username: The name of the user who requires the connection.
-
User Password: The user password.
-
-
Click .
The tabbed page displays the progress of the connection.
-
Click if you want to end the connection.
4.4.2 Using the Command Line Utility
The VPN client for Linux provides a command line utility to carry out the major VPN functions. After installing VPN client for Linux, you can access the help by entering the following in a terminal.
nvpn -h
NOTE:You must have root privileges to run this command.
This lists all the CLI commands and the available options, described in the following table:
Creating Profiles Using a CLI
You cannot create connection profiles using the CLI feature. Profiles must be created and edited using the GUI. See Section 4.3, Connection Profiles for more information.
Connecting to the Gateway
IMPORTANT:The VPN client for Linux allows only one connection at a time.
To connect to the gateway, enter any of the following commands:
nvpn -c profile
nvpn --connect profile
nvpn -v -c profile
nvpn --verbose --connect profile
HINT:Use the command nvpn -l command for a list of all available profiles along with their gateway types.
Disconnecting from the Server
To disconnect from the server, enter the following command:
nvpn -d