Installation Procedure
Install the eDirectoryTM server components in the order they are presented in this section. Each section lists the product to install and which CD the product is on.
Novell Client 4.9.1 SP1
- CD: NCL Server Components - CD 1
- Location: \novellclient\winnt\i386
-
Run setupnw.exe.
-
Select Typical Installation.
-
Follow the installation wizard to completion.
-
Reboot the computer when prompted.
-
At the Novell® ClientTM login screen, select Workstation Only and log in as the local Administrator.
NOTE: On a Windows 2003 server, after you install the Novell Client, the network load balancing service will report a failure on startup. This is not a problem. See TID 10086698 and MSKB 833375 for information about turning this service startup failure message off.
eDirectory 8.7.3
- CD: eDirectory 8.7.3 - CD 3
- Location: \nt
eDirectory License Installation
-
Copy the \license directory on CD 1 to a local drive.
You will point to this \license directory later in the eDirectory installation.
-
Insert the eDirectory 8.7.3 CD (CD 3) into the CD-ROM drive.
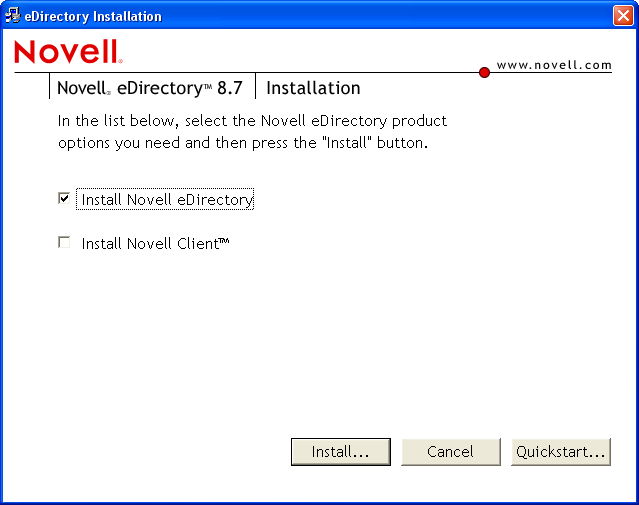
The eDirectory installation should auto-launch. If it does not, run setup.exe in the \nt directory. The following screen should appear:
-
Select Install eDirectory, then click Install.
Do not install Novell Client.
-
Accept the license agreement.
-
Install the licenses from a file.
-
Browse to the local copy of the \license directory that you created in Step 1.
-
Select the license file (.nfk file).
After the licenses are installed, the eDirectory installation continues.
-
eDirectory Installation
-
Accept the license agreement.
-
Accept the default installation path (c:\novell\nds).
-
Create a new eDirectory Tree.
-
Fill in values for Tree name, Server object context, Admin name, Admin context, and password.
Example values:
Tree Name:
NCL-TREE
Server Object Context:
NCL-eDir.ncl
Admin Name:
Admin
Admin Context:
ncl
Password:
ncl-test
NOTE: The server object context and the admin context should normally be the same. The above example uses ncl.
You should write down these values so you can reference them later.
-
Accept the defaults for the HTTP stack ports.
-
Accept the defaults for the LDAP ports.
If the eDirectory server is being installed on a Windows 2000 AD Domain Controller, you must change the ports to avoid a conflict with the AD LDAP server. We recommend changing the ports to 390 for clear text and 637 for SSL/TLS.
-
Clear all the NMASTM methods.
The Novell Enhanced Smart Card Method (NESCM) will be installed in a separate step.
-
Click Finish to complete the installation.
iManager 2.5 Maintenance Release 2
- CD: NCL Server Components - CD 1
- Location: \imanager\installs\win
Installing iManager 2.5
-
Run imanagerinstall.exe.
-
Accept the license agreement.
-
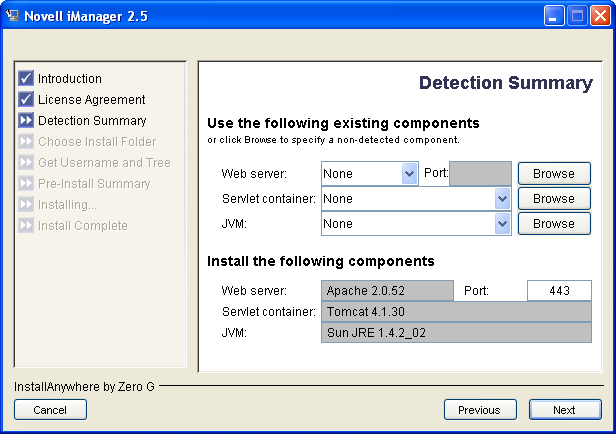
Configure iManager to use the following:
Web Server:
Apache
Servlet Container:
Tomcat
JVM:
Sun* JRE
-
Accept the default installation folder.
-
Enter the Tree name and Admin username.
Previous example values:
Tree Name:
NCL-TREE
Admin Name:
admin.ncl
-
Complete the installation.
NOTE: When logging in to iManager, use the fully distinguished Admin user DN (for example, admin.ncl). If the tree can't be located, use the IP address or DNS name of the eDirectory server.
Installing Maintenance Release 2
To install the iManager 2.5 Maintenance Release 2, do the following:
-
Log in to iManager.
-
Click the Configure tab.
-
Click Module Installation > Available Novell Plug-in Modules.
-
Click New, browse to the iman25_2.npm file located on the NCL Server Components - CD 1 in the imanager\installs\win\packages directory, then click OK.
-
Verify that the module is iman25_2.npm.
The description should read Maintenance Update 2 for iManager 2.5.
-
Select the checkbox next to the maintenance update file iman25_2.npm, then click Install.
This install takes a few minutes.
-
Restart the Tomcat service.
NOTE: Tomcat sometimes requires several minutes to fully initialize. Wait a few minutes before trying to log into iManager after restarting Tomcat.
Identity Manager 2.0.2 Server
- CD: Novell Nsure Identity Manager Pro 2.0.2 - CD 4
- Location: \nt for Windows
-
To begin the installation on Windows, insert CD 4 into the CD-ROM drive and close the drive.
(Conditional) If the installation does not auto-launch, run install.exe located in the \nt directory on CD 4.
-
Accept the license agreement.
-
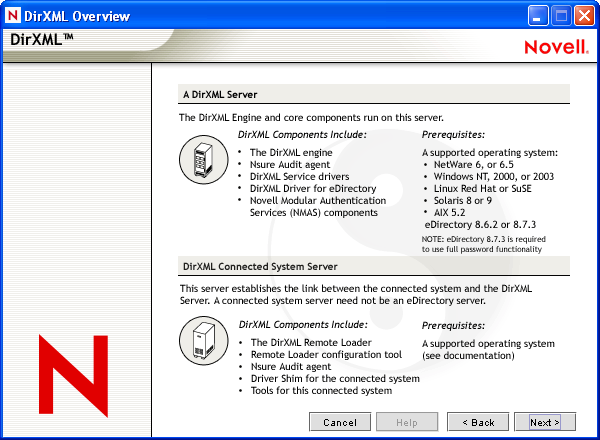
Review the Overview pages about the various systems and components.

-
Click Next to begin the installation.
-
Select the following three DirXML components, then click Next:
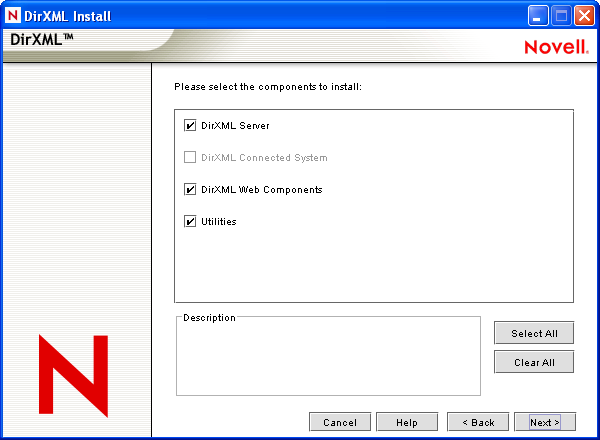
DirXML Server: Installs the DirXML® engine and service drivers, DirXML drivers, NMAS components, and Nsure Audit agent, and also extends the eDirectory schema.
Select the DirXML engine and the Active Directory driver.
DirXML Web Components: Installs the DirXML plug-ins, DirXML driver configurations, and Novell eGuide.
Utilities: Installs the application utilities you select (Windows only).
-
Select the following drivers for the engine installation, deselect all other drivers, then click Next:
- DirXML engine
- Active Directory driver (Windows only)
-
Click OK on any informational messages.
-
In the Schema Extension page, specify the following:
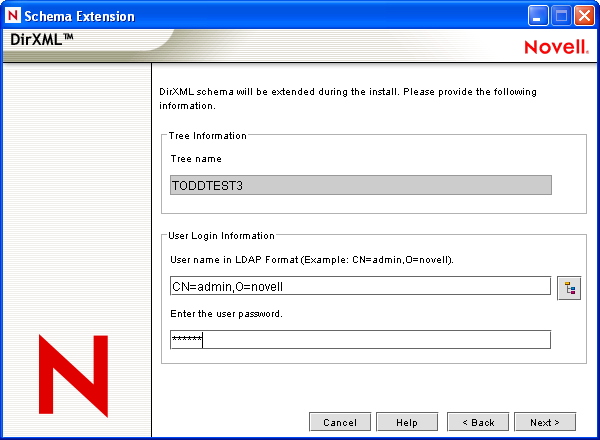
Previous example values:
Tree Name:
NCL-TREE
User Name:
cn=admin,o=ncl
Password:
ncl-test
-
Accept the default Web components:
- iManager plug-ins
- Driver configurations
-
Accept the default utilities:
- Application Components
-
Accept the default installation location for the utilities.
-
Select Active Directory Discovery Tool and deselect all other utilities (Windows only).
NOTE: SQL Scripts for JDBC Drivers is selected by default. Make sure to deselect this.
-
Click Finish to complete the installation program.
With the Identity Manager server installed, you need to follow the configuration steps listed in Identity Manager Configuration - eDirectory Server in order to use Identity Manager.
NOTE: If you are prompted to overwrite certain files, select Do NOT overwrite newer files.
NOTE: You need to activate Identity Manager within 90 days of purchase. For instructions on how to activate Identity Manager, see Activating Identity Manager .
SecretStore 3.3.5.4
- CD: NCL Server Components - CD 1
- Location: For Windows: \secretstore\server\windows
-
Run secretstoreserverinstall.exe.
-
Install Novell SecretStore® in the same location as eDirectory.
The default location is c:\novell\sss\server.
-
Accept the license agreement.
-
Accept the default destination folder (c:\novell\nds).
-
Enter the eDirectory Admin username and password.
Previous example values:
User DN:
admin.ncl
Password:
ncl-test
eDirectory IR7 Patch
Security Updates
- CD: NCL Server Components - CD 1
- Location: \edirectory\securityupdate
-
Copy the entire \securityupdate folder to a local drive.
-
From the local \securityupdate folder, run .\secupd\nt\install.bat.
Ignore messages about ConsoleOne® not being detected.
-
From the local \securityupdate folder, run .\nmsrv239\nmaswin\install.bat.
NOTE: The local copy of the \securityupdate folder is not needed after installation.
Novell Enhanced Smart Card Method (NESCM) - Server Component
- CD: NCL Server Components - CD 1
- Location: \nmasmethods
-
Run methodinstaller.exe.
-
Select the Enhanced Smart Card method.
-
Enter the eDirectory login information.
Previous example values:
User Name:
Admin
Password:
ncl-test
Context:
ncl
Server:
127.0.0.1 Port 636
-
Accept the SSL certificate information.
-
Accept the license agreement.
-
Accept the NESCM details.
-
Accept the default NMAS sequence name.
-
Accept the default iManager plug-in location.
Nsure Audit 1.0.3
- CD: NCL Server Components - CD 1
- Location: \nsureaudit\windows
Installing to Windows
-
Run naudit_win32.exe.
-
Accept the license agreement.
-
Accept the defaults for the username and company information.
-
Accept the default destination folder.
-
Select the full installation.
-
Accept the default loop back address for the logging server.
-
Enter the eDirectory Admin information when prompted.
Previous example values:
User Name:
admin.ncl
Password:
ncl-test
-
Accept the default log server name.
-
Reboot the computer when prompted.
HINT: If you try to log in immediately following the reboot, you might receive an error message. If this happens, log out, wait 10 seconds, then log back in.
-
After installing Nsure Audit, import the schemata if you want to use the advanced query and reporting options.
You'll get an error if you try to access the advanced options before importing the schemata.
-
Click Start > Programs > Nsure Audit Reporting Application.
-
From the main menu, select File > Import > Application Schemata.
-
Specify the IP address of the eDirectory server and the preferred language, then click OK.
The license takes effect the next time the application is started.
-
Password Generation Service
- CD: NCL Server Components - CD 1
- Location: \passwordgenerationservice
The Password Generation Service uses Novell Client and NICI. If you install the Password Generation Service on another machine, you will need to install Novell Client and NICI first. For this solution, NICI is already installed on the eDirectory server.
Prerequisite Procedure
Before installing the Password Generation Service, you must first extend the eDirectory schema by doing the following:
-
Copy the passwordgenerationservice.sch file located on CD 1 in the \passwordgenerationservice\schema directory to a location on your hard drive.
-
Click Start > Settings > Control Panel.
-
Double-click Novell eDirectory Services.
-
Verify that you are on the Services page.
This is the default tab.
-
Select Install.dlm.
-
Click Start.
HINT: The Novell eDirectory Install utility will come up behind the Novell eDirectory Services window.
-
Under the DS Install and Uninstall section, select Install Additional Schema Files (selected by default) and then click Next.
-
When the Authentication window comes up, type your eDirectory Admin name, context and password. Then click OK.
Previous example values:
User Name:
Admin
Context:
ncl
Password:
ncl-test
-
Browse for and select the passwordgenerationservice.sch file that you copied to your local drive.
If the Finish button is not active, copy the passwordgenerationservice.sch file to a different directory and repeat this step.
-
Click Finish.
The schema is now extended.
Installation Procedure
To install the Password Generation Service:
- CD: NCL Server Components - CD 1
- Location: \passwordgenerationservice
NOTE: You need to be authenticated as an Active Directory Domain Administrator before running this install. When configuring the Password Generation Service, you must configure it to run as the same administrative user. If you change the Password Generation policy, ensure that you log in as the same administrative user.
-
Run setup.exe.
-
On the Welcome screen, click Next.
-
When you receive a reminder message about manually extending the eDirectory schema. Click OK to close the message.
You already extended the schema in the previous section.
-
Specify the Password Generation Policy values.
Make sure the policy does not contain conflicting rules.
A conflicting policy would be as follows:
- Min Password Length = 10
- Max Password Length = 5
IMPORTANT: Your Password Generation policy must match your Active Directory password policy or you will receive Active Directory errors when Password Generation attempts to set the password.
-
Click OK > Finish.
Post-Install Procedure
After you have the Password Generation Service installed and running, you need to give the service rights to log on to the Active Directory Domain.
-
Click Start > Settings > Control Panel > Administrative Tools > Services.
-
Right-click PasswordGenerationService, then click Properties.
-
Click the LogOn tab.
-
Select This Account.
-
Click the browse button and select your Active Directory Domain/Administrator user.
-
Type the password, then retype the password where instructed to do so.
-
Click Apply, then click OK.
-
Restart the PasswordGenerationService.
You have to restart the service before changes take effect.
-
(Optional) Check the passwordgen.log file in the \system32 directory to make sure the service was started correctly.
For information on using the Password Generation Service plug-in and command line utilities, see Using the Password Generation Service.