2.2 Manual Installation
Manual installation can be done in several different ways. You can either install from a local installation source (such as the NLD CDs or DVD) or get the installation sources from an FTP, HTTP, or NFS server. In any case, this approach requires physical access to the system that is to be installed and user interaction during the installation and configuration procedure.
The installation procedure is basically the same, no matter which installation source or method you use. Understanding the manual procedure can help you to understand the automated installation procedures as well.
2.2.1 Using the NLD CDs or DVD as the Installation Source
Installation can be done from the distribution CDs by inserting Novell Linux Desktop CD 1 or DVD and then booting the workstation. This type of installation requires user interaction.
IMPORTANT:Make sure that the workstation's BIOS has been configured to boot from CD before you start the installation process. Otherwise, you cannot perform an installation because the installer is not able to access the installation media in your drive.
Booting for Installation
Insert the Novell Linux Desktop CD 1 or DVD into the drive, then reboot the computer to start the installation program.
This brings up the installation screen offering the following options for you to choose from.
- Boot from Hard Disk
- Boots the system already installed on the hard drive (the system normally booted when the machine is started).
- Installation
- Boots the normal installation.
- Installation—ACPI Disabled
- If the normal installation fails, it could be because the system hardware doesn't support the Advanced Configuration and Power Interface (ACPI). If this seems to be the case, use this option to install without ACPI support.
- Installation—Safe Settings
- Boots the system with the DMA mode (for CD-ROM drives) and any interfering power management functions disabled.
- Manual Installation
- By default, drivers are loaded automatically during the installation. If this appears to cause problems, use this option to load drivers manually. This option does not work if you use a USB keyboard on your system.
- Rescue System
- If you are unable to boot into your installed Linux system for some reason, you can boot the computer from the CD using this option. This starts a minimal Linux system without a graphical user interface, which lets you access disk partitions for troubleshooting and repairing the installed system. For more information on the rescue system, refer to How do I recover a corrupted system? .
- Memory Test
- Tests your system RAM by means of repeated read and write cycles. This is done in an endless loop because memory corruption often shows up sporadically and many read and write cycles might be necessary to detect it. If you suspect that your RAM is defective, start this test and let it run for several hours. If no errors are found after a long period of time, you can assume that the memory is intact. End the test by rebooting the system.
IMPORTANT:Some hardware models, mostly fairly aged or very recent ones, require special boot options to be passed on to the kernel at installation time. Use the boot options prompt to pass these on to the kernel. After you determined the right set of options to use, YaST automatically adds them to the boot loader configuration making sure the system boots up correctly. See Section 5.0, Troubleshooting for details on this and read “Chapter 8: Booting and Boot Managers” in the SUSE LINUX Enterprise Server 9 Administration Guide for instructions on the syntax of the boot loader configuration in NLD.
Use the boot options prompt to enter any additional boot option for the Linux kernel. Options entered here are valid during only one boot process.
The menu bar at the bottom of the screen offers some additional functionality needed in some setups:
Table 2-1 Installation Menu Bar Options
Leave these menus either by selecting one of these options or by pressing Esc.
Then select and press Enter. This loads the Novell Linux Desktop installation program and starts the installation in normal mode.
Read the License agreement, then click to accept it and continue the installation.
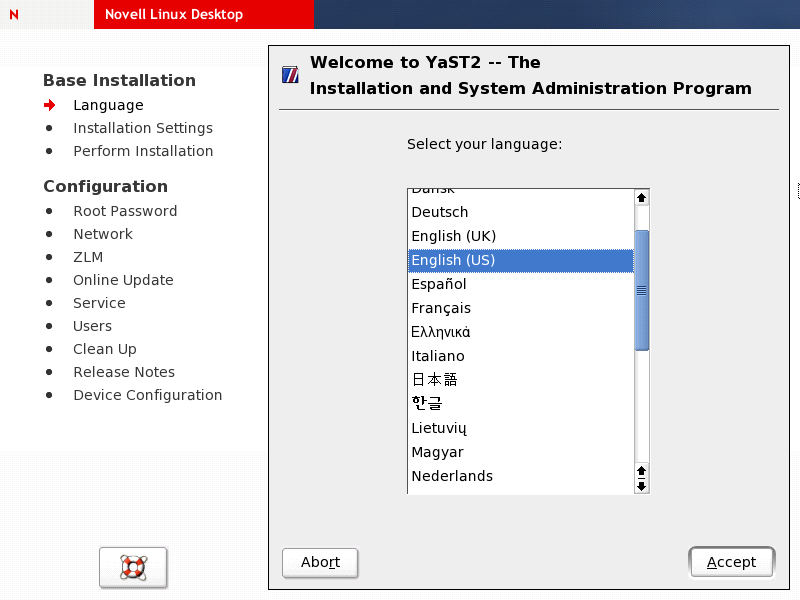
Language Selection
After you have accepted the licence agreement, set the keyboard language. This setting applies not only to the keyboard layout during installation, but also to the installed system. The settings made here are used by NLD to assume the time zone settings for your workstation.
HINT:If you want to change these settings later on during the installation process, launch the YaST modules for time zone and keyboard from the Installation Settings screen (described in Installation Settings). If you want to change these settings in the installed NLD system, start the YaST Control Center and launch the Date and Time and Select Keyboard modules of the System submenu.
Figure 2-1 Language Selection
After you have completed the language settings, click and proceed with selecting your preferred desktop environment.
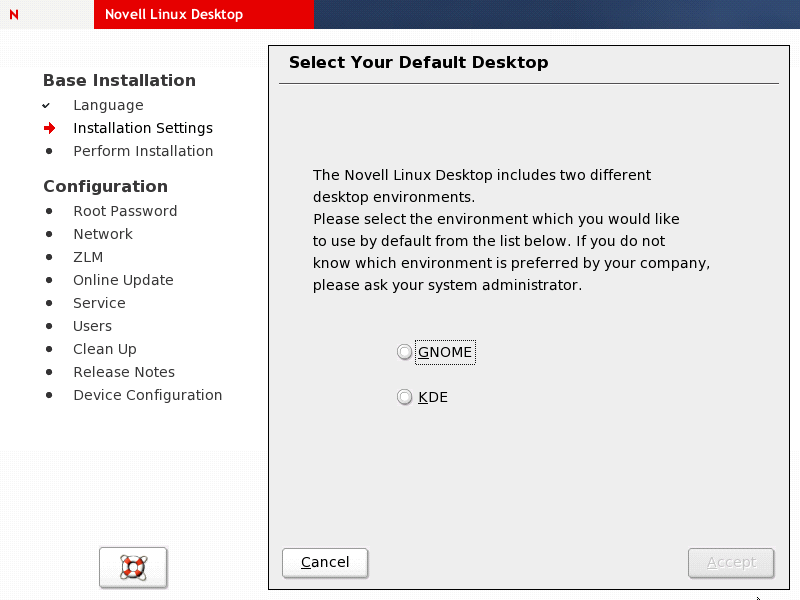
Selecting the Desktop Environment
Novell Linux Desktop ships with two fully fledged desktop environments, GNOME and KDE. Selecting one of them at this point limits the scope of your installation to a set of default system packages plus all the packages provided by the desktop of your choice. If you do not know which environment your company prefers, ask your system administrator. For more information on the desktop environments, see the Novell Linux Desktop GNOME User Guide and the Novell Linux Desktop KDE User Guide.
HINT:If you want to install packages belonging to the other desktop environment because you need a special tool, you can do so later on in the installation process. See Software Selection for information.
Figure 2-2 Selecting the Default Desktop Environment
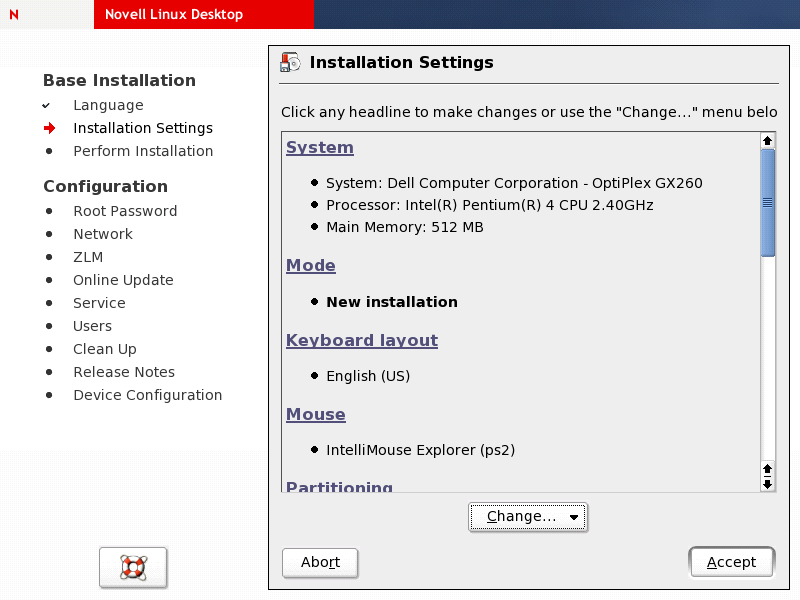
Installation Settings
The Installation Settings screen comprises any information relevant to the installation procedure. You can select any of the following options and configure them in the corresponding dialogs. After your changes have been made, you are always returned to the Installation Settings screen, which is updated accordingly.
- System
- Detects system hardware and lets you save the results to a floppy or file.
- Mode
- This version of Novell Linux Desktop only offers the New Installation mode.
- Keyboard Layout
- Changes the previously selected keyboard layout. By default, the layout corresponds to the selected language.
- Mouse
- Selects a mouse type other than the one NLD detected automatically. After selecting a mouse type, press Alt+T to test whether the device works correctly without making the selection permanent.
- Partitioning
- Customizes the partitioning. In most cases, NLD suggests a reasonable partitioning scheme that can be accepted without any change. For more information, see Partitioning.
- Software
- NLD offers several types of software packages with various installation scopes. Depending on the available disk space and the desktop environment you selected, NLD selects one of the these predefined systems for you. Use this option to change the selected desktop environment and to add or remove packages and filters. For more information on how the management of software packages is done using YaST, see Software.
- Booting
- During the installation, NLD proposes a boot configuration for your system. You should normally leave these settings unchanged, but you can use this option if you need a custom setup.
- Time Zone
- Selects a time zone. You can also set the hardware clock to Local Time or UTC. If you set the hardware clock to UTC, your system can rely on NLD to switch between standard time and daylight saving time automatically. Set the clock to Local Time if you are dual booting.
- Language
- Changes the language you selected. You can also change the language when you log in.
- Default Runlevel
- Defines how the system is started after booting. Use the default runlevel 5: Full Multiuser with Network and xdm (which prompts you to log in directly under a graphical interface). Do not change the runlevel unless instructed to do so by your system administrator. For more information on the SUSE® LINUX boot concept that is used with NLD, see “Chapter 11: The SUSE LINUX Boot Concept” in the SUSE LINUX Enterprise Server 9 Administration Guide.
Figure 2-3 Installation Settings Overview
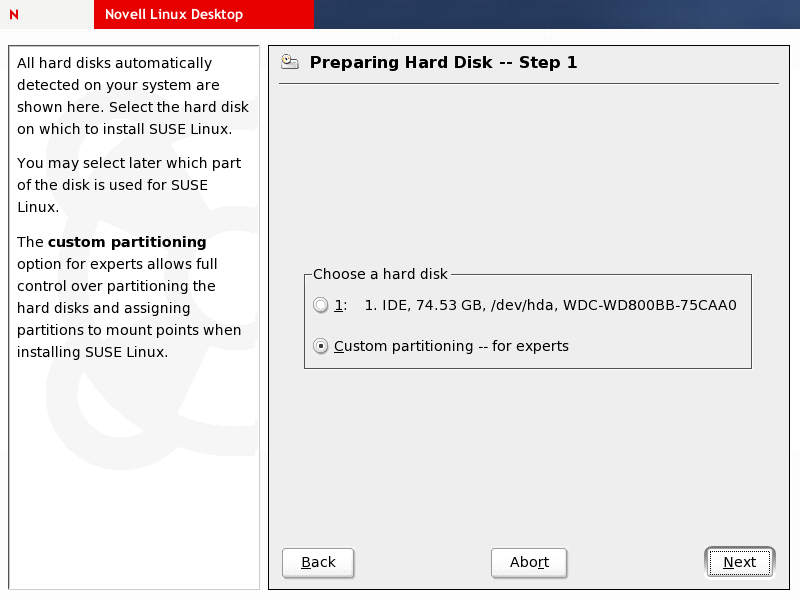
Partitioning
During installation, YaST usually suggests a reasonable partitioning. However, if you want to change the suggested partitioning (for example, add extra partitions for later use or for alternate operating systems), you can customize the partition setup by clicking the heading in the Installation Settings screen mentioned above.
YaST displays the current partitioning suggestions.
Figure 2-4 Suggested Partitioning

Select from the following options to continue with the partitioning setup:
- Accept proposal as-is
- Leave the suggested partitioning unchanged and return to the Installation Settings screen.
- Base partition setup on this proposal
- Refine the proposed partitioning using the Expert Partitioning dialog. Only those partitions and hard disks will be listed that YaST which were included in its initial suggestion.
- Create custom partition setup
- If you want to make changes to the partition setup that go beyond mere fine-tuning of the YaST suggestions, select this option. Any hard disk and partition included in your system then applies.
Select and click to create a new partition setup.
The following dialog lets you select the disks your settings should be applied on.
Figure 2-5 Customizing Your Partition Setup
To create a whole new partitioning setup, select . The Expert Partitioner appears.
Figure 2-6 Expert Partitioner: Adding, Deleting and Editing Partitions
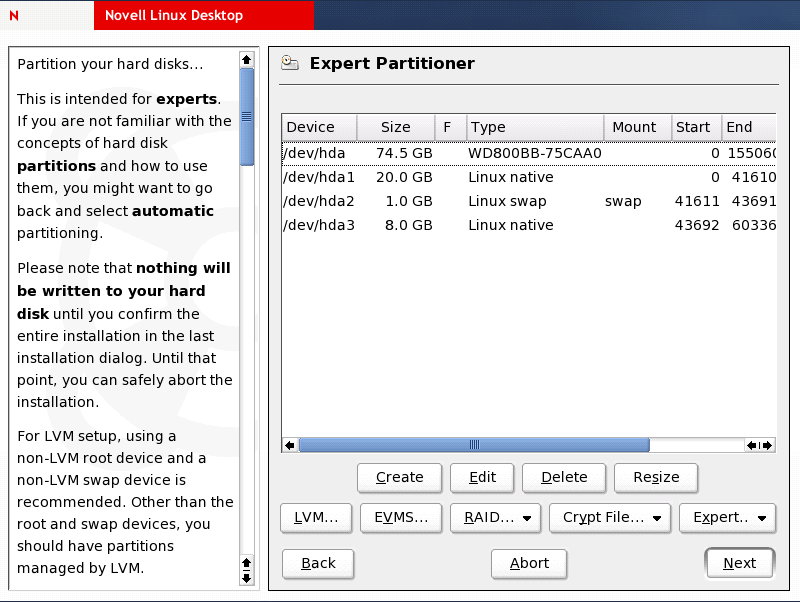
The Expert Partitioner displays any partition and hard disk inc6luded in your system. You can add partitions, edit existing ones, delete partitions, or resize them. Whole disks appear without any device number. SCSI disks are called /dev/sdxy, whereas (E)IDE disks are called /dev/hdxy. The.x represents the disk number; the first disk in a Linux system always appears as “a.” The y represents the partition number on a disk. The first partition on the first SCSI disk would, therefore, be addressed as /dev/sda1.
To create a new partition, select . In the next step, determine the type of partition you want to create. For detailed information on the partition types in Linux, turn to Partition Types.
Figure 2-7 Determining the Partition Type
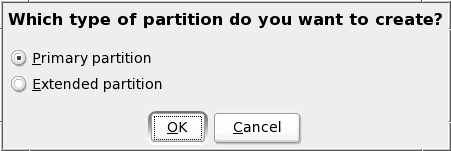
To create another primary partition on your first hard disk, select and then click .
Figure 2-8 Creating a New Partition
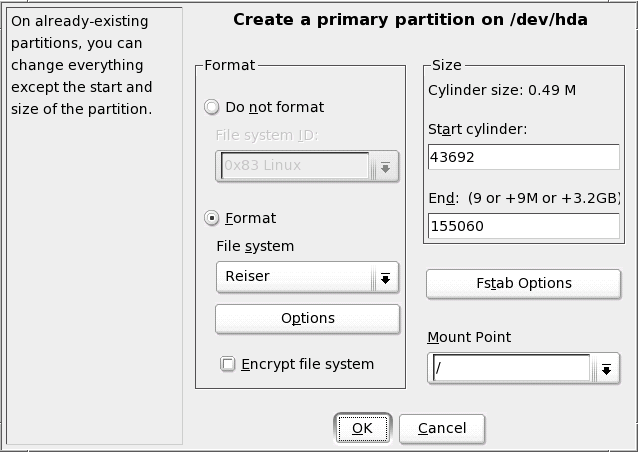
Set the partitioning parameters, such as file system ID, type, size, and mount point. If you are just creating a new Linux partition to hold additional data, select as the file system (the NLD default file system). For the size of the new partition just specify the end point of it; the start cylinder is assigned automatically. Finally, assign a mount point, if the partition is to be mounted into your installed system. If you don't want to include it right now, just omit the mount point. The partition appears in the partition table of the installed system, but it is not mounted by default.
HINT:For detailed information on partitioning, turn to Section D.0, Partitioning. For an overview of Linux file systems, see “Chapter 18: File Systems in Linux” of the SUSE LINUX Enterprise Server 9 Administration Guide.
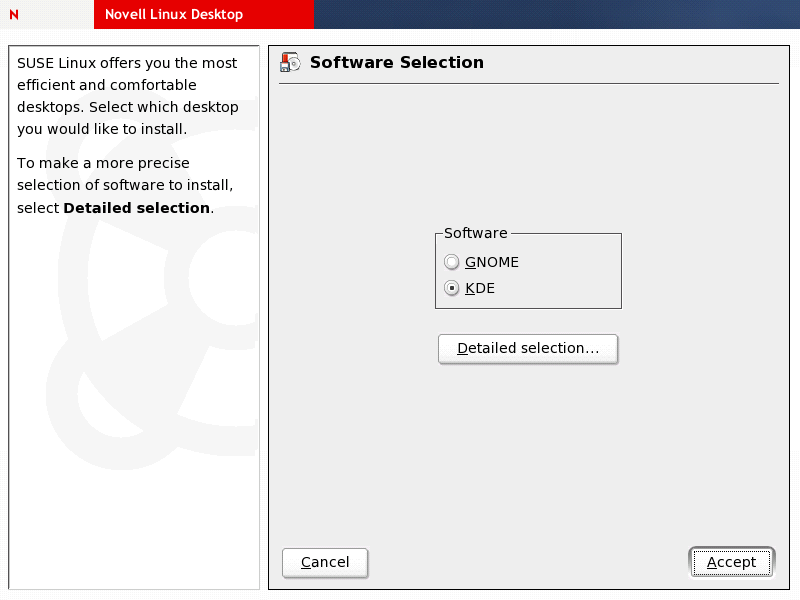
Software Selection
Although you have already selected the desktop environment for your NLD workstation, you might want to refine your selection. To modify the software selection, click . The Software Selection dialog appears.
Figure 2-9 Editing the Software Selection
To open the YaST package management tool, click . The YaST package manager allows you to select and deselect single packages as well as entire package groups or package selections and offers an extensive search function.
Figure 2-10 Selecting New Packages
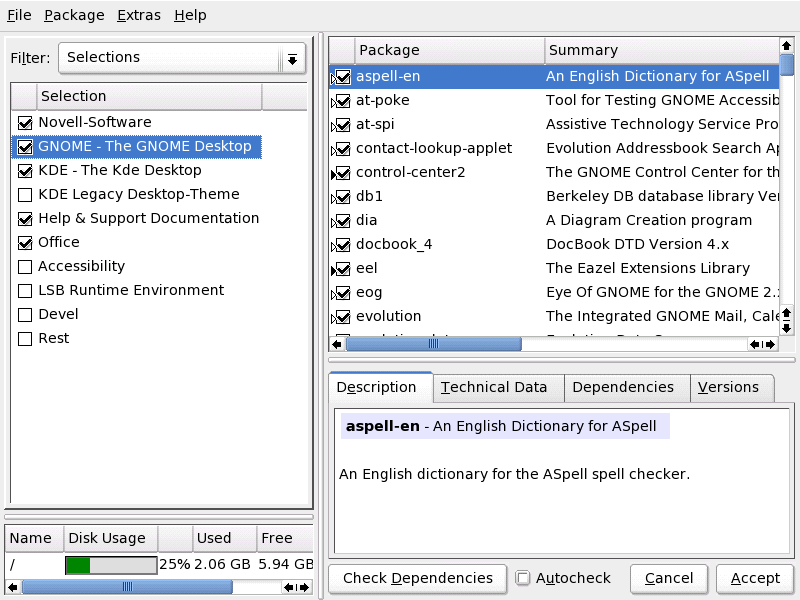
The right part of the package window displays the list of packages included in the recent selection and an information window on the currently selected package featuring a brief package description, technical data, packages dependencies associated with this particular package, and the package's version. To the bottom left, statistics for the current disk usage are displayed. To select an entire package selection, such as an additional desktop environment or Accessibility software, select (check) the package name in the Selection window on the left.
To search for a particular package, switch the Filter setting from Selection to Search. Determine the scope and mode of your search and type the name of the package you are looking for or a binary or pathname included in this package.
Figure 2-11 Searching for Packages
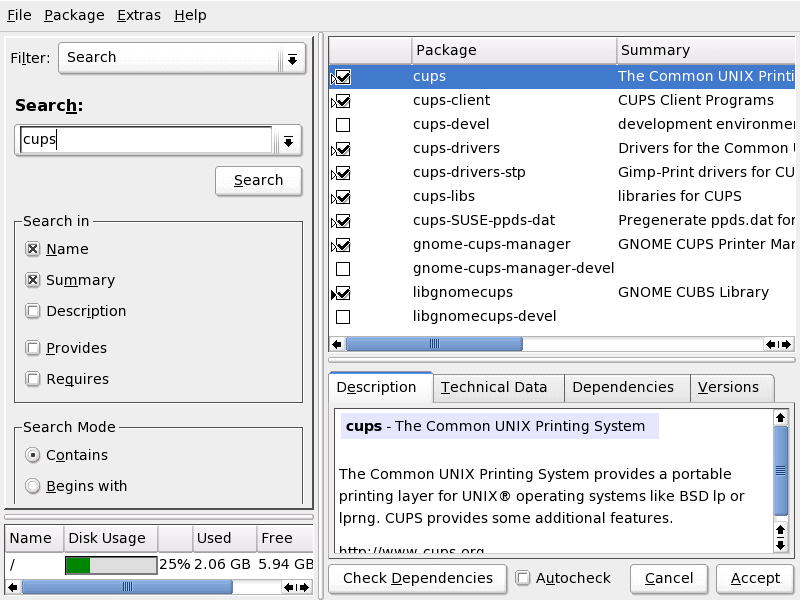
By default, the list of package names and package summaries are searched for the string you entered. The following options can be selected as well:
- Description
- Searches through the verbose packages descriptions. These are displayed in the Description tab of the information window.
- Provides
- Searches through the binaries or capabilities provided by any package. This information is displayed in the Technical Data tab of the information window.
- Requires
- Similar to the Provides option in that it allows a search for paths and binaries, but it triggers a search over the requirements of a package. This information is displayed in the Technical Data tab of the information window.
The search mode is usually set to which allows a much broader search than if you limited the search method to . comes in handy if you know exactly what you are searching for and need to limit the scope of the search.
For more information about the YaST package manager, see Installing and Removing Software .
After you finish the package selection, click . YaST automatically checks for missing packages dependencies or for conflicting packages. In case of a conflict, YaST displays a summary screen showing all package conflicts arising with the current selection and offering possible solutions.
Booting
The default boot loader configuration created during installation works for any default installation of NLD. However, if you want to modify it on your own (for example, add a boot entry for another operating system), you need to modify the boot loader's configuration files.
Click on the Installation Settings screen to launch the YaST Boot Loader Configuration module.
Figure 2-12 Configuring the Boot Loader
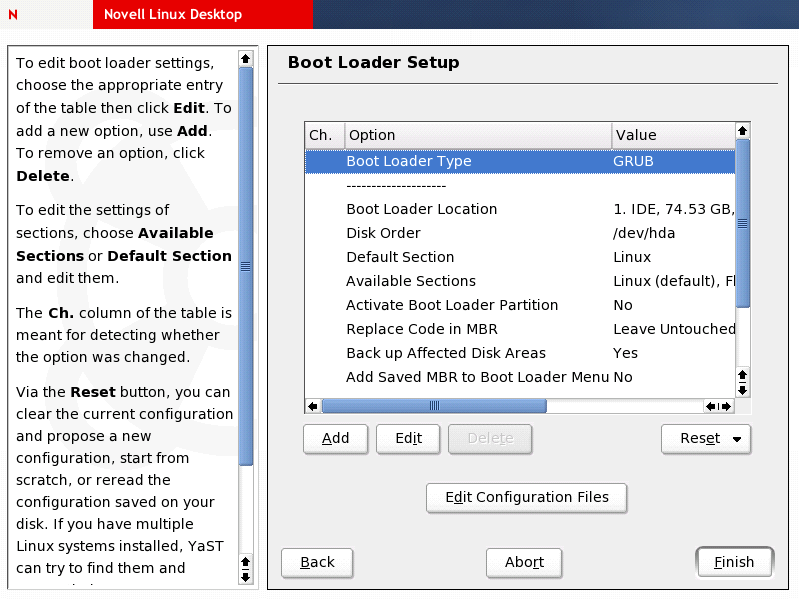
For a detailed description of this module and some background information on GRUB, the NLD boot loader, see “Chapter 8: Booting and Boot Managers” in the SUSE LINUX Enterprise Server 9 Administration Guide
Initiating the Installation
Having finished the package selection (and any optional boot loader configuration), you are returned to the Installation Settings screen. As soon as you have verified all other settings, click to launch the installation process. A prompt appears asking you to confirm this action.
Figure 2-13 Start Installation
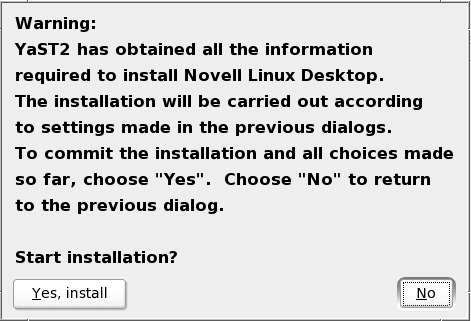
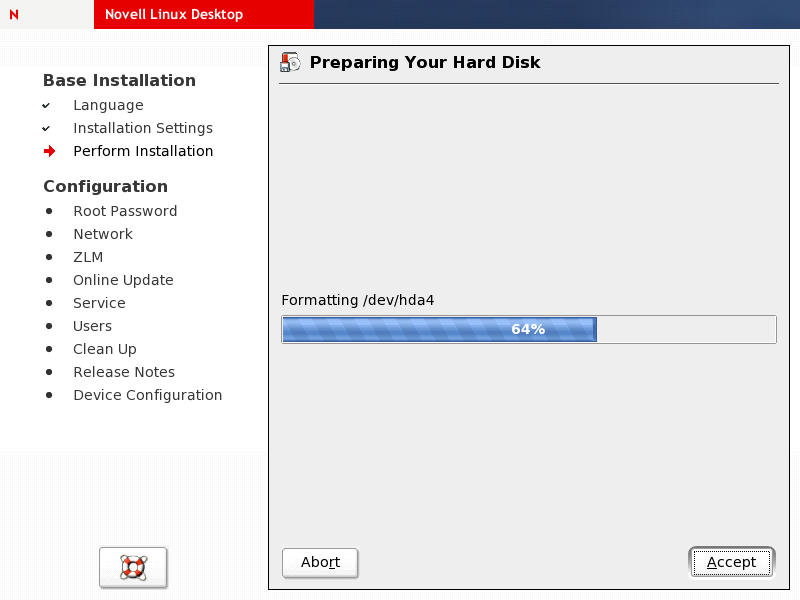
Click and the installation procedure begins. First, the hard disk is partitioned and formatted according to the settings made in the Partitioning dialog. After that, the actual installation of software begins.
Figure 2-14 Formatting the Hard Disk Prior to Installation
Installing Software
After the hard disk has been partitioned and formatted according to your preferences, YaST installs the software packages. If installing from an NLD DVD, all packages get installed without any further actions required from your side. If you are installing from a set of NLD CDs, you need to change CDs when prompted.
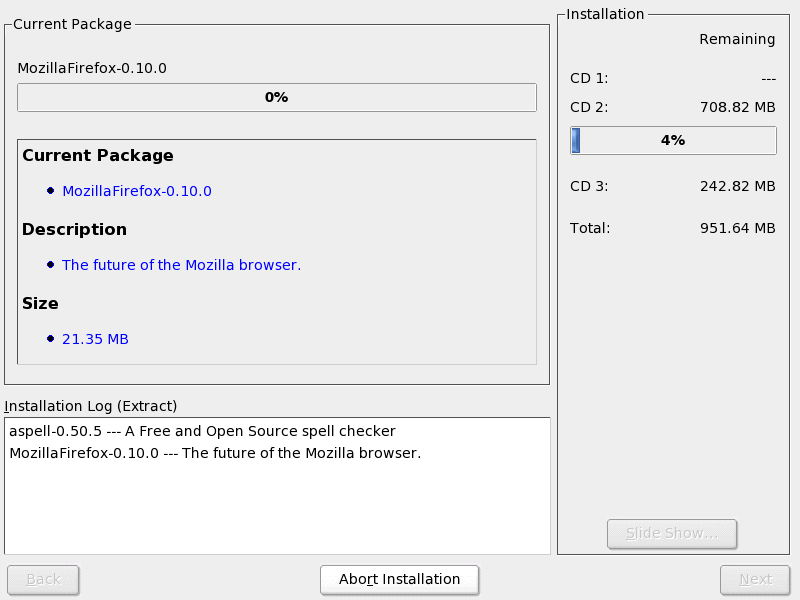
Figure 2-15 Installing Software Packages—Opening Window

During package installation, you are shown a slide show highlighting the most important features of your Novell Linux Desktop system. The right side of the window displays some statistics on the media needed and the amount of data that needs to be transferred onto your hard disk. Click to view a detailed log of the packages currently being installed.
Figure 2-16 Initial System Boot after Installation of CD1 Has Been Completed
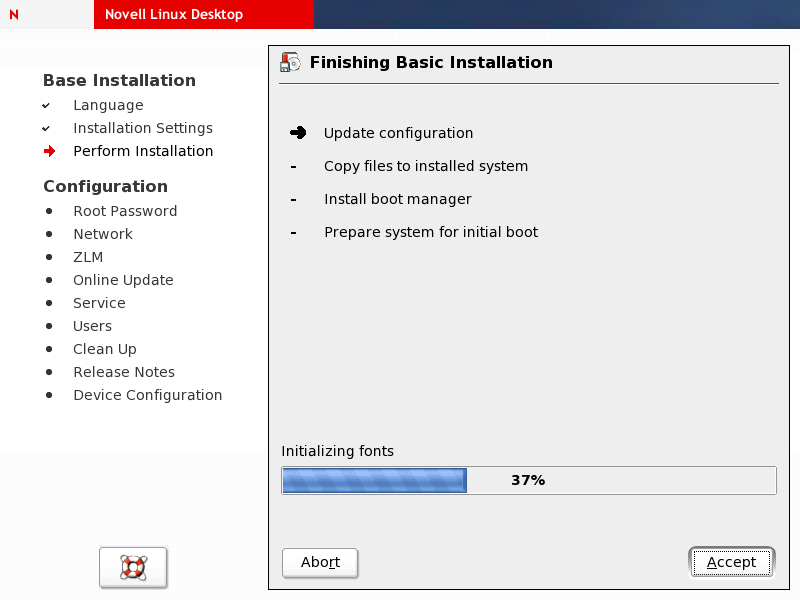
After all packages (or all packages of the first CD) are installed, the system boots and updates the system configuration and continues with the package installation. When the boot loader comes up, leave the default boot option () unchanged and wait for the system to boot on its own.
YaST continues with the installation requesting additional CDs or, if you installed from DVD, moves on to the system configuration.
Figure 2-17 Installing Software Packages Continuation
Configuring the System Administrator's Account (root)
After the initial boot of the installed system and after the final packages have been installed, you are prompted to configure the system administrator's account (root). Unlike regular users, which might or might not have permission to do certain things on the system, root has unlimited power to do anything: change the system configuration, install programs, and set up new hardware. If users forget their passwords or have other problems with the system, root can help. The root account should be used only for system administration, maintenance, and repair. Logging in as root for daily work is rather risky: a single mistake could lead to irretrievable loss of many system files.
IMPORTANT:The user root has all the permissions needed to make changes to the system. To carry out such tasks, the root password is required. You cannot carry out any administrative tasks without this password.
Figure 2-18 Creating the Root Account

For verification purposes, the password for root must be entered twice. Don't forget the root password. When entered, this password cannot be retrieved.
HINT:Make sure your passwords cannot easily be guessed. Use a mixture of digits, capitalized letters, and special keys.
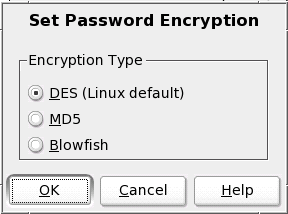
Using the default encryption method of NLD, DES, you can use passwords of five to eight characters in length. However, NLD supports a maximum password length of 72 characters. To use a password longer than eight characters, click and then select the encryption option.
Figure 2-19 Determining the Password Encryption Method
Network Configuration
You can configure any network devices for a connection to the outside world, such as network cards, modems, and ISDN or DSL hardware. If you have such devices, it is a good idea to configure them now, because an Internet connection allows YaST to retrieve any available NLD updates and include them in the installation.
HINT:If your network is set up to support DHCP-based configuration of the network clients, you can just accept the network settings as preconfigured by YaST during installation. DHCP network configuration works out of the box with any NLD installation. If your network doesn't include DHCP services, configure the detected network devices from scratch.
Figure 2-20 List of Available Network Interfaces
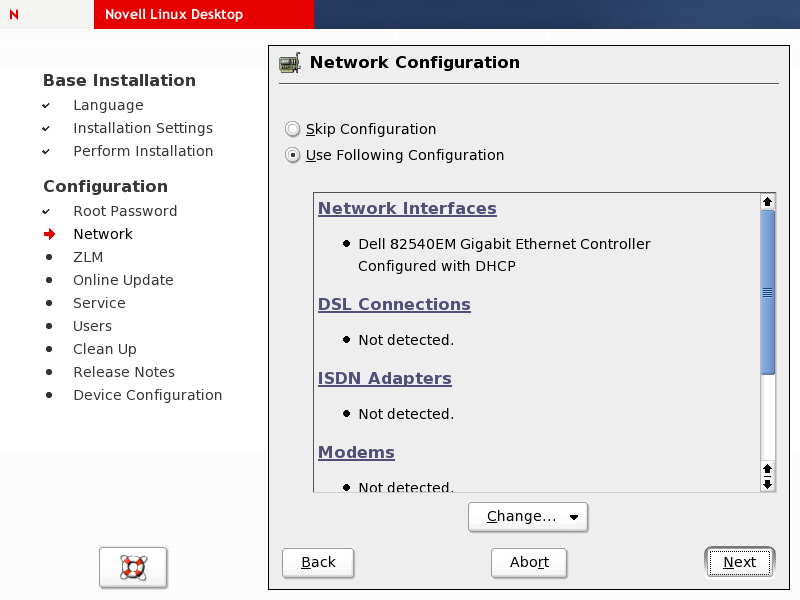
The Network Configuration dialog lists all possible network hardware. If an item has been detected and preconfigured during installation, this configuration appears in the overview screen. To edit any configuration item, click it and a dialog specific to this type of interface opens.
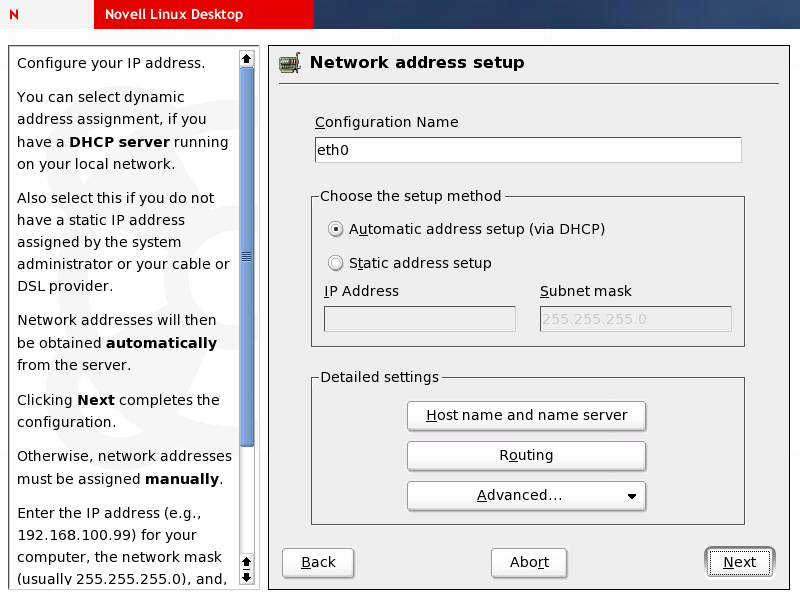
To configure an Ethernet device with a static IP address, click on the Network Configuration screen. Then decide whether you want to modify an existing configuration or start from scratch. To modify the preconfigured DHCP-based configuration, click .
The Network address setup dialog opens. Don't change the configuration name; it is normally derived automatically during system setup. Select and specify an appropriate IP address and netmask. If necessary, get these parameters from your network administrator.
Figure 2-21 Configuring the Network Address
lets you set up a hostname and name server for this particular machine and configure a default route and some advanced settings, such as the following:
- Hardware Details
- If your network hardware requires specialized kernel modules, configure them here. This should not be necessary in most cases.
- DHCP Client Options
- Depending on whether your network device is set up via DHCP, you can do some fine-tuning on the DHCP client side.
- Detailed Settings
- Sets the maximum transfer rate of your network interface and the device activation mode. Because the default setting for the MTU size is reasonable and the device activation is set to , you hardly ever need to make changes here. Changing the device activation mode to or would make sense if your machine contained more than one type of interface and you didn't want all interfaces to be active at the same time.
- Virtual Aliases
- If you intend to use one and the same network hardware for a set of differently configured virtual interfaces, define these configurations using this option. This option is rarely needed outside very complex network setups.
Unless your setup requires any of this fine-tuning to be performed, proceed with the configuration of the hostname and name server.
Figure 2-22 Configuring Host Name and Name Server
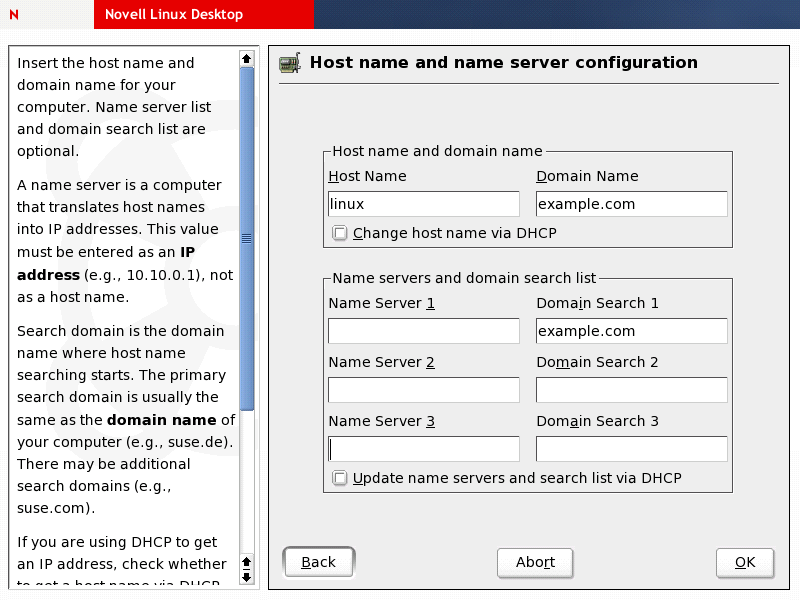
Specify a hostname and a domain name for your machine. If necessary, get this information from your network administrator. Specify an IP address and search domain for at least one name server in your network. If possible, specify more than one to have a fallback server in place just in case the main name server of your network crashes or is offline.
Click to go back to the dialog and click to configure any routing information needed for your machine.
Figure 2-23 Configuring the Routing
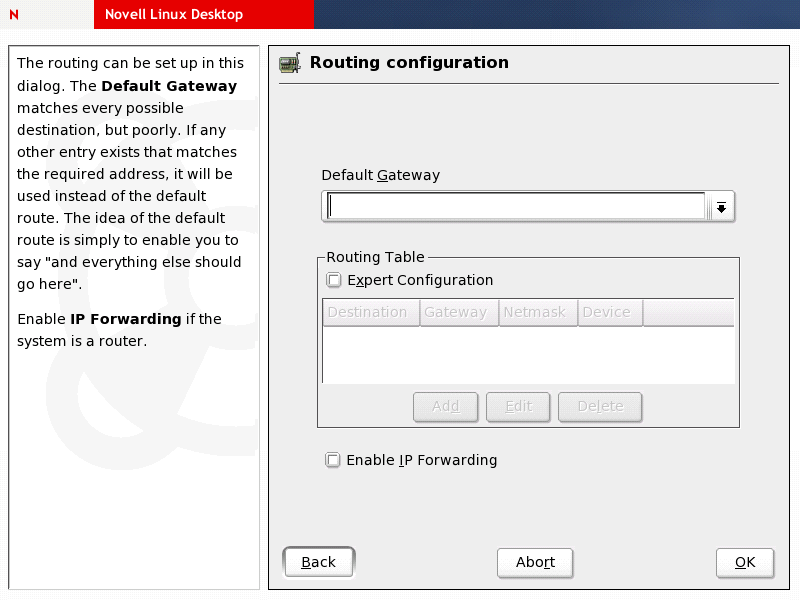
If you are in a local network that uses one particular host as a gateway to other networks and the Internet, type its IP address in (ask your network administrator for details). Select only if you intend to use your NLD machine as a router; otherwise, click to return to the dialog. Click to complete your network configuration.
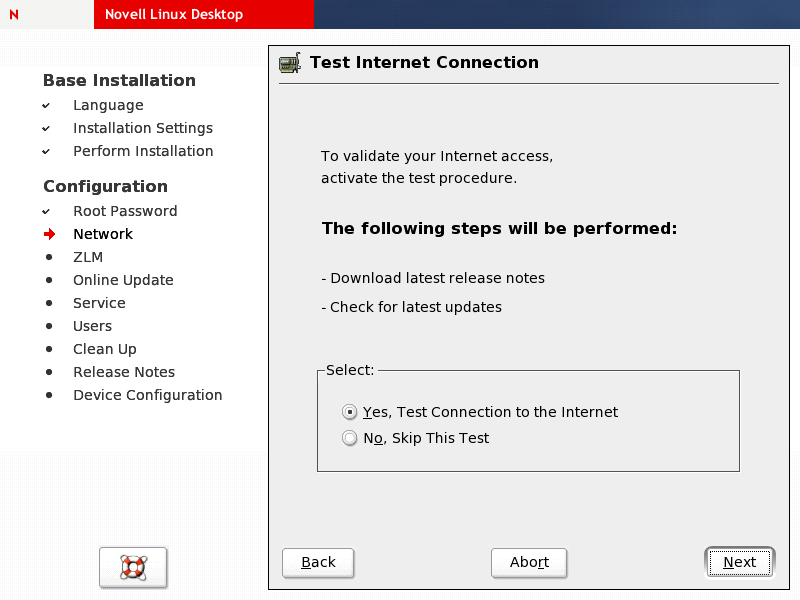
After your network has been set up correctly, YaST offers to let you test your Internet access by querying the Novell update server for software updates for NLD. Select and click to launch the activation dialog for ZENworks.
Figure 2-24 Testing the Internet Connection
Other Network Connection Types
The previous sections cover network integration only by means of an Ethernet device. However, ISDN, modem, and DSL connections are supported as well. Detailed instructions on the configuration of these devices can be found in “Section 21.4: Network Integration” in the SUSE LINUX Enterprise Server 9 Administration Guide.
ZENworks Linux Management Activation and Update
Novell Linux Desktop makes use of the ZENworks Online Update service. Before you can actually receive the patches and updates available for your NLD installation, you must provide the activation data you received upon purchase of NLD and the subsequent registration of your product.
In case you haven't yet registered your NLD with Novell, proceed as follows:
-
After purchasing NLD, you received an e-mail containing a URL that took you to the Novell eLogin page. If you already have an eLogin account, enter your username and password to log in. If not, create one using the option on the eLogin page.
-
Log in providing your authentication data.
This takes you to the registration page containing a serial number and status for your NLD product.
-
Make note of the serial number, because it will later serve as the activation code.
-
Register the activation code by clicking .
When the activation code is registered, you can use it for ZENworks authentication.
Figure 2-25 Activating the ZENworks Online Update Service
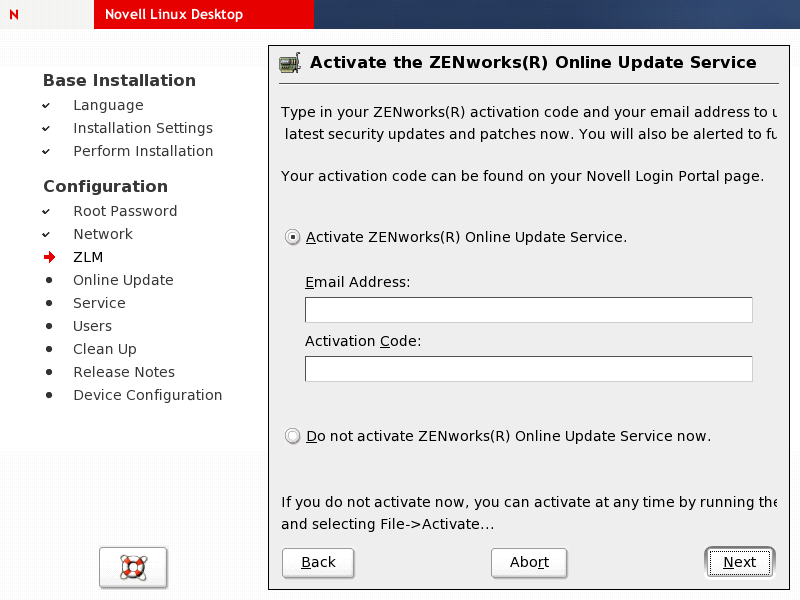
After you have entered the correct authentication data, the Online Update automatically starts installing the most recent patches and updates on top of your NLD installation.
If you prefer to not run the online update right now, select and click to close the dialog.
HINT:In an installed system, activate the update service by starting Red Carpet® and clicking . For more information on ZENworks and Red Carpet, see the ZENworks Linux Management and Novell Red Carpet documentation.
Managing User Accounts
NLD offers several different methods for user authentication and management. You can choose between network based methods and local authentication:
- Local
- Local authentication is mostly used on standalone workstations. All user authentication data is stored locally in a file called /etc/passwd. Adding or editing user information has to be done locally.
- LDAP
- If your machine runs in a corporate environment, use a centralized user database instead of a local file. Apart from serving as a user authentication database, LDAP can be used for many other purposes as well. To learn more about LDAP, see “Section 21.8: LDAP—A Directory Service” in the SUSE LINUX Enterprise Server Administration Guide.
- NIS
- Very similar to LDAP, NIS provides a means to distribute user authentication data throughout a network. To learn more about NIS, see “Section 21.9: NIS—Network Information Service” in the SUSE LINUX Enterpriser Server 9 Administration Guide.
Figure 2-26 Selecting the User Authentication Method
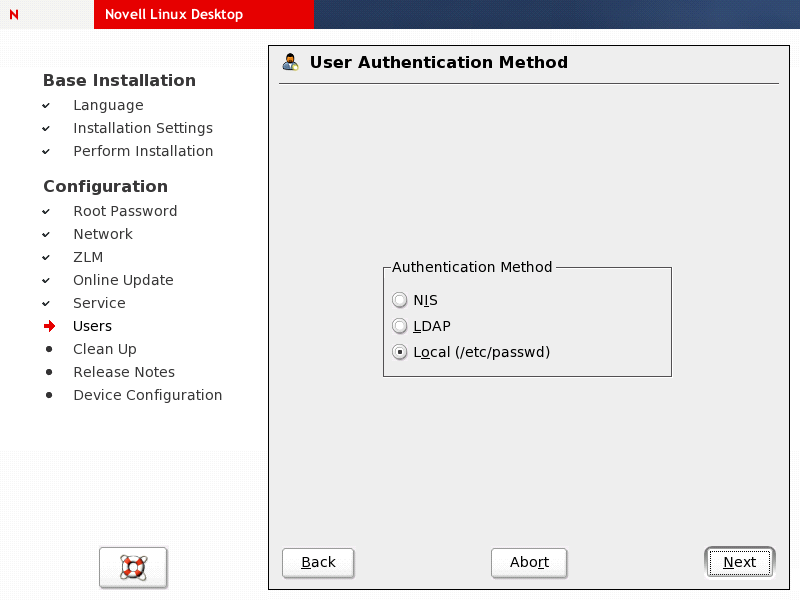
Select the appropriate user authentication method, then click . If you select NIS or LDAP, you are prompted for the server name.
If you select Local, YaST prompts you for the user data of the first local user.
Figure 2-27 Adding a New Local User
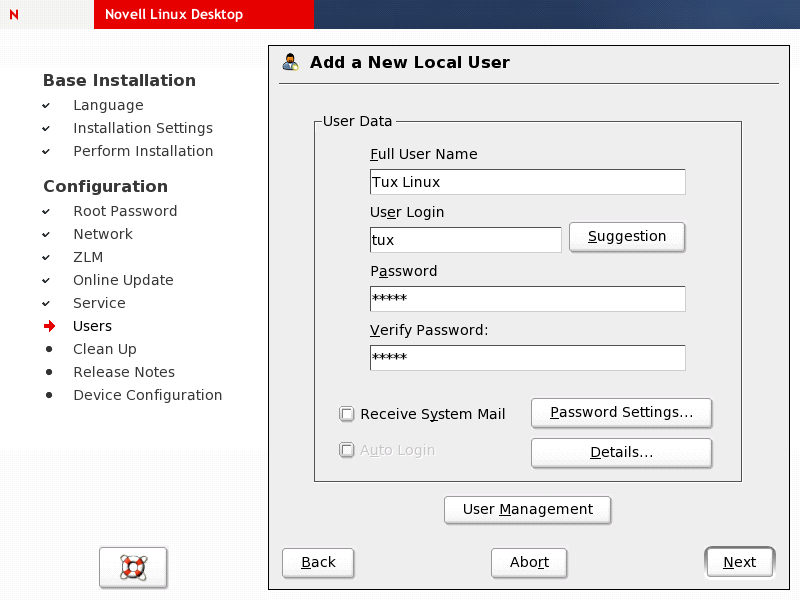
Specify the full username, a login name, and a password for the first local user. You can let YaST propose a user login name by clicking . Password handling is similar to the root user account.
If you want to redirect mail messages generated by your system to this particular user, select . If the local user account you just configured is the only one on this system, you might consider skipping the login procedure for this user and letting them enter the system without any username and password. Select if you want automatic login for a single-user system.
WARNING:Enabling auto-login might present a severe security issue. Anybody who can physically access this system will be able to enter it without the need to authenticate himself. When logged in, this person has access to all user data.
provides a means to configure parameters like password expiration time and number of retries. lets you modify the default attributes assigned to a new user account, such as group membership, user ID, and location of home directory.
Clicking opens the YaST module for user management and creation where you can add several new users, configure user authentication sources, and delete users.
After you click , the new user is added to the system configuration.
Finishing the Installation
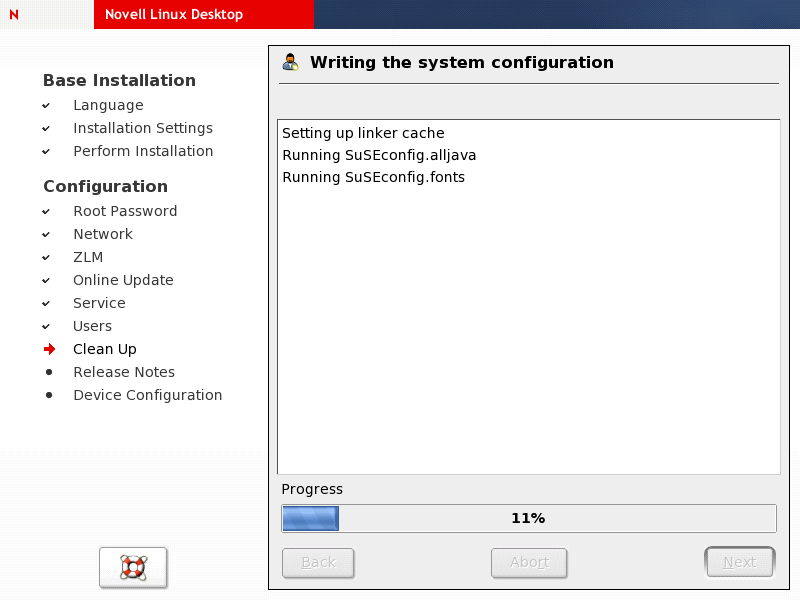
After you have completed the user configuration, the system rewrites the system configuration to make sure all your settings are applied. Wait until the SuSEconfig script is done. Depending on your hardware, this system initialization process might take a long time.
Figure 2-28 Writing the System Configuration
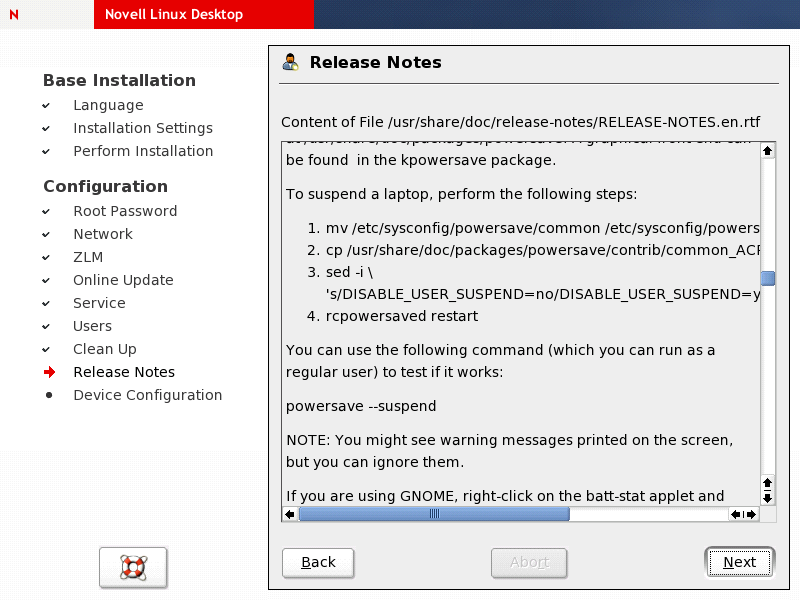
After the system configuration has been successfully written to disk, YaST displays the release notes associated with this release of NLD. These notes contain important information that was not included in any other documentation and that needs to be acknowledged in order to get NLD working properly.
Figure 2-29 Release Notes of Novell Linux Desktop
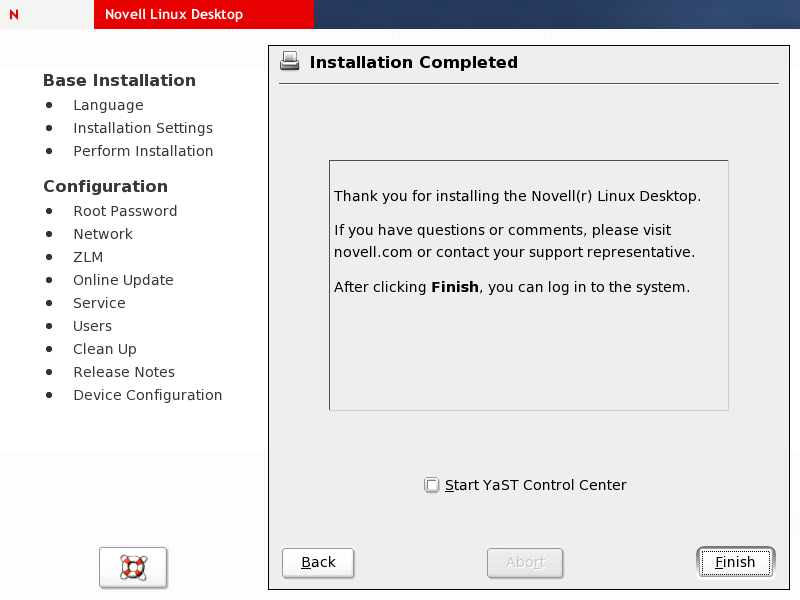
After you have read and acknowledged the release notes, click and finish the installation by optionally configuring additional hardware items such as printers, sound devices, or joysticks. These items can always be configured later in the installed system by launching the YaST Control Center and selecting the appropriate modules. See The YaST Control Center for further information on the configuration modules offered by YaST.
Click to end the installation process and switch to your freshly installed system. A graphical login screen appears prompting you for your username and password. When you have successfully authenticated yourself, the system automatically starts the desktop environment of your choice.
Figure 2-30 Installation Completed
2.2.2 Using a Network Installation Source
If you want to install manually but prefer a centralized installation source, consider using a network installation server. The procedure is very much the same as described later for remote installations.
Standard Manual Network Installation
To perform a standard manual network installation:
-
Set up an installation server as described in Setting Up the Server Holding the Installation Sources.
-
Insert the first CD or DVD of the media kit into the CD-ROM drive and reboot the machine.
-
At the boot screen, select and use the boot options prompt to give additional information, such as
- Location of the installation server.
- Network configuration parameters (if your setup doesn't support the network to be configured via DHCP).
Detailed information on the use of boot options at installation time can be found in Using Custom Boot Options.
-
Click to boot for installation.
If no network parameters have been specified at the boot options prompt, the installation routines try to set up the network using DHCP. If this fails, you are prompted for these parameters. After you have provided them, the installation proceeds as normal.
-
Finish the installation as you would if you had chosen to install from physical media (see Manual Installation).
Network Installation with OpenSLP
If your network setup supports OpenSLP and your network installation source has been configured to announce itself via OpenSLP (see Setting Up the Server Holding the Installation Sources), you can simply do the following:
-
Set up an installation server as described in Setting Up the Server Holding the Installation Sources.
-
Insert the first CD or DVD of the media kit into the CD-ROM drive and reboot the machine.
-
At the boot screen, select , press F3, and then select SLP.
For more information on the use of the F keys during the initial boot, see Using the F Keys
The installation program retrieves the location of the network installation source via OpenSLP and configures the network connection via DHCP. If the DHCP network configuration fails, you are prompted to enter the appropriate parameters manually. The installation then proceeds as normal.
-
Finish the installation as if you had chosen to install from physical media (see Manual Installation).
Network Installation through VNC
If you want to remotely control the network installation, proceed as described in Simple Remote Installation via VNC—Static Network Configuration or Simple Remote Installation via VNC—Dynamic Network Configuration via DHCP.