9.4 Upgrading the Filr, Search, or Database Appliances
The method of upgrading is the same for the Filr appliance, search appliance, and the database appliance.
Although it is possible to install a new search index appliance and subsequently re-index your data, Novell recommends that in a production environment you upgrade your existing search index appliances rather than install new appliances and re-index your data. However, because of changes made to the search index since the previous release, you should re-index your Filr site after upgrading from Filr 1.0.1 to 1.1.
The data location for the original appliance that you are upgrading from must be independent of the appliance on a separate VMware, Xen, or Hyper-V hard disk, as described in Section 9.1, Prerequisites.
The upgrade process differs depending on your virtual platform.
IMPORTANT:
-
You can upgrade only to the same virtual platform as the platform where you deployed your original Filr system. For example, if your original Filr system was deployed on VMware, you can upgrade only to VMware.
-
If you are upgrading the MySQL database appliance that ships with Filr for a large deployment or if you are upgrading a small Filr deployment, ensure that you have backed up the existing database as described in Section 9.3, Backing Up the Filr MySQL Database to Prepare for the Upgrade.
9.4.1 VMware
-
Download the software to your management workstation:
-
Filr Appliance: Filr.x86_64-version.ovf.zip
-
Search Appliance: Filrsearch-version.ovf.zip
-
Database Appliance: MySQL.x86_64-version.ovf.zip
You can access the software from the Novell Customer Center (NCC). Or, you can access an evaluation version of the software from this location on the Novell Downloads page.
-
-
Extract the file that you downloaded in Step 1 on your management workstation until one of the following folders appears, depending on which appliance you are upgrading:
-
Filr-version
-
Filrsearch-version
-
MySQL-version
-
-
In the vSphere client, click > .
-
Browse to and select the .ovf file in the Filr-version file folder.
-
Click .
-
Click again.
-
In the field, rename the Filr appliance to a name of your choosing, then click .
-
Select the datastore where you want to store the virtual machine files, then click .
-
Click to accept the default for the disk format.
-
Click .
-
Shut down the appliance you are upgrading from.
IMPORTANT:When shutting down the appliance, be aware of the following limitations:
-
In a large deployment with one or more Filr appliances, always bring down the Filr appliances first before you bring down the search appliances or database appliance. When restarting, start the Filr appliances last.
-
In a large deployment with one or more Filr appliances, complete the Lucene search index appliance upgrades before attempting to upgrade the Filr appliances. If the source Filr system contains multiple search index appliances, all search appliances must be upgraded and available before you run the Upgrade wizard for the Filr appliances. If not, the upgrade is not successful.
Rolling upgrades (upgrading one Filr or search index server while another continues to serve clients) are not supported when upgrading Filr in a clustered environment. This issue does not affect small or non-clustered large deployments.
-
When you shut down the appliance, use the button from the Novell Appliance Configuration screen (as described in
Shutting Down and Restarting the Novell Appliance
in the Novell Filr 1.1 Administration Guide). You can also use the init 0 command from the appliance console when you are logged in as root.
-
-
Before you power on the new appliance, point it to a copy of the VMware data disk that your previous appliance used (Hard Disk 2). (This is the copy that you created in Section 9.2, Copying the Appliance Data Storage Location to Prepare for the Upgrade.)
If the data storage location for the Filr system you are upgrading from is on NFS, you need to migrate the data storage (/vastorage) to a hard disk before you can continue with the upgrade, as described in Section B.0, Migrating /vastorage from NFS to a Hard Disk.
For example, for ESX 5.x:
-
In the vSphere client, right-click the virtual machine that you just created, and for which you want to create secondary storage, then click .
The Virtual Machine Properties page is displayed.
-
On the tab, click .
The Add Hardware dialog box is displayed.
-
Select , then click .
-
Select , then click .
-
Next to the field, click , browse to and select the datastore or datastore cluster where you copied the VMware data disk that your previous appliance used (Hard Disk 2). (This is the copy that you created in Section 9.2, Copying the Appliance Data Storage Location to Prepare for the Upgrade.) Then click .
-
Click .
-
In the section, select from the drop-down list.
-
Leave the section blank, then click .
-
Click .
-
-
Create another separate VMware hard disk for the appliance. This hard disk is used to store the /var directory for the appliance. (The /var directory is where system events for the Novell appliances are logged.)
-
In the Virtual Machine Properties window, on the tab, click .
-
Select , then click .
-
Leave selected, then click .
-
In the field, specify the amount of hard disk space that you want to allocate. The recommended minimum is 40 GB.
For more detailed information about the type of information that is stored here, see Filr Appliance Storage.
-
In the section, select , then click .
-
Select a datastore, then click .
-
Click .
-
In the section, select from the drop-down list.
-
Leave the section blank, then click .
You do not need to select anything in this section, because unlike Hard Disk 2, this hard disk does not need to be carried over on an upgrade.
-
Click .
-
-
(Conditional) If you are upgrading the MySQL database appliance, or if you are upgrading the Filr appliance in a small deployment, attach the disk that contains the backup of the original Filr database to the new Filr system:
(You should have already backed up the Filr database on the source Filr system, as described in Section 9.3, Backing Up the Filr MySQL Database to Prepare for the Upgrade.)
-
Use the Datastore Browser to copy the hard disk to the location where the 1.1 system is installed. (This is the hard disk that you created in Step 4 in Section 9.3, Backing Up the Filr MySQL Database to Prepare for the Upgrade.)
This provides a failsafe that allows you to restart the old Filr system if there is a failure with the new Filr system.
-
In a small deployment, add a new hard disk for the Filr appliance, then browse to the disk that you copied in Step 14.a.
In a large deployment, add a new hard disk for the MySQL database appliance, then browse to the disk that you copied in Step 14.a.
IMPORTANT:When creating the hard disk, consider the following:
-
The hard disk must be large enough to store the existing Filr database.
-
Select as the device controller.
-
-
-
(Conditional) If you added an additional Network Interface Controller (NIC) when you installed the Filr appliance, point the new appliance to the secondary NIC.
An additional NIC should be used only if you have multiple networks associated with the Filr installation; bonding or teaming NICs is not supported with Filr. For example, if your NFS mount is on a separate network from the main Filr appliance, you can configure an additional NIC for the second network.
-
In the Virtual Machine Properties window, on the tab, click .
The Add Hardware dialog box is displayed.
-
Select , then click .
-
In the drop-down list, select the name of the secondary NIC.
-
Click > .
-
-
Increase the amount of memory that VMware allocates for the Filr appliance.
The default of 8 GB is the recommended minimum amount of memory for a large deployment. Novell also recommends 2 CPUs.
For an all-in-one deployment, you should increase the default to at least 12 GB of memory and 4 CPUs.
Small deployments require more CPUs and memory because in a small deployment, all components are running on a single virtual machine.
IMPORTANT:When you increase or decrease server memory for the Filr appliance or the search index appliance, you should also modify the Java heap size, as described in
Changing the JVM Configuration Settings
in the Novell Filr 1.1 Administration Guide, and in Section 6.1, Configuring the Search Index Appliance.At least half of the memory should be dedicated to the Java heap. You cannot adjust the Java heap until after the appliance is installed.
-
In the Virtual Machine Properties window, select , then increase the setting to a suitable size for your environment.
-
Click to exit the Virtual Machine Properties window.
-
-
Before powering on the appliance that you are upgrading, ensure that the appliance has all the required disks:
Appliance Type
Appliance Disk (Disk 1)
(Created new in Filr 1.1 System)
/vastorage (Disk 2)
(Copied from original system)
/var (Disk 3)
(Created new in Filr 1.1 System)
Database Backup (Disk 4)
MySQL
Required
New
Required
Copied
See Step 12.
Required
New
See Step 13.
Required
Temporary use
See Step 14.
Search Index
Required
New
Required
Copied
See Step 12.
Required
New
See Step 13.
N/A
Filr
Required
New
Required
Copied
See Step 12.
Required
New
See Step 13.
N/A
-
Power on the appliance (virtual machine).
IMPORTANT:In a large deployment, you must power on the search index and database appliances before you power on the Filr appliance. These appliances must be running at the time you power on the Filr appliance.
-
Click the tab.
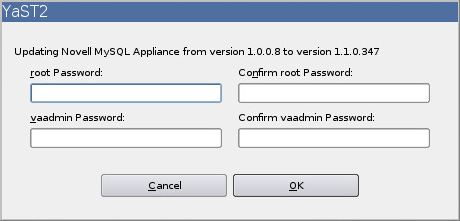
A dialog box is displayed, prompting for the root and vaadmin passwords.
If this dialog box is not displayed after powering on the appliance, begin the upgrade process again and ensure that you have configured the new Filr system to point to the data storage location of the source Filr system.
-
Specify and confirm the root and vaadmin passwords for the appliance you are upgrading from, then click .
When using a non-English keyboard, specify 1234 as the passwords (or use another simple password that uses the same keys regardless of the keyboard language). Passwords are recorded as if you were using an English keyboard even when another keyboard language is being used. After the system is successfully upgraded, change the password as described in
Changing Administrative Passwords
in the Novell Filr 1.1 Administration Guide.A message indicating that the upgrade was successful is displayed.
IMPORTANT:At this stage of the upgrade process, consider the following:
-
When upgrading multiple Filr appliances in a large installation, you must wait for the upgrade to succeed on one Filr appliance before beginning the upgrade process for another Filr appliance in the cluster.
-
When upgrading the Filr database, the upgrade process can take a significant amount of time with no visual indication that upgrade is in process. It is typical for the upgrade to take 10 minutes for every 1 GB of information in the database. For example, upgrading a 6 GB database takes about one hour to complete.
-
-
In a browser, navigate to the following URL:
https://ip_address:9443
Use the IP address or DNS name of the server that you specified during the appliance installation.
-
You can now log in to the appliance using the vaadmin user and the password that you set.
The Novell Filr Appliance, Novell MySQL Appliance, or Novell Filr Search Appliance landing page is displayed, depending on which appliance you are upgrading.

-
(Conditional) If you are upgrading the search appliance:
-
Click the icon.

The Search Settings page is displayed.
-
(Conditional) If the Filr Configuration wizard is displayed rather than the Settings, there was a problem with the configuration. Resolve any configuration issues, then click to reconfigure the system.
-
Ensure that all of the settings are set to your desired specifications.
-
-
(Conditional) If you are upgrading the database appliance:
-
Click the icon.

-
Verify that the database is populated.
-
The Filr database user does not carry over from the 1.0.1 system.
IMPORTANT: You need to add the same Filr database user that was used for the system that you are upgrading from. For information about how to create this user, see Step 5 in Section 7.1, Configuring the MySQL Database Appliance.
You also need to change the root user’s password that you used in the previous Filr system, because the password gets reset to the default password during the upgrade.
If any upgraded Filr appliances are currently running in the 1.1 system, you need to restart them in order for the database user to be recognized.
-
(Optional) On the source Filr system, delete the original hard disk that you created in Step 4 in Section 9.3, Backing Up the Filr MySQL Database to Prepare for the Upgrade.
-
(Optional) On the target Filr system, remove the disk that you used for the backup of the database from the database appliance. You can either delete the disk or store it in a separate location.
-
-
(Conditional) If you are upgrading the Filr appliance in a large deployment:
-
Click the icon.
The Filr Settings page is displayed.
-
(Conditional) If the Filr Configuration wizard is displayed rather than the Settings page, there was a problem with the configuration. Resolve any configuration issues, then click to reconfigure the system.
Following are common configuration issues:
-
If your system is not using DNS, this is most likely a problem due to unresolvable DNS names and missing /etc/hosts entries.
-
The Filr appliance does not have access to the database.
-
The Filr database user did not carry over from the 1.0.1 system. You need to create another Filr database user, as described in Step 5 in Section 7.1, Configuring the MySQL Database Appliance.
-
-
Ensure that all of the settings are set to your desired specifications.
-
-
(Conditional) If you are upgrading the Filr appliance in a small deployment:
-
Click the icon.
The Filr Settings page is displayed.
-
(Conditional) If the Filr Configuration wizard is displayed rather than the Settings page, there was a problem with the configuration. Resolve any configuration issues, then click to reconfigure the system.
-
Ensure that all of the settings are set to your desired specifications.
-
Click , then click the icon.
-
Verify that the database is populated.
-
(Optional) On the source Filr system, delete the original hard disk that you created in Step 4 in Section 9.3, Backing Up the Filr MySQL Database to Prepare for the Upgrade.
-
(Optional) On the target Filr system, remove the disk that you used for the backup of the database from the database appliance. You can either delete the disk or store it in a separate location.
-
-
In a large deployment, repeat this process for each appliance in the Filr system.
For information about how to add additional Filr appliances to the Filr system, see Adding a Filr Appliance to an Existing Deployment to Accommodate System Load.
-
Continue with Section 9.5, Performing Post-Upgrade Tasks.
9.4.2 Xen
IMPORTANT:You can upgrade only to the same virtual platform as the platform where you deployed your original Filr system. For example, if your original Filr system was deployed on VMware, you can upgrade only to VMware.
-
Log in to the host server either locally or from a remote workstation.
You can use the following command to log in to the host server from a remote workstation on Linux:
ssh -X root@host_ip_address
You must use the -X in the command in order to display the GUI installation program. The steps in this section use the GUI installation program to configure the server.
-
Navigate to the /var/lib/xen/images directory on the host server.
-
Create a new directory inside the images directory where you can download the Filr software. The name of this directory must be the same as the name that you plan to use for your Filr virtual appliance. For example, if you plan to name the Filr appliance Filr1, the name of this new directory must also be Filr1.
-
Change to the directory that you just created. For example, /var/lib/xen/images/Filr1.
-
Download the software to the current directory on the host server. For example:
/var/lib/xen/images/Filr1
-
Filr Appliance: Filr.x86_64-version.xen.tar.gz
-
Search Appliance: Filrsearch-version.xen.tar.gz
-
Database Appliance: MySQL.x86_64-version.xen.tar.gz
You can access the software from the Novell Customer Center (NCC). Or, you can access an evaluation version of the software from this location on the Novell Downloads page.
-
-
Untar the file that you downloaded in Step 5 in the directory where you downloaded it.
You can use the following command to untar the file:
tar -Sxvzf Filr.x86_64-version.xen.tar.gz
A filr-version directory is created; it contains a .raw file that you will use to run the virtual image. This process can take a few minutes.
-
From the host server, run the following command to launch the GUI configuration menu:
vm-install
The Create a Virtual Machine wizard is displayed.
-
Click .
-
Select , then click .
-
Leave selected, then click .
-
Rename the virtual machine by clicking and specifying a new name in the field. Then click . For example, Filr1.
-
Configure the amount of memory and number of CPUs that Xen allocates for the Filr appliance.
-
On the Summary page, click , then specify the following information:
Available Memory: Displays the amount of memory that is available on the host server.
Initial Memory: 8 GB is the recommended minimum for a large deployment.
For an all-in-one deployment, you should increase the default to at least 12 GB of memory.
Small deployments require more memory because in a small deployment, all components are running on a single virtual machine.
IMPORTANT:When you increase or decrease server memory for the Filr appliance or the search index appliance, you should also modify the Java heap size, as described in
Changing the JVM Configuration Settings
in the Novell Filr 1.1 Administration Guide, and in Section 6.1, Configuring the Search Index Appliance.At least half of the memory should be dedicated to the Java heap. You cannot adjust the Java heap until after the appliance is installed.
Maximum Memory: Set this to the same value as you set for Initial Memory.
Available Processors: Displays the number of available processors on the host server.
Virtual Processors: Specify 2 CPUs for a large deployment and 4 CPUs for a small deployment. At least half of the memory should be dedicated to the Java heap. (Java heap is set in the Filr configuration.)
Small deployments require more CPUs because in a small deployment, all components are running on a single virtual machine.
-
Click .
-
-
Configure the bootable disk image:
-
On the Summary page, click s.
-
Click .
-
On the Virtual Disk page, specify the following information:
Source: Click , then browse to the .raw file that you untared in Step 6.
Protocol: Select .
Size (GB): The default size is 40.1 GB. This cannot be changed.
Create Sparse Image File: This option is not available.
Read-Only Access: Do not select this option.
-
Click OK.
-
-
Shut down the appliance that you are upgrading.
IMPORTANT:When shutting down the appliance, be aware of the following limitations:
-
In a large deployment with one or more Filr appliances, always bring down the Filr appliances first before you bring down the search appliances or database appliance. When restarting, start the Filr appliances last.
-
In a large deployment with one or more Filr appliances, complete the Lucene search index appliance upgrades before attempting to upgrade the Filr appliances. If the source Filr system contains multiple search index appliances, all search appliances must be upgraded and available before you run the Upgrade wizard for the Filr appliances. If not, the upgrade is not successful.
Rolling upgrades (upgrading one Filr or search index server while another continues to serve clients) are not supported when upgrading Filr in a clustered environment. This issue does not affect small or non-clustered large deployments.
-
When you shut down the appliance, use the button from the Novell Appliance Configuration screen (as described in
Shutting Down and Restarting the Novell Appliance
in the Novell Filr 1.1 Administration Guide). You can also use the init 0 command from the appliance console when you are logged in as root.
-
-
Before you power on the new appliance, point it to a copy of the Xen data disk (Hard Disk 2) that your previous appliance used. (This is the copy that you created in Section 9.2, Copying the Appliance Data Storage Location to Prepare for the Upgrade.)
If the data storage location for the Filr system you are upgrading from is on NFS, you need to migrate the data storage (/vastorage) to a hard disk before you can continue with the upgrade, as described in Section B.0, Migrating /vastorage from NFS to a Hard Disk.
-
On the Disks page, click .
-
On the Virtual Disk page, specify the following information:
Source: This field should already contain the path to the .raw file that will be created when the virtual machine is created. If desired, you can rename the disk in the source field from disk0 to a name of your choosing.
Protocol: Select .
Size (GB): Specify the amount of hard disk space that you want to allocate. The recommended minimum is 100 GB.
Create Sparse Image File: Select this option.
Read-Only Access: Do not select this option.
-
-
Create another separate Xen hard disk for the appliance. This hard disk is used to store the /var directory for the appliance. (The /var directory is where system events for the Novell appliances are logged.)
-
On the Disks page, click .
-
On the Virtual Disk page, specify the following information:
Source: This field should already contain the path to the .raw file that will be created when the virtual machine is created. If desired, you can rename the disk in the source field from disk0 to a name of your choosing.
Protocol: Select .
Size (GB): Specify the amount of hard disk space that you want to allocate. The recommended minimum is 40 GB.
For more detailed information about the type of information that is stored here, see Filr Appliance Storage.
Create Sparse Image File: Select this option.
Read-Only Access: Do not select this option.
-
-
(Conditional) If you are upgrading the MySQL database appliance, or if you are upgrading the Filr appliance in a small deployment, attach the disk that contains the backup of the original Filr database to the new Filr system:
(You should have already backed up the Filr database on the source Filr system, as described in Section 9.3, Backing Up the Filr MySQL Database to Prepare for the Upgrade.)
-
Use the Datastore Browser to copy the hard disk to the location where the 1.1 system is installed. (This is the hard disk that you created in Step 4 in Section 9.3, Backing Up the Filr MySQL Database to Prepare for the Upgrade.)
This provides a failsafe that allows you to restart the old Filr system if there is a failure with the new Filr system.
-
In a small deployment, add a new hard disk for the Filr appliance, then browse to the disk that you copied in Step 17.a.
In a large deployment, add a new hard disk for the MySQL database appliance, then browse to the disk that you copied in Step 17.a.
IMPORTANT:When creating the hard disk, consider the following:
-
The hard disk must be large enough to store the existing Filr database.
-
Select as the device controller.
-
-
-
(Conditional) If you added an additional Network Interface Controller (NIC) when you installed the Filr appliance, point the new appliance to the secondary NIC.
An additional NIC should be used only if you have multiple networks associated with the Filr installation; bonding or teaming NICs is not supported with Filr. For example, if your NFS mount is on a separate network from the main Filr appliance, you can configure an additional NIC for the second network.
-
From the virtual machine page, click .
-
Select .
-
In the drop-down list, select the name of the secondary NIC.
-
Click .
-
-
Before powering on the appliance that you are upgrading, ensure that the appliance has all the required disks:
Appliance Type
Appliance Disk (Disk 1)
/vastorage (Disk 2)
(Copied from original system)
/var (Disk 3)
(Created new in Filr 1.1 System)
Database Backup (Disk 4)
MySQL
Required
New
Required
Copied
See Step 15.
Required
New
See Step 16.
Required
Temporary use
See Step 17.
Search Index
Required
New
Required
Copied
See Step 15.
Required
New
See Step 16.
N/A
Filr
Required
New
Required
Copied
See Step 15.
Required
New
See Step 16.
N/A
-
Power on the appliance (virtual machine).
IMPORTANT:In a large deployment, you must power on the search index and database appliances before you power on the Filr appliance. These appliances must be running at the time you power on the Filr appliance.
-
Click the tab.
A dialog box is displayed, prompting for the root and vaadmin passwords.
If this dialog box is not displayed after powering on the appliance, begin the upgrade process again and ensure that you have configured the new Filr system to point to the data storage location of the source Filr system.
-
Specify and confirm the root and vaadmin passwords for the appliance you are upgrading from, then click .
When using a non-English keyboard, specify 1234 as the passwords (or use another simple password that uses the same keys regardless of the keyboard language). Passwords are recorded as if you were using an English keyboard even when another keyboard language is being used. After the system is successfully upgraded, change the password as described in
Changing Administrative Passwords
in the Novell Filr 1.1 Administration Guide.A message indicating that the upgrade was successful is displayed.
IMPORTANT:At this stage of the upgrade process, consider the following:
-
When upgrading multiple Filr appliances in a large installation, you must wait for the upgrade to succeed on one Filr appliance before beginning the upgrade process for another Filr appliance in the cluster.
-
When upgrading the Filr database, the upgrade process can take a significant amount of time with no visual indication that upgrade is in process. It is typical for the upgrade to take 10 minutes for every 1 GB of information in the database. For example, upgrading a 6 GB database takes about one hour to complete.
-
-
Click .
A message indicating that the installation was successful is displayed.
-
In a browser, navigate to the following URL:
https://ip_address:9443
Use the IP address or DNS name of the server that you specified during the appliance installation.
-
Log in to the appliance using the vaadmin user and the password that you set.
The Novell Filr Appliance, Novell MySQL Appliance, or Novell Filr Search Appliance landing page is displayed, depending on which appliance you are upgrading.
-
(Conditional) If you are upgrading the search appliance:
-
Click the icon.
The Search Settings page is displayed.
-
(Conditional) If the Filr Configuration wizard is displayed rather than the Settings page, there was a problem with the configuration. Resolve any configuration issues, then click to reconfigure the system.
-
Ensure that all of the settings are set to your desired specifications.
-
-
(Conditional) If you are upgrading the database appliance:
-
Click the icon.
-
Verify that the database is populated.
-
The Filr database user does not carry over from the 1.0.1 system.
IMPORTANT: You need to add the same Filr database user that was used for the system that you are upgrading from. For information about how to create this user, see Step 5 in Section 7.1, Configuring the MySQL Database Appliance.
You also need to change the root user’s password that you used in the previous Filr system, because the password gets reset to the default password during the upgrade.
If any upgraded Filr appliances are currently running in the 1.1 system, you need to restart them in order for the database user to be recognized.
-
(Optional) On the source Filr system, delete the original hard disk that you created in Step 4 in Section 9.3, Backing Up the Filr MySQL Database to Prepare for the Upgrade.
-
(Optional) On the target Filr system, remove the disk that you used for the backup of the database from the database appliance. You can either delete the disk or store it in a separate location.
-
-
(Conditional) If you are upgrading the Filr appliance in a large deployment:
-
Click the icon.
The Filr Settings page is displayed.
-
(Conditional) If the Filr Configuration wizard is displayed rather than the Settings page, there was a problem with the configuration. Resolve any configuration issues, then click to reconfigure the system.
Following are common configuration issues:
-
If your system is not using DNS, this is most likely a problem due to unresolvable DNS names and missing /etc/hosts entries.
-
The Filr appliance does not have access to the database.
-
The Filr database user did not carry over from the 1.0.1 system. You need to create another Filr database user, as described in Step 5 in Section 7.1, Configuring the MySQL Database Appliance.
-
-
Ensure that all of the settings are set to your desired specifications.
-
-
(Conditional) If you are upgrading the Filr appliance in a small deployment:
-
Click the icon.
The Search Settings page is displayed.
-
(Conditional) If the Filr Configuration wizard is displayed rather than the Settings page, there was a problem with the configuration. Resolve any configuration issues, then click to reconfigure the system.
-
Ensure that all of the settings are set to your desired specifications.
-
Click , then click the icon.
-
Verify that the database is populated.
-
(Optional) On the source Filr system, delete the original hard disk that you created in Step 4 in Section 9.3, Backing Up the Filr MySQL Database to Prepare for the Upgrade.
-
(Optional) On the target Filr system, remove the disk that you used for the backup of the database from the database appliance. You can either delete the disk or store it in a separate location.
-
-
In a large deployment, repeat this process for each appliance in the Filr system.
For information about how to add additional Filr appliances to the Filr system, see Adding a Filr Appliance to an Existing Deployment to Accommodate System Load.
-
Continue with Section 9.5, Performing Post-Upgrade Tasks.
9.4.3 Hyper-V
IMPORTANT:You can upgrade only to the same virtual platform as the platform where you deployed your original Filr system. For example, if your original Filr system was deployed on VMware, you can upgrade only to VMware.
-
Log in to the host server either locally or from a remote workstation.
You can use Windows Remote Desktop to log in to the host server from a remote workstation.
-
Create a new directory in the location where you want each virtual machine to reside (for example, C:\Users\Public\Documents\Hyper-V\Virtual Hard Disks). In a later step, you will download the Filr software to this directory.
As a best practice, give this directory the same name that you plan to use for your Filr virtual appliance. For example, if you plan to name the Filr appliance Filr1, the name of this new directory should also be Filr1.
-
Download the software to your management workstation:
-
Filr Appliance: Filr.x86_64-version.ovf.zip
-
Search Appliance: Filrsearch-version.ovf.zip
-
Database Appliance: MySQL.x86_64-version.ovf.zip
You can access the software from the Novell Customer Center (NCC). Or, you can access an evaluation version of the software from this location on the Novell Downloads page.
-
-
Extract the file that you downloaded in Step 3 to a the directory on the host server that you created in Step 2.
-
Open the Hyper-V Manager.
-
In Hyper-V Manager, right-click the disk name in the Action Pane where you want to create the new virtual machine, then click > .
The New Virtual Machine Wizard is displayed.
-
Review the Before You Begin page, then click .
-
In the field, specify a name for the new virtual machine. For example, Filr1.
-
Click .
-
In the field, specify the amount of memory (in MB) to allocate to the virtual machine. 8 GB (8192 MB) is the recommended minimum for a large deployment of Filr.
For an all-in-one (small) deployment, you should increase the default to at least 12 GB (12288 MB) of memory. Small deployments require more memory because in a small deployment, all components are running on a single virtual machine.
IMPORTANT:When you increase or decrease server memory for the Filr appliance or the search index appliance, you should also modify the Java heap size, as described in
Changing the JVM Configuration Settings
in the Novell Filr 1.1 Administration Guide, and in Section 6.1, Configuring the Search Index Appliance.At least half of the memory should be dedicated to the Java heap. You cannot adjust the Java heap until after the appliance is installed.
-
Click .
-
On the Configure Networking page, select the networking card of your choice, then click .
-
Configure the bootable disk image:
-
On the Connect Virtual Hard Disk page, select , then browse to the .vhd file that was in the downloaded .zip file that you extracted in Step 4.
-
Click to select the file, then click .
-
-
Click .
WARNING:If for any reason you need to delete the new or the previous appliance, you must unlink (remove) the disk. Otherwise, the disk is deleted. Having the disk linked to the original or to the new appliance does not provide the expected safeguard. In other words, if the disk is linked to multiple appliances and you delete one of them, the disk is deleted despite the remaining link.
-
Shut down the appliance that you are upgrading.
IMPORTANT:When shutting down the appliance, be aware of the following limitations:
-
In a large deployment with one or more Filr appliances, always bring down the Filr appliances first before you bring down the search appliances or database appliance. When restarting, start the Filr appliances last.
-
In a large deployment with one or more Filr appliances, complete the Lucene search index appliance upgrades before attempting to upgrade the Filr appliances. If the source Filr system contains multiple search index appliances, all search appliances must be upgraded and available before you run the Upgrade wizard for the Filr appliances. If not, the upgrade is not successful.
Rolling upgrades (upgrading one Filr or search index server while another continues to serve clients) are not supported when upgrading Filr in a clustered environment. This issue does not affect small or non-clustered large deployments.
-
When you shut down the appliance, use the button from the Novell Appliance Configuration screen (as described in
Shutting Down and Restarting the Novell Appliance
in the Novell Filr 1.1 Administration Guide). You can also use the init 0 command from the appliance console when you are logged in as root.
-
-
Before you power on the new appliance, point it to a copy of the Hyper-V data disk that your previous appliance used (Hard Disk 2). (This is the copy that you created in Section 9.2, Copying the Appliance Data Storage Location to Prepare for the Upgrade.)
If the data storage location for the Filr system you are upgrading from is on NFS, you need to migrate the data storage (/vastorage) to a hard disk before you can continue with the upgrade, as described in Section B.0, Migrating /vastorage from NFS to a Hard Disk.
-
In Hyper-V Manager, right-click the virtual machine that you just created, then click .
-
In the Hardware section, select , select , then click .
-
Select , then click .
-
Review the Before You Begin page, then click .
-
On the Choose Disk Format page, select , then click .
-
On the Choose Disk Type page, select , then click .
-
On the Specify Name and Location page, specify the following information, then click :
Name: Specify a name for the hard disk. For example, FilrDisk2.
Location: Specify the location where you want the hard drive to be located.
-
On the Configure Disk page, select , then specify a size for the hard disk. The recommended minimum is 25 GB.
For more detailed information about the type of information that is stored here, see Filr Appliance Storage.
-
Click .
-
Review the summary information, then click > .
-
-
Create another separate Hyper-V hard disk for the appliance. This hard disk is used to store the /var directory for the appliance. (The /var directory is where system events for the Novell appliances are logged.)
-
In Hyper-V Manager, right-click the virtual machine for which you want to create a new hard disk, then click .
-
In the section, select , select , then click .
-
Select , then click .
-
Review the Before You Begin page, then click .
-
On the Choose Disk Format page, select , then click .
-
On the Choose Disk Type page, select , then click .
-
On the Specify Name and Location page, specify the following information, then click :
Name: Specify a name for the hard disk. For example, FilrDisk3.
Location: Specify the location where you want the hard drive to be located.
-
On the Configure Disk page, select , then specify a size for the hard disk. The recommended minimum is 40 GB.
For more detailed information about the type of information that is stored here, see Filr Appliance Storage.
-
Click .
-
Review the summary information, then click > .
-
-
(Conditional) If you are upgrading the MySQL database appliance, or if you are upgrading the Filr appliance in a small deployment, attach the disk that contains the backup of the original Filr database to the new Filr system:
(You should have already backed up the Filr database on the source Filr system, as described in Section 9.3, Backing Up the Filr MySQL Database to Prepare for the Upgrade.)
-
Use the Datastore Browser to copy the hard disk (that you created in Step 4 in Section 9.3, Backing Up the Filr MySQL Database to Prepare for the Upgrade) to the location where the 1.1 system is installed.
This provides a failsafe that allows you to restart the old Filr system if there is a failure with the new Filr system.
-
In a small deployment, add a new hard disk for the Filr appliance, then browse to the disk that you copied in Step 18.a.
In a large deployment, add a new hard disk for the MySQL database appliance, then browse to the disk that you copied in Step 18.a.
IMPORTANT:When creating the hard disk, consider the following:
-
The hard disk must be large enough to store the existing Filr database.
-
Select as the device controller.
-
-
-
(Conditional) If you added an additional Network Interface Controller (NIC) when you installed the Filr appliance, point the new appliance to the secondary NIC.
An additional NIC should be used only if you have multiple networks associated with the Filr installation; bonding or teaming NICs is not supported with Filr. For example, if your NFS mount is on a separate network from the main Filr appliance, you can configure an additional NIC for the second network.
-
In Hyper-V Manager, right-click the virtual machine for which you want to create a new hard disk, then click .
-
In the section, select , then click .
-
In the drop-down list, select the name of the secondary NIC.
-
Make any other relevant configuration changes, then click .
-
-
Before powering on the appliance that you are upgrading, ensure that the appliance has all the required disks:
Appliance Type
Appliance Disk (Disk 1)
/vastorage (Disk 2)
(Copied from original system)
/var (Disk 3)
(Created new in Filr 1.1 system)
Database Backup (Disk 4)
MySQL
Required
New
Required
Copied
See Step 16.
Required
New
See Step 17.
Required
Temporary use
See Step 18.
Search Index
Required
New
Required
Copied
See Step 16.
Required
New
See Step 17.
N/A
Filr
Required
New
Required
Copied
See Step 16.
Required
New
See Step 17.
N/A
-
Power on the appliance (virtual machine).
IMPORTANT:In a large deployment, you must power on the search index and database appliances before you power on the Filr appliance. These appliances must be running at the time you power on the Filr appliance.
-
Click the tab.
A dialog box is displayed, prompting for the root and vaadmin passwords.
If this dialog box is not displayed after powering on the appliance, begin the upgrade process again and ensure that you have configured the new Filr system to point to the data storage location of the source Filr system.
-
Specify and confirm the root and vaadmin passwords for the appliance you are upgrading from, then click .
When using a non-English keyboard, specify 1234 as the passwords (or use another simple password that uses the same keys regardless of the keyboard language). Passwords are recorded as if you were using an English keyboard even when another keyboard language is being used. After the system is successfully upgraded, change the password as described in
Changing Administrative Passwords
in the Novell Filr 1.1 Administration Guide.A message indicating that the upgrade was successful is displayed.
IMPORTANT:At this stage of the upgrade process, consider the following:
-
When upgrading multiple Filr appliances in a large installation, you must wait for the upgrade to succeed on one Filr appliance before beginning the upgrade process for another Filr appliance in the cluster.
-
When upgrading the Filr database, the upgrade process can take a significant amount of time with no visual indication that upgrade is in process. It is typical for the upgrade to take 10 minutes for every 1 GB of information in the database. For example, upgrading a 6 GB database takes about one hour to complete.
-
-
In a browser, navigate to the following URL:
https://ip_address:9443
Use the IP address or DNS name of the server that you specified during the appliance installation.
-
Log in to the appliance using the vaadmin user and the password that you set.
The Novell Filr Appliance, Novell MySQL Appliance, or Novell Filr Search Appliance landing page is displayed, depending on which appliance you are upgrading.
-
(Conditional) If you are upgrading the search appliance:
-
Click the icon.
The Search Settings page is displayed.
-
(Conditional) If the Filr Configuration wizard is displayed rather than the Settings page, there was a problem with the configuration. Resolve any configuration issues, then click to reconfigure the system.
-
Ensure that all of the settings are set to your desired specifications.
-
-
(Conditional) If you are upgrading the database appliance:
-
Click the icon.
-
Verify that the database is populated.
-
The Filr database user does not carry over from the 1.0.1 system.
IMPORTANT: You need to add the same Filr database user that was used for the system that you are upgrading from. For information about how to create this user, see Step 5 in Section 7.1, Configuring the MySQL Database Appliance.
You also need to change the root user’s password that you used in the previous Filr system, because the password gets reset to the default password during the upgrade.
If any upgraded Filr appliances are currently running in the 1.1 system, you need to restart them in order for the database user to be recognized.
-
(Optional) On the source Filr system, delete the original hard disk that you created in Step 4 in Section 9.3, Backing Up the Filr MySQL Database to Prepare for the Upgrade.
-
(Optional) On the target Filr system, remove the disk that you used for the backup of the database from the database appliance. You can either delete the disk or store it in a separate location.
-
-
(Conditional) If you are upgrading the Filr appliance in a large deployment:
-
Click the icon.
The Filr Settings page is displayed.
-
(Conditional) If the Filr Configuration wizard is displayed rather than the Settings page, there was a problem with the configuration. Resolve any configuration issues, then click to reconfigure the system.
Following are common configuration issues:
-
If your system is not using DNS, this is most likely a problem due to unresolvable DNS names and missing /etc/hosts entries.
-
The Filr appliance does not have access to the database.
-
The Filr database user did not carry over from the 1.0.1 system. You need to create another Filr database user, as described in Step 5 in Section 7.1, Configuring the MySQL Database Appliance.
-
-
Ensure that all of the settings are set to your desired specifications.
-
-
(Conditional) If you are upgrading the Filr appliance in a small deployment:
-
Click the icon.
The Filr Settings page is displayed.
-
(Conditional) If the Filr Configuration wizard is displayed rather than the Settings page, there was a problem with the configuration. Resolve any configuration issues, then click to reconfigure the system.
-
Ensure that all of the settings are set to your desired specifications.
-
Click , then click the icon.
-
Verify that the database is populated.
-
(Optional) On the source Filr system, delete the original hard disk that you created in Step 4 in Section 9.3, Backing Up the Filr MySQL Database to Prepare for the Upgrade.
-
(Optional) On the target Filr system, remove the disk that you used for the backup of the database from the database appliance. You can either delete the disk or store it in a separate location.
-
-
In a large deployment, repeat this process for each appliance in the Filr system.
For information about how to add additional Filr appliances to the Filr system, see Adding a Filr Appliance to an Existing Deployment to Accommodate System Load.
-
Continue with Section 9.5, Performing Post-Upgrade Tasks.